Table of Contents
Advertisement
For Customer Service, additional set up,
operating assistance, or to order accessories,
please call: 1-800-289-0981
NEED MORE INFO ON THE DTV TRANSITION?
See page 14 in this Operating Guide and
please visit www.dtvtransition.org
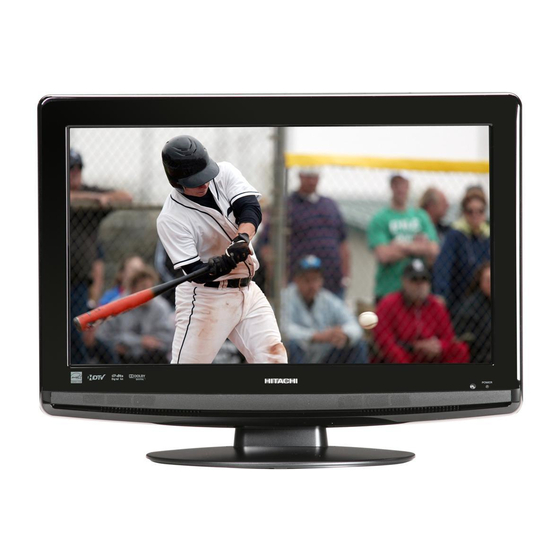
LCD HDTV with Built-in DVD Player
Operating Guide for L19D103
IMPORTANT SAFETY INSTRUCTIONS ..............................................................................2-6
FIRST TIME USE ...............................................................................................................9-15
TV OPERATION ...............................................................................................................16-23
DVD OPERATION ............................................................................................................23-31
CONNECTIONS TO OTHER EQUIPMENT .....................................................................32-34
TROUBLE SHOOTING ....................................................................................................35-37
TV STAND .............................................................................................................................39
LIMITED WARRANTY ...........................................................................................................40
READ THE ENCLOSED INSTRUCTIONS CAREFULLY. KEEP THIS OPERATING GUIDE FOR FUTURE REFERENCE.
Record the model name and serial number of your LCD Television for future reference.
SERIAL NO.
This information is located on the back of the television.
SERIES A
Advertisement
Chapters
Table of Contents

Related Manuals for Hitachi L19D103 - 19" LCD TV


Summary of Contents for Hitachi L19D103 - 19" LCD TV
-
Page 1: Table Of Contents
For Customer Service, additional set up, operating assistance, or to order accessories, please call: 1-800-289-0981 NEED MORE INFO ON THE DTV TRANSITION? See page 14 in this Operating Guide and please visit www.dtvtransition.org LCD HDTV with Built-in DVD Player Operating Guide for L19D103 IMPORTANT SAFETY INSTRUCTIONS ................2-6 FIRST TIME USE .......................9-15 TV OPERATION .......................16-23... - Page 2 ENGLISH The lightning flash with arrowhead symbol, within an equilateral triangle is intended to alert the user to the presence of uninsulated dangerous voltage within the product's enclosure that may be of sufficient magnitude to constitute a risk of electric shock. CAUTION: TO REDUCE THE RISK OF ELECTRIC SHOCK, DO NOT REMOVE COVER...
-
Page 3: Important Safety Instructions
IMPORTANT SAFETY INSTRUCTIONS Read these instructions. Keep these instructions. Heed all warnings. Follow all instructions. Do not use this apparatus near water. Clean only with dry cloth. Do not block any ventilation openings. Install in accordance with the manufacturer’s instructions. Do not install near any heat sources such as radiators, heat registers, stoves, or other apparatus (including amplifiers) that produce heat. - Page 4 LCD television and call your authorized dealer or service center. Adjust only those controls that are covered in the instructions, as improper changes or modifications not expressly approved by Hitachi could void the user’s warranty. Declaration of Conformity This device compiles with part 15 of the FCC Rules.
-
Page 5: Child Safety Notice
• Flat Panel displays that are inappropriately situated on dressers, bookcases, shelves, desks, speakers, chests or carts may fall over and cause injury. HITACHI CARES! • The consumer electronics industry is commited to making home entertainment enjoyable and safe. TUNE INTO SAFETY •... -
Page 6: Safety Precautions
If the unit is to be mounted on a cabinet smaller than length of the unit, it could result in an unstable location and the unit may tumble over, making a risk of personal, possibly fatal injury. Also, this would damage the product seriously. Accordingly, Hitachi accepts no responsibility or liability for any injuries or property damage resulting from the improper installation. -
Page 7: Features
Features LCD color TV With DVD/CD player Unique space saving design combines a 19” class LCD color TV and a DVD/CD player. A DVD disc has much more capacity, but is the same size as an audio CD disc. The Picture/Audio quality of a DVD is very good. The audio quality is higher than an audio CD. -
Page 8: Contents
Contents Before using your unit DVD operation Preparation ..............23 IMPORTANT SAFETY INSTRUCTIONS ......3 Status display of disc ............23 CHILD SAFETY NOTICE ...........5 Playback procedure ............23 SAFETY PRECAUTIONS ..........6 Special playback ..............24 IMPORTANT NOTICE ............6 MP3/WMA/JPEG and Audio CD playback .......24 Features ................7 Setting the JPEG interval ..........25 Contents ................8... -
Page 9: Disc
Disc Playable discs CAUTION: Disc type and logo mark content • Playable disc types are shown in table at left. DVD-ROM, CD-ROM, SVCD, CVD, VCD, etc. cannot be played. Audio • 8cm discs can be played directly. If an 8cm disc adapter is used it will cause errors. -
Page 10: Location Of Controls
Location of controls Front Remote sensor POWER indicator Left side DISC slot EJECT button VOLUME +/– buttons CHANNEL / (PLAY) button CHANNEL / (STOP) button MENU button INPUT/ENTER button POWER button To display the menu screen. Press MENU button to display the menu screen. CHANNEL / buttons, VOLUME +/–... - Page 11 Location of controls (continued) Rear side AC INPUT jack RF (ANT.) IN jack HEADPHONE jack DIGITAL AUDIO COAXIAL OUT jack COMPONENT IN jacks HDMI IN jack PC/HDMI AUDIO IN jack AUDIO (L/R) jacks (for COMPONENT IN) LINE 1 IN jacks PC MONITOR IN jack (VIDEO/S-VIDEO/AUDIO (L/R))
-
Page 12: Remote Control
Remote control POWER Power On/Off DISPLAY/– Call TV information Call DVD information Input “–” for digital channels TV/DVD Switch between TV/AV and DVD (EJECT) Eject a disc Direct channel selection of TV Input setting Enter a password VOL +/– Adjust volume of TV MUTE Switch off the sound SLEEP... -
Page 13: Power Source
Remote control (continued) Inserting Batteries Open the battery compartment cover in Install two “AAA” batteries, paying Replace the compartment cover. the direction of the arrow. attention to the polarity diagram in the battery compartment. Operation • Aim the remote control at the remote sensor and press control buttons to operate. •... -
Page 14: Antenna Connections
Please review this Operating Guide for further information regarding such connections. Hitachi supports the DTV transition and as a member of the DTV Transition Coalition urges consumers to visit these web sites for interactive guides and further detailed information: •... -
Page 15: Cable Tv Connections
Cable TV connections This TV has an extended tuning range and can tune most cable channels without using a Cable TV Converter box. Some cable companies offer “premium pay channels” where the signal is scrambled. Descrambling these signals for normal viewing requires the use of a descrambler device which is generally provided by the Cable TV company. -
Page 16: Tv Operation
Starting setup TO SELECT DIGITAL CHANNELS Press the first 3 digits, then press the – button, followed by the remaining number. The Starting Setup menu appears the first time you turn Example, to select channel 015-001, press 0, 1, 5, –, 0, 0, 1, on the TV, and assists you to select the menu language, then press ENTER. -
Page 17: Quick Guide For Menu Operation
Quick guide for menu DISPLAY Press DISPLAY to display the current information on the screen. operation When the TV receives a digital signal, the digital information will appear. example: Select Language. 62-001 HDTV Moving Picture1 Sleep Timer CH-1 Press INPUT to select TV mode. English Digital No Program Information is available... -
Page 18: Convenience Functions
Convenience functions You can change the default settings to convenience use. Icon Selected Items Setup hint Video Picture Brightness / You can adjust the picture quality to your preference. Setting Contrast / Sharpness / Color / Tint Color Temperature Bluish (Cool) / Neutral (Standard) / Reddish (Warm) Backlight The Backlight feature adjusts the screen brightness for improved picture clarity. -
Page 19: Memorizing Channels
Memorizing channels Adding Channel If you find a new digital channel unregistered, you can add the new channel into the channel memory. This TV is equipped with a channel memory feature which allows channels to skip up or down to the next channel Tune in the new channel. -
Page 20: Checking The Digital-Signal Strength
Checking the digital-signal When you finish inputting the label name, press EXIT to return strength to the normal screen. Repeat steps 3-4 for other channel. You can assign a label to each channel. This TV will allow you to view the digital signal meter for To clear a Channel Label digital channels. - Page 21 To set the Parental Control To change the password Select “Locks” menu, then press ▶ or ENTER. Select “Locks”, then press ▶ or ENTER. Use Number buttons (0-9) to enter your password, then Use Number buttons (0-9) to enter your password, then press press ENTER.
-
Page 22: Closed Caption
Closed Caption Select “Setup”, then press ▶ or ENTER. Press ▲ or ▼ to select “Closed Captions”, then press ▶ or WHAT IS CLOSED CAPTIONING? ENTER. This television has the capability to decode and display Closed The Closed Caption menu will appear. Captioned television programs. -
Page 23: Preparation
Preparation NOTE: • Selectable picture format aspect ratios may vary depending on the input source or broadcast signal. The following pages describe the setup/operation in DVD • Picture Size menu also can be displayed by pressing ASPECT mode. on the remote control. Preparation Natural Before DVD/CD operation, please make the following... -
Page 24: Special Playback
NOTE: Press STOP to end playback. • The unit is capable of holding a still video image or On screen • The unit memorizes the stopped point, depending on the display image on your television screen indefinitely. If you leave disc. -
Page 25: Setting The Jpeg Interval
Press ENTER or PLAY. Operation status File number Elapsed time Selected file name The selected picture appears on the TV screen. 1/15 00:00:00 Rotating an image /MP3-5.MP3 You can rotate an image by 90 degrees. MP3-5 Select Files MP3-6 Tool kit Press ANGLE during playback of the image. -
Page 26: Repeat Playback (Cd)
Press PLAY. The unit automatically starts repeat playback after finishing Folder-1 Repeat :Off Folder-2 the current track. Mode :Off MP3-1 Edit Mode MP3-2 To resume normal playback, select Repeat : “Off” in step 2. MP3-3 WMA-1 JPEG Preview WMA-2 NOTE: WMA-3 •... -
Page 27: Repeat Playback
Marking the scenes: Press ENTER. • Playback starts. Press MARKER during playback. • When you change the title, playback starts from Chapter 1 of the selected title. Select the blank Marker using ▲ or ▼, then press ENTER at • Some discs may not work in the above operation. -
Page 28: Subtitles
Subtitles NOTE: • Depending on the DVD, you may not be able to select the title. Depending on the DVD, a “title menu” may simply be called a Turning the subtitles on and off “menu” or “title” in the instructions supplied with the disc. When playing back a disc recorded with subtitles, you can turn the DVD menu subtitles on or off. -
Page 29: Setting On Screen Display
Press ▲ or ▼ to select your desired screen type, then press TV Screen : 16:9 ENTER. Language Display : On Auto Video Picture Mode TV Screen Film Language JPEG Interval Video Display Audio 16:9 Video Picture Mode Locks JPEG Interval : Off Audio Auto:... -
Page 30: Parental Control
Off: There is no sound output from DIGITAL AUDIO Setting the new password: OUT jack. PCM: Change Dolby Digital to PCM for the output. Press SETUP/TV MENU in the stop mode or No Disc. Select when connected to a 2 channel digital Press ▲... -
Page 31: Language Code List
Language code list Enter the appropriate code number for the initial settings “Menu”, “Subtitle” and/or “Audio” (see page 28). Language Name Code Language Name Code Language Name Code Language Name Code Abkhazian 1112 Fiji 1620 Lingala 2224 Singhalese 2919 Afar 1111 Finnish 1619 Lithuanian 2230 Slovak... -
Page 32: Connections To Other Equipment
Connections to other equipment The exact arrangement you use to interconnect various video and audio components to this unit is dependent on the model and features of each component. Check the Owner’s Manual provided with each component for the location of video and audio inputs and outputs. To connect the LCD TV/DVD to a VCR Rear of the unit To VIDEO/AUDIO IN... - Page 33 Connections to other equipment (continued) To connect a HDMI or a DVI device to the unit The HDMI input receives digital audio and uncompressed video from a HDMI device or uncompressed digital video from a DVI device. When you connect to a DVI device with a HDMI-to-DVI adapter cable, it transfers only video signal. Separate analog audio cords required.
- Page 34 Connections to other equipment (continued) To connect the TV/DVD to a camcorder, or a TV Game To play back from a camcorder, connect the camcorder to the unit as shown. This unit can also be used as a display device for many video games. However, due to the wide variety of signals generated by these devices and subsequent hook-up variations required, they have not all been included in the suggested connection diagrams.
-
Page 35: Reception Disturbances
Reception disturbances IGNITION NOISE: Black spots or horizontal streaks may appear, picture may flutter or drift. Usually caused by interference from automobile ignition systems, neon lamps, electrical drills, and other electrical appliances. GHOSTS: Ghosts are caused by the television signal following two paths. One is the direct path and the other is reflected from tall buildings, hills or some other objects. -
Page 36: Trouble Shooting
Problems and troubleshooting Use the following check list for troubleshooting when you have problems with your TV/DVD. Consult your local dealer or service outlet if problems persist. Be sure all connections are properly made when using with other units. SYMPTOMS POSSIBLE SOLUTIONS PAGE POWER... - Page 37 Problems and troubleshooting (continued) SYMPTOMS POSSIBLE SOLUTIONS PAGE When the letter string is • Check “Auto Adjust”. displayed in full-screen, all of • If the condition is not improved with “Auto Adjust”, check “Phase” until you get the the characters on the screen are clearest image.
-
Page 38: Specifications
Batteries (AAA) x 2 AC Cord Clamp Screw (Clamp) Stand Screw x 2 (Stand) • Designs and specifications are subject to change without notice. • FOR INFORMATION ON OUR OTHER PRODUCTS, OR TO ORDER ACCESSORIES ONLINE, PLEASE VISIT OUR WEBSITE AT www.hitachi.us... -
Page 39: How To Attach The Stand
How to attach the stand NOTE: • Unplug the AC cord from the AC INPUT terminal. • Before beginning this process, assure that TV is laid on a clean, safe, and cushioned space to avoid any damage to the unit. •... -
Page 40: Limited Warranty
LIMITED WARRANTY 19” LCD HDTV with Built-in DVD Player ORION warrants this product to be free from manufacturing defects in material and workmanship under normal use and conditions for a period of 1 year from date of original purchase in the United States. Should service be necessary under this warranty for any reason due to a manufacturing defect or malfunction during the first 12 months from date of original purchase, ORION will provide carry-in service only by an ORION authorized Independent Service Center at no charge.
Need help?
Do you have a question about the L19D103 - 19" LCD TV and is the answer not in the manual?
Questions and answers