Advertisement
- 1 Via Mini Overview
- 2 Device Features
- 3 Turning the Device On and Off
- 4 Turning the Amplifier On and Off
- 5 Adjusting the Volume
- 6 Using the Touchscreen
- 7 Positioning the Stand
- 8 Removing the Handle
- 9 Changing the Wrap
- 10 Charging the Device and Amplifier
- 11 Cleaning and Disinfecting the Device
- 12 Finding the App Manuals
- 13 Using Guided Access
- 14 Safety Information
- 15 Specifications
- 16 Contact Information
- 17 Customer Service and Technical Support
- 18 Documents / Resources
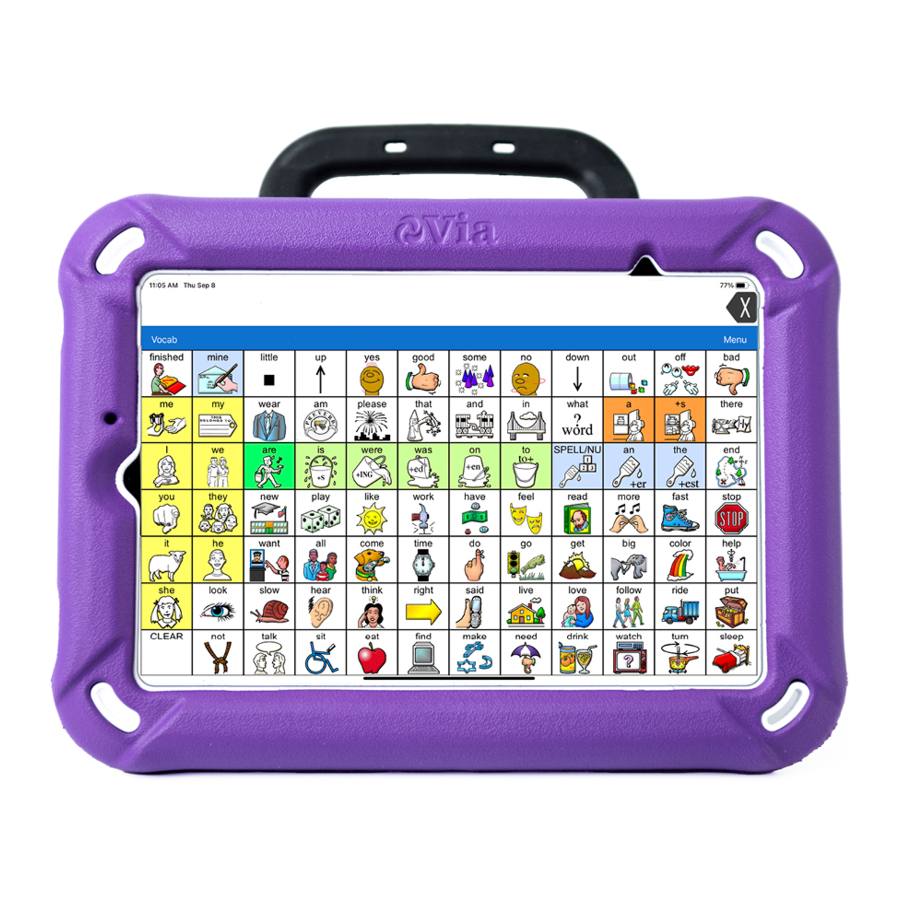
Via Mini Overview
Via Mini is an electronic speech generating device that augments communication for an individual with speech/language impairment. The device and its language programs give the user the power to initiate conversation, seek information, state opinions, and share feelings. The wrap provides protection while the Bluetooth® amplifier and speakers increase audio output.
The device can be accessed by direct selection by making physical contact with the display (for example, fingers); direct selection aided by mechanical aids (for example, a stylus or head-pointer); or indirect selection using a variety of switches that enable scanning access. The head tracking feature allows individuals who are unable to use their hands to alternatively use small head movements to control where the pointer moves on the screen. The front camera in the device translates these head movements into pointer movements and activations/selections on the screen. The device can be hand-held, placed on a flat surface, used with a table stand, or mounted to a wheelchair.
This manual offers step-by-step instructions for getting started with your Via Mini device.
For information on using iPad features, view the iPad User Guide at https://support.apple.com/guide/ipad/welcome/ipados
Device Features
Front View

- Handle
- Colored wrap
- Attachment points for a keyguard or TouchGuide
- Touchscreen
- Sleep/wake button
- Volume buttons
- Strap holders
Rear View

- Handle
- Sleep/wake button
- Volume buttons
- Rear camera
- Amplifier speakers
- Wheelchair mounting plate holes
- Stand
- Amplifier reset button
- Strap holders
- Colored wrap
Side View

- Charging port
- Charging LED (amber)
- Switch jack A
- Switch jack B
- Headset jack
- Amplifier LED (blue)
Turning the Device On and Off
This section applies to non-dedicated devices only.
The sleep/wake button allows you to turn the device on and off.

To turn the device on: Hold down the sleep/wake button until the Apple® logo appears on the screen.
To turn the device off: Hold down the sleep/wake button and the volume up or volume down button until you see the Power Off screen. Then slide the onscreen power off button to the right to turn the device off.
Turning the Amplifier On and Off
The device and amplifier communicate using a Bluetooth® connection. Typically, the amplifier should be left on. During air travel and in some medical facilities the Bluetooth option is required to be turned off. When the amplifier is off, speech is still present but comes from the device's internal speaker.
Non-Dedicated Devices: Turning Bluetooth Off
- Open the device Settings.
- Turn Bluetooth off.
Non-Dedicated Devices: Turning Bluetooth On
- Open the device Settings.
- Turn Bluetooth on.
- Choose the amplifier from the list of options under "Devices" to the right of "Bluetooth".
- Close the Settings.
- The blue light on the edge of the amplifier should be solid blue.
Connecting Bluetooth to the TouchChat® Software
- Open the TouchChat app.
- Open your vocabulary file and choose Menu > Settings.
- Scroll down to the Amp Connect section.
- Choose Select Amp and choose your amplifier.
Turning the Amplifier On and Off
To turn the amplifier off: Press and hold the amplifier reset/power button (labeled "I/O") until the amplifier LED goes out.

 Hint: The button is recessed. When you need to press it, use a pin.
To turn the amplifier on: Press the reset/power button for a second. The amplifier LED will flash to indicate the amplifier is on.
Adjusting the Volume
![]() Excessive volume or sound pressure level when using earphones or headphones can cause hearing loss over extended periods of time.
Excessive volume or sound pressure level when using earphones or headphones can cause hearing loss over extended periods of time.
Using the Volume Buttons
The volume buttons are located on the top edge of the device. Pressing one button increases the volume and pressing the other lowers the volume

Using the Touchscreen
Your device comes with a capacitive touchscreen. It responds best to a light touch from the pad of your finger.

Using excessive force or a metallic object when pressing on the touchscreen may damage the tempered glass surface.
Stylus
A stylus was provided with your device. If you prefer to get your own stylus, it must be compatible with a capacitive touchscreen.

 Note: The stylus provided has an opening on the end for attaching to you or the device. Find a chain, string, or lanyard that matches your personal style.
The stylus is a potential hazard for poking an eye.
Positioning the Stand
Your device comes with a stand that can be positioned for easy viewing. The stand is shown here in the closed position.

To position the device at an angle for easy viewing of the screen, do the following:
- Place the device face-down on a flat surface.
- While holding your thumb on the edge of the device below the stand's bottom support, press on the inside of the support with the tip of your index finger (or the tips of several fingers) to pull the support away from the back of the device.
- Position the device as needed.


Removing the Handle
If you do not plan to use the handle, you can remove it by removing the screws that hold it in place.
The handle and screws are potential choking hazards.

Changing the Wrap
Via Mini devices come with an Active wrap. You can replace the wrap on your device with a wrap of a different color.
To remove the old wrap:
- Pull one or both of the bottom corners of the old wrap off the device.

- Pull the sides of the wrap away from the device. Then pull the top of the wrap off the device.


To attach the new wrap:
- Align the wrap with the device. Align the holes in the wrap with the device power and volume buttons.

![information]() Hint: On a Via Mini, you can also align the wrap with the strap attachment holders and the cutouts of the frame.
Hint: On a Via Mini, you can also align the wrap with the strap attachment holders and the cutouts of the frame. - Pull one of the bottom corners of the wrap over the bottom corner of the device. You will need to stretch the wrap to pull it into place. Pull the other bottom corner into place.
- Push the sides and bottom of the wrap into place.

- Pull one of the top corners of the wrap over the top corner of the device. You will need to stretch the wrap to pull it into place. Pull the other top corner into place.

- Make sure the top, bottom, and sides of the wrap fit tightly against the device.


Charging the Device and Amplifier
Connecting the Charger
You received a battery charger with your device. One end of the charger plugs into a wall outlet—a surge protector is recommended. The other end has a USB-C connector, allowing you to charge the device and amplifier at the same time.

| 1 | Charging LED (amber) |
| 2 | Device charging port |
Use only the battery charger provided with your device.
Cords and cables are potential entanglement or strangulation hazards. Please consider this prior to placing these items with device users.
On a regular basis, visually inspect cables, cords, and connectors for damage or wear, especially where they are subject to extra stress. Cables and cords can become frayed or damaged from heavy use or with age. For example, a frayed cable could cause a battery charger/power adapter to short-circuit, posing a hazard to the user. If any cable, cord, or connector is damaged or worn, call Service for a replacement.
Locate the device in a safe location while charging.
Batteries are not replaceable by the customer.
To charge the device and amplifier
Hint: Charge the system each night.
- Plug the charger's USB-C cable into the device charging port.
- Plug the other end of the charger into a wall outlet or surge protector.
- The amber light next to the charging port will flash during charging and remain on when the amplifier is fully charged.
When the device and amplifier are fully charged
- Unplug the charger from the device.
- Unplug the charger from the wall outlet or surge protector (optional).
- Tap the device's power switch to turn the display light on.
Checking Battery Status
To check the battery level or charging status at any time, create a button with the Battery Status action or find and tap a battery status button in your vocabulary.
Non-Dedicated Device: Extending Battery Life
To extend battery life, you can dim the screen. Open the iPad Settings, select Display & Brightness, and drag the slider.
Cleaning and Disinfecting the Device
If your device will only be used by one person, routine cleaning and disinfecting should be sufficient. If, however, more than one person will be using the unit, take additional measures to clean and disinfect the unit after it has been used by one person before allowing it to be used by another.
Routine Cleaning and Disinfecting
Do not use solvents or abrasives or spray water or cleaner on the unit.
Cleaning the touchscreen
The touchscreen is very sensitive. Fingerprint smears, dust, grime, saliva, etc. will affect its performance. The screen also reacts to raindrops and extremes in temperature (condensation).
To dust the touchscreen, use a soft, lint-free cloth. For heavier cleaning, use a slightly dampened, lintfree cloth and then dry the screen with another soft, lint-free cloth.
Cleaning the device components and keyguard
You can wash the device components and keyguard in hot, soapy water. Dry them thoroughly before reassembling the unit. The best practice for regular cleaning is to dry accessories by hand, lay them on a dry towel, and let them air dry for about 5 minutes before placing them back on the device.
Disinfecting
To disinfect everything but the display, use a solution of vinegar and water (¼ cup vinegar to 1 cup water). Wipe the rubber boot (not the display) using a cloth dampened with this solution.
Wash the plastic shell and keyguard separately with the vinegar and water solution. Allow all equipment to air dry. Do not use vinegar and water on the display!
What about drooling/saliva?
Any saliva should be wiped up immediately, especially on the touchscreen or around any of the connectors. Use a slightly dampened, lint-free cloth to wipe the device.
What about spills, rain, or accidental immersion?
If you spill liquid or any runny substance on your device; if you are caught in a downpour; or if the unit is accidentally dropped in liquid, immediately dry the components as thoroughly as possible. Try using the device. If it does not work, call technical support and tell them what happened. They may ask you to send in your device for servicing.
Disinfecting the Device and Accessories for Multiple Users
Note: This section applies only when more than one person will be using the same unit. In that situation, it is vital to effectively disinfect the unit and accessories that have been used by one person before allowing them to be used by another.
First Step: Put on protective gloves
Next Step: Clean the device components and accessories
- Wipe down the device components and accessories with disinfectant wipes (Virucidal, Bactericidal, Pseudomonacidal, Tuberculocidal, Fungicidal)—Metrex CaviWipes™. Follow the disinfectant product manufacturer's instructions for cleaning.
- Take a Q-tip with cleaner applied (for example, Windex® or another commercial cleaner) and clean inside all cracks and crevices. You may want to use a toothbrush or similar brush.
- Blow the components off with an air hose or wipe it dry.
Make sure all soil is removed from the device components and accessories. This is vital before proceeding to disinfecting the equipment.
Next Step: Disinfect the device components and accessories
- Wipe down the device components and accessories with a new disinfectant wipe (Virucidal, Bactericidal, Pseudomonacidal, Tuberculocidal, Fungicidal)—Metrex CaviWipes. Follow the disinfectant product manufacturer's instructions for disinfecting.
- Make sure to clean inside all cracks and corners, and wipe more than once if necessary to keep the components wet for a minimum of three (3) minutes.
- Allow the components and accessories to dry.
Final Step: Wipe the touchscreen
- When the device components and accessories are dry, wipe down the viewing area (device touchscreen, keyguard, etc.) with glass cleaner, so the screen does not discolor.
- Allow the equipment to dry.
Finding the App Manuals
Your device came with one of the following iOS®/iPadOS® apps preinstalled.
TouchChat
The TouchChat® app is a full-featured communication solution for individuals who have difficulty using their natural voice. TouchChat is designed for individuals with Autism, Down Syndrome, ALS, apraxia, stroke, or other conditions that affect a person's ability to use natural speech.
Words, phrases and messages are spoken with a built-in voice synthesizer. Various synthesized voices are available in multiple languages, allowing the user to choose a voice that fits the user's personality.
For information on using the app: Go to https://touchchatapp.com/manuals-and-qrgs.
LAMP Words for Life
LAMP Words for Life® is a robust language system that combines the power of PRC's Unity® language system and Language Acquisition through Motor Planning (LAMP™) approach. The app is appropriate for beginning communicators who are just learning that they can affect those around them to skilled communicators with advanced language skills. The app is symbol-based but the symbols are paired with text to support literacy development.
Every word is produced by one unique and consistent motor pattern. When using a consistent motor pattern to produce a consistent response, over time with practice, the movement becomes automatic and can be produced quickly.
For information on using the app: Go to https://lampwflapp.com/support/support-articles/lamp-users-guide.
Dialogue AAC
Dialogue® AAC is an iOS app designed for literate individuals who require AAC (augmentative and alternative communication). Built-in message banking allows the individual to import messages that use the individual's own voice. The app can be accessed using touch, scanning, or head tracking.
The Essence® Vocabulary System is a simple spelling- and phrased-based vocabulary system that accommodates different visual and motor abilities. The Essence vocabulary allows individuals to use spelling and word prediction to say virtually anything. Customizing with specific, personalized sentences is easy to do, allowing the system to grow with an individual's needs.
For information on using the app: Go to https://www.prc-saltillo.com/dialogueaacapp#support.
Using Guided Access
Dedicated Via Mini devices are set up with Guided Access turned on. If you cannot locate the Guided Access passcode in your shipping box, please call our support team to get this information.
If you change the passcode at any time, PRC-Saltillo will not be able to retrieve your new passcode for you.
Guided Access helps you focus on a what you need to do in the app by temporarily limiting what the device will allow you to access.
- Restrict the device to a single app
- Control which app features are available
- Disable areas of the screen that do not apply to what you're trying to do in the app
- Disable the device hardware buttons
- Limit how long the app can be used
Ending a Guided Access Session
- Triple-click the Home button or top button (depending on your iPad model).
- Enter the Guided Access passcode.
- Swipe up from the bottom of the screen to navigate to the iOS menu.
If you choose to change your Guided Access passcode, write it down and store it in a safe place. PRC-Saltillo cannot restore a forgotten Guided Access passcode.
Restarting a Guided Access Session
- Open the TouchChat app.
- Triple-click the Home button or top button. The message "Guided Access Started" will appear briefly.
The Guided Access Option defaults are shown below:

For additional information on Guided Access:
Go to the "Use Guided Access on iPad" section of the iPad User Guide:
https://support.apple.com/guide/ipad/use-guided-access-ipada16d1374/ipados
Clear Private Information from a Non-Dedicated Device
- Swipe up to unlock the home button (if necessary).
- Tap on Settings.
- Tap General.
- Scroll down and tap on Reset.
- Tap on Erase All Content and Settings.
- Tap Erase Now at the "Do you want to update your iCloud Backup before erasing" prompt.
- Enter the restriction code for the device.
- Tap Erase on the Erase iPad pop up box.
- Tap Erase on the second Erase iPad pop up box.
- Enter the password of the account on the device.
- The device will erase the content and restart.
Arrange to Clear Private Information from a Dedicated Device
- Contact PRC-Saltillo Service.
Phone: Call 1-877-872-1428
Email: Contact Service@prc-saltillo.com - Follow the instructions provided by Service to pack and ship your device.
Safety Information
Emergencies
This device is not intended to be an emergency call device or sole communication aid.
Cleaning, Maintaining, and Servicing
Do not attempt to service or maintain the device while it is in use. Disconnect the charger and turn off the device before cleaning or disinfecting the device.
If your device or an accessory is damaged, call Service for assistance. Do not attempt to make repairs yourself.
Accessories
Do not use accessories, detachable parts, or materials not described in this manual.
Do not use accessories, detachable parts, or materials in any other way than described in this manual.
Mounting and Positioning
Any mounts used, including switch mounts, should be fitted by a qualified person. Failure to install the mounting system according to the manufacturer's instructions may result in an injury to the user. Be certain that the user's view is not obstructed by the mounting.
Analysis of positioning by a qualified person is required to prevent repetitive stress injuries to the user.
Use your device and phone safely while texting. Do not text while performing another task or activity. See the phone manufacturer's manual for safe mounting and placement.
Vision and Hearing
The communication partner should ensure that the user takes frequent breaks to avoid eye strain.
Consult your vision care provider about device positioning considerations for the user.
Excessive volume or sound pressure level when using earphones or headphones can cause hearing loss over extended periods of time. Set the volume at a low level and increase it only enough that you can hear comfortably.
Ports and Connectors
Keep the device ports and mating cable connectors clean so that they make the best possible contact and are able to maximize the service life of your device. Dirty cable connectors will transfer the contaminate to the mating connector on the device and may degrade performance.
If your device has been exposed to water, the USB port must be completely dry before a USB cable is inserted into it. To remove moisture from the USB port, shake the device several times with the USB port facing downward, and then use a microfiber cloth to wipe the device dry. You should then check the USB port area again. If moisture is still visible in the USB port, repeat the shaking and drying procedure.
Do not try to force a connector into a port. Be sure you are inserting the connector into the correct port and that you have the connector turned so that it matches the orientation of the port.
Small Parts, Cords, Cables, and Straps
Cords, cables, and straps are potential entanglement or strangulation hazards. Please consider this prior to placing these items with device users.
On a regular basis, visually inspect cables, cords, and connectors for damage or wear, especially where they are subject to extra stress. Cables and cords can become frayed or damaged from heavy use or with age. For example, a frayed cable could cause a battery charger/power adapter to short-circuit, posing a hazard to the user. If any cable, cord, or connector is damaged or worn, call Service for a replacement.
When unplugging a cable or cord, grasp the connector instead of the cable or cord itself to avoid damage or wear.
Always use cables, whether for charging or transferring vocabulary files, according to the instructions in this manual.
Small parts could present a choking or other hazard.
If the stand is removed, it becomes a potential hazard for choking or for poking the eye. Store it in a safe location.
The USB flash drive could be a choking hazard. Store it in a safe location when not in use.
The stylus is a potential hazard for poking an eye.
Screen
Do not use the device if the screen is cracked or broken.
Do not remove the screen protector from the device. The screen protector protects the device user from any glass shards in case of screen breakage.
Interference
When operating this device in a medical environment, do not use with any product that is not medically approved. Follow all rules for appropriate wireless device use.
Do not use this device close to sources of RF/RFID radiation or you may encounter interference. Move away, if possible, from the source of the interference.
Water
If your device has been exposed to water, the USB port must be completely dry before a USB cable is inserted into it. To remove moisture from the USB port, shake the device several times with the USB port facing downward, and then use a microfiber cloth to wipe the device dry. You should then check the USB port area again. If moisture is still visible in the USB port, repeat the shaking and drying procedure.
Your device is intended for use in normal communication situations. It is not waterproof. Do not spray or splash liquid directly on the device and use extreme caution when using it around water. As with most electronic devices, you should never use the device when you are actually in the water (for example, a pool or bath).
Batteries and Charging
Use only the battery charger provided with your device.
Amplifier batteries and tablet batteries are not replaceable by the customer.
Do not place the device where it is difficult to operate or difficult to disconnect from the charger.
Always follow the instructions in this manual when charging your device.
Do not insert any object into the charging port. This can result in damage to the port.
To avoid electric shock and damage to your device, do not charge the device while it is wet or in an area where it could get wet. Do not handle the device, charger, or cords with wet hands.
Locate the device in a safe, dry location while charging. Do not charge the device outdoors.
Keep the charger away from water and do not allow water or any other liquid to be spilled on it.
The battery charger country plug adapters could be choking hazards when not attached to the charger. Store the adapter that is not currently in use in a safe location.
If the charger, cable, or cord is damaged, call Service for a replacement.
Heat
Do not place the device in an appliance such as a microwave or oven, near an open flame, or on or near a source of heat such as a stove or heater.
Do not leave the device in a hot vehicle for a prolonged period.
Oxygen-Rich Environment
Do not take the device into an oxygen-rich environment (operating room, oxygen tent, etc.).
Touching the Surface
While the device is charging, touching the surface of the device with broken skin may aggravate a wound.
While the device is charging, infants or high-risk groups should not touch the surface of the device if there is a chance of burning the skin.
Implantable Medical Devices
A minimum of six (6) inches should be maintained between a handheld wireless mobile device and an implantable medical device, such as a pacemaker, implantable cardioverter defibrillator, vagus nerve stimulator, shunt, or stent, to avoid potential magnetic interference with the medical device. Persons who have such devices:
- Should ALWAYS keep the mobile device a minimum of six (6) inches from their implantable medical device;
- Should not carry the mobile device in a breast pocket;
- Should move the mobile device away from themselves immediately if there is any reason to suspect that it is interfering with the implantable medical device;
- Should read and follow the directions from the manufacturer of the implantable medical device. If you have any questions about using your wireless mobile device with an implantable medical device,consult your health care provider.
Instructions for Storage
If you will be leaving the device in storage for a long period of time, turn the device and amplifier off. Devices in storage must be charged every six months.
Explanation of Symbols
This section explains the symbols that appear on PRC-Saltillo devices, accessories, or packaging.

Specifications
| Weight | 1.8 lbs. |
| Dimensions | 9 1/16 in. (23.02 cm) x 7 3/4 in. (19.69 cm) x 1 3/4 in. (4.45 cm) |
| Battery life | 10-12 hours, depending on individual usage and power settings |
| Software/operating system | TouchChat, LAMP Words for Life, Dialogue AAC apps / iPadOS |
| Standard components | Amplifier, handle, stand, wrap, battery charger/USB cable, stylus, carrying case, shoulder strap |
| Accessories | Keyguards, TouchGuides, wheelchair mounting plate, backpack, waist belt, shoulder strap |
Operating Environment
| Ambient temperature | 5°C to 40°C (41°F to 104°F) |
| Relative humidity | 15% to 93%, non-condensing |
| Atmospheric pressure | 70 kPa to 106 kPa |
| The device needs to be protected from moisture during use. | |
Transport and Storage Environment
While in transport or storage, the range of temperatures to which the device can be exposed is -25°C (-13°F) without relative humidity control to 70°C (158°F) at a relative humidity up to 93%, non-condensing.
Temperature Conditions for Direct Contact
At an ambient temperature of 40°C (104°F), the surface temperature of the back of the device can increase as much as 11°C (51.8°F) during charging to a temperature of 51°C (123.8°F). For this reason, minimize contact with the back of the device while the device is charging.
While the device is charging, touching the surface of the device with broken skin may aggravate a wound.
While the device is charging, infants or high-risk groups should not touch the surface of the device if there is a chance of burning the skin.
While the device is charging, minimize contact with the back of the device.
Contact Information
If you need assistance in setting up, using, or maintaining your device or if you need to report unexpected operation of the device or an unexpected event related to the device, please contact us by phone at 1-877-872-1428 or by email at service@saltillo.com.
USA
Tel.: +1 330 262-1984
+1 800 262-1984
Fax: +1 330 262-4829
Email: info@prentrom.com
Web: www.prc-saltillo.com/
UK
Tel.: +44 (0) 1733 370 470
Fax: +44 (0) 1476 552 473
Email: info@liberator.co.uk
Web: www.liberator.co.uk/
Customer Service and Technical Support
Getting Help
If you need assistance in setting up, using, or maintaining your device or if you experience problems, please contact us by one of the following methods.
Phone: Call 1-877-872-1428
Email: Contact service@saltillo.com
Realize Language™ website support: Contact support@realizelanguage.com
Dedicated Devices
A dedicated Via Mini device is set up for communication only. Your funding source requires that your device be locked when shipped. If you wish to enable additional features, contact PRC-Saltillo Order Management at (800) 262-1933 or email sales@prc-saltillo.com. A dedicated device is set up with Guided Access turned on. If you cannot locate the Guided Access passcode in your shipping box, please call our support team to get this information. For information on using Guided Access, see Using Guided Access.
Documents / Resources
References
https://support.apple.com/guide/ipad/welcome/ipados
TouchChat - Manuals & Quick Reference Guides
Support Articles | LAMP Words For Life
https://support.apple.com/guide/ipad/use-guided-access-ipada16d1374/ipados
![www.prc-saltillo.com]() PRC-Saltillo
PRC-Saltillo![www.liberator.co.uk]() Liberator - Homepage | Liberator Ltd
Liberator - Homepage | Liberator Ltd
Download manual
Here you can download full pdf version of manual, it may contain additional safety instructions, warranty information, FCC rules, etc.
Advertisement


Need help?
Do you have a question about the Mini and is the answer not in the manual?
Questions and answers