Advertisement
- 1 Introduction
- 2 Functional Diagram
- 3 Quick Installation Guide
- 4 Cycling Preparation
- 5 Learning to Ride
- 6 Vehicle Usage Instructions
- 7 Charging Instructions
- 8 All-Terrain Electric Off-Road Motorcycle Specifications
- 9 Other comments
- 10 Symptoms of failure and solutions
- 11 Maintenance Guide
- 12 Maintenance and Service Record Card
- 13 Safety precautions
- 14 Documents / Resources
Introduction
This manual should be considered an integral part of the all-terrain electric motorcycle and must be transferred to the next owner upon resale.
This publication includes the latest production information provided prior to printing. Rawrr reserves the right to make changes at any time without further notice and without any obligation.
Rawrr retains the ultimate interpretation rights of this manual.
No part of this publication may be reproduced, translated, copied, or transferred without the written permission of Rawrr Corporation. The all-terrain electric motorcycle depicted in this manual may differ slightly in configuration or parameters from your actual vehicle (due to certain configuration upgrades).
Ensure your safety and riding enjoyment:
- Carefully read this manual.
- Follow all recommendations and procedures contained herein.
- Pay close attention to the safety information and tips provided in this manual.
To protect your property, we strongly recommend maintaining your vehicle properly. Additionally, adhere to the operational guidelines and always perform pre-ride checks and other routine inspections as outlined in this manual.
Your Rawrr dealer is most familiar with your all-terrain motorcycle. For any questions or concerns regarding the vehicle, manuals, and related policies, contact Rawrr or an authorized dealer. We are not responsible for any unofficial statements or opinions concerning off-road vehicles, manuals, and related policies. For more information, visit our website at www.rawrrmantis.com
Enjoy your off-road electric journey!
Your safety, as well as the safety of others, is our top priority. Safe operation of this all-terrain electric motorcycle is a significant responsibility.
To ensure your safety and that of others, operational procedures that could potentially harm you or others, along with other safety label information, are provided in this manual. It is impossible to inform you about all dangers when operating or maintaining the all-terrain electric motorcycle; you must exercise your own good judgment to avoid risks. You will find crucial safety information in various forms, including:
- Safety labels on the all-terrain electric motorcycle.
- Instrument panel warnings and fault codes in the event of errors. Driving this all-terrain electric motorcycle on public roads without registration is strictly prohibited. Unauthorized use in non-permitted areas is also prohibited.
Due to technical upgrades and firmware updates, the actual product appearance and functionality may differ from the contents of the manual. To obtain the latest feature descriptions and safety instructions, please visit our official website at www.rawrrmantis.com for the most up-to-date information on RAWRR products.
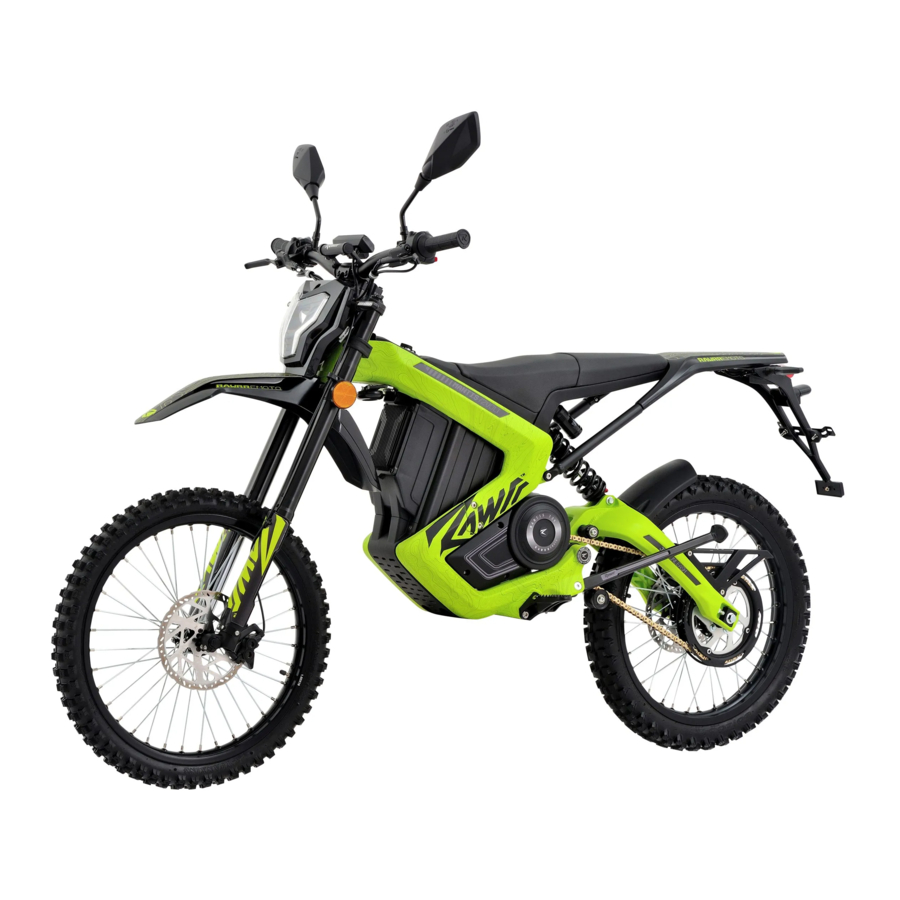
Functional Diagram

- Rearview mirror
- Instrument panel
- Front headlight
- Front turn signal light
- Front mudguard
- Horn
- Front suspension
- Front reflector
- Rear license plate light
- Rear tail light
- Rear turn signal light
- Rear mudguard
- Rear fork
- Rear seat
- Rear shock absorber
- Motor
- Front seat
- Charging port
- Ignition lock
- Rear brake assembly
- Chain
- Tensioner wheel
- Side support flameout switch
- Side support
- Peda
- Battery
- Controller
- Front brake caliper

- Rearview mirror
- Rear brake lever
- Rearview mirror
- Instrument panel base bracket
- Front brake lever
- Grip cover
- Left combination
- Right combination switch switch
| Left-side switch |  |  |  |  |
| High beam and low beam switch (requires front headlights to be on) | Left and right turn signal switch | Horn switch | Seat lock switch (used when powered) | |
| Right-side switch |  |  |  |  |
| Decoration Sport and | ECO mode switch | Reverse gear (press and hold when powered to activate reverse mode) | Forward gear (usable when powered in ECO mode, with three forward gears D1/D2/D3 switch) |

| Number | Function | Display Symbol | Description |
| 1 | Speed |  | Displays current speed during riding |
| 2 | ODO |  | Odometer showing total distance, switchable to metric |
| 3 | Trip Meter |  | Resets each time power is turned on, shows single trip distance |
| 4 | Gear Display |  | Shows ECO/SPORT mode and actual gear (includes 1/2/3 in ECO mode) |
| 5 | Operating Status |  | Indicates working status; off when speed is off, on when speed is on |
| 6 | Under Voltage |  | Flashes when battery voltage is low |
| 7 | High Beam Display |  | Indicates high beam on dashboard |
| 8 | Turn Signal |  | Indicates left and right turn signals |
| 9 | P Gear Indicator |  | Displays gear position with letter "P" |
| 10 | Motor Fault |  | Displays fault status |
| 11 | Battery Percentage |  | Shows current battery level, ranging from 00% to 100% |
| 12 | Reverse Gear |  | Displays reverse gear status |
| 13 | Fault Code |  | Displays fault codes (refer to controller manual for details) |
Recommended Torque for Installation of Important Components
| Number | Installation Position | Recommended Torque |
| 1 | Front wheel axle tightening | 25-30N.m |
| 2 | Function switch tightening | 3-5N.m |
| 3 | Rear wheel sprocket tightening | 18-20N.m |
| 4 | Front and rear disc brake tightening | 10-12N.m |
| 5 | Front and rear brake lever tightening | 12-15N.m |
| 6 | Tension wheel tightening | 18-20N.m |
| 7 | Tension arm tightening | 20-22N.m |
| 8 | Footrest bracket tightening | 30-35N.m |
| 9 | Motor fixing | 20-22N.m |
| 10 | Rear fork tightening | 30-35N.m |
| 11 | Rear shock absorber tightening | 22-28N.m |
| 12 | Rear tailstock tightening | 15-20N.m |
| 13 | Rear wheel axle tightening | 60-70N.m |
| 14 | Handlebar tightening | 7-9N.m |
| 15 | Steering column tightening (pre-tightening nut) | 3-5N.m |
| 16 | Steering column compression nut tightening | 40-45N.m |
Quick Installation Guide
Do not assemble, disassemble, or package the all-terrain electric motorcycles individually. Team cooperation is required.
Install the handlebars
- Place the headlight bracket onto the upper mounting plate, aligning with the four holes, then tighten the clamping nuts into the slots in front of the headlight bracket.


- Place the handlebars on the headlight bracket, aligning the holes, and secure with the 4 bolts using a 5# hex key wrench.
Note: Be sure to use washers with the 4 bolts.


Handlebar adjustment:
- Use a 3# hex key wrench to loosen the 2 bolts, then rotate the handlebars to the desired angle.


- Use a 5# hex key wrench to loosen the 4 bolts, adjust the handlebar angle.
Note: Do not lose the washers securing the bolts.


Installation of brake lever and throttle
- As shown in the diagram, adjust the front brake lever and throttle to an angle of 25 ° -35 ° that is comfortable for your grip distance.

- Use a 4# hex key wrench to secure and adjust the angle of the brake lever. Use a Phillips screwdriver to secure the throttle.


- Rotate the speed control handle to ensure it returns to its normal position and can accelerate inward.
Note: If stuck, check the speed control handle.
Note: Installation steps for the rear brake lever and left function switch are the same as the above steps.


Installing the front wheel:
- Remove the brake caliper pads, place the front wheel between the forks, ensuring the axle passes through both forks and the front wheel. Use two 8# hex key wrenches to secure the front axle.

- Use two 19# wrenches to loosen the front wheel locking nuts, then remove the axle and nuts.

- Install the front axle spacers on both sides.
Note: Be careful not to crush the seals.

- Tighten the bolt in the front wheel axle hole, a total of 4 pieces.


Note:
- After removing the caliper pad retainer, do not squeeze the front brake lever. Squeezing the front brake lever may cause the brake caliper to clamp, making it difficult to insert the disc brake rotor.
- When installing the front wheel, pay attention to the installation of the disc brake rotor and caliper. After installation, ensure the front wheel rotates smoothly without any unusual noise.
- When installing the disc brake rotor, apply anaerobic adhesive to the threaded portion (heat the threaded portion when disassembling).
Installation of the front mudguard
Use a 5# hex key wrench to secure the front mudguard to the lower mounting plate using 3 screws, including flat washers and spring washers.

Installing the front reflectors
Rotate clockwise to install the front reflectors on both sides of the front forks.

Installation of the rearview mirror
Adjust the rearview mirror to the desired position and tighten the nut using a 14# open-end wrench. (Example shown with E Mark handlebars in the diagram.)

Installation of the front headlight
- Place the front headlight on the positioning pin of the front mudguard and insert adjustment washers between the headlight and the bracket.

Adjust the pos ition and tig hten th e central securing bolt using a 5# hex key wrench.


Installing the battery:
- Insert the key into the round hole beneath the rear seat cushion (in case the vehicle cannot be powered on due to lack of battery or battery damage, urgent action is required). Under normal circumstances, simply turn on the switch to power the entire vehicle, press the switch on the handlebar cushion, and the cushion will open.


- Near the right side of the frame, locate the battery charging port, place the battery into the compartment, connect the discharge plug, open the air switch on the left side, close the seat, turn off the switch lock, and remove the key.


How to open the seat cushion when the entire vehicle is powered on
- Insert the key into the switch lock, then turn it clockwise.
- Press the seat cushion button on the left combination switch to open the seat cushion.


Installation instructions for rear shock absorber mount:

Raise the rear tail frame to facilitate the installation of the rear shock absorber.

Align the front end of the shock absorber with the mounting hole slot on the frame, and tighten the securing bolt from the left side to the bottom.

Align the shock absorber with the mounting hole slot on the frame, and thread the bolt through from the left side to the bottom. Apply thread sealant to the upper and lower damping nuts. Use a 13# ring spanner to tighten the left-side bolt and a 14# ring spanner to tighten the right-side nut.

The original shock absorber has undergone multiple extreme tests. The manufacturer is not responsible for any property damage or personal injury resulting from unauthorized modifications or damage caused by force majeure. Apply thread sealant to the shock absorber securing nuts. Tighten the bolt and nut to a torque of 22-28 N.m.

Cycling Preparation
Please ensure that you have carefully read all items in Safety Instructions of this manual before cycling, focusing especially on the following items:
Check front and rear tires:
- Tires are in good condition without any abnormalities.
- Normal tire pressure is 200∽220 Kpa. Insufficient tire pressure can cause abnormal wear, steering issues, lower speed, and reduced distance. Excessive tire pressure can lead to localized abnormal tire wear, reduced tire grip, decreased riding comfort, and even tire burst, posing safety hazards.
Check LCD display, horn, and brakes:
- Verify the normal functioning of all instrument displays.
- Ensure the horn is operating correctly.
- Grip the front and rear brake levers separately to check if both brakes are functioning properly and if the front and rear wheels are working correctly.
Check vehicle lights and wiring functions:
- Power on the vehicle and verify if the instrument panel and lights are functioning properly.
- Check if the front/rear turn signals are synchronized.
Check handlebars:
Handlebars should be securely tightened without any swing, flexible, without interference, and without strange noises.
Adjust suspension:
Adjust the front and rear suspension according to actual conditions to meet your riding needs.


Please be sure to wear a helmet and protective gear. For your safety, please choose a full-face off-road helmet and off-road protective gear. The images provided are for illustration purposes only; please take comprehensive safety precautions. Do not lend the electric off-road motorcycle to individuals who are unfamiliar with or unable to operate it. One-handed driving, riding recklessly, or driving under the influence of alcohol are all very dangerous activities.
Learning to Ride
Starting:
- Insert the key into the electric locking hole and rotate clockwise to supply power.

- Check if all switches, instruments, horn, front and rear brakes are functioning properly.


- Before starting the vehicle: Sit securely on the seat and retract the side stand.

- Slowly rotate the throttle grip inward to accelerate and outward to decelerate.
Note: When accelerating, release the brake lever to avoid triggering the brake power cut-off function.


Accelerate smoothly and gently to avoid any danger or damage to vehicle components. For initial driving, use the EC0 mode, and only switch to SPORT mode after becoming fully familiar with the vehicle.
Please control the brake lever according to the actual situation, gradually applying pressure. Avoid gripping it suddenly to prevent the wheels from locking up and causing skidding, which can be dangerous. Try to anticipate and avoid sudden braking, sharp turns, and other maneuvers that can lead to sliding and falling, especially in slippery conditions like rainy days.
Squeezing the front brake suddenly while riding can lead to a side flip.

A sudden squeeze of the front brake with the left hand while riding can cause a rollover.

Parking:
Pay attention to road conditions and decelerate as you approach the parking spot. Once the vehicle is stable, turn off the ignition, remove the key, lower the parking brake, and secure the vehicle.

While parked (with occupants still inside), please make sure to engage the parking brake and shift into 'P' (Park) mode to disable the vehicle's power, preventing accidental engagement of the gear shift lever and potential accidents.
Please do not hitch or tow other vehicles.

It is prohibited to use phones, cameras, headphones, or earphones while driving.

Complex road conditions, proceed with caution and drive at a reduced speed.

Driving is prohibited in severe weather conditions or when extremely fatigued. Deep water immersion is strictly prohibited, as it can damage the battery and even cause personal injury.

Before making sharp turns, be sure to reduce your speed.

Please grip the handlebars tightly with both hands and refrain from speeding.

Safety hazards, take precautions to avoid!
Dangerous behaviors, do not attempt!
Driving after drinking is prohibited!
Vehicle Usage Instructions
P Mode Parking Function
- Enter the P-gear parking position upon startup.
- When the side stand is lowered, enter the P mode parking position.
Note: Before squeezing the brake lever to activate the P mode parking function, ensure the side stand is open!
Vehicle "Power Off" (Power On but Not Engaged)
- Turn off the brake power: Grip the brake lever, return the handle to its position, and the motor will have no output.
- Motor overheating protection.
- Controller overheating protection.
- Battery overheating, power reaching undervoltage protection point.
Vehicle Power Reduction
- Controller overheating (begins deceleration when operating temperature exceeds 85°C; reduces output by 10% for every additional 1°C. If overheating persists, power output reduces to 20% of rated value; can be reused after controller cools).
- Motor overheating (begins derating process when operating temperature exceeds 110°C; derating value increases by 10% for every additional 1°C. If overheating continues, power output reduces to 20% of rated value; wait for motor to cool down before reuse).
- Battery voltage linearly reduces from 71V; decreases by 20% for each 1V reduction, minimum derated to 15% of rated value. Battery enters undervoltage protection at 63V.
- Power output stops when power is zero. (If not charged in time to continue use, battery may enter overdischarge protection.) Note: After overdischarge protection, battery needs to be charged and activated with a charger; activation method is detailed in Fault Phenomenon.
Environmental Conditions During Use
Not recommended to use sports equipment at temperatures below 0°C to -20°C; battery equivalent to 80% at room temperature.
Avoid prolonged high-power driving when temperatures exceed 50°C.
Water Involvement
Occasional water contact (up to 24 cm / 9 inches deep) is acceptable for all-terrain electric motorcycles, but prolonged immersion is not recommended. Especially when the motor is hot, water cooling and internal air contraction can cause water to seal oil and absorb into cable positions, leading to internal damage. Below are the waterproof ratings for each component: Battery, Motor: IP65 Controller: IP67 Vehicle connectors: IP65
Charging Instructions
To charge the entire all-terrain electric motorcycle
Connect the charger output to the vehicle's charging port, and then connect the other end to a power source.

Prohibited to charge the battery below 0°C, as it may damage the battery. Please wait until the battery temperature rises before charging. Proper use and maintenance methods for lithium batteries: Do not dismantle waste lithium batteries without authorization, they should be recycled by relevant departments. When the vehicle is not used for more than one month, be sure to turn off the air switch or unplug the power plug and store it fully charged. When not charging, please tighten the charging sealing cap.
Portable Charging
- Remove the battery
- Ensure the power switch is in the ON position, press the left combination function switch unlock button, open the seat, and turn off the air switch.
The images are for reference only; the actual product appearance and functionality may differ.

- Remove the discharge plug from the lithium battery, lift it upward, and then pull out the lithium battery.

- Ensure the power switch is in the ON position, press the left combination function switch unlock button, open the seat, and turn off the air switch.


- Charge the battery.
- First, connect the charger's output to the lithium battery charging port, then connect the other end to a power source.

- Charger indicator display: The red light indicates it is charging. When fully charged, the green light remains on continuously. Please power off promptly when the battery is fully charged.

- First, connect the charger's output to the lithium battery charging port, then connect the other end to a power source.


- Charging Instructions:
- Charge the all-terrain electric motorcycle away from children.
- Do not place any objects on the charger. Use the charger in a dry and well-ventilated environment.
- If you smell any odor or notice excessive heat during the charging process, immediately stop charging. If the battery does not show full charge after an extended period, please take it to a service center for maintenance.
 Please use the dedicated lithium battery charger for this vehicle. When replacing the charger, use an original manufacturer charger. Ensure the air switch is turned off before installing or removing the battery. Hot plugging or unplugging may affect the lifespan of the battery discharge plug. There is a risk of sparking when inserting the battery plug with the air switch open, which can lead to damage of the plug or battery. The charger will automatically shut off when fully charged, but it is advisable to avoid leaving the charger connected to the power grid for extended periods, with a maximum limit of 6 hours.
All-Terrain Electric Off-Road Motorcycle Specifications


Note: Depending on the testing environment, the range may vary significantly. The data is measured with a bicycle rider weight of 220 pounds, at an ambient temperature of 26°C.
Other comments
- RAWRR is committed to continuously improving product performance, and specifications and manual content may change without prior notice. Please understand! If there are any discrepancies between the icons and images in the manual and the actual product, please refer to the actual product.
- RAWRR reserves the right to interpret and explain the statements regarding this product within the limits permitted by law.
- If you intend to resell or transfer your RAWRR all-terrain electric motorcycle, please remember to pass on this manual as it is part of the product. For any questions you may have about RAWRR, we will be happy to assist you at any time. Thank you again for choosing and trusting this product.
Attachment: Off-road Vehicle Electrical Schematic Diagram

Controller Alarm Code List
| Alarm Code (Buzzer Beep) | Fault Name | Protective Measures | Fault Diagnosis |
| 1 (1 short) | Software Overcurrent | Shutdown |
|
| 2 (2 short) | Motor Overspeed | Shutdown |
|
| 3 (3 short) | Battery Overvoltage | Shutdown |
|
| 4 (4 short) | KEY Power Abnormality | Shutdown |
|
| 5 (5 short) | 12V Power Supply Abnormality | Shutdown |
|
| 6 (6 short) | 5V Power Supply Abnormality | Shutdown |
|
| 7 (7 short) | Angle Sensor Disconnected | Shutdown |
|
| 8 (8 short) | Hardware Overcurrent | Shutdown |
|
| 9 (9 short) | Current Loop Fault | Shutdown |
|
| 10 (1 long) | Battery Undervoltage | Derating |
|
| 11 (1 long 1 short) | Controller Overtemperature | Derating |
|
| 12 (1 long 2 short) | Motor Overtemperature Motor | Derating |
|
| 13 (1 long 3 short) | Motor Temperature Too High | Shutdown |
|
| 14 (1 long 4 short) | Motor Signal Interference | Shutdown |
|
| 15 (1 long 5 short) | No Signal from Throttle | Shutdown |
|
| 16 (1 long 6 short) | Throttle Not Reset | Shutdown |
|
| 17 (1 long 7 short) | Motor Stall | Derating |
|
| 18 (1 long 8 short) | Battery Communication Disconnection | Shutdown |
|
| 19 (1 long 9 short) | Battery Communication Fault | Shutdown |
|
| 21 (2 long and 1 short) | Battery Communication Fault | Shutdown |
|
Symptoms of failure and solutions
| Number | List | Reasons for the malfunction | Causes of the malfunction |
| 1 | Power on but motor doesn't work |
|
|
| 2 | The governor is not functioning, or the maximum speed is lower. |
|
|
| 3 | When turning on the power, the motor does not operate, and the range per charge is insufficient. |
|
|
| 4 | The charger is not charging |
|
|
| 5 | The seat cushion cannot be opened |
|
|
| 6 | During riding, the all-terrain off-road electric motorcycle emits abnormal noises from the chassis. |
|
|
| 7 | After connecting the power, the charger does not work properly, and the power meter does not display power levels. |
|
|
| 8 | The brake is not functioning | Worn brake pads. | Replace the brake pads. |
| 9 | Other malfunctions |
| If you encounter any of the above situations, please contact your supplier or repair station. Do not attempt to open these components without permission. Otherwise, you may void the company's warranty commitment. |
Maintenance Guide
In principle, during normal riding, you should conduct the first inspection (also considered as the first service) at around 10-30 kilometers. Here are the inspection items:
- Check the tightness of the front and rear wheel spokes and brake cables.
- Inspect for any play in the front steering column bearings.
- Check the sealing of the chain.
- Verify if the chain is properly seated in the tensioner wheel guide groove.
- Inspect the shock absorbers for oil leaks and ensure the rebound position is correct (Note: Do not rotate adjustment knobs left or right during adjustment).
- Check the tightness of handlebar fixing screws.
Special Note: Before starting any maintenance, always ensure to turn off the power.
During inspection, prioritize safety:
- 1. Choose a wide and flat area to park the vehicle.
- 2. When performing riding checks, do so in a safe location, being mindful of surroundings and conditions.
- 3. If any abnormalities are found, resolve them before riding. If unable to resolve on your own, contact after-sales service or an authorized service center.
Additional Notes:
- The front and rear brakes are disc brakes; brake pads should be replaced before significant wear occurs.
- Regularly maintain cleanliness of the disc brake system to prevent prolonged accumulation of mud and dirt, especially avoiding oil contamination.
Component Inspection
- Suspension Check Check if there are any bends, deformations, or damage to the suspension. If the front suspension is damaged or leaking oil, rock the handlebars up and down to check for abnormal noises.
- Brake Inspection Verify that the free play of the brake lever is within the specified range (15-30mm). Adjust if measurements do not meet requirements.
- Brake Effectiveness Check Perform a low-speed test on dry, flat roads to assess brake effectiveness. Test both front and rear brakes separately.
- Tire, Spoke, Tension Wheel, and Chain Inspection Your all-terrain off-road electric motorcycle's tires are in contact with the ground for extended periods, making them susceptible to damage from objects like stones, glass, and nails on the road. Therefore, be mindful of road conditions to avoid places that could potentially damage your tires. Additionally, regularly inspect tires for visible cracks, other damage, embedded stones, glass, and foreign objects, as well as for any irregular or excessive wear.
Check tire pressure using a tire pressure gauge when tires are cold.
- Inspect for cracks, damage, and abnormal wear.
- Check if wheel rim spokes are loose.
- Verify chain tension, which should have a slack of 10-20mm.
- Check tire tread depth.
Monitor tire wear and replace tires when tread wear reaches 2/3 of the height of the tread pattern. If tires produce unusual noise or vibration, contact an authorized service center or designated repair facility.
Recommended Torque:
- Rear axle nut: 30-35 Nm
- Front axle nut: 25-30 Nm
Note: If tightening the brake lever does not achieve desired braking performance, inspect the cleanliness and thickness of the brake discs. If issues persist, contact an authorized service center for further inspection and maintenance.
Lithium Battery Inspection
- Power Check To verify the normal operation of the sealed lithium-ion battery used in the all-terrain off-road electric motorcycle, measure the voltage at the terminals using a multimeter. During normal operation, the voltage should be between 66.2V to 84.6V.
- Visual Inspection of the Battery Inspect for any physical damage, such as cracks or damage to the upper and lower sealing caps and power indicator lights. Damaged seals can lead to water ingress risk, so contact the after-sales market or designated service outlet if any issues are found.
Notes:
- Before removing or installing the battery, ensure to turn off the ignition and circuit breaker, and cover the charging port with the sealing rubber cap.
- If you encounter difficulty inserting the battery into the battery compartment, do not force it. Check if there are any foreign objects obstructing the battery.
- During winter storage of lithium batteries, it is recommended to store them indoors at temperatures above 0°C. Additionally, regularly check the battery level and charge it to 70-80% capacity when the charge is low.
Charging the Battery and Using the Charger
- The all-terrain electric motorcycle must be charged with a charger compatible with its original model. Do not use other charger models that are not compatible, as this may damage the battery or pose risks.
- Verify that the charger input voltage matches the mains voltage.
- Although the charger automatically shuts off when the battery is fully charged, it is advisable to avoid leaving the charger connected to the power outlet and charging port after the battery reaches full charge.
Lithium Battery Inspection
- Power Check: To verify the normal operation of the sealed lithium-ion battery used in the all-terrain off-road electric motorcycle, use a multimeter to measure the voltage at the terminals. During normal operation, the voltage should be between 66.2V to 84.6V.
- Visual Inspection of the Battery: Inspect for physical damage. For example, if the upper and lower sealing caps or power indicator lights are damaged, it can lead to risks of water ingress after seal failure. Contact the after-sales market or designated authorized service outlet for assistance.
Notes:
- Before removing or installing the battery, ensure to turn off the ignition and circuit breaker, and cover the charging port with the sealing rubber cap.
- If you find difficulty inserting the battery into the battery compartment, do not force it. Check for any foreign objects obstructing the battery.
- During winter storage of lithium batteries, it is recommended to store them indoors at temperatures above 0°C. Additionally, regularly check the battery level and charge it to 70-80% capacity when the charge is low.
Battery Charging and Charger Usage:
- The all-terrain electric motorcycle must be charged with a charger compatible with its original model. Do not use other charger models that are not compatible, as this may damage the battery or pose risks.
- Verify that the charger input voltage matches the mains voltage.
- Although the charger automatically shuts off when the battery is fully charged, it is advisable to avoid leaving the charger connected to the power outlet and charging port after the battery reaches full charge.
- Users are strictly prohibited from disassembling the battery to avoid damage and potential dangers.
- If the battery enters over-discharge protection mode, it needs to be activated by charging using the charger. Refer to troubleshooting methods and activation procedures.
- Electrical Component Use and Maintenance:
- Regularly check if motor mounting screws are loose.
- Periodically inspect motor and controller wiring for loose connections and insulation conditions.
- Check periodically for loose connections in the circuit breaker.
- Avoid driving in deep water to prevent affecting the brake friction life and motor operation.
Note: The all-terrain off-road electric motorcycle will automatically reduce power operation if the motor or controller temperature is too high, or if the battery power is too low. This is not a malfunction.
Maintenance and Repair of Electric Motors
Operation
- During operation, if the controller fails to function properly, do not start the vehicle directly.
- There should be no intermittent or abnormal sounds or vibrations during operation.
- Before starting the vehicle, ensure that the gear oil (GL-4 85W-90, approximately 100 mL) has been added.
Maintenance
Perform the first maintenance check when the new vehicle has ridden 300 km, primarily to inspect the break-in of components and the condition of fasteners.
Perform the second maintenance at 1000 km, in addition to regular checks, replace the gearbox oil, clean the iron filings from the drain plug, remove residual iron filings from the gearbox, clean dust and foreign matter around the vent plug to keep it clean, and then check sensor signals and tighten bolts. According to the maintenance requirements of the all-terrain electric motorcycle, conduct maintenance checks on the assembly as follows:
- Check the sensor signals of the motor; if signal wires are found damaged, replace them promptly.
- Inspect the suspension of the assembly and check if all component bolts are loose; tighten immediately if any are loose.
- Check the sealing surfaces and oil seals of components, replacing damaged oil seals promptly to ensure sealing performance.
- Clean foreign matter around the exhaust plug and keep the exhaust plug open.
- According to the riding conditions of the all-terrain electric motorcycle, replace the gear oil and clean iron filings every three months or 5000 km (whichever comes first from the two options).
Maintenance and Service Record Card
| Regular Maintenance Record Card | ||
| Maintenance Interval | Materials Needed for Maintenance | Maintenance personnel/unit stamp |
| 300 kilometers / 1 month | Fasteners for the entire all-terrain electric motorcycle, inspection of the chain, and tensioner wheel tightening inspection (motor, brakes, spokes, etc.) | |
| After the initial warranty period, every 1000 kilometers or 3 months | Complete inspection of safety components, fastening check, high-voltage circuit inspection, chain and tensioner wheel tension, inspection of motor, brakes, spokes, and chain cushioning rubber sleeves, and other vulnerable parts for the entire all-terrain electric motorcycle. | |
| 2000 kilometers / 6 months | High-voltage electrical circuit inspection, brake fluid check, circuit inspection, brake pad inspection, spoke inspection, chain and tensioner wheel tension check, and inspection of chain cushioning rubber sleeves and other vulnerable components. | |
Notes:
- Users must timely handle the mandatory maintenance items described in the "Regular Maintenance Record Card" at designated authorized service outlets.
- Failure to perform maintenance on time may result in warranty invalidation. For subsequent maintenance intervals, please adhere to maintenance schedules of 1000 kilometers / 3 months and 2000 kilometers / 6 months respectively to avoid warranty lapses and potential losses.
Safety precautions
For your and others' safety, please read this chapter carefully!
Before riding:
- Do not assemble, disassemble, or pack this all-terrain electric motorcycle alone. Teamwork is essential.
- Use the all-terrain electric motorcycle according to local regulations. It can only be ridden on public streets or highways after registration.
- You must understand local laws and comply with them when using the all-terrain electric motorcycle.
- When using the all-terrain electric motorcycle, it is recommended to carry this manual and other purchase voucher documents.
- Do not overload the all-terrain electric motorcycle: Avoid exceeding the weight limit of this all-terrain electric motorcycle. No passengers without driving training other than the vehicle owner are allowed to use this off-road electric motorcycle.
- Ensure you have received training on the all-terrain electric motorcycle and understand all its control functions.
- Understand the capabilities, power, and limitations of the all-terrain electric motorcycle. Familiarize yourself with the brake and motor systems for proper control. Practice braking in a clear area until you can control the all-terrain electric motorcycle smoothly. The off-road mode of this all-terrain electric motorcycle is powerful, and without proper knowledge and training, riders may be seriously injured.
- Avoid riding in a way that could cause slipping, as this may lead to loss of control or tire damage.
- Modifying this all-terrain electric motorcycle in any way is not recommended, as it could result in property damage and injury.
- This all-terrain electric motorcycle is not a children's toy.
- Always use Rawrr's dedicated lithium battery charger with an input AC voltage of 100-240V. Before charging, check the charging port and charger for moisture or water. Do not charge in the presence of flammable or explosive materials, high temperatures, high dust levels, or similar hazardous environments. Disconnect the power promptly after charging is complete.
- Charging below -10°C is prohibited, as it may damage the battery pack. Wait for the battery temperature to rise before charging.
Perform a safety check before starting the motor or riding each time.
Pre-Ride Checklist:
Loose parts
No rattling or other noises due to loose or damaged components during riding.
If assistance is needed, contact an authorized dealer for inspection or call customer service.
Brakes
Check that the brake functions are operating correctly. When you squeeze the lever, the brakes should provide positive braking action. Pressing the brakes while riding should cut off the motor power output.
Tire Inflation
Regularly check tire pressure and tread wear. Inflate or replace tires as needed. Front tire pressure should be 23-25 psi (160-170 kPa), and rear tire pressure should be 35 psi (240 kPa). Ensure the tread pattern is normal and free of nails, stones, glass, or other foreign objects embedded in the tire.
Frame, Swingarm, and Handlebar Grips
Inspect for cracks or broken connections. While frame breakage is rare, aggressive riders may impact curbs or walls, leading to frame damage, bending, or breakage. Develop a habit of regular product inspection.
Other Components
Check if lights/reflector are dirty and ensure adequate vehicle lighting and reflector safety warning function. Inspect power circuits, lighting, etc., for normal operation to ensure power meets riding requirements. Spoke tension: Ensure spoke tension meets riding requirements. If loose, tighten immediately and visit an authorized service center for wheel alignment and truing calibration. Handlebar rotation should be smooth without sticking and quick return. If the chain is stuck, clean mud and sand.
Detached chain surface and add chain lubricant; under normal circumstances, the displacement of the chain from the lowest to the highest position is 15-20 mm.
The moving parts of the front and rear shock absorbers are clean and free of dirt.
Safety Gear
Ensure you wear approved personal protective equipment and appropriate clothing, including:
**Helmet:** Approved protective helmet with eye protection and high visibility.
Failure to properly wear an approved helmet increases the risk of serious injury or death in accidents.
**Gloves:** High abrasion-resistant full-finger leather gloves.
**Elbow and Knee Guards:** Soft elbow and knee guards covering joints without restricting movement.
**Boots or Riding Shoes:** Sturdy boots with non-slip soles and ankle protection.
**Jacket and Pants:** Protective, high visibility long-sleeve jacket and durable riding pants (or protective gear).
**Additional Off-Road Gear:** Road gear is suitable for casual off-road riding. However, for serious off-road riding, more dedicated off-road gear is recommended. In addition to your helmet and eye protection, we recommend off-road motorcycle boots and gloves, riding pants with knee and hip pads, jerseys with elbow pads, and chest/shoulder protectors. Avoid wearing loose or baggy clothing that could get caught in any part of the vehicle. Do not allow others to operate your all-terrain electric motorcycle unless they have carefully read this manual and understand the features, functions, capacities, capabilities, and risks of this off-road bike. The safety of new riders is your responsibility. Assist new riders until they are fully capable of operating this all-terrain electric motorcycle. Ensure other riders also wear approved personal protective equipment and appropriate clothing.
During Transport:
This all-terrain electric motorcycle is heavy. Do not attempt to lift the vehicle alone during riding or maintenance to avoid injury or damage to the vehicle.
It is recommended to provide appropriate protection for both the vehicle and the carrier when moving and lifting the all-terrain electric motorcycle. Keep clear of sharp and moving parts, including wheels, handlebars, gears, chains, footpegs, and any other potentially hazardous components. Securely fasten the all-terrain electric motorcycle during transport to reduce the risk of injury and damage.
While Riding:
- When riding this all-terrain electric motorcycle on public streets or highways, first ensure your license plate is securely fixed and clearly visible. Due to its weight, be mindful of road conditions to prevent loss of life or property damage.
- Accidents can happen unexpectedly regardless of location when riding this all-terrain electric motorcycle at full speed. Do not exceed speed limits that could pose a danger and consider existing weather and terrain conditions to avoid accidents or injuries.
- Exercise caution and reduce speed in consideration of weather, road, and environmental conditions.
- Avoid riding in extreme weather conditions such as rain, snow, storms, high winds, or on muddy, icy, or slippery roads for any reason.
- Braking distances increase when riding on wet roads, rain, or snow. Water exceeding 9 inches on roads may affect brake performance.
- Keep both hands on the handlebars and both feet on the footrests at all times, while being mindful of road conditions and surroundings.
- The use of mobile devices such as phones, cameras, headphones, or earplugs that may cause distraction while driving is strictly prohibited.
- Always prioritize the safety of other drivers and passengers on the road.
- When navigating complex road conditions such as intersections, highways, or turns, reduce speed and yield to pedestrians and vehicles.
- For long-distance high-speed riding, it is advisable to use ECO mode and select appropriate gear to meet riding needs. Prolonged use of sport mode may reduce range and affect battery life.
- If the vehicle exhibits abnormal behavior during operation, immediately stop and identify the cause of the alarm or malfunction. Wait until warnings are resolved and repaired before resuming use of the vehicle. Contact after-sales service as needed for support.
Driving under the influence of alcohol or drugs is illegal. Alcohol or drugs impair judgment of road conditions and responsiveness to environmental changes. Driving under the influence of alcohol or drugs is strictly prohibited.
People who should not ride the all-terrain electric motorcycle include:
- Anyone under the influence of alcohol or drugs.
- Individuals with a medical condition that could endanger them during vigorous physical activity.
- Individuals whose weight exceeds the specified limit (refer to specifications). The recommended maximum weight is 100 kg (220 lbs).
- Anyone with balance disorders.
- Pregnant individuals.
- Anyone restricted by law from driving or riding a motorcycle.
- Individuals who are medically unfit for vigorous physical activities.
- Minors without authorized and professional training and supervision by an adult.
If you are involved in an accident:
Ensure personal safety is your priority. If you or anyone else is involved in an accident, take time to assess the severity of injuries. Seek emergency assistance if necessary. Additionally, adhere to applicable laws and regulations if others or vehicles are involved in the accident.
Lithium Battery:
If you notice an unusual smell from the lithium-ion battery, immediately park the vehicle in a safe, open area, turn off the motor, and move away from the vehicle. Notify your dealer to arrange for professional inspection of your vehicle as soon as possible.
Competitions:
Regardless of the rider's professionalism or training, competitions carry potential safety risks.
Parking:
Park the all-terrain electric motorcycle on a sturdy, level, and secure surface. Conveniently, riders can mount or dismount the vehicle safely and quickly.
Parking Procedure:
- Stop the motor.
- Lower the side stand.
- Slowly lean the all-terrain electric motorcycle to the left side until the side stand supports the vehicle securely.
- Turn the handlebars fully in the direction of the side stand.
- Turn off the power and remove the key, then lock the handlebar.
- If you must park on uneven or loose surfaces, find a flat, secure area to prevent the vehicle from moving or tipping over.
- Ensure there are no flammable materials near hot components such as batteries, motors, or brakes.
- Avoid touching components that may become hot during riding, such as motors, batteries, brakes, and other high-temperature parts.
- Confirm the handlebars are in the locked position and remove the key from the vehicle to reduce the risk of theft or accidental startup. Consider using additional anti-theft devices.
- This all-terrain electric motorcycle contains numerous electrical components. Avoid submerging parts and the bike in water. Additionally, prevent parts and components from prolonged exposure to water or rain.
When not riding:
- **Turn Off the Motor:** Always ensure the motor is turned off when the all-terrain electric motorcycle is not in use.
- **Maintain in a Safe State:** Keep your all-terrain electric motorcycle in a safe condition.
- **Ensure Proper Storage and Safe Riding Conditions:** It is important to maintain appropriate storage and ensure safe riding conditions for your all-terrain electric motorcycle.
- **Thorough Pre-Ride Inspection:** Before each ride, thoroughly inspect the all-terrain electric motorcycle to prevent potential malfunctions during off-road trips away from campsites.
- **Power Off When Not in Use:** When not riding, turn off the all-terrain electric motorcycle to prevent accidental operation that could harm you, others, or the vehicle.
- **Keep Unsupervised Minors Away:** Minimize potential safety risks by keeping unsupervised minors away from the all-terrain electric motorcycle.
- **Storage of Motorcycle and Batteries:** Store the all-terrain electric motorcycle and its batteries away from water, open flames, and heat sources to effectively reduce disaster risks. Extreme hot or cold conditions may damage the vehicle, leading to accidents during rides.
- **Avoid Battery Submersion:** Do not immerse the battery in water (as it can damage or compromise its waterproofing). If the battery is submerged, strictly avoid recharging it, as it could overheat and pose fire, burning, or explosion hazards.
- **Battery Temperature:** The vehicle operates between -10°C to 45°C. It's recommended to store lithium batteries between 0°C to 40°C. Do not store batteries or ride outside this safe temperature range.
- **Battery Maintenance:** Within 60 days of receiving the vehicle, if it hasn't been started, promptly charge the battery to 70% to 80% to prevent under-voltage protection issues that can damage the battery and cause property loss.
- **Cleaning the All-Terrain Electric Motorcycle:** When cleaning the vehicle, remove the battery first and only use low-pressure water. Never use a hydraulic sprayer, as it may damage electrical components due to water ingress.
- **Children and Maintenance:** Children should not operate or play with any parts or tools of the all-terrain electric motorcycle. Cleaning or maintenance should not be performed by children or unauthorized adults.
Attachments and Modifications:
Adding non-Rawrr designed or authorized accessories on your vehicle is strongly discouraged. We do not recommend making any personal or unauthorized modifications to your all-terrain electric motorcycle. Doing so may compromise the original design and render the vehicle unsafe for use.
Before using attachments, carefully inspect them to ensure they do not reduce ground clearance or turning clearance, limit suspension travel, steering range, or obstruct lights or reflectors. Accessories in the handlebars or front fork area can cause instability due to improper weight distribution or aerodynamic changes. If accessories are added to the handlebars or front fork area, they must be as light as possible and kept to a minimum.
Heavy accessories can significantly affect the stability of the all-terrain electric motorcycle due to aerodynamic effects. Certain accessories may alter the rider's riding position, which can adversely affect control and lead to collisions, potentially causing serious injury or death. Modifying your all-terrain electric motorcycle without authorization may void your warranty and render your vehicle illegal to operate. Ensure that any modifications made to your vehicle are both safe and legal before installation.
Never carry cargo that could impair the performance of your vehicle, such as towing a trailer with your vehicle or adding side boxes. Never attempt to modify the vehicle to accommodate additional passengers. This all-terrain electric motorcycle is not designed for transporting passengers or goods.
Driving in rainy conditions reduces the friction between tires and the road, decreasing braking performance and visibility, significantly increasing the risk of accidents.
Special Warning: If the vehicle is damaged by external forces and starts smoking or burning, use a dry chemical fire extinguisher or sand to extinguish it. Lithium-ion batteries contain various chemicals that can pose risks to human health and the environment due to aging or external damage. It is strongly recommended to dispose of them properly. Within 36 months of purchase and use, please submit them to a professional company for specialized handling. The manufacturer holds responsibility for any damage caused by non-compliance with manual requirements, unauthorized modifications, or force major events.
Documents / Resources
References
Download manual
Here you can download full pdf version of manual, it may contain additional safety instructions, warranty information, FCC rules, etc.
Advertisement

Need help?
Do you have a question about the MANTIS and is the answer not in the manual?
Questions and answers