
Related Manuals for Oregon Scientific EW96


Summary of Contents for Oregon Scientific EW96
- Page 1 C8314A(DCF MSF) Size: 148 x 105(mm) Radio Controlled Projection Alarm Model: EW96 USER MANUAL...
-
Page 2: Table Of Contents
Time and Calendar Manual Setting ....4 Alarm Time Setting ..........5 Using Alarm Function ........5 To Silence the Alarm ........6 Using the Projector ........6 Battery Replacement ........6 Precautions ..........7 Specifications ..........8 About Oregon Scientific .........8 EU-Declaration of Conformity.......8 FCC Statement ..........9 Declaration of Conformity ......9... -
Page 3: Brief Introduction
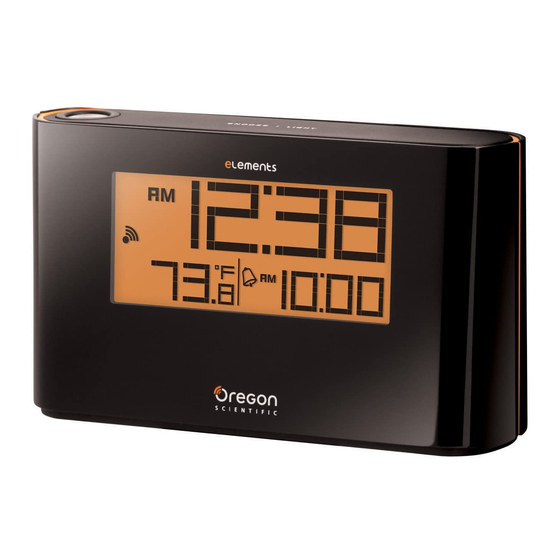
12 13 14 BRIEF INTRODUCTION Thank you for your purchase of this Radio Controlled Projection Alarm. Please read these instructions carefully and keep the manual well for future reference. The receiver unit has a clear display that shows the indoor temperature, time and date. 1.Projector: OVERVIEW Use it to project the time. - Page 4 In normal time setting mode, press it to step 12.RESET key: the setting items. Press and hold it to exit the Press it to return all values to default values. setting mode in any step. In case of malfunction, the unit may be required to reset.
-
Page 5: Operating The Main Unit
2. Signal reception indicator SIGNAL RECEPTION INDICATOR 3. Indoor temperature 4. Time The wave segment flashing means time signals are 5. Alarm time & Date being received. The signal quality could be classified into 3 types: OPERATING THE MAIN UNIT No signal Weak signal Excellent signal... -
Page 6: Alarm Time Setting
and calendar can be set manually. As soon as the ALARM TIME SETTING signal of sensor is received again, the clock will automatically synchronize with the exact time and In normal time mode, press “SET ALARM” calendar. key once to enter the alarm time setting In normal time mode, press “SET CLOCK”... -
Page 7: To Silence The Alarm
Note TO SILENCE THE ALARM Slide “PROJECTION ON/OFF” to turn on the Press “SNOOZE/LIGHT” to silence the alarm projection function. for 8 minutes. The “ ” will be flashing. Press “SNOOZE/LIGHT” to turn on the Press “ALARM ON/OFF” key to turn the alarm projector for 5 seconds. -
Page 8: Precautions
The technical speciûcations for this product and the objects that may safely be placed on the contents of the user manual are subject to change wood surface. Oregon Scientiûc shall not be without notice. responsible for any damage to wood surfaces from contact with this product. -
Page 9: About Oregon Scientific
Hereby, Oregon Scientific, Radio Controlled Projec- Power 2 x AA 1.5V batteries tion Alarn Clock (Model EW96) is in compliance with the essential requirements and other relevant provi- ABOUT OREGON SCIENTIFIC sions of Directive 1999/5/EC. Visit our website (www.oregonscientific.com) to learn... -
Page 10: Fcc Statement
Part 15 of the FCC Rules. These limits are designed to provide reasonable protection against harmful interference in a residential installation. This Name: Oregon Scientific, Inc. equipment generates, uses and can radiate radio Address: 19861 SW 95th AVe., Tualatin,... - Page 11 Address: Block C, 9/F, Kaiser Estate, Phase 1,41 Man Yue St., Hung Hom, Kowloon, Hong Kong is in conformity with Part 15 of the FCC Rules. Operation is subject to the following two conditions: This device may not cause harmful interference.
- Page 12 Impostazione Manuale di Ora e Data .....5 Impostazione Dell’ora Della Sveglia ....6 Utilizzo Della Sveglia ........6 Silenziamento Della Sveglia ......6 Uso Dell'orologio ........6 Sostituzione Delle Batterie ......7 Precauzioni ..........7 Dati Tecnici ..........8 Informazioni Su Oregon Scientific ....9 Dichiarazione di Conformita’UE ....9...
-
Page 13: Introduzione
12 13 14 INTRODUZIONE Grazie per aver acquistato questo Orologio radiocontrollato con proiezione dell'ora. Leggere attentamente queste istruzioni e conservare il manuale per riferimento futuro. L’unità ricevente permette la chiara visualizzazione di temperatura interna, ora e data. 1.Proiettore: PANORAMICA Consente di proiettare l’ora. RICEVITORE 2.Tasto SNOOZE / LIGHT: In modalità... - Page 14 contemporaneamente accedere alla modalità 5.Tasto SET CLOCK: di impostazione della sveglia. In modalità normale, premerlo una volta per In modalità di impostazione dell’ora della accedere alla modalità di impostazione normale sveglia, premere per accedere alle voci di dell’ora. impostazione In modalità impostazione normale dell’ora, premere per scorrere le voci delle impostazioni.
-
Page 15: Display Lcd
Inserire 2 batterie nuove di tipo AA rispettando 16.Tasto RCC: la polarità indicata sul vano. In modalità normale, premerlo una volta per Premere “RESET” per riavviare l’unità principale. ricevere il segnale RC per testare la ricezione. Durante la ricezione del segnale tenere premuto il Spostare la levetta “°C/°F”... -
Page 16: Impostazione Manuale Di Ora E Data
Premere “SET CLOCK” per confermare. NOTA L’ordine delle impostazioni è: formato ora 12-24, ora, differenza oraria +/- L’unità avvia automaticamente la ricerca del 23, anno, formato giorno/mese, data. segnale orario ogni giorno alle 2:00 (se il segnale Premere “SET CLOCK” per salvare e uscire non viene ricevuto alle 2:00, anche alle 3:00 o dalla modalità... -
Page 17: Impostazione Dell'ora Della Sveglia
In modalità normale dell’ora, premere una volta IMPOSTAZIONE DELL’ORA DELLA SVEGLIA “ALARM ON/OFF” per visualizzare l’ora corrente della sveglia. In modalità normale, premere una volta “SET Premere nuovamente per attivare / disattivare ALARM” per accedere alla modalità di la sveglia. impostazione dell’ora. -
Page 18: Sostituzione Delle Batterie
SOSTITUZIONE DELLE BATTERIE Se compare l’indicatore di batteria in esaurimento visualizzato con l’icona “ ” accanto alla ora, significa che è necessario sostituire le batterie dell’unità principale con 2 batterie nuove di tipo AA. Indicatore di batteria in esaurimento NOTA Spostare “PROJECTION ON/OFF”... -
Page 19: Dati Tecnici
Non manomettere i componenti interni. In questo contenuto del manuale sono soggetti a modificare modo si invalida la garanzia. senza preavviso. Oregon Scientific declina ogni responsabilità per eventuali danni alle finiture causati dal posizionamento del prodotto su determinati tipi di legno. Consultare le istruzioni fornite dal DATI TECNIC fabbricante del mobile per ulteriori informazioni. -
Page 20: Informazioni Su Oregon Scientific
DICHIARAZIONE DI CONFORMITA’ UE Con la presente Oregon Scientific dichiara che questo prodotto (Modello EW96) è conforme ai requisiti essenziali ed alle altre disposizioni pertinenti stabilite dalla direttiva 1999/5/ CE. Una copia firmata e datata della Dichiarazione di Conformità è... - Page 21 Réglage de L’heure de L’alarme ......6 Utilisation de La Fonction Alarme ....6 Pour Couper Le Son de L’alarme .....6 Avec Projecteur ..........7 Remplacement Des Piles ........7 Precautions ..........8 Caracteristiques ...........9 A Propos D’oregon Scientific ......9 Eu-deci Aration de Conformité .......9...
-
Page 22: Introduction
INTRODUCTION 12 13 14 Nous vous remercions pour avoir fait l’acquisition de ce Réveil Projecteur Radio Piloté. Veuillez lire attentivement ces instructions et conserver ce manuel pour toute référence ultérieure. Le récepteur est équipé d’un écran clair affichant les relevés de température intérieure, heure & date. 1.Projecteur: VUE D’ENSEMBLE Utilisez le projecteur pour projeter l’heure. - Page 23 5.Touche SET CLOCK: En Mode de réglage de l’heure de l’alarme, En mode d’heure standard, appuyez une fois appuyez sur cette touche pour entrer dans les sur cette touche pour entrer dans le mode de éléments de réglage. réglage de l’heure standard. En Mode de réglage de l’heure standard, appuyez 10.Molette FOCUS: sur cette touche pour entrer dans les éléments...
-
Page 24: Ecran Lcd
16.Touche RCC: FONCTIONNEMENT En mode d’heure standard, appuyez une fois pour recevoir le signal RC afférent au test de Retirez le couvercle du compartiment des piles réception. et faites glisser l’encoche pour « UK / EU » Pendant la période de réception, maintenez sélectionner le pays entre EU (Allemagne) et appuyé... -
Page 25: Indicateur De Réception Du Signal
INDICATEUR DE RECEPTION DU SIGNAL REGLAGE MANUEL DE L’HEURE ET DU CALENDRIER Les segments en forme de vagues clignotant signifient que les signaux de l’heure sont en cours Si vous êtes hors de portée de la sonde radio- de réception. La qualité du signal peut se classifier pilotée ou si la réception est hors d’atteinte, vous en trois catégories : pouvez régler manuellement l’heure et le calendrier. -
Page 26: Réglage De L'heure De L'alarme
Grâce au réglage du « fuseau horaire à +/-23 REMARQUE heures », l’heure exacte d’un autre lieu s’affichera. L’alarme s’activera automatiquement lorsque vous réglez l’heure de l’alarme. Pendant le réglage de l’heure de l’alarme, appuyez et maintenez « + » ou « - » pour accélérer la Réglage format 12 / 24 h Réglage de l'heure Réglage du fuseau horaire... -
Page 27: Avec Projecteur
Si vous utilisez l’adaptateur secteur CC, le AVEC LE PROJECTEUR projecteur sera continuellement activé. Si l’alarme est activée, l’icône de l’alarme “ ” Faites glisser l’encoche « PROJECTION ON/OFF » sera également projetée. pour activer/désactiver le projecteur, et utilisez-le Appuyez sur « 180 FLIP » pour faire tourner sur fond sombre entre 1 et 4 mètres pour projeter l’image projetée à... -
Page 28: Precautions
être placé sans dommage sur la surface du bois. REMARQUE Oregon Scientiûc ne sera pas tenu pour responsable pour tout dommage aux surfaces Les caractéristiques techniques de cet appareil et en bois résultant du contact avec cet appareil. -
Page 29: Caracteristiques
EU - DECLARATION DE CONFORMITÉ -5°C to 50°C (23 °F to 122°F de la température intérieure Par la présente Oregon Scientific déclare que le Réveil Résolution de la Projecteur Radio Piloté (Modèle EW96) est conforme 0.1°C (0.2 ) °F température aux exigences essentielles et aux autres disposi- tions pertinentes de la directive 1999/5/CE. - Page 30 Empfang des funkgesteuerten Zeitsignals ..4 Indikator für Signalempfang ......4 Manuelle Einstellung von Uhrzeit und Kalender ..5 Einstellung der Alarmzeit ......6 Alarmfunktion verwenden ......6 Alarm stummschalten ........6 Den Projektor verwenden ......7 Batteriewechsel ........7 Vorsichtsmassnahmen ........8 Technische Daten ........9 Über Oregon Scientific ......9 EG-Konformitatserklarung ......9...
-
Page 31: Kurze Einführung
12 13 14 KURZE EINFÜHRUNG Wir danken Ihnen für den Erwerb dieses Funkgesteuerte Projektionsuhr. Lesen Sie bitte diese Anleitung sorgfältig durch und bewahren Sie sie zur späteren Einsichtnahme auf. Die Empfangseinheit verfügt über ein deutliches anzeigt Display, das die Innentemperatur, Uhrzeit & Datum. - Page 32 zu ändern. Die Hintergrundbeleuchtung geht für 5.SET CLOCK-Taste: 5 Sekunden an. Drücken Sie die Taste einmal im normalen Drücken Sie die Taste im Alarmeinstellungsmodus, Uhrzeitmodus, normalen um die Einstellungspunkte aufzurufen. Uhreinstellungsmodus aufzurufen. Drücken Sie die Taste im normalen 10.FOCUS-Drehknopf: Uhreinstellungsmodus, Das Projektionsbild scharfstellen.
-
Page 33: Lcd-Display
Landesversion zwischen EU (Deutschland) und 16. RCC-Taste: UK (England) zu wählen. Drücken Sie die Taste im normalen Iegen Sie 2 neue Batterien des Typs AA Uhrzeitmodus einmal, um das RC-Signal für entsprechend der Polaritätsmarkierung in das den Empfangstest zu empfangen. Batteriefach ein. -
Page 34: Manuelle Einstellung Von Uhrzeit Und Kalender
Signals kann in 3 Typen eingeteilt werden: verfügbar ist, können Sie Uhrzeit und Kalender manuell einstellen. Sobald das Signal der Sendeeinheit wieder empfangen wird, synchronisiert sich die Uhr automatisch mit der genauen Uhrzeit Kein Signal Schwaches Signal Ausgezeichnetes Signal und dem Kalender. HINWEIS Drücken Sie einmal im normalen Uhrzeitmodus Das Gerät sucht jeden Tag automatisch um... -
Page 35: Einstellung Der Alarmzeit
HINWEIS HINWEIS Der Alarm wird automatisch eingeschaltet, Halten Sie während der Einstellungsphase wenn Sie die Alarmzeit einstellen. die Taste “+” oder “-” gedrückt, um die Halten Sie während der Phase der Änderung der Einstellungen zu beschleunigen. Alarmeinstellung die Taste “+” oder “-” gedrückt, Durch die Einstellung der “Zeitverschiebung um die Änderung der Einstellungen zu +/-23 Stunden”... -
Page 36: Den Projektor Verwenden
Drücken Sie die Taste “SNOOZE/LIGHT”, um Wenn innerhalb von 120 Sekunden keine Taste den Projektor 5 Sekunden lang einzuschalten. gedrückt wird, wird der Alarm ausgeschaltet Bei Verwendung des Netzadapters wird der und nach 24 Stunden erneut aktiviert. Projektor dauerhaft eingeschaltet. Wenn der Alarm aktiviert ist, wird das DEN PROJEKTOR VERWENDEN Alarmsymbol “... -
Page 37: Vorsichtsmassnahmen
Der Inhalt dieser Anleitung darf ohne Genehmigung werden können, entnehmen Sie bitte der des Herstellers nicht vervielfältigt werden. Pûflegeanleitung Ihres Möbelherstellers. Oregon Entsorgen Sie das Gerät nicht im allgemeinen Scientiflc ist nicht haftbar für Beschädigungen Hausmüll, sondern ausschließlich in den dafür von Holzflächen, die durch die Berührung mit... -
Page 38: Technische Daten
übereinstimmt. Eine Kopie der unterschriebenen und Temperatur mit Datum versehenen Konformitätserklärung Strom 2 x AA 1.5V erhalten Sie auf Anfrage über unseren Oregon Sci- entific Kundendienst. ÜBER OREGON SCIENTIFIC Besuchen Sie unsere Website (www.oregonscientific.de) KONFORM IN FOLGENDEN LÄNDERN und erfahren Sie mehr über unsere Oregon Scientific-... - Page 39 Configuración de La Alarma ......6 Uso de La Función de Alarma ....6 Cómo Silenciar La Alarma ......6 Cómo Utilizar El Proyector ......6 Cómo Reemplazar Lar Pilas ......7 Precaución ..........7 Ficha Técnica ..........8 Sobre Oregon Scientific .......8 U - Declaración de Conformidad ..9...
-
Page 40: Breve Presentación
BREVE PRESENTACIÓN 12 13 14 Gracias por adquirir este Reloj proyector controlado por radio. Por favor, lea detenidamente estas instrucciones y guarde el manual para consultarlo en el futuro. La unidad de recepción tiene una pantalla clara que muestra la temperatura interior, hora & día. 1.Proyector: RESUMEN Permite proyectar la hora. - Page 41 5.Botón CONFIGURACIÓN DE HORA: 10.Botón FOCUS: En el modo de hora normal, púlselo una vez Enfoca la imagen proyectada. para acceder al modo de configuración de la hora normal. 11.COMPARTIMIENTO PARA LAS PILAS: En el modo de configuración de la hora normal, Funciona con dos pilas tamaño AA.
-
Page 42: Pantalla Lcd
Pulse el botón “RESET” para reiniciar la unidad 17.Interruptor RU / UE: principal. Deslícelo para elegir qué versión quiere, UE Coloque el interruptor °C / °F en la unidad de (Alemania) o UK (Inglaterra). temperatura que desee. Cierre el compartimiento de las pilas. 18.TAPA DEL COMPARTIMIENTO PARA PILAS RECEPCIÓN DE SEÑAL DE TIEMPO PANTALLA LCD... -
Page 43: Configuración Manual De Reloj Y Calendario
NOTA una vez para acceder al modo de configuración de la hora. La unidad buscará automáticamente señales Pulse “+” o “-” para modificar la configuración. horarias todos los días a las 2:00 (si no Pulse “SET CLOCK” para confirmar. La encuentra señal, puede buscar a las 3:00 o secuencia de configuración es: las 4:00), 8:00, 14:00 y 20:00. -
Page 44: Configuración De La Alarma
CONFIGURACIÓN DE LA ALARMA CÓMO SILENCIAR LA ALARMA En el modo de hora normal, pulse “SET ALARM” Pulse “SNOOZE/LIGHT” para silenciar la alarma una vez para acceder al modo de configuración durante 8 minutos. El icono “ “ parpadeará. de la alarma. Pulse cualquier otro botón para silenciar la alarma Pulse “+”... -
Page 45: Cómo Reemplazar Lar Pilas
Consulte las instrucciones del fabricante del mueble para saber qué tipo de objetos se pueden colocar sobre la superûcie de madera. Oregon... -
Page 46: Ficha Técnica
2 x AA 1.5V Los contenidos de este manual no pueden reproducirse sin permiso del fabricante. No tire este producto a un contenedor de SOBRE OREGON SCIENTIFIC basura municipal sin clasiûcar. Es necesario que recicle este tipo de basura para un Visite nuestra página... -
Page 47: U - Declaración De Conformidad
1-800-853-8883. U - DECLARACIÓN DE CONFORMIDAD Por medio de la presente Oregon Scientific declara que el Reloj Proyector Controlado Por radio (Modelo EW96) cumple con los requisitos esenciales y cualesquiera otras disposiciones aplicables o... - Page 48 Ajuste Manual Da Horae Do Calendário ..5 Ajuste Da Hora Do Alarme ......5 Usando a Função de Alarme ......6 Para Silenciar o Alarme ........6 Usando o projetor ........6 Substituição de Pilhas ......7 Precauções ...........7 Especificações ..........8 Sobre a Oregon Scientific ....8 Declaração Conformidade ...9...
-
Page 49: Breve Introdução
BREVE INTRODUÇÃO 12 13 14 Obrigado por adquirir este Relógio com projetor controlado por rádio. Leia estas instruções com cuidado e guarde o manual em um lugar seguro para referência futura. A unidade do receptor possui um display que exibe os registros de temperatura do ambiente interior, hora &... - Page 50 5.Botão SET CLOCK: 10.Botão FOCUS: No modo de hora normal, pressione uma vez Focaliza a imagem projetada. para entrar no modo de ajuste de hora normal. No modo de ajuste de hora normal, pressione 11.COMPARTIMENTO DE PILHAS: o botão para passar pelos valores de ajuste. Acomoda duas pilhas tamanho AA.
-
Page 51: Display De Lcd
17.Interruptor deslizante UK/EU: RECEPÇÃO DO SINAL DE HORA Deslize para selecionar a versão do país entre CONTROLADO POR RÁDIO EU (Alemanha) e UK (Inglaterra). A hora e o calendário são controlador por rádio. A 18.PORTA DO COMPARTIMENTO DE PILHAS hora atual e o calendário são sincronizados automaticamente com o sinal de hora transmitido da Alemanha ou da Inglaterra. -
Page 52: Ajuste Manual Da Horae Do Calendário
Sempre posicione a unidade longe de fontes Pressione o botão “SET CLOCK” para salvar de interferência, como aparelhos de TV, e sair do modo de ajuste. computadores, etc. Não posicione a unidade sobre ou próximo a placas de metal. Também não são recomendadas áreas Ajuste de 12/24 horas Ajuste da hora Ajuste da diferença... -
Page 53: Usando A Função De Alarme
Pressione o botão “SET ALARM” para salvar e PARA SILENCIAR O ALARME sair do modo de ajuste. “ ” indica que o alarme está ativado (ON). Pressione o botão “SNOOZE/LIGHT” para silenciar o alarme por 8 minutos. “ ” ficará piscando. Pressione qualquer outro botão para desativar o alarme e ativá-lo novamente após 24 horas. -
Page 54: Substituição De Pilhas
NOTA NOTA Deslize “PROJECTION ON/OFF” para ativar a função de projeção. Atenção! Descarte a unidade ou as pilhas usadas Pressione “SNOOZE/LIGHT” para ativar o de maneira segura e ecologicamente correta. projetor por 5 segundos. Quando estiver usando um adaptador CC, o PRECAUÇÕES projetor ficará... -
Page 55: Especificações
A As especiûcações técnicas deste produto e o Oregon Scientiûc não será responsável por conteúdo do manual do usuário estão sujeitos a nenhum dano causado em superfícies de alterações sem aviso prévio. -
Page 56: Declaração De Conformidade
55 11 2182-8608. DECLARAÇÃO DE CONFORMIDADE Oregon Scientiûc declara que este(a) Relógio com projector controlado por rádio (Model EW96) está conforme com os requisitos essenciais e outras provisões da Diretriz 1999/5/CE. Uma cópia assinada e datada da Declaração de Conformidade está... - Page 57 Ontvangstindicator Signaal ......4 Klok en Datum Handmatig Instellen ....5 Alarmtijd Instellen .........6 Alarmfunctie Gebruiken .........6 Om Het Alarm Uit Te Zetten ......6 De Projector gebruiken .........6 Batterijen Vervangen ......7 Waarschuwingen ..........7 Specificaties ..........9 Over Oregon Scientific ......9 EU Conf Ormiteits Verklaring ....9...
-
Page 58: Korte Introductie
12 13 14 KORTE INTRODUCTIE Dank u voor de aanschaf van deze Radiogestuurde Projectorklok. Lees deze instructies zorgvuldig door, en bewaar de handleiding om later te kunnen raadplegen. De ontvanger heeft een helder scherm, waarop de binnentemperatuur, tijd & datum. 1.Projector: OVERZICHT Gebruik de projector om de tijd te projecteren. - Page 59 5.SET CLOCK knop: en tegelijkertijd de alarminstellingsmodus te In normale tijdmodus drukt u eenmaal op deze openen. knop om de normale tijdinstellingsmodus te In de alarminstellingsmodes drukt u hierop om openen. naar de volgende instelling te gaan. In de normale tijdinstellingsmodes drukt u hierop om naar de volgende instelling te gaan.
-
Page 60: Lcd-Scherm
Plaats twee nieuwe AA formaat batterijen 16. RCC knop: volgens de in het batterijvak aangegeven In normale tijdmodus drukt u eenmaal op de knop polariteit. voor het ontvangen van het RC-testsignaal. Druk op “RESET” om het basisstation opnieuw Houd tijdens ontvangen 8 seconden ingedrukt op te starten. -
Page 61: Klok En Datum Handmatig Instellen
In normale tijdmodus drukt u eenmaal op de “SET CLOCK” knop om de tijdinstellingsmodus te openen. Geen Signaal Zwak signaal Uitstekend signaal Druk op “+” of “-” om de instelling te wijzigen. Druk op “SET CLOCK” om te bevestigen. De volgorde van instellingen is: 12/24 uur formaat, tijd, +/-23 uur tijdverschil, Het apparaat gaat elke dag automatisch op... -
Page 62: Alarmtijd Instellen
In normale tijdmodus drukt u eenmaal op de ALARMTIJD INSTELLEN “ALARM ON/OFF” knop om de huidige alarmtijd weer te geven. In normale tijdmodus drukt u eenmaal op de Druk nogmaals op de knop om het alarm AAN/ “SET ALARM” knop om de alarminstellingsmodus UIT te zetten. -
Page 63: Batterijen Vervangen
BATTERIJEN VERVANGEN Als naast de tijd het batterij-indicatorpictogram “ ” wordt weergegeven, betekent dit dat u 2 nieuwe AA batterijen in het basisstation moet plaatsen. Batterij-indicator Schuif “PROJECTION ON/OFF” om de Let op! Lege batterijen moeten op een ecologische projectiefunctie aan te zetten. en veilige manier verwerkt worden, dus gooi ze niet Druk op “SNOOZE/LIGHT”... - Page 64 KCA depot. veilig op het houten oppervlak geplaatst kunnen worden. Oregon Scientiûc is niet verantwoordelijk voor enigerlei schade aan houten oppervlakken door contact met dit De technische speciûcaties van dit product en de product.
-
Page 65: Specificaties
TYPE BESCHRIJVING Draadloze Radiogestuurde Projectorklok (Model HET WEERSTATION EW96) voldoet aan de essentiële eisen en aan de 138 x 42 x 82 mm L x B x H overige relevante bepalingen van Richtlijn 1999/5/ (5.43 x 1.65 x 3.23 in) EC. - Page 66 Mottagning av Radiokontrollerad Tidsignal ...4 Signalmottagningsindikator ......4 Manuell Inställning av Tid Och Kalender ..5 Alarmtidsinställning ........5 Använda Alarmfunktionen ......6 Stänga av Alarmet ..........6 Använda Projektorn ........6 Batteribyte ..........7 Försiktighetsåtgärder ........7 Specifikationer ...........8 Om Oregon Scientific ......8 EU-Försäkran Om Överensstämmelse ...9...
-
Page 67: Snabb Introduktion
12 13 14 SNABB INTRODUKTION Tack för att du köpt denna Radiokontrollerad projektorklocka. Läs dessa instruktioner noga och spara manualen för framtida behov. Mottagningsenheten har en klar display som visar inomhustemperaturen, tid & datum. ÖVERSIKT 1.Projektor: Används för att projicera tid. MOTTAGARE 2.SNOOZE / LIGHT-knapp: I normalt tidläge trycker du en gång på... - Page 68 5.SET CLOCK-knapp: 10.FOCUS-knapp: I normalt tidläge trycker du en gång för att Fokusera den projicerade bilden. öppna normalt tidinställningsläge. I normalt tidinställningsläge trycker du på 11. BATTERIUTRYMME: Enter för att bläddra mellan inställningarna. Kräver 2 AA-batterier. Tryck håll nere för lämna inställningsläget i alla situationer.
-
Page 69: Lcd-Display
17. UK/EU-knapp: Sätt tillbaks batteriluckan. Flytta knappen till valt land mellan EU M O T TAG N I N G AV (Tyskland) och UK (England). RADIOKONTROLLERAD TIDSIGNAL 18. BATTERILUCKA Tiden och kalendern är radiokontrollerad. Den aktuella tiden och kalendern synkroniseras LCD-DISPLAY automatiskt med tidsignalen som överförs från Tyskland/England. -
Page 70: Manuell Inställning Av Tid Och Kalender
Placera alltid apparaten på avstånd från störande källor såsom TV, dator etc. Undvik att placera apparaten på eller bredvid metallplattor. 12/24 Hr inställning Tidinställning Tidskillnadsinställning Isolerade platser såsom flygplatser, källare, eller fabriker rekommenderas inte. Undvik att starta tidmottagning när apparaten är i rörelse, såsom på... -
Page 71: Använda Alarmfunktionen
Om ingen knapp trycks in inom 120 sekunder stängs alarmet automatiskt av och aktiveras igen efter 24 timmar. Normaltidsläge Alarmtidsinställningsläge ANVÄNDA PROJEKTORN NOTERING Flytta knappen “PROJECTION ON/OFF” för att aktivera/inaktivera projektorn, projicera på en mörk Alarmet aktiveras automatiskt när du ställer bakgrund på... -
Page 72: Batteribyte
Indikator för lågt batteri möbeltillverkare för att få mer information om huruvida det går bra att placera föremål på ytan. Oregon Scientific kan inte hållas ansvariga för skador på träyto r som uppkommit på grund av kontakt med denna NOTERING produkt. -
Page 73: Specifikationer
Vi hoppas du hittar all information du behöver på vår hemsida och om du vill komma i kontakt med Oregon Scientific kundkontakt besöker du vår lokala hemsida www.oregonscientific.se eller... -
Page 74: Eu-Försäkran Om Överensstämmelse
EU-FÖRSÄKRAN OM ÖVERENSSTÄMMELSE Härmed intygar Oregon Scientific att denna Radio kontrollerad projekforklocka (Modell EW96) står I överensstämmelse väsentliga egenskapskrav och övriga relevanta bestämmelser som framgår av direktiv 1999/5/EG. En signerad kopia av “DECLARATION OF CONFORMITY” kan erhållas vid hänvändelse till OREGON SCIENTIFIC... - Page 75 2009 Oregon Scientific.All rights reserved. 096001...
Need help?
Do you have a question about the EW96 and is the answer not in the manual?
Questions and answers