Advertisement
Table of Contents
- 1 Close-Up View (Interior)
- 2 Loading the Dishwasher
- 3 Turning on the Appliance
- 4 Wash Cycle Adjustment Buttons
- 5 Wash Cycle Table
- 6 Energy Saving Tips
- 7 How to Keep Your Dishwasher in Shape
- 8 Cleaning and Special Maintenance
- 9 Troubleshooting
- 10 Installation
- 11 Electrical Connection
- Download this manual
Safety Is a Good Habit to Get Into
NOTICE
Carefully read the instructions contained in this manual, as
they provide important information which is essential to safe
and proper installation, use and maintenance of the
appliance.
This appliance complies with the following EEC
directives:
- 73/23/EEC of 19/02/73 (Low Voltage) and subsequent
modifications;
- 89/336/EEC of 03/05/89 (Electromagnetic Compatibility)
and subsequent modifications.
1.Carefully dispose of the packing material.
2.After removing the packing, check to make sure that the
appliance is not damaged. If in doubt, contact a qualified
professional.
3.The dishwasher must only be used by adults for the washing
of household dishes and cooking utensils.
4.Fundamental rules to follow when using the appliance:
- Never touch the dishwasher when barefoot or with wet
hands or feet;
- We discourage the use of extension cords and multiple
sockets;
- During installation, the power supply cord must not be
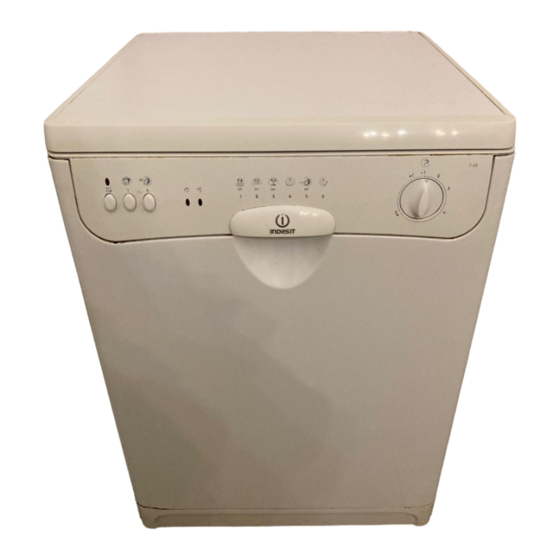
Close-up View (control panel)
A
ON - OFF Button
ON - OFF Light
Handle For Opening Door
Knob For Selecting Cycles
E
F
B
H
I
excessively or dangerously bent or flattened;
- If the appliance is not operating properly or maintenance
must be performed, disconnect the appliance from the power
supply.
5.Keep detergents out of the reach of children, who must
also be kept away from the dishwasher when it is open.
6.This appliance cannot be installed outdoors, not even if
the area in which it is installed is covered by a roof; it is also
very dangerous to leave it exposed to the rain and elements.
7.Do not touch the heating element during or after a wash
cycle.
8.Do not lean or sit on the door when it is open, as this
could overturn the dishwasher.
9.If the appliance malfunctions, turn off water supply to the
appliance and disconnect the plug from the wall socket.
Then, consult the section entitled, "Troubleshooting." If you
cannot resolve the problem, contact a service centre.
10.Appliances which are no longer being used must be made
inoperable by cutting the power supply cord and removing
the door lock.
To maintain the EFFICIENCY and SAFETY of
this appliance, we recommend:
use only the MANUFACTURER Service
use only ORIGINAL Spare Parts
C
"INTENSIVE 65°C" Button
"HALF LOAD" Button
Low Salt Indicator Light
Low Rinse Aid Indicator Light
1
D
GB
Advertisement
Table of Contents

Related Manuals for Indesit D 63


Summary of Contents for Indesit D 63
- Page 1 Safety Is a Good Habit to Get Into NOTICE excessively or dangerously bent or flattened; Carefully read the instructions contained in this manual, as - If the appliance is not operating properly or maintenance they provide important information which is essential to safe must be performed, disconnect the appliance from the power and proper installation, use and maintenance of the supply.
-
Page 2: Close-Up View (Interior)
Close-up View (Interior) Bottom Sprayer Arm Upper Rack Salt Container Cap Top Sprayer Arm Washing Filter Rack Height Adjustor Detergent and Rinse Aid Dispenser Lower Rack Technical characteristics Width cm. 60 Depth cm. 60 Height cm. 85 Capacity 12 standard place settings Mains water pressure 20 KPa÷... - Page 3 Salt ..Salt Adjusting Salt Consumption The hardness of the water varies from place to place. If The dishwasher is designed to hard water is used in the dishwasher, deposits will form on allow for adjusting the amount the dishes and utensils. of salt consumed based on the The appliance is equipped with a special softener that uses harness of the water used.
- Page 4 Detergent and Rinse Aid ..Rinse Aid Detergent This product makes dishes sparkle and helps them to dry Detergent specifically intended for use with dishwashers must without spotting. The dispenser is located on the inside panel be used. The dispenser must be refilled before the start of of the door and should be filled after every 80 wash cycles each wash cycle following the instructions provided in the (or when the rinse aid indicator light comes on for those...
-
Page 5: Loading The Dishwasher
Loading the Dishwasher Upper Rack Lower Rack Before placing the dishes in the dishwasher, remove the larger food particles to prevent the filter from becoming clogged, which results in reduced performance. If the pots and pans have baked-on food that is extremely hard to remove, we recommend that they be allowed to soak before they are washed. -
Page 6: Turning On The Appliance
Turning on the Appliance Starting a wash cycle..Press the ON-OFF button, and the ON light will turn off. Rota- 1. Make sure that the plug for the appliance is inserted into te the knob in the clockwise direction to the desired cycle the wall socket. -
Page 7: Wash Cycle Table
Wash Cycle Table Cycle INTENSIVE Cycle Selection Description of Cycle Detergent Rinse 65°C Information Pre-wash Button + Wash Normally dirty 2 pre-washes with cold water. dishes, pots and Extended wash a 55°C. 8+22gr. 1) Normal pans. Standard Rinse with hot water at 65°C. Wash 55°C daily cycle. -
Page 8: Energy Saving Tips
Energy Saving Tips - Use the right amount of detergent: if you use too much - It is important to try and run the dishwasher when it is fully loaded in order to save on energy. In order to prevent odors detergent, the result will not be cleaner dishes, but, rather, from forming and food from caking onto the dishes, you a greater negative impact on the environment. -
Page 9: Cleaning And Special Maintenance
Cleaning and Special Maintenance Filter Assembly Improper replacement of For best performance and results, the filter assembly must the filters may reduce the be cleaned frequently. performance level of the The filter efficiently removes food particles from the wash appliance and damage water, allowing it to be dishes and utensils. -
Page 10: Installation
Installation Positioning the Appliance Drain Hose Connection Insert the drain hose into a drain Position the appliance in the desired location. The back pipe with a minimum diameter should rest against the wall behind it, and the sides, along the adjacent cabinets or wall. The dishwasher is equipped of 4 cm., or let it run into the with water supply and drain hoses that can be positioned to sink, making sure to avoid... -
Page 11: Electrical Connection
Electrical Connection As the colours of the wires in the mains lead may not Electrical Connection correspond with the coloured markings identifying the If your appliance is supplied with a 13 amp. fused plug it terminal in your plug, proceed as follows: can be plugged into a 13 amp socket for immediate use.
Need help?
Do you have a question about the D 63 and is the answer not in the manual?
Questions and answers