Table of Contents
Advertisement
Advertisement
Table of Contents

Subscribe to Our Youtube Channel
Related Manuals for Minolta VECTIS WEATHERMATIC ZOOM


Summary of Contents for Minolta VECTIS WEATHERMATIC ZOOM
- Page 1 INSTRUCTION MANUAL...
- Page 2 ADVANTAGES… OF THE ADVANCED PHOTO SYSTEM Thank you for purchasing the Minolta Vectis New processing..Weathermatic. The Vectis Weathermatic is a water New print formats... resistant Advanced Photo System™ camera designed to In addition to returning your prints in the Classic C print, wider H print, take pictures anywhere you go.
-
Page 3: Table Of Contents
TABLE OF CONTENTS Taking Pictures For Proper and Safe Use Date Imprinting Taking Pictures Underwater Imprinting the Date or Time Using In/Around Water For Closer Subjects Setting the Date and Time Operating Conditions Changing the Date/Time Format Special Focus Situations Names of Parts Self-Timer Focus Hold... -
Page 4: For Proper And Safe Use
Do not disassemble. Electric shock may occur if a high voltage circuit inside the camera is • Do not install the battery with the polarity (+/-) reversed. touched. Take your camera to a Minolta Service Facility when repairs are required. • Do not subject the battery to fire or high temperatures. -
Page 5: Using In/Around Water
USING IN/AROUND WATER USING IN/AROUND WATER This camera is water resistant and can be used in the rain, snow, or underwater to a depth of • Do not jump or dive into the water approx. 10 meters (33 ft.). However, careless handling may cause irreparable damage not while holding the camera. - Page 6 USING IN/AROUND WATER USING IN/AROUND WATER • Clean and dry the camera before • The gaskets will be damaged if the camera opening the film and battery is not washed in fresh water after exposure chambers. to salt water. • The surface of the camera can be damaged if sunscreen and tanning lotions are not •...
- Page 7 Battery Chamber Gasket the film or battery chambers are opened. If the seals are brittle, cracked, or discolored, the camera may leak. Contact an authorized Minolta Service Facility to • Clean the gaskets and joining surfaces have the gaskets replaced.
-
Page 8: Operating Conditions
If normal operation does not resume or the camera malfunctions repeatedly, contact an authorized Minolta Service Facility. • When photographing in cold weather, keep the camera and spare batteries inside your coat to keep them warm when you are not shooting. -
Page 9: Names Of Parts
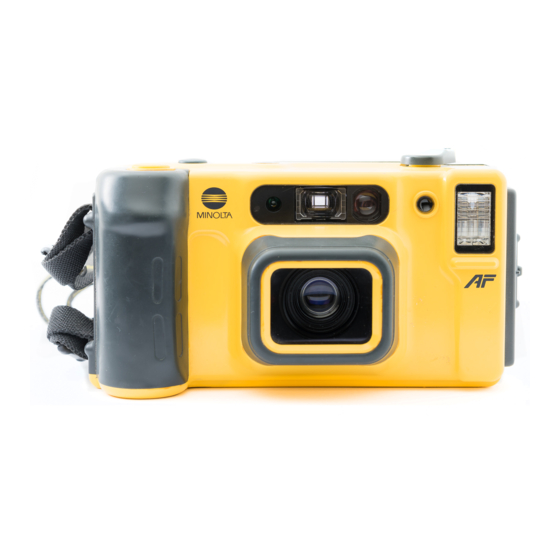
NAMES OF PARTS NAMES OF PARTS Body Control dial Film-chamber lock Data panel Tripod socket Zoom lever Film-chamber door Flash* Shutter-release button Battery-chamber lock Self-timer/ Viewfinder window* Adjust button Red-eye reduction / Self-timer lamp* Battery-chamber door AF window* Date/ Select button Meter window* Accessory port Lens*... -
Page 10: Attaching And Removing The Strap
NAMES OF PARTS ATTACHING AND REMOVING THE STRAP Data Panel Viewfinder Attaching Insert the strap tab into the strap port until it ‘clicks’. Close-framing guides Date/ Time display • Tug on the strap to make sure it is secure. Ready lamp Frame counter Focus frame Removing... -
Page 11: Installing The Battery
INSTALLING THE BATTERY INSTALLING THE BATTERY Your camera uses one 3-volt CR2 lithium battery to supply power for all camera operations. 2. Insert a new battery into the chamber as indicated by the + and – marks. Important – Before opening the Battery Chamber •... -
Page 12: Loading Film
INSTALLING THE BATTERY LOADING FILM Use IX240 (Advanced Photo System) film in this camera. Battery Warning • Your camera’s transport system loads the film, sets the film speed, and advances the film after each Power is low, but sufficient for all camera operations. exposure. - Page 13 LOADING FILM LOADING FILM 2. Open the film-chamber door and insert a new cassette Important – Before opening the Film Chamber into the film chamber. • Wipe all water, sand, and grit off of the camera. • If the film-chamber door will not open, internal pressure needs to be •...
- Page 14 • If the current VEI is , reload the cassette. If the film will not load, contact the nearest authorized 2. Select the print format. Minolta Service Facility. • The viewfinder changes to match your selection. Hold the camera steady, making sure your fingers do not cover the flash.
-
Page 15: Taking Pictures
TAKING PICTURES TAKING PICTURES 5. When the ready-lamp glows, press the shutter- 3. Looking through the viewfinder, frame the subject as release button all-the-way down to take the picture. desired. Press the shutter with a slow steady squeeze, never Push the zoom lever to the right to zoom in. a quick jab. -
Page 16: Taking Pictures Underwater
TAKING PICTURES UNDERWATER FOR CLOSER SUBJECTS This camera’s focus range is from 40cm to ∞ (1.4 ft. - ∞), 53cm to ∞ (1.75 ft. - ∞) underwater. • The ready lamp blinks rapidly and the shutter locks when the subject is closer than 40cm. •... -
Page 17: Special Focus Situations
SPECIAL FOCUSING SITUATIONS SPECIAL FOCUSING SITUATIONS Some subjects or scenes, such as those described below, are difficult for the autofocus system to detect. To ensure proper focus in these situations, first lock focus on another object The ready lamp will glow, at the same distance from you as your main subject, recompose, then press the shutter- When two subjects overlap but the closer of the two... -
Page 18: Focus Hold
FOCUS HOLD FOCUS HOLD Subjects outside the focus frame may not be in focus. Use 2. Press and hold the shutter-release button focus hold to ensure accurate focusing. partway down until the ready lamp glows. 1. Center your subject in the focus frame. 3. -
Page 19: Using The Built-In Flash
USING THE BUILT-IN FLASH USING THE BUILT-IN FLASH Autoflash mode is set when the control dial is turned to , the flash will fire automatically Flash Range in low-light situations. The range of the built-in flash depends on the film speed and the focal length you are using. Ready Lamp To ensure proper exposure, make sure your subject is positioned within the flash range. -
Page 20: Red-Eye Reduction
USING THE BUILT-IN FLASH USING THE BUILT-IN FLASH Red-Eye Reduction Manual Fill-Flash When photographing people or animals at night or other low-light The flash will fire when the shutter is released regardless of situations, light reflecting off the inside of the subject’s eyes may lighting. -
Page 21: Night Portrait
USING THE BUILT-IN FLASH REWINDING THE FILM Night Portrait Auto Rewind Night-portrait mode balances the flash and existing light exposure Your camera automatically rewinds the film into the cassette after the last exposure. so you can take beautiful pictures of people at sunset or at night. 1. -
Page 22: Manual Rewind
REWINDING THE FILM DATE IMPRINTING Your camera uses the film’s magnetic data strip to record date and time information your Manual Rewind photofinisher can imprint on the front and back of your photographs. Use manual rewind when you want to remove the film before exposing the last frame. Note: Some labs can not imprint on the front of your photographs. -
Page 23: Setting The Date And Time
DATE IMPRINTING DATE IMPRINTING Setting the Date and Time 4. Press the date/ select button to choose the next item • This camera has an automatic calendar through the year 2030. to adjust. 1. Turn the control dial to • The sequence is `YY •... -
Page 24: Changing The Date/Time Format
DATE IMPRINTING DATE IMPRINTING Changing the Date/ Time Format 3. Press the self-timer/ adjust button to change the date format. 1. Turn the control dial to OFF. • The format sequence is `Y M D M D`Y D M`Y. 4. Press the date/ select button until all items in the data 2. -
Page 25: Self-Timer
SELF TIMER SELF TIMER The self-timer delays release of the shutter for approximately ten seconds. 3. Frame your subject(s) in the viewfinder. 1. Mount the camera on a tripod or the optional handy tripod (not included) and place on a level surface. 2. -
Page 26: Caring For Your Camera
• Before shipping your camera for repair, contact an authorized Minolta Service Facility for details. Before Important Events • Check camera operation carefully or take test photographs. • Minolta is not responsible for any loss that may occur due to an equipment malfunction. -
Page 27: Lab Services
LAB SERVICES LAB SERVICES 1. CHP - Print Format Your film will be printed according to the format set when the picture was taken. 2. Date Imprinting The date and time are printed on the back of the picture in the chosen format. Take your film to a photolab displaying the Advanced 3. -
Page 28: Specifications
50% of the exposures.) Underwater Performance: Tested by Minolta to be submersible to a depth of approx. 10m (33 ft.). This Class B digital apparatus meets all requirements of the Canadian Interference-Causing Equipment Regulations. - Page 29 Room 208, 2/F, Eastern Center, 1065 King’s Road, Quarry Bay, Hong Kong, China Minolta Singapore (Pte) Ltd. 10, Teban Gardens Crescent, Singapore 608923 Shanghai Minolta Optical Products Co., Ltd. 368 Minolta Road, Songjiang, Shanghai, China 9222-2208-31 ©1997 Minolta Co., Ltd. under the Berne Convention and Universal Copyright Convention Printed in China...
Need help?
Do you have a question about the VECTIS WEATHERMATIC ZOOM and is the answer not in the manual?
Questions and answers