
Related Manuals for MPMan TS300


Summary of Contents for MPMan TS300
-
Page 1: Instruction Manual
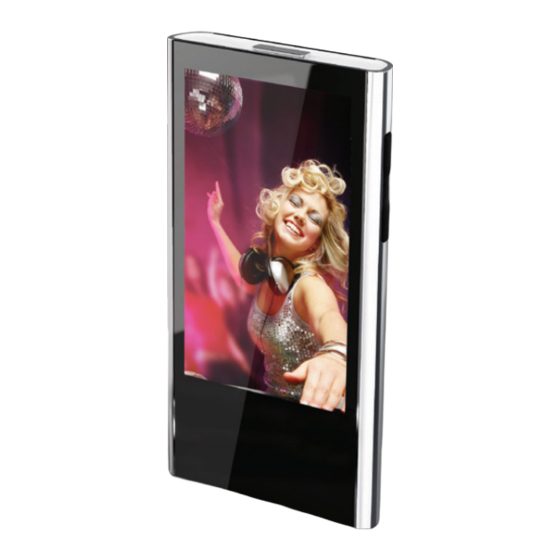
TS300 2.8” High-Resolution MP3 & Video Player with Touchscreen Controls Instruction Manual Please read this manual carefully before operation... -
Page 2: Table Of Contents
Table of Contents Table of ConTenTs ............2 PaCkage ConTenTs ............. 5 ConTRols aT a glanCe ..........6 Using the Touchscreen Controls ........8 Disabling the Controls (Hold) ........9 geTTIng sTaRTed ............10 Charging the Battery ........... 10 Turning Your Player On/Off ......... 11 Resetting the Player ............. - Page 3 Table of Contents TexT Mode ..............29 Text Browser Controls ...........29 Text Reader Controls ............29 Quick Option Menu ..........30 exPloReR Mode ............32 Explorer Controls ............32 CalCulaToR Mode ............33 oTHeR funCTIon Mode ..........34 Calendar ...............34 Stop Watch ..............35 Time ................36 Date ................
- Page 4 Table of Contents feaTuRes ...............48 sPeCIfICaTIons ............49 Page 4...
-
Page 5: Package Contents
Please make sure that the items shown below are included in the package. Should an item be missing, please contact the local retailer from which you pur- chased this product. TS300 USB Cable Instruction Manual Professional Stereo Earphones Protective Pouch... -
Page 6: Controls At A Glance
Controls at a glance Page 6... - Page 7 Controls at a glance Top View Power / Hold Switch Slide and hold the switch to the right to power the player on/off. <POWER> Slide the switch to the left for Hold (controls disabled). Front View LCD Touchscreen Touch with your finger (or fingernail) to activate the on-screen control.
-
Page 8: Using The Touchscreen Controls
Controls at a glance using the Touchscreen Controls Your player comes equipped with an easy-to-use touch- screen that controls all of its functions. Different controls will be available to you based on the mode that the player is in. Use your finger tip to touch the area of the screen where a control icon is displayed. -
Page 9: Disabling The Controls (Hold)
Controls at a glance Do not use force when touching the screen, as it may cause damage to the screen. To avoid damage to the screen, do not use any object other than your fingers to operate it. Avoid touching the screen if your fingers are not clean. -
Page 10: Getting Started
getting started Charging the battery Your player has an integrated rechargeable battery. Upon initial use, the battery should be charged fully to ensure optimal performance and battery life. If the player has not been used in a while, the battery may need to be recharged. -
Page 11: Turning Your Player On/Off
getting started Charging with a Computer Your player can be charged through a USB computer connection. Use the supplied USB cable to connect USB Port the player to the USB port of a com- puter. The computer must be powered on and not in sleep mode. -
Page 12: Resetting The Player
getting started Resetting the Player Reset the player if it should freeze and not respond or otherwise malfunction. Disconnect your player if it is connected to a computer. Use a paper clip to gently press the Reset button lo- cated on the bottom of the player. Page 12... -
Page 13: Main Menu
Main Menu When you turn on the player, you will see the Main menu. The Main menu gives you access to the different function modes of your player. These modes are: Music Browse and play music Video Browse and play movies Photo Browse and view pictures Radio... -
Page 14: Music Mode
Music Mode Browse for and play your music files. more information about how to get music onto your player, please refer section “Transferring Files to the Player”. Music browser Controls When you choose MUSIC mode from the Main menu, you will see the Music Browser screen. -
Page 15: Now Playing Controls (Music Playback)
Music Mode Add Song(s) to the Favorite List Select “All Music” from the Music Browser screen. Use the Browser controls to select a song to add. . The screen will display “Add To Favorite”, or “Exit”. Select the appropriate item as follows: Add to Favorite: Add the current song to —... - Page 16 Music Mode Time Display Battery Level File name Equalizer Elapsed Time Repeat Mode Total Time Progress Bar Play Mode Album Cover Display Volume Level Play status Next/Fast Forward Previous/Reverse Quick Option 35/43 Back icon Menu icon Current Track/ Total Tracks Use the following controls during music playback.
-
Page 17: Quick Option Menu
Music Mode Function Key Action Press the <VOL To adjust the volume level UP> or <VOL DOWN> button To access the Quick Option menu (see section below for details) To return to the Music Explorer screen To view the controls when the music is playing, touch the screen once. -
Page 18: Play Mode
Music Mode Item Description Once Play the current track once Repeat One Play the current track repeatedly Normal Play all tracks once Repeat All Play all tracks repeatedly Intro Play the first 10 seconds of each track Play Mode Set the play mode as “In Order” or “Shuffle”. MSEQ The MSEQ (PlayFx) has 3 options: 3D, Bass, and LEQ (Auto Volume: consistent volume level respectively). - Page 19 Music Mode play requires a “.LRC” lyric file which may be found on the internet or may be created with a Lyric file editor. Lyric files can contain synchronized timing information as well as lyric information. Lyric files must have the same name as corre- sponding music file (e.g., “SongTitle1.lrc”...
-
Page 20: Video Mode
Video Mode Browse for and play your video files. Your player supports AVI files encoded with XviD at 400 x 240 and 30 fps. Videos may need to be encoded with the included software for device playback. For more information about converting video, please refer to the section “Video Conversion”. -
Page 21: Video Playback Controls
Video Mode Video Playback Controls When a video is playing, hold the player horizontally (landscape). The orientation of the controls will change accordingly. The following functions may be performed from the video playing screen. Function Key Action To pause/resume playback To play the next track To forward-scan through the track Hold... -
Page 22: Photo Mode
Photo Mode Browse for and view your photo files. For more information about how to get music onto your player, please refer to the section “Transfer- ring Files to the Player”. Photo browser Controls When you choose PHOTO mode from the Main menu, the Photo Explorer will appear on screen and all available photos will display as thumbnail images. - Page 23 Photo Mode Function Icon Tap on the icon and then slide your finger on the LCD to pan around the magnified picture. Tap on the icon again to disable this function. Rotate the photo left. Rotate the photo right. Turn the slideshow mode on or off, and set the amount of time between photos during slideshow mode.
- Page 24 Photo Mode Function Icon To view the next photo. (You may also position and slide your finger rightward on the LCD to view the previous photo.) Zoom in. Zoom out. Return to the Photo Explorer screen. To view the controls when the photo is displayed, touch the screen once.
-
Page 25: Radio Mode
Radio Mode Listen to FM radio broadcasts. You must have a pair of headphones connected to the headphone jack to receive FM broadcasts; your player will utilize the headphone cord as an antenna. Radio Tuning Controls When you choose RADIO from the Main menu, you will see the Radio Tuning screen. -
Page 26: Quick Option Menu
Radio Mode Action Function Press the <VOL UP> or <VOL To adjust the volume level DOWN> button To access the Quick Options menu (see the section below for details) To return to the Main menu You may also tune to a desired station manually by tapping the onscreen frequency bar. -
Page 27: Delete Channel
Radio Mode Auto Presetting Scan for all stations in broadcast reception range. The player will automatically seek and save all frequencies with a broadcast signal to the Preset Station list. The auto scan feature will overwrite any previously stored Preset Stations. Preset Mode Set the tuning mode as Preset (you should add presets prior to using this tuning method). - Page 28 Radio Mode Sensitivity Set the sensitivity of the Auto Preset function. Force Mono Set this to “On” in order to force mono radio reception. Use mono reception for weak station signals. Area Set the FM frequency range area (China, Japan, US(World), Europe(others), Campus Radio).
-
Page 29: Text Mode
Text Mode Read text files loaded on your player (TXT). Text browser Controls When you choose TEXT from the Main menu, you will see the Text Browser Screen. Use the Text Browser to find folders and photo files loaded on your player. Your text files will be displayed as a list. -
Page 30: Quick Option Menu
Text Mode Function Key Action Point and slide your To move the display one line up/down finger up or down on the screen. Start or pause the Auto Page Scroll. To return to the Text Browser screen To access the Quick Option Men Quick Option Menu The Quick Option menu gives you easy access to your player’s option settings. - Page 31 Text Mode Save Mark Save the current location as a bookmark. LoadMark Open file at a saved bookmark. DelMark Delete a saved bookmark. Set Font Set the font size of the text display. Set Color Set the text color of the display. Flip Time Adjust the amount of time between pages during Auto Scroll mode.
-
Page 32: Explorer Mode
explorer Mode Enter Explorer mode to view all folders and files loaded on your player. To enter Explorer mode, select and confirm EXPLORER from the Main Menu. Files and folders will be displayed in a list. If a compatible file is selected, it will be played in its corresponding mode. Music Mode: MP3, WMA Video Mode: AVI, WMV, 3GP Photo Mode: JPG, BMP, GIF... -
Page 33: Calculator Mode
Calculator Mode Perform basic mathematical operations with the calculator. To input a value, tap the number on the screen. To cancel and reset, touch To exit Calculator mode, touch Page 33... -
Page 34: Other Function Mode
other function Mode Access the Calendar, Time, Date, and Stop Watch utilities. To select a utility, tap on the desired menu. To return to the Main menu, tap Calendar Set or view a calendar. to highlight the Month or Year to adjust. ... -
Page 35: Stop Watch
other function Mode stop Watch Record the elapsed time. to start the stopwatch. to stop. again to save the recorded time. The player can save 3 records total. Page 35... -
Page 36: Time
other function Mode Time Set the internal time display of your player. Slide your finger up or down on the LCD to adjust the hour or minute. to save the setting. Page 36... -
Page 37: Date
other function Mode date Set the internal date display of your player. Slide your finger up or down on the LCD to adjust the Month, Date, and Year (from left to right). to save the setting. Page 37... -
Page 38: Settings Mode
settings Mode Enter SETTINGS mode to set your player’s system options. To enter Settings mode, select SETTINGS from the Main menu. To browse through the settings, tap on the desired item to highlight it. To select a setting, tap on the selection again or tap ... -
Page 39: System Information
settings Mode Item Description Set the language that the on-screen menus appear in. system Information View the player’s firmware and storage version. sleep Set the duration of time (in minutes) that the player will remain on when it is idle. The settng of “OFF”... -
Page 40: Transferring Files To The Player
Transferring files to the Player Connect the player to a computer with the provided USB cable to: Transfer files to and from your player Perform basic file management functions. Upon connection: Your computer will automatically recognize the player as a Removable Disk. -
Page 41: Transferring Files With Microsoft Windows
Transferring files to the Player If you need further assistance with transferring files, please refer to your operating system’s instruction manual or on-screen help. If you are using media management software such as iTunes, Winamp, or Windows Media Player, please refer to their documentation for support. Transferring with Microsoft Windows Open a file explorer window. -
Page 42: Disconnecting From A Computer
Transferring files to the Player disconnecting from a Computer Disconnect your player as instructed below to detect data loss or file/firmware corruption. Microsoft Windows Double-click the green ar- row in the taskbar located on the lower-right side of the computer screen (Safely Remove Hardware). -
Page 43: Macintosh Os X
Transferring files to the Player Macintosh OS X On the left side of the Finder Window, identify the appropriate Remov- able Disk icon. Click on the “Eject” arrow on the right of the Removable Disk icon. Disconnect the USB cable from the player and your computer. -
Page 44: Video Conversion
Video Conversion For movie and music synchronisation and conversion, please use MPMANAGER software supplied in the CD ROM. This software can be used also for UPDATE of your player MPMANAGER manual is included in your CDROM Page 44... -
Page 45: Troubleshooting
Troubleshooting If you have a problem with this device, please read the troubleshooting guide below. The player does not turn on. Ensure that the player is fully charged. Try charging the player overnight (8 hours). Ensure that the Power switch is set to the “On” ... - Page 46 Troubleshooting Ensure that the player’s memory capacity is not full. Ensure that the Hold switch is disengaged. There is no sound during playback. Check the volume level. Ensure that the headphones are attached securely to the player. The sound quality of the music is poor.
- Page 47 Troubleshooting The LCD characters are corrupted or something is wrong with the display. Ensure that the correct menu language has been set. Reset the player (use a paper clip to gently press the Reset button on the rear of the player) and try again.
- Page 48 features Integrated Flash Memory Intuitive Touchscreen Control 2.8” High-Resolution TFT Display Plays Music, Video, Photos and Text ID3 and LRC Support for song and synchronized lyric information display Integrated FM Radio USB 2.0 Hi-speed for fast file transfers ...
- Page 49 specifications Display Type 2.8” Full-Color TFT @ 240x400 Memory Integrated Flash Memory Audio Format Support MP3, WMA, OGG Video Format Support WMV, MPEG-4 (AVI/XviD): 400x240@30fps Photo Format Support JPG, GIF, BMP Text Format Support Song Info Support ID3, Windows Media FM Frequency Range 87.5 - 108.0MHz PC Interface...
- Page 50 Page 50...
- Page 51 Page 51...
- Page 52 for more information please check our website www.mpmaneurope.com...
Need help?
Do you have a question about the TS300 and is the answer not in the manual?
Questions and answers