
Subscribe to Our Youtube Channel
Related Manuals for MPMan TK185


Summary of Contents for MPMan TK185
-
Page 1: Instruction Manual
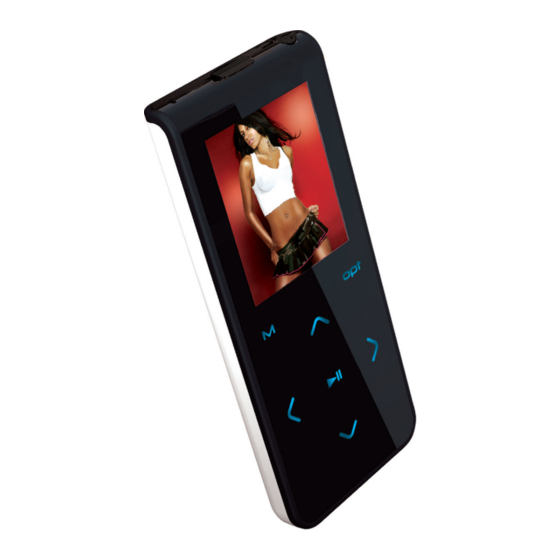
TK185 Super-Slim MP3 and Video Player with Touchpad Control Instruction Manual Please read this manual carefully before operation... -
Page 2: Table Of Contents
TABLE OF CONTENTS TABLE OF CONTENTS ..................8 PACKAGE CONTENTS ..................10 FEATURES ......................11 POWERING YOUR PLAYER ................12 Charging the Battery .................12 Turning Your Player On/Off ...............13 Locking/Unlocking Your Player’s Keys (Hold) ...........13 Resetting Your Player ................13 LOCATION OF CONTROLS ................14 DISPLAY OVERVIEW .................. -
Page 3: Table Of Contents
TABLE OF CONTENTS Transferring Files ..................29 Microsoft Windows ................30 Macintosh OS X ................30 Disconnecting from a Computer ...............31 Microsoft Windows ................31 Macintosh OS X .................31 VIDEO CONVERSION ..................32 TROUBLESHOOTING ..................36 SPECIFICATIONS ....................39 Page 3... -
Page 4: Package Contents
PACKAGE CONTENTS Please make sure that the items shown below are included in the package. Should an item be missing, please contact the local retailer from which you purchased this product. 1. TK185 2. USB Cable 3. Instruction Manual 4. Professional Stereo Earphones 5. -
Page 5: Features
FEATURES • Integrated Flash Memory • Touchpad control with LED backlight • 1.8” TFT LCD Full-color display • Plays Music, Video, Photos and Text • ID3 and LRC Support for song and synchronized lyric information display • Integrated FM Radio •... -
Page 6: Powering Your Player
POWERING YOUR PLAYER Charging the Battery Your player has an integrated rechargeable battery. Typical music playtime is up to 8 hours (when playing an MP3 encoded at 128 kbps and the battery is fully charged) Upon initial use, the battery must first be charged fully (12 hours) to ensure optimal performance and battery life. To charge your player: •... -
Page 7: Turning Your Player On/Off
Turning Your Player On/Off TOP VIEW • To turn the player on, press and hold the POWER but- ton until you see the “MPMAN” screen. • To turn the player off, press and hold the POWER but- POWER Button ton until you see “Good Bye!”. -
Page 8: Location Of Controls
LOCATION OF CONTROLS Bottom Front Back 1. HOLD Switch 10. USB Port 2. Power On/Off 11. Headphone Jack 3. MENU 12. Reset 4. UP / Volume up 5. Left / Previous 6. DOWN / Volume down Option 8. Play / Pause 9. -
Page 9: Display Overview
DISPLAY OVERVIEW Plays Status Lock icon Battery Level Equalizer Current track/ Total track Song name Play Mode Time Time Elapsed Remaining Music Playing Mode Page 9... -
Page 10: Basic Operations
BASIC OPERATIONS Using the Touchpad Controls Your player comes equipped with a touch-sensitive control pad. To use the controls, touch the arrow keys on the front of the player lightly just as you would a button and the controls will light up. If you touch and hold a key, it will register as a continuous button press. -
Page 11: Music Playback Controls
MUSIC MODE Enter Music mode to play your MP3 or WMA audio files. To enter MUSIC mode, select and confirm MUSIC from the Main Menu. Upon entering Music mode, you will see a list of all available musics that located on your player. Music Playback Controls Select a track and touch to start playback. - Page 12 MUSIC MODE No Repeat Play tracks once in sequential order. Play the current track repeatedly. Play all tracks repeatedly. Random All Play all tracks in random order. DirNormal Repeat all tracks in the current folder. DirRep Repeat all tracks in all folder. DirRandom Play folders in random order.
-
Page 13: Photo Mode
PHOTO MODE Enter Photo mode to display your JPEG photo files. To enter Photo mode, select and confirm PHOTO in the Main menu. Photo Controls Upon entering Photo mode, you will see a list of all photos that located on your player. • Touch to move the selection up or down. •... -
Page 14: Video Mode
VIDEO MODE Enter Video mode to play your MTV video files. To enter Video mode, select and confirm VIDEO in the Main menu. This player supports playback of MTV files. Please see the Video Conversion section for details on how to create video files that are compatible with your player. Video Controls Upon entering Video mode, you will see a list of all videos that located on your player. -
Page 15: Fm Radio Mode
FM RADIO MODE Enter FM Radio Mode to listen the FM Radio broadcasts. To enter FM Radio Mode, select and confirm FM Radio from the Main Menu. Upon entering FM Radio mode, you can tune into stations manually (Normal) or by using preset stations (Preset). • Touch to toggle between these Normal and Preset tuning modes. •... -
Page 16: Smart Menu Option (Preset Actions)
FM RADIO MODE Smart Menu Option (Preset Actions) The Smart Menu gives you quick access to your player’s option settings. To access the Smart Menu, touch The Smart Menu options are: Del/Add Preset. Add Preset (Manual) Manually save the current station as a Preset station. Make sure the player is in Normal tuning mode. 1. -
Page 17: E-Book Mode
E-BOOK MODE Enter E-BOOK mode to read TXT E-book files. To enter E-BOOK mode, select and confirm E-BOOK from the Main Menu. Upon entering E-BOOK mode, you will see a list of all text files that located on your player. • Touch to move the selection up or down. • Touch to confirm and play a selection. • While a text file is displayed: • Touch to skip backward one page; touch to skip forward one page. -
Page 18: Delete Mode
DELETE MODE Enter Delete mode to manage (Delete) the files on your player. To enter Delete mode, select and confirm DELETE from the Main Menu. Upon entering Delete mode, you will see a “tree view” which will display all of the fold- ers on your player. • Touch to select a folder and press to view its contents. -
Page 19: Setting Mode
SETTING MODE Enter the Setting mode to set your player’s system options. To enter Setting mode, select and confirm SETTING in the Main menu. Upon entering Setting mode, you will have the following options: Power, Lan- guage, Display, and Sys Tools. Touch to select a setting and then press to confirm. Press return to a previous menu screen. Power This setting contains two options: Power Off and Sleep. Power Off Set the duration of time (in minutes) until the player turns off automatically. A setting of “Off”... - Page 20 SETTING MODE Display Set the Brightness and Backlight. Brightness Set the Brightness (Contrast) level of the display. • Touch to adjust the Brightness level. • Touch when you are finished to save. • Touch to return to the Display menu without saving. Backlight Set the duration of time until the LCD screen turns off when your player is idle. The options are: 3s, 4s, 5s, 6s, 7s, 8s, 9s, 10s, 11s and On. A setting of “On” will disable this power-saving feature.
- Page 21 SETTING MODE • Touch to select a Format option and touch to confirm. • Touch to select “Yes” or “No” and touch to confirm and for- mat your player. • Touch to return to the Sys Tools menu without formatting. Reset Return all of your player’s internal options to their factory-default settings. •...
-
Page 22: Usb Connections
USB CONNECTIONS Connect the player to a computer with the USB 2.0 cable provided to: • Transfer files to and from your player • Perform basic file management functions. Connecting to a Computer Connect the player to your computer with the supplied USB cable. Upon connection: USB Port • Your computer will be detected as a “Removable Disk” when you USB Port Computer open “My Computer”. -
Page 23: Macintosh Os X
USB CONNECTIONS 2. Drag the files to transfers and drag-and-drop then onto the “Removable Disk” icon that represents your player. • You may also transfer files from your player to computer. Macintosh OS X 1. Open a finder window. Located the files you would like to transfer from your computer. Select the files/folders with the mouse and press APPLE- C (copy) on the keyboard. 2. Click on the Removable Disk icon located on the left side of the finder window. The computer will display all files and folders currently stored in the player. 3. Press APPLE-V (paste) on the keyboard to transfer the files you selected in Step 1 to the player. Disconnecting from a Computer Disconnect your player as instructed below to detect data loss or file/firmware corruption. -
Page 24: Macintosh Os X
USB CONNECTIONS your computer. Macintosh OS X 1. On the left side of the Finder Window, iden- tify the appropriate Removable Disk icon. 2. Click on the “Eject” arrow on the right of the Removable Disk icon. 3. Disconnect the USB cable from the player and your computer. Page 24... -
Page 25: Video Conversion
VIDEO CONVERSION For movie and music synchronisation and conversion, please use MPMAN- AGER software supplied in the CD ROM. This software can be used also for UPDATE of your player MPMANAGER manual is included in your CDROM Page 25... -
Page 26: Troubleshooting
TROUBLESHOOTING If you have a problem with this player, please read the troubleshooting guide below. The player does not turn on. • The battery level may be too low. Try charging the player or operate the player on AC power. •... - Page 27 TROUBLESHOOTING The player will not play my music file. • Ensure that the file is in a compatible format (MP3, WMA). • The file may be copy-protected. Use Windows Media Player to transfer the file. • The file may be copy-protected. Ensure that the license has not expired. The LCD characters are corrupted. • Ensure that the correct language has been selected. Try transferring some songs and restart the player to automatically rebuild the Music Library. The player will not play my video file.
- Page 28 TROUBLESHOOTING The player has malfunctioned. • Reset the player (use a pin to gentlyl press the Reset button on the rear of the player) and try again. Page 28...
-
Page 29: Specifications
SPECIFICATIONS Display Type 1.8” Full-Color TFT Display Resolution 160 x 128 Memory TK185 FM 1GB: 1GB Flash TK185 FM 2GB: 2 GB Flash TK185 FM 4GB: 4 GB Flash Audio Format Support MP3, WMA Video Format Support MTV: 160 x 128, 15fps Photo Format Support JPEG Song Info Support ID3, Windows Media PC Interface USB 2.0 High-Speed Plug and Play Support Windows 2000/XP/Vista... - Page 30 For more information please check our website www.mpmaneurope.com...
Need help?
Do you have a question about the TK185 and is the answer not in the manual?
Questions and answers