Advertisement
Product Overview
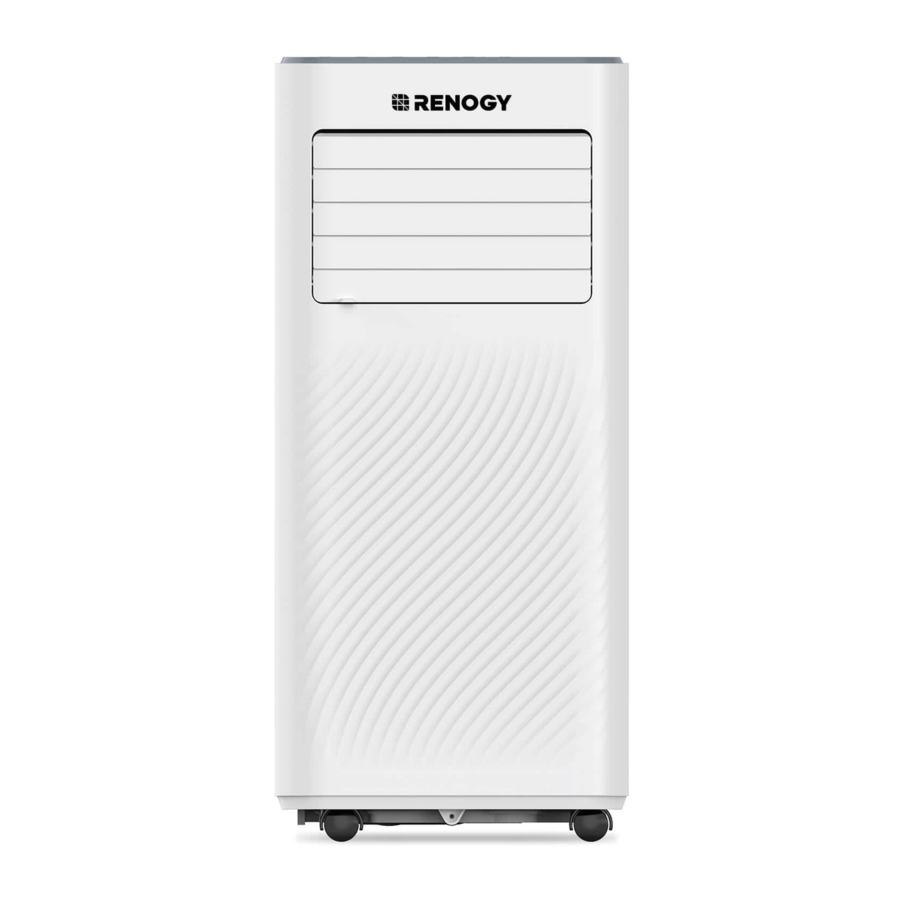
Product Diagram

- Air outlet with adjustable shutter
- Castors (4)
- Portable handle (2)
- Continuous drain hole (middle)
- Control panel
- Air inlet with air filter
- Air exhaust outlet
- Drain hole (bottom)
Mounting Accessories

Features
- 3-in-1 portable air conditioner offering effective cooling, dehumidification, and fan features.
- 3 control options: touch control panel, remote control, and smart Wi-Fi app.
- LED temperature display for easy reading.
- Thoughtful timer setting and sleep mode.
- Auto defrost in low ambient temperatures.
- Efficient self-evaporation system.
- Automatic restart after power outage.
- Auto shut-off when water tank is full.
- Easy mobility with four casters.
Specifications
| Product dimensions | 12.4 x 12.2 x 27.5 in/315 x 310 x 698 mm |
| Product weight | 40.8 lbs/18.5 kg |
Package List
- 1 x Portable Air Conditioner
- 1 x Remote Control (use two AAA batteries; batteries not included)
- 1 x Drain Hose
- 1 x Air Exhaust Hose
- 1 x Hose Connector (for attaching to air conditioner)
- 1 x Hose Connector (for attaching to window bracket)
- 1 x Window Bracket Kit
Installation Guide
Unboxing
- Unbox the carton and remove the appliance along with the included mounting accessories.
- Inspect the appliance for any signs of damage or scratches that might have occurred during transit.
Before Using It for The First Time
Due to the appliance's use of refrigerant, we recommend placing it horizontally for 24 hours to allow the refrigerant to stabilize before initial use.
Choose The Installation Location
- Position the appliance on a stable, even surface with a minimum of 20 inches (50 cm) of clearance around it to ensure adequate air circulation.


- Avoid operating the appliance near walls, curtains, or objects that could obstruct the air inlet and outlet.
- Ensure that the air inlet and outlet remain unobstructed by any objects.
- Do not install the appliance in locations where it might be exposed to:
- Heat sources like radiators, heat registers, stoves, or other heat-producing devices.
- Direct sunlight.
- Mechanical vibration or impact.
- Excessive dust.
- Poor ventilation, such as within a cabinet or bookcase.
- Uneven surfaces.

Install the appliance in a room larger than 43 sq. ft. (4 sq. m).
Avoid installing the appliance in areas with potential inflammable gas leaks.
 NOTE
NOTE
The manufacturer might offer alternative examples or provide additional information regarding the odor of the refrigerant.
Installation Steps
The air conditioner must be vented outside to allow the exhaust air, containing waste heat and moisture, to exit the room.
Do not replace or extend the exhaust hose, as this could lead to reduced efficiency and potentially cause the unit to shut down due to low back pressure.
Using an additional extension hose with the provided installation kit or deviating from the manufacturer's instructions during installation may void any warranties associated with this appliance. If you require assistance with the installation process, please contact Customer Support for guidance.
- Use the hose connector (for attaching to air conditioner). Connect it to one end of the air exhaust hose, turning the connector clockwise to secure it in place.

- Use the hose connector (for attaching to window bracket kit). Connect it to another end of the air exhaust hose, turning the connector clockwise to secure it in place.

- Customize the length of the window bracket kit to match your window size using the thumb screw on the kit.
Attach the air exhaust hose to the window bracket kit.
![]()
- Close the window to ensure the window bracket kit remains secure. If necessary, use duct tape to firmly secure the window bracket kit in place.
To enhance efficiency, it's advisable to seal off any gaps between the window bracket kit and the sides of the window.
![]()
- Connect the hose connector to the exhaust air outlet of the appliance. Slide the hose connector in from right to left.
![]()
- Adjust the length of the flexible air exhaust hose to ensure that the distance between the appliance and the window is greater than 28 inches (70 cm), and the height from the air exhaust hose to the floor is more than 35 inches (90 cm). Additionally, avoid creating bends in the hose.

- Plug in the AC power cord. Adjust the shutter at the air outlet, and then turn on the appliance.


Control Methods
Control Panel

| 1 | Display Screen | Cooling mode: Set temperature. Fan & dehumidification mode: Room temperature. Timer: Hours. |
| 2 | Power | Press to turn on or off the machine. |
| 3 | Mode | Press to switch the operation mode between cooling, dehumidification, and fan. |
| 4 | Down | Decrease the desired temperature (60°F~90°F/16℃~32℃). Decrease the timer (1-24 hours). Note:
|
| 5 | Up | Increase the desired temperature (60°F~90°F/16℃~32℃). Decrease the timer (1-24 hours). Note:
|
| 6 | Speed | Press to switch fan speed and cooling efficiency between High and Low. Note: For fan and cooling modes. |
| 7 | Timer/Wi-Fi | Press to set timer. Press and hold for 5 seconds to activate or turn off the Wi-Fi connection. |
| 8 |  | Low fan speed / Low cooling efficiency |
| 9 |  | High fan speed / High cooling efficiency |
| 10 |  | Cooling mode |
| 11 |  | Dehumidification mode |
| 12 |  | Fan mode |
Remote Control
- The remote control requires two AAA batteries. Please note that batteries are not included in the package, so you will need to purchase them separately.
- Remove the batteries if the remote control is not in use for a month or longer.
- Do not mix alkaline, standard (carbon-zinc), or rechargeable (nickel-cadmium) batteries.
- Properly dispose of used batteries.

 | High fan speed / High cooling efficiency |
 | Low fan speed / Low cooling efficiency |
 | Timer setting (1-24 hours) |
 | Temperature + (60°F~90°F/16℃~32℃) / Timer + (1-24 hours) |
 | Temperature - (60°F~90°F/16℃~32℃) / Timer - (1-24 hours) |
 | Sleep mode (for cooling mode only) The preset temperature will increase by 2°F/1℃ after the first hour, and by another 2°F/1℃ in the second hour. The temperature will remain at this level until the mode ends. |
 | Cooling mode |
 | Dehumidification mode |
 | Fan mode |
 | Switch between ℃/°F units |
 | Power on or off |
Smart Wi-Fi APP Control
This appliance enables remote control through your home network. A prerequisite is a steady Wi-Fi connection to your router and the free "Smart Life" app.
Download the app
Scan the QR code (both for iOS and Android) below to download the "Smart Life" app for remote control.


Using the app
- Open the "Smart Life" app and create a user account.
- Position the appliance within the signal range (2.4 GHz) of your router.
- Press and hold the Timer/Wi-Fi button on the appliance for 5 seconds until the indicator flashes, activating the Wi-Fi function.
Note: The Wi-Fi indicator will automatically flashes while the power is on. If no network configuration is done within 3 minutes, the status cancels, and the indicator turns off. For Wi-Fi connection, press and hold the "Timer/Wi-Fi" button for 5 seconds until the indicator flashes to initiate network configuration.
Connecting to the appliance
- Turn on the Bluetooth setting on your smartphone and connect to the Wi-Fi network. If the device fails to connect to the Wi-Fi network, check if your Wi-Fi network is operating on the 2.4 GHz frequency (5 GHz networks are not compatible).
- When the appliance's Wi-Fi indicator is flashing, select "Add Device" – agree "Location" access permissions, tap "Continue" – add the device with an air conditioner icon, enter your Wi-Fi password, and then follow the instructions on your smartphone to complete the setup.


Connection & disconnection
- Once the appliance is successfully connected, the Wi-Fi indicator will illuminate. You can now control the appliance using the app.
- Press and hold the Timer button on the appliance for approximately 5 seconds to disconnect it. The Wi-Fi indicator will turn off after 3 minutes if there's no connection.
Warm reminder
To differentiate between multiple devices being used simultaneously, you can edit the device name by tapping the upper right corner of the appliance's main interface.

Use And Operation
Power On & Off
Press the Power button to turn it on or off. Please open the front air outlet shutter before turning on the unit.
Operation Modes
The appliance offers four operation modes: Cooling, Dehumidification, Fan, and Sleep. Please be aware that you can activate Sleep mode using the remote control during cooling mode only.
- Cooling Mode
The ambient operating temperature range is 60°F (16℃) to 95°F (35℃).- Press the Mode button to switch to cooling mode until the cooling indicator lights up.
- Use the Up or Down button to adjust the temperature. The temperature range is between 60°F (16℃) and 90°F (32℃).
- Press the Speed button to toggle between high and low cooling efficiency. The respective indicator will illuminate.
- To control the air flow direction, manually adjust the air outlet shutter.
- Note: The appliance will automatically shut down if the room temperature falls below the selected temperature.
- Dehumidification Mode
- Press the Mode button to switch to dehumidification mode until the dehumidification indicator is illuminated.
- The appliance can remove up to 46 pints (22L) of moisture per day.
- It's advisable to attach the drain hose to the middle continuous drain hole of the appliance when starting this mode.
- Note: The Speed button cannot be used to adjust settings during this mode.
- Fan Mode
- Press the button to switch to fan mode until the fan indicator lights up.
- In fan mode, the appliance circulates room air without cooling it.
- Press the Speed button to opt for high or low fan speed.
- Sleep mode
This function is exclusive to the remote control. It can only be activated while in cooling mode. The preset temperature will increase by 2°F/1℃ after the first hour, and by another 2°F/1℃ in the second hour. The temperature will remain at this level until the mode ends.
Timer Setting
- The timer setting is available for 1-24 hours.
- You can configure an auto shut down timer while the appliance is powered on.
Auto shut down (Appliance is powered on)
![]()
Press Timer button once to turn on the timer function.
![]()
Press Up / Down button to set the delay OFF time.

- Additionally, you can set an auto turn on timer while the appliance is in standby mode.
Auto turn on (Appliance is powered off but connected with the power supply)
![]()
Press Timer button once to turn on the timer function.
![]()
Press Up / Down button to set the delay ON time.
- When you want to cancel timer:
Cancel timer
![]()
Press the Down button until the display screen shows '00'.
Note: Press the Power button to turn off the appliance will also exit the timer setting.
Automatic Defrost
During operation at low room temperatures, frost may accumulate on the evaporator. The unit will initiate automatic defrosting, indicated by a blinking Power indicator. The defrost control sequence is as follows:
- In cooling or dehumidification mode:
- When the ambient temperature sensor detects the evaporator coil temperature is below 30°F (-1°C), the compressor stops for 10 minutes.
- If the coil temperature rises to 45°F (7℃), the unit resumes cooling or dehumidification mode.
- In dehumidification mode:
If the coil temperature sensor notes that the evaporator temperature falls below 104°F (40℃) and the temperature difference between the coil and room is less than 66°F (19℃) after 20 minutes of compressor operation, the unit enters a 5-minute defrost cycle, during which the power indicator blinks.
Draining
Manual Draining (for the bottom drain hole):
- The appliance will stop automatically when the water tank is full. Unplug the power cord first.
Note: Handle the appliance with care to avoid spilling the water from the bottom water pan. - Place a shallow pan (not included) beneath the bottom drain hole.
- Remove the water plug to initiate drainage, and the water will flow into the shallow pan (water container).
Notes:- Keep the water plug handy for reinsertion after drainage.
- While draining, you can slightly tilt the appliance backward.
- If the shallow pan isn't sufficient, quickly reinsert the water plug before it's full to prevent water from spilling onto the floor or carpet.
- Once draining is complete, remember to reinsert the water plug to prevent the condensate water from flowing onto the floor or carpet.
![]()

Continuous Draining (for the middle drain hole):
- Cooling Mode:
The self-evaporating system uses collected water to cool the condenser coils, increasing efficiency. Condensate water evaporates at the condenser and exits through the exhaust hose. Connect the drain hose to the middle continuous drain hole. There's no need to empty the drainage tank during cooling.
- Dehumidification Mode:
For continuous, unattended dehumidification, attach the drain hose to the appliance's middle continuous drain hole. Condensate water will flow into a bucket or drain by gravity.

- Ensure the appliance is turned off.
- Remove the water plug from the drain hole and keep it in a safe place if you intend to reinsert it later.
- Securely and correctly attach the drain hose, ensuring it's free from kinks and obstructions.
- Direct the hose's outlet over a water tank or drain system to allow uninterrupted water flow from the unit.
- Do not submerge the hose's end in water; this can result in an "Air Lock" where water cannot drain smoothly.
- Regularly empty the water container to prevent overflow, in accordance with the dehumidification capacity of 46 pints (22L)/day.
To Prevent Water Spillage:
- Due to the significant negative pressure of the condensate drain pan, angle the drain hose downward towards the floor. A suitable inclination degree should surpass 20 degrees.
- Ensure the hose is straightened to prevent twisting or bending.
Note:
A drain hose that is too long or a limited height difference from the drain plug to the floor can hinder water drainage.
Overload Protection
In case of power loss, a 3-minute delay is implemented before the compressor restarts to safeguard its operation.
Cleaning & Maintenance
Cleaning The Air Filter (recommended every two weeks)
Dust accumulating on the filter can impede airflow, leading to reduced system efficiency. If the airflow is significantly blocked, it may even cause damage to the unit. Regular cleaning of the air filter is essential. The air filter is removable for cleaning purposes. Operating the unit without the air filter can lead to contamination of the evaporator.

- Turn off the appliance and unplug the power cord.
- Remove the filter mesh from the unit.
- Use a vacuum cleaner to remove dust from the filter.
- Rinse the filter under running water.
- Allow the filter to dry completely before re-inserting it.
Avoid touching the evaporator surface with bare hands, as it may result in injury to your fingers.
Cleaning The Cabinet
Clean the appliance using a slightly damp cloth and then dry it with a dry cloth.
Note:
- Do not wash the appliance body with water.
- Avoid using petrol, alcohol, or solvents for cleaning.
- Do not spray insecticide liquids or similar substances on the appliance.
Refrigerant Cleanup Procedure
General Measures:
- As gas/vapor is heavier than air, it can accumulate in confined spaces, especially at or below ground level.
- Ensure elimination of any potential sources of ignition.
- Wear appropriate personal protective equipment (PPE).
- Evacuate unnecessary personnel, isolate the area, and ensure proper ventilation.
- Avoid contact with eyes, skin, and clothing. Do not inhale vapors or gas.
- Prevent release into sewers and public waters.
- Halt the source of the release, if safe to do so. Consider using water spray to disperse vapors.
- Isolate the affected area until the gas has dissipated. Ventilate and test the area for gas before entry. Notify competent authorities after a spill.
Storage
If the appliance will not be used for an extended period, follow these steps:
- Turn off the appliance and unplug it from the power supply.
- Remove the batteries from the remote control.
- Make sure to drain any remaining water condensation.
- Remove the air filter and clean it with water. Allow the filter to dry before reinstalling it.
- Disconnect the window bracket kit if it was used. If necessary, clean the window bracket kit with a damp cloth before storing it. Ensure all parts are dry before storage.
- It is recommended to coil the power cord before storing it to prevent bends and creases.
- The unit must be stored in an upright position.
- Store the machine indoors in a well-ventilated, dry, and non-corrosive environment.
Before storage, ensure that the evaporator inside the machine is dried to prevent component damage and mold growth. There are two methods to achieve this:
Method 1: Unplug the unit and place it in a dry and open area for several days to allow it to dry out.
Method 2: Turn on the machine, select the fan mode, and adjust it to low-speed mode. Maintain this state until the drainage pipe becomes dry.
Troubleshooting
| Problems | Inspections | Solutions | |
The appliance is not functioning | Ensure the power connection is secure. | Make sure the power cord is properly inserted into the wall outlet. | |
| Check if the display shows the 'FT' error code. | Empty the drain pan by removing the rubber plug. | ||
| Verify the room temperature. | Ensure the room temperature is within the range of 41°F~95°F (5℃-35℃). | ||
Decreased cooling efficiency | Ensure the air filter is clean. | Clean the air filter if needed. | |
| Inspect for any obstructions in the air duct. | Remove any obstructions. | ||
| Ensure all doors and windows are closed. | Close doors and windows. | ||
| Verify the correct operating mode and temperature settings. | Set the mode and temperature as instructed in the manual. | ||
| Ensure the exhaust hose is properly connected. | Ensure the exhaust hose is firmly connected. | ||
Water Leakage | Overflow during movement. | Before moving, ensure the water tank is emptied. | |
| Inspect the drain hose for kinks or bends. | Straighten the hose to prevent trapping. | ||
Excessive Noise | Check if the unit is securely positioned. | Ensure the unit is placed on a stable and level surface. Make sure all parts are properly tightened and | |
| Check for any loose or vibrating parts. | Make sure all parts are properly tightened and secured. | ||
| The noise sounds like water flowing. Communication failure between the main | It's the refrigerant moving through the system, which is normal. | ||
| Error Codes | E0 | Communication failure between the main PCB and display PCB. | Inspect the wire harness of the display PCB for any damage. |
| E1 | Failure of the ambient temperature sensor. | Check the connection or replace it. Clean or replace the temperature sensor. | |
| E2 | Failures of coil temperature sensors. | Check the connection or replace it. Clean or replace the temperature sensor. | |
| FT | High-level alarm for condensate water. | Empty the drain pan by removing the rubber plug. | |
Customer Service
BEFORE CALLING FOR SERVICE IF THE AIR CONDITIONER FAILS TO OPERATE:
- Ensure that the air conditioner is securely plugged in. If not, unplug it from the outlet, wait 10 seconds, and then securely plug it in again.
- Verify if a circuit fuse is blown or the main circuit breaker is tripped. If they appear functional, test the outlet using another appliance.
- Refer to the troubleshooting details provided above.
IF NONE OF THE ABOVE RESOLVES THE ISSUE, PLEASE CONTACT A QUALIFIED TECHNICIAN. AVOID ATTEMPTING TO ADJUST OR REPAIR THE AIR CONDITIONER ON YOUR OWN.
Customer Service Information
If you have any problem with this unit, please contact us via renogy.com/contact-us
Important Safety Information
Your safety is our top priority. Please read this manual thoroughly and ensure full comprehension before operating your appliance.
Symbols Used
| This unit operates with a flammable refrigerant. In the event of a refrigerant leak in proximity to fire or heated components, it may generate hazardous gas and pose a fire risk. |
 | Read this USER MANUAL carefully before operation. |
 | Additional information can be found in the USER MANUAL, SERVICE MANUAL, and similar resources. |
 | Service personnel must diligently review the USER MANUAL and SERVICE MANUAL before operating this equipment. |
For Indoor Use Only
- This appliance is for household and indoor use only.
- This appliance is suitable for use by children aged 8 years and older. Additionally, individuals with restricted physical, sensory, or mental capabilities, or those who lack experience and knowledge, can also use it, provided they have received proper supervision or instructions for safe usage and understand the associated risks.
- Children should not play with the appliance, and cleaning or user maintenance should not be performed by unsupervised children.
Safety Guidelines for R32 Refrigerant
This appliance utilizes the environmentally-friendly R32 refrigerant. R32 has no adverse impact on the ozone layer (ODP), minimal greenhouse effect (GWP), and global availability. Its efficient energy properties make it an excellent choice for cooling in this application. However, due to its high flammability, specific precautions must be observed.
Failure to heed this warning could lead to an explosion, fatalities, injuries, and property damage.
- The appliance is specifically intended for use with R32 gas, the designated refrigerant.
- The refrigerant loop is sealed. Only a certified technician should attempt to perform servicing.
- Avoid releasing the refrigerant into the atmosphere.
- R32 (propane) is both flammable and denser than air. It tends to accumulate in lower areas initially, but fans can circulate it.
- If there is any presence or suspicion of propane gas, do not permit untrained individuals to attempt to identify the source.
- The propane gas utilized in the unit is odorless.
- The absence of odor does not mean there is no leaked gas.
- In case of a leak detection, promptly evacuate all individuals from the premises, ventilate the area, and immediately inform the local fire department about the propane leak.
- Do not allow anyone to re-enter the room until a qualified service technician arrives and confirms that it is safe to do so.
- Avoid using open flames, cigarettes, or other potential sources of ignition either inside the units or in their proximity.
- The component parts are designed for use with propane, and they are non-incendiary and non-sparking. Replacement of component parts should be done solely with identical repair parts.
Operation Precautions

To minimize the risk of fire, electric shock, or harm to individuals and property.
- If the supply cord is damaged, it must be replaced by the manufacturer, its authorized service personnel, or individuals with equivalent qualifications to prevent potential hazards.
- The appliance must be disconnected from its power source during servicing.
- Always operate the unit using a power source with the same voltage, frequency, and rating as indicated on the product identification plate.
- Always use a grounded power outlet.
- Disconnect the power cord when cleaning or when the appliance is not in use.
- Do not operate the unit with wet hands. Avoid spilling water onto the appliance.
- Do not submerge or expose the unit to rain, moisture, or any other liquid.
- Do not leave the unit running without supervision. Avoid tilting or turning over the unit.
- Do not disconnect the unit while it is in operation.
- Avoid unplugging by tugging on the power cord.
- Do not use extension cords or adapter plugs.
- Do not place objects on the unit.
- Do not climb or sit on the unit.
- Do not insert fingers or objects into the air outlet.
- Do not touch the air inlet or the aluminum fins of the unit.
- Do not operate the unit if it is dropped, damaged, or exhibiting signs of malfunction.
- Do not clean the appliance with any chemicals.
- Keep the unit away from sources of fire, inflammable, or explosive materials.
- The unit must be installed in compliance with national wiring regulations.
- Do not use any methods to speed up defrosting or cleaning other than those recommended by the manufacturer.
- Store the appliance in a room without continuous sources of operation (e.g., open flames, operational gas appliances, or active electric heaters).
- Store the appliance in a manner that prevents mechanical damage.
- Do not puncture or burn, even after use.
- Note that refrigerants may lack a noticeable odor.
- Ensure pipe-work is safeguarded from physical harm and not installed within an unventilated space smaller than 43 sq. ft. (4 sq. m).
- Adhere to national gas regulations.
- Maintain proper clearance for required ventilation openings.
- Store the appliance in a well-ventilated area where the room size aligns with the specified operating room area.
Any individual engaged in tasks related to servicing or tampering with a refrigerant circuit must possess a currently valid certificate from an industry-recognized assessment authority. This certificate verifies their competence to handle refrigerants safely in accordance with an industry-accepted assessment specification.
Servicing must exclusively follow the recommendations provided by the equipment manufacturer. Maintenance and repair that involve the expertise of other skilled personnel should be conducted under the guidance of an individual competent in handling flammable refrigerants.
If you have any questions or need assistance, please don't hesitate to contact our customer service team.
Safety Precautions for Servicing
Please adhere to the following warnings when performing maintenance on an appliance using R32 refrigerant.
- Safety Inspection for the Area
Before commencing work on systems containing flammable refrigerants, safety checks are essential to minimize the risk of ignition. For repairs to the refrigerating system, the following precautions must be observed before conducting any work on the system. - Work Procedure
All tasks must be carried out following a controlled procedure to minimize the possibility of a flammable gas or vapor being present during the work process.
- General Work Area
All maintenance personnel and other individuals in the vicinity must be informed about the type of work being conducted. Working within confined spaces should be avoided. The area surrounding the work space must be cordoned off. Confirm that the conditions within the area have been made safe through the management of flammable materials. - Checking for Refrigerant Presence
Before and during the work, the area must be checked using a suitable refrigerant detector to ensure the technician is informed of any potentially flammable atmospheres. Confirm that the leak detection equipment employed is compatible with flammable refrigerants, meaning it should not produce sparks, should be adequately sealed, and must be intrinsically safe. - Availability of Fire Extinguisher
If any hot work is to be performed on the refrigeration equipment or related components, ensure that suitable fire extinguishing equipment is readily accessible. Keep a dry powder or CO2 fire extinguisher nearby the charging area. - Avoid Ignition Sources
Any person working on a refrigeration system that involves exposing pipe work containing or previously containing flammable refrigerant must refrain from using ignition sources that could potentially cause a fire or explosion. All potential ignition sources, including cigarette smoking, should be kept a safe distance away from the installation, repair, removal, and disposal sites where flammable refrigerant may be released. Before beginning work, survey the area around the equipment to ensure there are no flammable hazards or ignition risks. Display "No Smoking" signs. - Ventilation Requirements
Before commencing work such as breaking into the system or performing hot work, confirm that the area is either outdoors or adequately ventilated. Adequate ventilation should be maintained throughout the work process. The ventilation should effectively disperse any released refrigerant and preferably direct it externally into the atmosphere. - Inspections for Refrigeration Equipment
When altering electrical components, they must be appropriate for the intended purpose and meet the correct specifications. Always adhere to the manufacturer's maintenance and service guidelines. If uncertain, consult the manufacturer's technical department for assistance.
For installations involving flammable refrigerants, conduct the following checks:
- Confirm that the charge size matches the room size in which the refrigerant-containing components are installed.
- Ensure that ventilation machinery and outlets are functioning adequately and free from obstruction.
- If using an indirect refrigerating circuit, inspect the secondary circuit for the presence of refrigerant.
- Maintain the visibility and legibility of equipment markings. Correct any illegible markings or signs.
- Position refrigeration pipes or components in a manner that minimizes exposure to substances that could corrode refrigerant-containing components, unless the components are inherently resistant to corrosion or appropriately safeguarded against it.
- Inspections for Electrical Devices
When conducting repairs and maintenance on electrical components, perform initial safety checks and component inspections. If a fault is detected that could compromise safety, refrain from connecting any electrical supply to the circuit until the fault is resolved satisfactorily. If immediate correction of the fault is not possible but continued operation is necessary, implement an appropriate temporary solution. This must be reported to the equipment owner to ensure all relevant parties are informed.
Initial safety checks should cover:
- Discharging capacitors in a safe manner to prevent potential sparking.
- Ensuring that no live electrical components or wiring are exposed while charging, recovering, or purging the system.
- Verifying continuity of earth bonding.
Install the unit in rooms larger than 43 sq. ft. (4 sq. m). Avoid installing the unit in locations where flammable gas may be present.
NOTE:
The manufacturer might offer alternative appropriate examples or provide additional information regarding the odor of the refrigerant.
Documents / ResourcesDownload manual
Here you can download full pdf version of manual, it may contain additional safety instructions, warranty information, FCC rules, etc.
Advertisement


Need help?
Do you have a question about the DCAC08 and is the answer not in the manual?
Questions and answers