Advertisement
Introduction
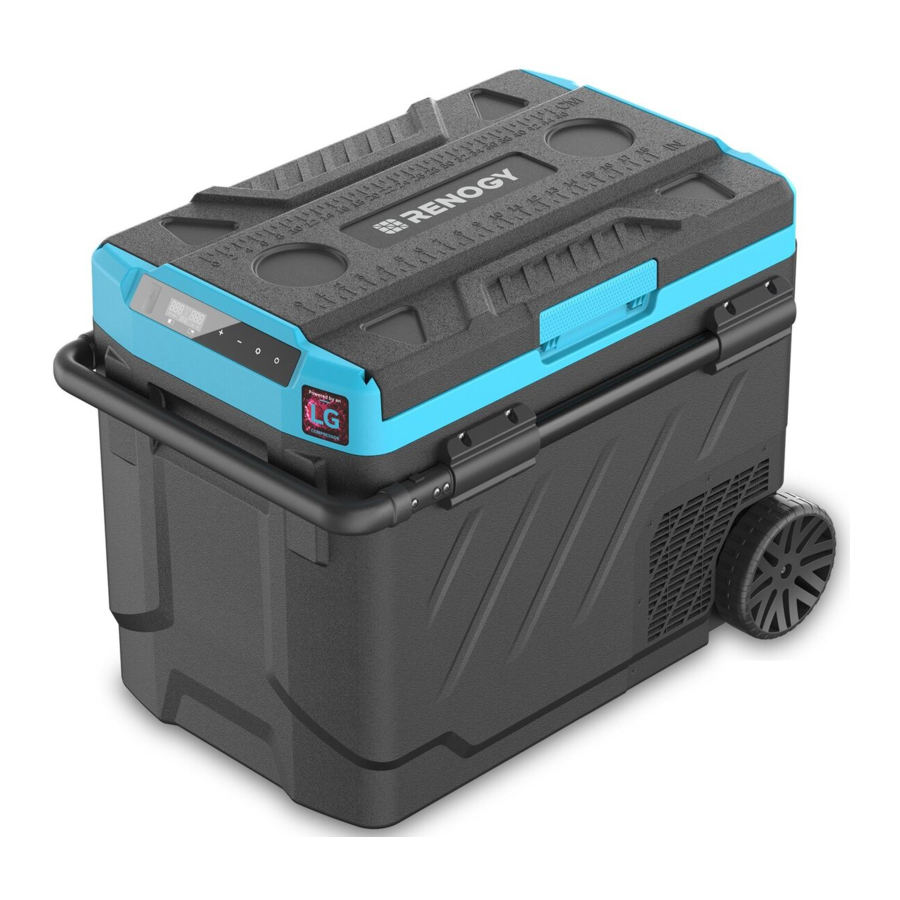
Key Features
- Powered by a high-efficiency LG compressor.
- CFC-free, excellent heat insulation.
- Dual-zone cooling with individual temperature control systems.
- An intelligent battery protection system prevents your vehicle from running out of battery.
- App remote control.
- LED display control panel for temperature settings.
- A 5V/1A USB charging output port.
- User-friendly design: Detachable opening door, cup holders, interior LED light, cutting board, interior drain port.
Product Overview

Package Contents
- 1 x Portable Refrigerator
- 1 x 12V/24V DC Power Cord
- 1 x 100V-240V AC Power Cord
- 1 x Removable Basket
- 1 x Cutting Board
- 1 x User Manual
How to Reverse the Door Opening Direction
- Open the door at a 90-degree angle.
![]()
- Take off the door from one side.
![]()
- Take off the door from the other side.
![]()
- Reverse the direction of the door opening.
![]()
- Align the door shaft with the hole on one side and insert it.
![]()
- Close the door after the installation is finished.
![]()


Function and Operation

NOTE:
- The Right Cooling Zone is on the side where the compressor is located (the smaller side).
- When selecting a function, if the panel is not operated, it will be automatically confirmed after 3 seconds.
Power Supply
Connect to the DC 12V/24V or AC 100-240V power supply using the included adapters.
Power ON/OFF
- Press the
![]() button to turn it on. Press and hold this button for 1 second to turn it off.
button to turn it on. Press and hold this button for 1 second to turn it off. - It's recommended to turn the machine off first, then unplug the socket. If you directly unplug the power to turn off the machine, it will automatically turn on once you plug in the socket again due to the memory function.
 button to turn it on. Press and hold this button for 1 second to turn it off.
 Display Screen Initialization
After turning on the appliance, the buzzer will make a long beep sound, the display will light up for two seconds, and then the appliance enters standby mode.
Power ON/OFF the Left and Right Cooling Zones
- In the running state, press
![]() and
and ![]() hold the and buttons simultaneously for 3 seconds to switch the Left cooling zone.
hold the and buttons simultaneously for 3 seconds to switch the Left cooling zone. - Press and hold the
![]() and
and ![]() buttons simultaneously for 3 seconds to switch ON/OFF the Right cooling zone.
buttons simultaneously for 3 seconds to switch ON/OFF the Right cooling zone. - The default factory mode is that dual cooling zones enter running state simultaneously when it is powered on.
- Two cooling zones cannot be switched OFF at the same time.
 and
and  hold the and buttons simultaneously for 3 seconds to switch the Left cooling zone.
  and
and Temperature +/- Settings
- Temperature setting range: -4~68 ℉ (-20~20℃)
- Adjust temperature for the Left cooling zone: When both the Left and Right cooling zones are in a running state, press
![]() to turn up and
to turn up and ![]() to turn down the temperature.
to turn down the temperature. - Adjust temperature for the Right cooling zone: Press
![]() or
or ![]() button. Then press
button. Then press ![]() to switch to R temperature control while the number is flashing. Finally press
to switch to R temperature control while the number is flashing. Finally press ![]() and
and ![]() to adjust the temperature number.
to adjust the temperature number. - The setting will be saved after stopping the setup operation for 4 seconds.
NOTE: After setting it successfully, the temperature displayed is the current temperature of the cooling zone, and it will take time to reach the set temperature.
Temperature Unit Setting
- Turn off the appliance.
- Press and hold the
![]() button, it will show the present unit, and then press the
button, it will show the present unit, and then press the ![]() button to switch between Celsius (℃) and Fahrenheit (℉).
button to switch between Celsius (℃) and Fahrenheit (℉). - The factory setting is Fahrenheit (℉).
Cooling Mode
- In the running state, press
![]() to switch between the MAX (Fast Cooling) and ECO (Energy Saving) modes.
to switch between the MAX (Fast Cooling) and ECO (Energy Saving) modes. - The default factory setting is MAX (Fast Cooling) mode.
Battery Protection System
- In the running state, press and hold
![]() for 3 seconds until the LED screen flashes, then press
for 3 seconds until the LED screen flashes, then press ![]() again to select the protection level between H (High), M (Medium), and L (Low).
again to select the protection level between H (High), M (Medium), and L (Low). - The default factory setting is H (High).
- Voltage reference:
Mode\Input DC 12V DC 24V Cut Out Cut In Cut Out Cut In L 8.5V 10.9V 20.3V 22.7V M 10.1V 11.4V 21.3V 23.7V H 11.1V 12.4V 23.3V 25.7V
Important Notice:
- The voltage is a theoretical value, and may vary due to different usage conditions.
- H mode should be set when the appliance is connected to car power supply.
- M or L mode should be set when the appliance is connected to a portable battery or other back-up battery.
Reset
- Turn off the appliance.
- Press
![]() and
and ![]() hold the and buttons to enter C1 display.
hold the and buttons to enter C1 display. - Press
![]() and
and ![]() hold and for 3 seconds to reset the appliance.
hold and for 3 seconds to reset the appliance.
USB Charging Output
The USB charging output port is 5V/1A.
Recommended Temperature for Common Food

Remote Control App Download and Connect
Download the App
Scan the QR code below or search for "Car Fridge Freezer" to download the app.


iOS


Android
How to Connect and Pair
- Turn on Bluetooth on your smart device.
- Open the app and tap "Start scanning fridge" to find the nearby refrigerator. The Bluetooth connection distance should be within 33 ft/10 m.
- Tap the refrigerator icon for Bluetooth pairing. Then the app will pop up an interface to remind you to pair the refrigerator by pressing the
![]() button on the appliance's control panel when pairing with the refrigerator for the first time.
button on the appliance's control panel when pairing with the refrigerator for the first time. - After pairing successfully, the app will automatically switch to the main interface and allow you to control the refrigerator.
Main Interface

- Menu
- Current Temperature
- Current Voltage
- Target Temperature
- Switch Left/Right Cooling Zone
- Set
- Power ON/OFF
- Current Battery
- Temperature Control
- Temperature Control
- ECO (Energy Saving Mode) / MAX (Fast Cooling Mode)
- Lock* / Unlock*
- Celsius / Fahrenheit
- Unpair the device and return to search
- Battery Protection System: High / Medium / Low
*Tap the Lock icon on the app to lock or unlock the control panel on the refrigerator. If it is locked, the refrigerator can only be controlled from the app end.
Care and Maintenance
Cleaning
- Turn off and unplug the appliance first to avoid the electric shock.
- Remove the drain plug and drain out through the hole at the bottom of the device.
- Use a wet cloth to clean the appliance and then dry it.
- Do not soak the appliance in water and do not wash it directly under flowing water.
- Do not use abrasive cleaning agents during cleaning as these may damage the appliance.
Storage
If the appliance will not be in use for a period of time:
- Turn off and unplug the appliance.
- Take out all the items stored in the appliance.
- Wipe off the excess water with a soft rag.
- Put the appliance in a cool and dry place.
- Leave the top lid slightly open to prevent odors from forming.
- Recommended storage environment: Ambient temperature: 77℉/25℃, humidity ≤75%.
Defrosting
Humidity can form frost in the interior of the cooling device or on the evaporator. This will reduce the cooling capability. Defrost the device in a timely manner.
- Turn off and unplug the appliance first to avoid the electric shock.
- Take out all the items stored in the appliance.
- Keep the top lid open.
- Wipe off the defrosted water.
 Never use hard or pointed tools to remove ice or to loosen objects that have frozen in place.
Specifications
| Model | ZG51 |
| Rated Voltage | DC 12V/24V, or AC 120V (Using the included adapters) |
| Rated Power | 60W |
| Capacity | 50 L/1.76 cu. ft. |
| Noise Level | ≤45 dB |
| Temperature Setting Range | -4~68℉/-20~20℃ |
| Climate Class | T/ST/N/SN |
| Dimensions | 27 x 18 x 20 in/692 x 453 x 515 mm (L x W x H) |
| Net Weight | 39 lbs/17.5 kg |
Troubleshooting
| Issues | Possible Causes & Solutions |
| Will there be a freeze function when the power is off? | According to lab testing data, at 77℉/25℃, it takes around 1 hour to heat up from -4℉/-20℃ to 32℉/0℃, around 1.8 hours from -4℉/-20℃ to 50 ℉/10℃, and around 3 hours from -4℉/-20℃ to 68℉/20℃. |
Refrigerator does not work |
|
Refrigerator compartments are too warm |
|
Food is frozen | The temperature was set too low. |
| There is a "water flow" noise coming from inside the refrigerator. | It's a normal phenomenon, caused by the flow of refrigerant. |
| There are waterdrops around the refrigerator casing or door gap. | It's a normal phenomenon. The moisture will condense water when it touches the cold surface of the refrigerator. |
| The compressor is slightly noisy when starting. | It's a normal phenomenon. The noise will be reduced after the compressor is stabilized. |
Code E1 displayed | Possible cause: Low voltage
|
Code E2 displayed | Possible cause: Condenser fan overloading.
|
Code E3 displayed | Possible cause: The compressor starts too often.
|
Code E4 displayed | Possible cause: The compressor does not start.
|
Code E5 displayed | Possible cause: The compressor and electronics were overheating.
|
Code E6 displayed | Possible cause: No parameter is detected by the main controller.
|
Code E7 or E8 displayed | Possible cause: The temperature sensor is faulty. Contact our customer support service. |
Technical Support
For additional support, contact the Renogy technical support team through renogy.com/contact-us. Have the following information available when contacting Renogy:
- Owner name
- Contact information
- Order number
- Purchase channel
- Serial number
- Brief description of the issue
Recommended Portable/Back-up Battery
For a better usage experience outdoors where there's no electricity, we recommend our Renogy 72000mAh power bank to power this portable refrigerator.

| Battery Life for Powering Your Refrigerator | |
| Lab Testing Conditions (At 68 ℉ /20 ℃ ) | Use Time |
| Dual zones: 32℉/0℃ | 16 H |
| One zone: 32℉/0℃, the other: -4℉/-20℃ | 10 H |
| One zone: -14℉/-10℃, the other: -14℉/-10℃ | 10 H |
| One zone: -4℉/-20℃, the other: -4℉/-20℃ | 8 H |
Note:
| |
Important Safety Information
The User Manual provides important installation, operation, and maintenance instructions for this Portable Refrigerator. Please read the User Manual carefully before installation and operation and save it for future reference. Failure to observe the instructions or precautions in the User Manual can result in electrical shock, serious injury, or death, or can damage the refrigerator, potentially rendering it inoperable.
Symbols Used
The following symbols are used throughout the User Manual to highlight important information:

Indicates a potentially dangerous condition which could result in injury.

Indicates a critical procedure for safe and proper installation and operation.
NOTE
Indicates an important step or tip for optimal performance.
General Safety Information
- Do not operate the appliance if it is visibly damaged.
- Do not block the gaps in the appliance with things like pins, wires, etc.
- Do not expose the appliance to rain or soak it in water.
- Do not place the appliance near naked flames or other heat sources, like heaters, direct sunlight, gas ovens, etc.
- Do not store any explosive substances like spray cans with a flammable propellant.
- Ensure the supply cord is dry and not trapped or damaged. Do not locate multiple portable socket outlets or portable power supplies at the rear of the appliance.
- Check that the voltage specification on the type plate corresponds to that of the energy supply. The appliance can only be used with the power supply unit provided with the appliance.
- Do not use electrical appliances inside the food storage compartments of the appliance, unless they are of the type recommended by the manufacturer.
- Once unpacked and before turning on, the appliance must be placed on a level surface for at least 24 hours.
- Make sure that the appliance stays horizontal when it is running. The tilt angle must be less than 5 degrees for long time running and less than 45 degrees for short time running.
- Keep the ventilation openings in the unit casing or in the built-in structure free of obstacles.
- Keep the appliance stable on the ground or in the car.
- Do not drain it upside down.
- Repairs may only be carried out by qualified personnel. Incorrect repairs may cause danger. The lamp and supply cord must be replaced by either the manufacturer or qualified persons.
- The installation of DC power for the boat must be handled by qualified electricians.
- Children shall not play with the appliance. Cleaning and user maintenance shall not be made by children without supervision.
- The appliance can be used by children aged 8 years old and above and persons with reduced physical, sensory, or mental capabilities or lack of experience and knowledge who have been given supervision or instruction concerning the use of the device in a safe manner and are aware of the hazards.
NOTE
- Disconnect the power supply before each cleaning and maintenance and after every use.
- Do not use sharp tools to defrost. Do not damage refrigerant circuits.
- Risk of child entrapment. Before you throw away your old refrigerator or freezer: take off the doors, and leave the shelves in place so that children may not easily climb inside.
- Check if the cooling capacity of the appliance is suitable for storing food or medicine. Food may only be stored in its original packaging or in suitable containers.
- If the appliance is left empty for long periods, switch it off, defrost, clean, dry, and leave the door open to prevent mould from developing within the appliance.
- The appliance is intended to be used in households and similar applications such as:
- Staff kitchen areas in shops, offices, and other work environments;
- Camping, farm houses, and use by clients in hotels, motels, and other residential environments;
- Bed and breakfast type environments;
- Catering and similar non-retail applications.
Information, illustrations, and specifications in this manual reflect the most current available at the time of publication, and are subject to change without prior notice.
Documents / Resources
References
![apps.apple.com]() App Store 上的“CAR FRIDGE FREEZER”
App Store 上的“CAR FRIDGE FREEZER”![play.google.com]() Google Play
Google Play![renogy.com]() Contact Us | Renogy Solar Panels and Complete Solar Kits
Contact Us | Renogy Solar Panels and Complete Solar Kits
Download manual
Here you can download full pdf version of manual, it may contain additional safety instructions, warranty information, FCC rules, etc.
Advertisement

Need help?
Do you have a question about the DCCR50L and is the answer not in the manual?
Questions and answers