Advertisement
- 1 What's In The Box?
- 2 Before You Get Started
- 3 Noise-Sensitive or Anxious Dog?
- 4 Getting to Know Your Cleaner
- 5 BISSELL No-Rinse Dog Shampoo
- 6 Assembly
- 7 Preparing Your Cleaner
- 8 Attaching the Bathing Tool
- 9 Bathing Your Dog
- 10 Emptying the Dirty Water Tank
- 11 Cleaning Your BarkBath After Use
- 12 Storing Your BarkBath
- 13 Troubleshooting
- 14 Service
- 15 IMPORTANT SAFETY INSTRUCTIONS
- 16 Documents / Resources
What's In The Box?

Before You Get Started

More of a video person? Look for this icon and go online for an instructional how-to video at BISSELL.com/videos
 Helpful Tips to Get Ready:
- Place unit at least 4 ft away to reduce sound.
- When placing the unit on the floor, be sure to set it on the sound dampening microfiber mat to help reduce sound and protect your floor.
- Always use a BISSELL no-rinse dog shampoo.
- If your dog has long hair, brush your pet's hair before bathing.
- When selecting an area to bathe your dog, choose a place where your pet feels comfortable and safe. Usual choices include the kitchen, utility room, garage or family room.
- Lay down a separate blanket or towel where you will be bathing your dog.


Noise-Sensitive or Anxious Dog?
Some dogs are sensitive to loud noises, or are not fans of vacuums or other loud appliances. Here are some quick training tips to help your dog have a great experience with this new bathing method.
TRAINING STEPS
Phase 1
- Place the unit in a room where you plan to bathe your dog. With the unit turned off and allow the dog to become familiar with it.
- With the unit turned off, have the dog walk over to the unit and use the spray nozzle as a "comb" to brush the dog.
- Praise your dog and offer a treat.
Phase 2
- With the dog out of the room, turn the unit on. Leave the unit on and offer your dog a treat.
- Turn the unit off.
- Repeat the last two steps of phase 1.
Phase 3
- Turn the unit on, have your dog enter the room and give the dog a treat.
- With the unit on, and without pulling the trigger to release water, "comb" your dog's fur with the bathing tool.
- Turn the unit off and offer a treat.
Phase 4
- Turn the unit on and have your dog enter the room.
- Comb a small section of your dog's fur with the unit on and pull the trigger in quick, short bursts to acclimate your pet to feeling the solution on their skin.
- Once your dog is comfortable with the unit, you're now ready to enjoy bathing your dog with the BARKBATH

For more tips and videos, visit us online at www.BISSELL.com/videos.
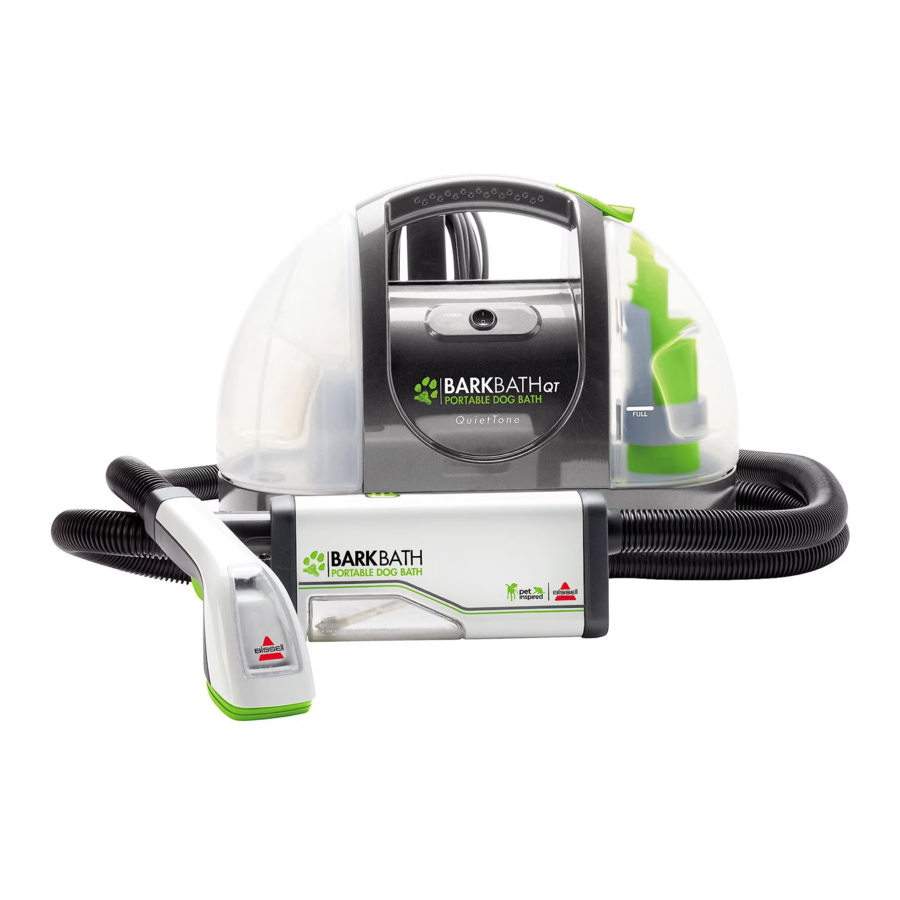
Getting to Know Your Cleaner

- Carry Handle
- Power On/Off Switch
- Dirty Water Tank
- Flex Hose Clip
- Flex Hose Storage Bracket
- Quick Release™ Cord Wrap
- Power Cord
- Clean Water Tank
- Flex Hose Connector Release
- Bathing Tool Connector
- Rinse/Shampoo Switch
- Shampoo Reservoir
- Spray Nozzle
- Nozzle Spray Trigger
- Mesh Plate
- Nozzle Height Selection
- Removable Face Plate
- Removable Face Plate Screw
BISSELL® No-Rinse Dog Shampoo

Always use genuine BISSELL No-Rinse Dog Shampoo. Other shampoos may harm the machine and will void the warranty.
 NOTICE: Do not use conditioners because they are too thick and may damage the machine. Use only BISSELL No-Rinse Dog Shampoo in your Portable Dog Bath System. Use of shampoos or soaps which contain lemon or pine oil may damage this appliance and void the warranty. These products may react with the plastic materials used in your cleaner, causing cracking or pitting.
Assembly

Do not plug in your Portable Dog Bath System until you are familiar with all the safety and operating instructions.
Assembling your Portable Dog Bath System is a simple process. The only tool you will need is a Phillips screwdriver.

- Slide the back plate of the flex hose clip into the opening on the front of the unit. You will hear a "click" when it is locked in place.

- Take the flex hose storage bracket and slide the lower plate into the opening on the back of the unit. Make sure the screw hole lines up.

- Insert screw and tighten with a screwdriver.

- Wrap the flex hose around unit and place hose grip into bracket. Turn bracket latch clockwise to lock in place.


Preparing Your Cleaner
To avoid damaging your unit and to reduce the risk of injury to your pet, do not boil or microwave water. Use only warm tap water.
- Remove the clean water tank by lifting it straight up and then away from the unit.
![]()
- Flip the tank so the black cap is on top and unscrew. Pull up to remove cap assembly from tank.
![]()
![warning]() NOTE: There may be condensation in the clean water tank due to quality testing before shipment.
NOTE: There may be condensation in the clean water tank due to quality testing before shipment. - To ensure your pet has a nice bathing experience, use warm-to-the-touch tap water to the fill line on your clean water tank. Replace and securely tighten the cap to the machine.
![]()
- Replace the clean water tank by lining up the grooves on the clean water tank with the vertical guides on the side of the unit. Gently slide it down into position.
![]()
- Before connecting the bathing tool, you will need to prime the system. Place the unit on a high, flat surface (such as a table or counter top).

- Plug the unit in and press the power switch to ON ( I ) position.
![]()
- Hold the flex hose end over the microfiber mat or towel and press the trigger at the end of the flex hose until water dispenses.
![]()
- Turn the unit OFF, pressing the power switch to ( O ) OFF position.
![]()


Attaching the Bathing Tool
NOTICE: Dish soap, traditional dog or human shampoos and/or conditioners should not be used as they may be too thick and may damage the machine. Use only BISSELL No-Rinse Dog Shampoo in your Portable Dog Bath System. Use of shampoos or soaps which contain lemon or pine oil may damage this appliance and void the warranty. These products may react with the plastic materials used in your cleaner, causing cracking or pitting.
- Locate the bathing tool and BISSELL No-Rinse Dog Shampoo.

- Unscrew the cap to the shampoo reservoir to unattach it from the bathing tool.
![]()
![information]() TIP: Since every dog is unique, first start by adding a small amount of BISSELL No-Rinse Dog Shampoo to reservoir. Continue to add more shampoo as needed to effectively clean your dog.
TIP: Since every dog is unique, first start by adding a small amount of BISSELL No-Rinse Dog Shampoo to reservoir. Continue to add more shampoo as needed to effectively clean your dog. - Holding the tool right side up, add BISSELL No-Rinse Dog Shampoo to the shampoo reservoir.
![]()
- Align the screw cap with the tabs of the reservoir opening and twist shut.
![]()
- Holding the tool horizontally on a flat surface (such as a table or counter top), attach the bathing tool to the cleaner by inserting the flex hose connector into the shampoo tool connector. You will hear a "click" when it locks into place.

- Prime the tool by pointing the nozzle at the microfiber mat and pressing and holding the spray trigger until solution dispenses.


Bathing Your Dog
TO REDUCE THE RISK OF ELECTRIC SHOCK, DO NOT IMMERSE APPLIANCE IN WATER OR PLACE IN AREA WHERE SPLASHING MAY OCCUR.
NOTICE: Always use genuine BISSELL No-Rinse Dog Shampoo. Other shampoos may harm the machine and will void the warranty.
Recommended areas for bathing your dog:
- Kitchen
- Utility Room
- Garage
- Family Room
- Place the base unit on the microfiber mat on the floor of the area where you are going to bathe your dog. The microfiber mat will help dampen the sound for your pet.

- Lay down a separate blanket or towel in the area where you will be bathing your dog, ensuring it is at least 4 feet away from the BARKBATH unit to help reduce sound.

- OPTIONAL: The spray nozzle is optimized for use on most hair types, however, using a screwdriver you can remove the screw from the plate of the bathing tool and pull off to expose longer nozzles for use on thick, heavy or longer coated dogs.

- Plug in the unit and press the power switch to ON ( | ) position.

- Set the Rinse/Shampoo switch to the desired setting. For Shampoo, the reservoir will dispense a mixture of shampoo and water; for Rinse, it will dispense just water.

- Test the system by pointing the nozzle at the microfiber mat and pressing and holding the spray trigger until solution dispenses.

![warning]() NOTE: The Dog Bathing Tool is always extracting dirty water. The trigger dispenses the shampoo and/or water. While pressing the trigger, it also continues extracting dirty water.
NOTE: The Dog Bathing Tool is always extracting dirty water. The trigger dispenses the shampoo and/or water. While pressing the trigger, it also continues extracting dirty water. - Place the tool on the dog so the nozzles are flush on the dog's body before pressing and holding the spray trigger to release the shampoo/water under the dog's coat.
![]()
- With the tool firmly against the dog's body, press and hold the spray trigger while using the nozzles to brush the bathing tool downwards, following the fall of the dog's coat.
![]()
- Release the spray trigger and use "drying strokes" to suction up moisture from the dog's coat. Repeat as needed.
![]()
- Spray shampoo/water on the microfiber towel and hand clean delicate areas such as the dog's face and paws.

- As a final step, coat should be air or towel-dried as needed.


Emptying the Dirty Water Tank
To reduce the risk of electric shock, turn power OFF and disconnect plug from electrical outlet before performing maintenance or troubleshooting.
- Turn power switch to the OFF (O) position and unplug power cord from outlet.

- Lift up the dirty water tank lever and pull up to remove the tank from the unit. Carry the tank upright to avoid spilling before emptying.

- Empty and rinse the dirty/collection tank after each use, OR when dirty water reaches the indicated maximum fill line.

- Place tank back in unit, and press down on tank lever to lock it in place.


Cleaning Your BarkBath™ After Use
To reduce the risk of electric shock, turn power OFF and disconnect plug from electrical outlet before performing maintenance or troubleshooting.
- Turn power switch to the OFF (O) position and unplug power cord from outlet.

- Remove and rinse out the dirty water tank following instructions in the "Emptying the Dirty Water Tank" section.
![]()
- Press release button and disconnect flex hose from the dog bathing tool by pulling straight out. (DO NOT twist tool to remove.)
![]()
- Once removed from flex hose, keep tool elevated to avoid dripping water on floor and rinse clean under running water.
![]()
- Flip tool to release water into sink. While holding the tool in the air and reservoir in the sink, press the trigger to assure all water empties from the hose.
![]()
- Check spray nozzle for accumulated dirt or debris. If necessary, clean with soft bristle brush.
![]()
- You may disassemble the spray nozzle for cleaning as needed. Removing the faceplates will expose longer spray nozzles.
![]()
- Be sure all pieces are completely dry before returning to base unit and before storage.
![]()


Storing Your BarkBath™
To reduce the risk of electric shock, turn power OFF and disconnect plug from electrical outlet before performing maintenance or troubleshooting.
NOTICE: To reduce the risk of a leaking condition, do not store unit where freezing may occur. Damage to internal components may result.
- Wipe all surfaces with a soft cloth and machine wash microfiber towel and mat, making sure all items are clean and dry.

- Wrap power cord around the cord wrap on the back of the base.

- Wrap flex hose around the base of the unit and secure the end into the flex hose storage bracket.
![]()
- Store unit in a protected dry area at room temperature.
![]()
- Place bathing tool, BISSELL no-rinse dog shampoo, microfiber towel and mat in the storage bag and store with cleaner.
![]()


Troubleshooting
To reduce the risk of electric shock, turn power switch off and disconnect plug from electrical outlet before performing maintenance or troubleshooting checks.
| Problem | Possible causes | Remedies | |
| Reduced or no suction | Hair build-up on suction nozzle | Clean as needed while washing dog | |
| Tool is not firmly placed against dog's body | Firmly press tool against dog's body, and periodically let go of spray trigger to allow for drying strokes | ||
| Area under dirty water tank has sand, hair, or debris | Remove dirty water tank and clean any sand or debris off inlet on the base of the machine and the gasket on the bottom of dirty water tank | ||
| Dirty tank full or not seated properly | Empty tank and replace, snapping top lid into place | ||
| Clog or build-up in hose | Suction hot water up to clear hose | ||
| Loose hose connection | Ensure machine hose is locked in place into the bathing tool | ||
| Reduced spray or not spraying | Solution or water tank is empty | Check and refill both water and bathing tool solution tanks | |
| Spray tip clogged | Rinse tool with warm water and use soft bristle brush on spray tips | ||
| Loose hose connection | Ensure machine hose is locked in place into the bathing tool. Hold trigger until water comes out | ||
| Lost prime | Turn unit off; Refill the water tank (and shampoo tank if needed), turn unit on and hold the trigger until spray resumes | ||
| Water has not reached the recovery tank | Suction water up until it appears in the recovery tank | ||
| Leaking | Dirty water tank gasket not in place or damaged | Place gasket in correctly (notched); If damaged, replace gasket | |
| Loose hose connection | Ensure machine hose is locked in place into the bathing tool; Hold trigger until water comes out | ||
| Damage or torn hose | Have an authorized technician repair unit | ||
| Bathing tool solution cap not in place | Make sure the solution cap on the bathing tool is in place with a gasket in the cap | ||
| Clean water tank cap is not securely tightened | Remove clean water tank, unscrew cap, then place cap back on tank and tighten securely | ||
| Water still remains bathing tool/hose | Similar to a garden hose, water may remain in the hose after unit is off | ||
| No power to unit | Outlet not working | Test outlet with a small appliance like a cell phone charger, and use another outlet if needed | |
| Fuse/breaker to outlet tripped | Reset the breaker | ||
| Dog still dirty or smells | Difficult Odor (ie. skunk) | Rewash with BISSELL Odor & Skunk no-rinse shampoo or consult a professional for very difficult odors | |
| Shampoo not foaming | Shampoo is designed to not be foamy | Continue using appropriate no rinse shampoo that is not foamy | |
| Shampoo is not flowing | Not using a BISSELL no-rinse dog shampoo | Always use a BISSELL no-rinse dog shampoo | |
| Rinse/Shampoo switch not fully engaged | Make sure switch is securely selected to the desired function | ||
| Lost prime | Turn unit off; Refill the water tank (and shampoo tank if needed), turn unit on and hold the trigger until spray resumes | ||
Service
If your BISSELL product should require service:
Contact BISSELL Consumer Care to locate a BISSELL Authorized Service Center in your area. If you need information about repairs or replacement parts, or if you have questions about your warranty, contact BISSELL Consumer Care.
Website: www.BISSELL.com
E-mail: www.BISSELL.com/email-us
Call:
BISSELL Consumer Care
1-800-237-7691
Monday – Friday 8am - 10pm ET
Saturday 9am - 8pm ET
Sunday 10am - 7pm ET
NOTE: Please keep your original sales receipt. It provides proof of purchase date in the event of a warranty claim.
Register your product today!
Registering is quick, easy and offers you benefits over the lifetime of your product:
www.BISSELL.com/registration
For cleaning tips and more visit www.BISSELL.com or find us at:
 BISSELL
 BISSELLClean
 BISSELLClean
 BISSELL
 BISSELL
IMPORTANT SAFETY INSTRUCTIONS
READ ALL INSTRUCTIONS BEFORE USING YOUR PORTABLE DOG BATH SYSTEM.
When using an electrical appliance, basic precautions should be observed, including the following:
TO REDUCE THE RISK OF FIRE, ELECTRIC SHOCK, OR INJURY:
- Use only warm tap water. Do not use heated water.
- Connect to a properly grounded outlet only. See grounding instructions. Do not modify the 3-prong grounded plug.
- Do not leave appliance when it is plugged in. Unplug from outlet when not in use and before servicing.
- Do not expose to rain. Store indoors.
- Do not allow to be used as a toy. Close attention is necessary when used by or near children.
- Do not use for any purpose other than described in this User's Guide. Use only manufacturer's recommended attachments.
- Do not use with damaged cord or plug. If appliance is not working as it should, has been dropped, damaged, left outdoors, or dropped into water, have it repaired at an authorized service center.
- Do not pull or carry by cord, use cord as a handle, close a door on cord, or pull cord around sharp edges or corners. Do not run appliance over cord. Keep cord away from heated surfaces.
- Do not unplug by pulling on cord. To unplug, grasp the plug, not the cord.
- Do not handle plug or appliance with wet hands.
- Do not put any object into openings. Do not use with any opening blocked; keep openings free of dust, lint, hair, and anything that may reduce air flow.
- Keep hair, loose clothing, fingers, and all parts of body away from openings and moving parts.
- Turn off all controls before plugging or unplugging appliance.
- Do not use appliance in an enclosed space filled with vapors given off by oil base paint, paint thinner, some moth proofing substances, flammable dust, or other explosive or toxic vapors.
- Keep appliance on a level surface.
- Do not carry the appliance while in use.
- Do not immerse appliance in water or place in area where splashing may occur.
- Liquid must not be directed towards equipment containing electrical components.
SAVE THESE INSTRUCTIONS FOR FUTURE USE
This model is for household use only. Commercial use of this unit voids the manufacturer's warranty.
Improper connection of the equipment-grounding conductor can result in a risk of electrical shock. Check with a qualified electrician or service person if you aren't sure if the outlet is properly grounded. DO NOT MODIFY THE PLUG. If it will not fit the outlet, have a proper outlet installed by a qualified electrician. This appliance is designed for use on a nominal 120-volt circuit, and has a grounding attachment plug that looks like the plug in the illustration. Make certain that the appliance is connected to an outlet having the same configuration as the plug. No plug adapter should be used with this appliance.
GROUNDING INSTRUCTIONS
This appliance must be connected to a grounded wiring system. If it should malfunction or break down, grounding provides a safe path of least resistance for electrical current, reducing the risk of electrical shock. The cord for this appliance has an equipment-grounding conductor and a grounding plug. It must only be plugged into an outlet that is properly installed and grounded in accordance with all local codes and ordinances.

Documents / Resources
References
![bissell.com]() Support Home Page
Support Home Page![www.bissell.com]() Support Home Page
Support Home Page![www.bissell.com]() http://www.bissell.com
http://www.bissell.com![www.bissell.com]() Ask a Question
Ask a Question![www.bissell.com]() http://www.bissell.com/registration!
http://www.bissell.com/registration!
Download manual
Here you can download full pdf version of manual, it may contain additional safety instructions, warranty information, FCC rules, etc.
Advertisement


Need help?
Do you have a question about the BarkBath QT and is the answer not in the manual?
Questions and answers