Advertisement
Quick Links
FULL LENGTH REAR BUMPER
MODULAR STORAGE PANEL SYSTEM
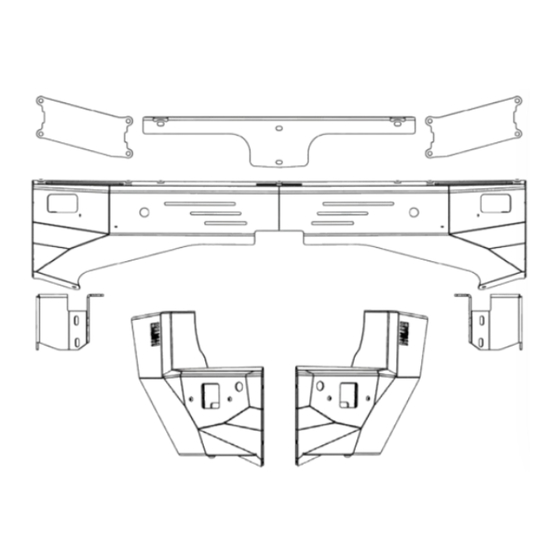
2010-2022/TOYOTA 4RUNNER
2024/TOYOTA LAND CRUISER
R1017T4RUMSP-DM
R770235090103
WARNINGS/CAUTIONS BEFORE STARTING INSTALLATION
WARNINGS/CAUTIONS BEFORE STARTING INSTALLATION
-BEFORE YOU INSTALL THIS KIT-
-BEFORE YOU INSTALL THIS KIT-
Read and understand all instructions
Read and understand all instructions, warnings,
warnings, cautions, & notes contained in this
cautions, & notes contained in this installation
installation instruction guide. Consult your
instruction guide. Consult your vehicle owner's manual
for proper disconnection of electrical and lifting of
vehicle owner's manual for proper disconnection
vehicle if required for installation of this product.
of electrical and lifting of vehicle if required for
installation of this product.
This install may require some technical skills and
This install may require some technical skills and
knowledge of basic mechanical work. If you do not feel
knowledge of basic mechanical work. If you do not
that you are capable of performing this install please
feel that you are capable of performing this install
take this product to a trained professional.
please take this product to a trained professional.
After reading this guide please contact us with any
questions or concerns before installing product.
After reading this guide please contact us with any
questions or concerns before installing product.
Customer Service: 830-896-7571
INSTALLATION GUIDE
INSTALLATION GUIDE
Rago Fabrication is not responsible for any bodily
Customer Service: 830-896-7571
injury or harm to you or your vehicle as a result of an
Rago Fabrication is not responsible for any bodily
,
improper install.
injury or harm to you or your vehicle as a result of an
improper install.
Proper installation of this kit required knowledge of
the factory recommended procedures for removal and
Proper installation of this kit required knowledge of
installation of original equipment components.
the factory recommended procedures for removal
and installation of original equipment components.
We recommend that the factory shop manual and
any special tools needed to service your vehicle be
We recommend that the factory shop manual and
on hand during the installation. Installation of this kit
any special tools needed to service your vehicle
without proper knowledge of the factory recommended
be on hand during the installation. Installation
procedures may affect the performance of these
of this kit without proper knowledge of the
components and the safety of the vehicle.
factory recommended procedures may affect the
TOOLS
REQUIRED
- 13mm, 15mm, 18mm & 21mm sockets
- 10mm, 15mm, 18mm & 21 mm wrenches
TOOLS
REQUIRED
- Pushpin Puller or Flathead Screwdriver
- 10mm, 12mm, 9/16, 7/16 sockets
- #4 Allen Head
- 10mm, 12mm, 9/16, 7/16 wrenches
- Snips/Scissors
- Pushpin Puller or Flathead Screwdriver
- 5/32, 7/32 Hex
- Plastic Pry Tool
- Cutting Tools
SKILL
- Rivet Hand Tool
SKILL
TIME
REQUIRED
- Approximately 1 Hour
TIME
REQUIRED
- Approximately 4.5 Hours
Inspect all contents of this package to make sure
performance of these components and the safety of
product is not damaged and all installation hardware
the vehicle.
has been included. If parts are missing from kit, please
Inspect all contents of this package to make
be prepared to provide the following information:
sure product is not damaged and all installation
hardware has been included. If parts are missing
1. Name of purchase location
from kit, please be prepared to provide the following
information:
2. Bar Code on side of box
3. Date above bar code
1. Name of purchase location
4. Date inside box cover
2. Bar Code on side of box
3. Date above bar code
4. Date inside box cover
*ALWAYS WEAR EYE PROTECTION
WHEN OPERATING POWER TOOLS*
*ALWAYS WEAR EYE PROTECTION
WHEN OPERATING POWER TOOLS*
- T40 Torx Bit
- Zip Ties
LEVEL
- Razor Blade
-Heat Gun
- Easy
- 2 people
LEVEL
- Skilled
Advertisement

Related Manuals for Rago FABRICATION R770235090103


Summary of Contents for Rago FABRICATION R770235090103
- Page 1 Inspect all contents of this package to make sure -BEFORE YOU INSTALL THIS KIT- -BEFORE YOU INSTALL THIS KIT- Rago Fabrication is not responsible for any bodily performance of these components and the safety of Customer Service: 830-896-7571 product is not damaged and all installation hardware...
- Page 2 QTY: 16 3M DOUBLE SIDED TAPE 1X1 3/8” RETAINING WASHER 3/8-16 X 1” CARRIAGE BOLT QTY: 6 QTY: 8 QTY: 6 Reference this page throughout the install NEED HELP? (830) 896-7571 Page 2 | Rago Fabrication Page 2 | Rago Fabrication...
- Page 3 1/4” FLAT WASHER BLACK M6 WASHER BLACK QTY: 4 QTY: 6 1/4-20” RIVET NUT 1/4” X 1/2” LONG SPACER QTY: 2 QTY: 2 Reference this page throughout the install NEED HELP? (830) 896-7571 Page 3 | Rago Fabrication Page 3 | Rago Fabrication...
- Page 4 INSTALLATION GUIDE INSTALLATION GUIDE PARTS SPL0799 SPL0823 QTY: 1 QTY: 2 SPL0800, SPL0800-M SPL0805 QTY: 2 QTY: 2 SPL0807 QTY: 2 Reference this page throughout the install NEED HELP? (830) 896-7571 Page 4 | Rago Fabrication Page 4 | Rago Fabrication...
- Page 5 INSTALLATION GUIDE STEP 1 Remove the receiver cover by pulling. Next using a (fastener remover tool) or a (flathead screwdriver) remove the push pins shown below. NEED HELP? (830) 896-7571 Page 5 | Rago Fabrication Page 5 | Rago Fabrication...
- Page 6 INSTALLATION GUIDE INSTALLATION GUIDE STEP 2 Using a (plastic pry tool), remove the top plastic cover. Then, Unplug the wire harness both on driver and passenger side. NEED HELP? (830) 896-7571 Page 6 | Rago Fabrication Page 6 | Rago Fabrication...
- Page 7 MODULAR STORAGE PANE L SYSTEM FULL LENGTH REAR BUMPER INSTALLATION GUIDE INSTALLATION GUIDE STEP 3 Remove the plastic cover as shown below by pulling. NEED HELP? (830) 896-7571 Page 7 | Rago Fabrication Page 7 | Rago Fabrication...
- Page 8 MODULAR STORAGE PANE L SYSTEM FULL LENGTH REAR BUMPER INSTALLATION GUIDE INSTALLATION GUIDE STEP 4 **KEEP HARDWARE** Using a (10mm socket), remove the OEM hardware as shown below. NEED HELP? (830) 896-7571 Page 8 | Rago Fabrication Page 8 | Rago Fabrication...
- Page 9 MODULAR STORAGE PANE L SYSTEM FULL LENGTH REAR BUMPER INSTALLATION GUIDE INSTALLATION GUIDE STEP 5 Remove the plastic covers shown below by pulling. NEED HELP? (830) 896-7571 Page 9 | Rago Fabrication Page 9 | Rago Fabrication...
- Page 10 MODULAR STORAGE PANE L SYSTEM FULL LENGTH REAR BUMPER INSTALLATION GUIDE INSTALLATION GUIDE STEP 6 **KEEP HARDWARE** Using a (10mm socket) remove the OEM hardware shown below. NEED HELP? (830) 896-7571 Page 10 | Rago Fabrication Page 10 | Rago Fabrication...
- Page 11 MODULAR STORAGE PANE L SYSTEM FULL LENGTH REAR BUMPER INSTALLATION GUIDE INSTALLATION GUIDE STEP 7 Using a (10mm socket), remove the OEM hardware located underneath the bumper as shown below. NEED HELP? (830) 896-7571 Page 11 | Rago Fabrication Page 11 | Rago Fabrication...
- Page 12 MODULAR STORAGE PANE L SYSTEM FULL LENGTH REAR BUMPER INSTALLATION GUIDE INSTALLATION GUIDE STEP 8 Using a (10mm socket) remove the mud flap hardware as shown below. NEED HELP? (830) 896-7571 Page 12 | Rago Fabrication Page 12 | Rago Fabrication...
- Page 13 FULL LENGTH REAR BUMPER INSTALLATION GUIDE INSTALLATION GUIDE STEP 9 Using a (10mm socket) remove the mud flap hardware located inside the wheel well as shown below. NEED HELP? (830) 896-7571 Page 13 | Rago Fabrication Page 13 | Rago Fabrication...
- Page 14 FULL LENGTH REAR BUMPER INSTALLATION GUIDE INSTALLATION GUIDE STEP 10 Using a (fastener removal tool), Remove the push pins located inside the wheel well as shown **KEEP HARDWARE** below. NEED HELP? (830) 896-7571 Page 14 | Rago Fabrication Page 14 | Rago Fabrication...
- Page 15 MODULAR STORAGE PANE L SYSTEM FULL LENGTH REAR BUMPER INSTALLATION GUIDE INSTALLATION GUIDE STEP 11 Remove the fender flare by pulling. Set aside. NEED HELP? (830) 896-7571 Page 15 | Rago Fabrication Page 15 | Rago Fabrication...
- Page 16 MODULAR STORAGE PANE L SYSTEM FULL LENGTH REAR BUMPER INSTALLATION GUIDE INSTALLATION GUIDE STEP 12 Next, Remove the push pin as shown below using a (fastener removal tool). NEED HELP? (830) 896-7571 Page 16 | Rago Fabrication Page 16 | Rago Fabrication...
- Page 17 FULL LENGTH REAR BUMPER INSTALLATION GUIDE INSTALLATION GUIDE STEP 13 Located inside the bumper on the sides push in all four sides of the clips and push out. PUSH NEED HELP? (830) 896-7571 Page 17 | Rago Fabrication Page 17 | Rago Fabrication...
- Page 18 MODULAR STORAGE PANE L SYSTEM FULL LENGTH REAR BUMPER INSTALLATION GUIDE INSTALLATION GUIDE STEP 14 Pull the sides out as shown below. PULL NEED HELP? (830) 896-7571 Page 18 | Rago Fabrication Page 18 | Rago Fabrication...
- Page 19 MODULAR STORAGE PANE L SYSTEM FULL LENGTH REAR BUMPER INSTALLATION GUIDE INSTALLATION GUIDE STEP 15 You can now remove the rear bumper. NEED HELP? (830) 896-7571 Page 19 | Rago Fabrication Page 19 | Rago Fabrication...
- Page 20 MODULAR STORAGE PANE L SYSTEM FULL LENGTH REAR BUMPER INSTALLATION GUIDE INSTALLATION GUIDE STEP 16 Remove the foam located on top of the hitch. NEED HELP? (830) 896-7571 Page 20 | Rago Fabrication Page 20 | Rago Fabrication...
- Page 21 MODULAR STORAGE PANE L SYSTEM FULL LENGTH REAR BUMPER INSTALLATION GUIDE INSTALLATION GUIDE STEP 17 Remove the plastic located on the sides as shown below using a (fastener removal tool). NEED HELP? (830) 896-7571 Page 21 | Rago Fabrication Page 21 | Rago Fabrication...
- Page 22 MODULAR STORAGE PANE L SYSTEM FULL LENGTH REAR BUMPER INSTALLATION GUIDE INSTALLATION GUIDE STEP 18 **KEEP HARDWARE** Using a (12mm socket), remove the crash supports located on the hitch. NEED HELP? (830) 896-7571 Page 22 | Rago Fabrication Page 22 | Rago Fabrication...
- Page 23 FULL LENGTH REAR BUMPER INSTALLATION GUIDE INSTALLATION GUIDE STEP 19 **CAUTION: TABS Remove the parking sensors from the bezels by prying outwards on the tabs. ARE FRAGILE, PRY GENTLY** NEED HELP? (830) 896-7571 Page 23 | Rago Fabrication Page 23 | Rago Fabrication...
- Page 24 MODULAR STORAGE PANE L SYSTEM FULL LENGTH REAR BUMPER INSTALLATION GUIDE INSTALLATION GUIDE STEP 20 Using your choice of cutting tools, cut along the line highlighted below. NEED HELP? (830) 896-7571 Page 24 | Rago Fabrication Page 24 | Rago Fabrication...
- Page 25 INSTALLATION GUIDE STEP 21 **Ensure to cut below the Using your choice of cutting tools, cut along the line highlighted below. mounting holes as shown below** NEED HELP? (830) 896-7571 Page 25 | Rago Fabrication Page 25 | Rago Fabrication...
- Page 26 OEM hardware removed from step 18 using a Install the provided (B2) (12mm socket). Next, Install the provided nut clips on top of the mounting plate as shown below. NEED HELP? (830) 896-7571 Page 26 | Rago Fabrication Page 26 | Rago Fabrication...
- Page 27 FULL LENGTH REAR BUMPER INSTALLATION GUIDE INSTALLATION GUIDE STEP 23 Now would be a good time to install the OEM plastic bumper with the hardware removed from step 4. NEED HELP? (830) 896-7571 Page 27 | Rago Fabrication Page 27 | Rago Fabrication...
- Page 28 FULL LENGTH REAR BUMPER INSTALLATION GUIDE INSTALLATION GUIDE STEP 24 After you fine tune your cut, remove the bumper and install the plastic trim removed from step 3. NEED HELP? (830) 896-7571 Page 28 | Rago Fabrication Page 28 | Rago Fabrication...
- Page 29 MODULAR STORAGE PANE L SYSTEM FULL LENGTH REAR BUMPER INSTALLATION GUIDE INSTALLATION GUIDE STEP 25 Using a (10mm socket), Install the OEM hardware shown below and re-install the plastic cover. NEED HELP? (830) 896-7571 Page 29 | Rago Fabrication Page 29 | Rago Fabrication...
- Page 30 Next, Using a (7/32 allen) and a (9/16 wrench), install the support bracket on the bumper as shown below with the provided A1, A2) 3/8” hardware. NEED HELP? (830) 896-7571 Page 30 | Rago Fabrication Page 30 | Rago Fabrication...
- Page 31 INSTALLATION GUIDE STEP 27 (C, C1) Install the provided 3/8” carriage bolts and retaining washers into the side of the bumper pointing outwards as shown below. NEED HELP? (830) 896-7571 Page 31 | Rago Fabrication Page 31 | Rago Fabrication...
- Page 32 INSTALLATION GUIDE STEP 28 Use a (heat gun) to soften adhesive and use (flathead screwdriver) remove the inner sensor bezels from the OEM bumper. **Keep for install** NEED HELP? (830) 896-7571 Page 32 | Rago Fabrication Page 32 | Rago Fabrication...
- Page 33 Remove double sided tape from the bezel until the surface is clear of residue. Tec tip: Use a razor blade or brake clean to remove adhesive. NEED HELP? (830) 896-7571 Page 33 | Rago Fabrication Page 33 | Rago Fabrication...
- Page 34 INSTALLATION GUIDE INSTALLATION GUIDE STEP 30 Install the provided 3m double sided tape to each side of the bezel wings and trim excess with a (razor blade). NEED HELP? (830) 896-7571 Page 34 | Rago Fabrication Page 34 | Rago Fabrication...
- Page 35 Install the sensor bezels in the orientation shown below. **CAUTION: DOUBLE SIDED TAPE TAKES UP TO 72 HOURS TO CURE FULLY. ENSURE TO CLEAN THE SURFACE FOR BEST RESULTS** NEED HELP? (830) 896-7571 Page 35 | Rago Fabrication Page 35 | Rago Fabrication...
- Page 36 STEP 32 Install the blind spot sensors with the provided bracket and the provided (E, E2, E3) Hardware using a (5/32 allen) and a (7/16 Wrench). NEED HELP? (830) 896-7571 Page 36 | Rago Fabrication Page 36 | Rago Fabrication...
- Page 37 FULL LENGTH REAR BUMPER INSTALLATION GUIDE INSTALLATION GUIDE STEP 33 You can now install the bumper with the provided (B, B1) 3/8” hardware using a (9/16 socket). NEED HELP? (830) 896-7571 Page 37 | Rago Fabrication Page 37 | Rago Fabrication...
- Page 38 (A, A1, A2) 3/8 hardware using a (7/32 allen) and a (9/16 wrench). NEED HELP? (830) 896-7571 Page 38 | Rago Fabrication Page 38 | Rago Fabrication...
- Page 39 FULL LENGTH REAR BUMPER INSTALLATION GUIDE INSTALLATION GUIDE STEP 35 Bend the tab next to the bracket installed in step 34 in or out as shown below. NEED HELP? (830) 896-7571 Page 39 | Rago Fabrication Page 39 | Rago Fabrication...
- Page 40 INSTALLATION GUIDE STEP 36 Install the side pods with the provided (A1, A2) 3/8 hardware using a (9/16 wrench) into the hardware installed on step 27. NEED HELP? (830) 896-7571 Page 40 | Rago Fabrication Page 40 | Rago Fabrication...
- Page 41 INSTALLATION GUIDE STEP 37 Install the provided (A, A1, A2) 3/8 hardware to the bracket installed on step 34 using a (7/32 allen) and a (9/16 wrench). NEED HELP? (830) 896-7571 Page 41 | Rago Fabrication Page 41 | Rago Fabrication...
- Page 42 1/4 rivet nut and (E1, F, H) 1/4 hardware and spacer inside the wheel well as shown below using a (rivet nut hand tool) and a (5/32 allen). NEED HELP? (830) 896-7571 Page 42 | Rago Fabrication Page 42 | Rago Fabrication...
- Page 43 MODULAR STORAGE PANE L SYSTEM FULL LENGTH REAR BUMPER INSTALLATION GUIDE INSTALLATION GUIDE STEP 39 Trim the fender flairs using your choice of cutting tools and install. NEED HELP? (830) 896-7571 Page 43 | Rago Fabrication Page 43 | Rago Fabrication...
- Page 44 Install your sensors into the bezels. For installing the outer sensors and blind spots, insert into the window cutout located on the side of the bumper as shown below. NEED HELP? (830) 896-7571 Page 44 | Rago Fabrication Page 44 | Rago Fabrication...
- Page 45 MODULAR STORAGE PANE L SYSTEM FULL LENGTH REAR BUMPER INSTALLATION GUIDE INSTALLATION GUIDE STEP 41 Install the provided (B2) nut clips onto the provided cover plate as shown below. NEED HELP? (830) 896-7571 Page 45 | Rago Fabrication Page 45 | Rago Fabrication...
- Page 46 INSTALLATION GUIDE INSTALLATION GUIDE STEP 42 Next, Install the provided cover plate on top of the bumper and using a (7/32 allen), install the provided 3/8” hardware. NEED HELP? (830) 896-7571 Page 46 | Rago Fabrication Page 46 | Rago Fabrication...
- Page 47 INSTALLATION GUIDE STEP 43 Stand back and enjoy your new RAGO Full Length Rear Bumper. Check and re-tighten all mounting bolts after 100 miles and periodically thereafter. NEED HELP? (830) 896-7571 Page 47 | Rago Fabrication Page 47 | Rago Fabrication...
Need help?
Do you have a question about the R770235090103 and is the answer not in the manual?
Questions and answers