
Related Manuals for Honeywell Notifier AM Series


Summary of Contents for Honeywell Notifier AM Series
- Page 1 AM SERIES Installation Manual AM-2000-N for firmware V.013c or higher AM-4000 for firmware V.1.66c or higher AM-6000-N for firmware v.019c or higher Analog fire panel...
-
Page 2: Table Of Contents
DETECTION SYSTEM LIMITS PRECAUTIONS EN 54: INFORMATIONS 1 - GENERAL DESCRIPTION 2 - INSTALLATION 2.1 - AM2000/AM4000 wall assembly 2.2 - AM6000 wall assembly 2.3 - Extractable labels on the AM2000 and AM4000 2.4 - Extractable labels on the AM6000 3 - ELECTRICAL FEATURES 3.1 - Earthing 3.2 - Main power supply... - Page 3 5 - MODULE AND SENSOR CONNECTION 5.1 - Example of closed line (style 6) 5.1.1 - Loop connection supply (style 6) 5.2 - Notes on the connection lines used 5.2.1 - Connection features (Class“B”) 5.3 - test procedure for analogue system lines 5.3.1 - Line resistance 5.3.2 - Line insulation 5.3.3 - Test procedure for analogue system lines...
-
Page 4: Detection System Limits
NOTE: Do not try to install the control unit and devices connected without reading this manual. DETECTION SYSTEM LIMITS An alarm or fire detection system can be very useful for the prompt warning of any dangerous event, such as fire, a robbery or a simple burglary, in some cases it can automatically manage events (transmission of messages for room evacuation, automatic fire-extinguishing, TVCC system interface, access route or door blockage, automatic warning to authorities, etc.), but in any case, it does not ensure protection against damages to propriety or... -
Page 5: 54: Informations
This device is marked CE to certify it is in conformity with the requirements of the European community Directives: • Electromagnetic Compatibility Directive 89/336/EEC (and the directive 92/23/EEC) • Low Voltage Directive 73/23/EEC NATIONAL RULES This device must be installed and must operate in accordance with these instructions and to the rules in force in the installation place. -
Page 6: General Description
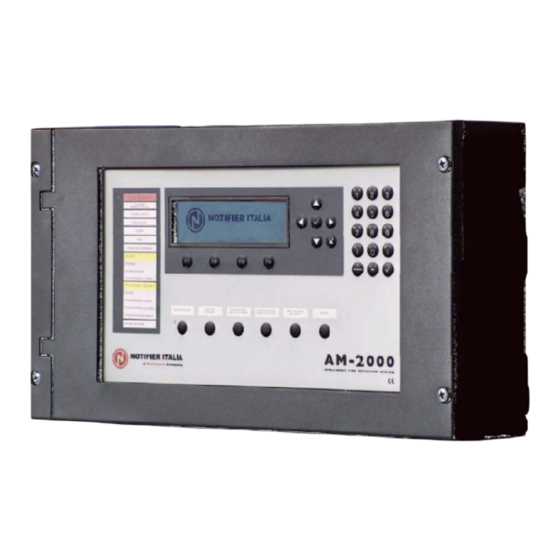
1 – GENERAL DESCRIPTION The AM2000 40000 6000 controls unit are a fire detection control unit manufactured in conformity with the EN.54.2 and EN.54.4 rules. TECHNICAL FEATURES • Multi-microprocessor system • LCD Display having 8 lines and 40 columns for (240 x 64 points) AM2000 and AM4000. •... -
Page 7: Installation
2 – INSTALLATION 2.1 - AM2000 AND AM4000 WALL ASSEMBLY Knockout hole Knockout hole lower side lower side ∅28,00 ∅28,00 3 knockout hole ∅28,00 The control unit must be installed to the wall Moreover, if the control unit must be so as to allow a clear view of the display installed to the wall beside a corner and easy access by the operator. -
Page 8: Am6000 Wall Assembly
2.2 - AM6000 WALL ASSEMBLY The control unit must be installed to the wall Moreover, if the control unit must be so as to allow a clear view of the display installed to the wall beside a corner and easy access by the operator. For wall, the minimum distance from the example, it allows an optimal view of the latter must be at least 280 mm, so... -
Page 9: Extractable Labels On The Am2000 And Am4000
2.3 - EXTRACTABLE LABELS ON THE AM2000 AND AM4000 The PANELS control unit are provided with extractable labels to indicate the State LED functions and some function buttons. The standard labels provided with the control unit are in Italian Alternative labels in the required language can be printed on high quality paper by using the enclosed model Etichetta ET-0210B... -
Page 10: Extractable Labels On The Am6000
2.4 - EXTRACTABLE LABELS ON THE AM6000 LABEL (A) LABEL (B) The acontrol unit are provided with extractable labels to indicate the State LED functions and some function buttons. The standard labels provided with the control unit are in Italian Alternative labels in the required language can be printed on high quality paper by using the enclosed model AM SERIES... -
Page 11: Electrical Features
3 – ELECTRICAL FEATURES ■ ■ Operation temperature: - 5° C ÷ + 40° C. ■ ■ ■ Relative humidity: 10 % ÷ 93 % (without condensation). ■ ■ ■ Storage temperature: - 10°C÷ + 50°C. ■ ■ ■ AM-2000 and AM-4000 Weight: 6,150 Kg ■... -
Page 12: Power Supply And Battery Operation
3.5 – POWER SUPPLY AND BATTERY OPERATION The main microprocessor of the control unit periodically checks the state of the main AC power supply source, batteries and the recharging circuit. The control unit will automatically switch on the standy-by battery source when AC mains fails. When the control unit operates through AC mains, the main microprocessor controls the battery charger output and the presence of them. -
Page 13: User Power Supply Output
3.7 – USER POWER SUPPLY OUTPUT The AM2000/AM4000/AM6000 control units had: AM2000 AM4000 - A 24 Vdc fixed output AM6000 - A 24 Vdc resettable output The output is protected by 1 A FAST fuse CNA-01 Use the fixed voltage output to power external loads such as, for example, LCD repetition 32 31 30 24 23 22... -
Page 14: Siren Controlled Output Connection
3.10 – SIREN CONTROLLED OUTPUT CONNECTION AM4000 AM2000 AM6000 Siren output connections (refer to basic board topography) 05 06 3.10.1 – POLARIZED DEVICES (ELECTRONIC SIREN, ECC..) 47 K ¼ W AM2000 47 K ¼ W AM4000 47 K ¼ W AM6000 3.10.2 –... -
Page 15: Rs.485 Serial Line
3.11 – RS.485 SERIAL LINE EN54-2 12.5 • The AM2000/AM4000/AM6000 control units can be connected to a EN54 Connection integrity peripheral family through the RS.485 serial line. • The RS. 485 line must be installed in “MULTI-POINT” The RS.485 network does not provide configuration (daisy chain). -
Page 16: Installation With Separated Power Supply
3.11.2 – INSTALLATION WITH SEPARATED POWER SUPPLY Connect two wires from the control unit RS.485 terminals (LIN + and LIN- +24V GND +24V GND terminals) correspondent EOL= 120 Ω EOL= 120 Ω terminals of the first device on the line. Continue the wiring from the first device to the following device, and so Install the line end resistance (120-150... -
Page 17: System Components
4 – SYSTEM COMPONENTS 4.1 – COMMUNICATION LINES FITTED WITH SENSORS/MODULE The AM2000, AM4000 and AM6000 control units communicates with intelligent detection and control devices which are addressable through a 2 wire line. The line can be connected to respect the specifications relevant to the signalling circuit lines of the STYLE 4 (open line) and STYLE 6 (closed line). -
Page 18: Module And Sensor Connection
5 – MODULE AND SENSOR CONNECTION 5.1 – EXAMPLE OF CLOSED LINE (STYLE 6) For the connections, refer to the “Analogue system device installation manual” document : M-199.1-SCH-ITA by Notifier Italia. analog push-button Separated derivation to other devices of the loop AM SERIES Installation manual PAGE - 15... -
Page 19: Loop Connection Supply (Style 6)
5.1.1 – LOOP CONNECTION SUPPLY (STYLE 6) FUNCTIONS IN ACCORDANCE WITH THE SPECIFICATIONS RELEVANT TO THE NFPA STILE 6 SIGNALLING CIRCUITS Protected rooms section 2 ISO-X insulator module ISO-X insulator module Protected rooms Protected rooms section 1 section 3 ISO-X insulator module ISO-X insulator module CHANNEL “A”... -
Page 20: Notes On The Connection Lines Used
5.2 – NOTES ON THE CONNECTIONG LINES USED CHANNEL B Loop SLC A “T” derivation is not allowed CHANNEL A SCREEN The total length of the loop couple (from the control unit output and input) SHALL NOT exceed 3.000 mt CHANNEL B CHANNEL A The direct current resistance of the loop couple SHALL NOT exceed 40 Ohm. -
Page 21: Connection Features (Class"B")
5.2.1 – CONNECTION FEATURES (CLASS“B”) BRANCH B SCREEN BRANCH C BRANCH A BRANCH D Shortcircuit one terminal point of a branch at a time and measure the DC reistance, from the beginning of the channel to the end of that particular branch. The total DC resistance from the panel to the branch end MUST NOT exceed 40 Ohm. -
Page 22: Test Procedure For Analogue System Lines
5.3 – TEST PROCEDURE FOR ANALOGUE SYSTEM LINES Before powering the control unit lines, check the following values: NOTE: A DIGITAL TESTER IS REQUIRED 5.3.1 – LINE RESISTANCE Short-circuit positive and negative of an end of the system and place between (+) and (-) of line through a tester. STYLE 4 STYLE 6 The resistance must be lower than 40 Ohm. -
Page 23: Boards And Terminals
6 – BOARDS AND TERMINALS 6.1 – “AM2000” FRONT BOARD TOPOGRAPHY JLA-B LD19 Jumpers to select the type of line cable Earth dispersion N.B.: NON UTILIZZARE ON (default) NOTE: DO NOT USE Signalling led JDSPE Jumper to enable earth dispersion detection. (Default : ON) Reset push button Trimmer for regulation... -
Page 24: Am6000 Front Board Topography
6.3 – AM6000 FRONT BOARD TOPOGRAPHY Main Board termianl block Connenctor AM SERIES Installation manual PAGE - 21 SERIE_AM_manu-inst Doc. M-142.2-SERIEAM -ITA Rev A.1 NOTIFIER ITALIA... -
Page 25: Am2000" And "Am4000" Basic Board Topography
6.4 – “AM2000” and “AM4000” BASIC BOARD TOPOGRAPHY AM4000 CNU AM2000 CNU Termianl board Termianl board JUMPER SELECTION FOR FAULT RELAY TERMINAL BLOCK FOR EXPANSION CONTACTS NO-N.C. BOARD. DEFAULT N.O.. JUMPER SELECTION FOR ALARM RELAY CONTACTS N.O.-N.C. DEFAULT N.O.. JUMPER SELECTION FOR STATUS LED FOR ALARM RELAY CONTACTS SERIAL OUTPUT:... -
Page 26: Am2000 Cnu Terminal Block
6.4.1 – AM2000 CNU TERMINAL BLOCK N° Descrizione Caratteristiche Note Siren Output (Idle negative) Output protected by self-reset 0,75A fuse (polarity inversion output). Siren Output Available total current : 1 A (Idle positive) (= sum of the three outputs) +24Vcc Resettable Outputs protected by self-reset 1 A fuse +24Vcc User Breakdown relay C... -
Page 27: Am6000" Basic Board Topography
6.5 – “AM6000” BASIC BOARD TOPOGRAPHY 6.5.1 – AM6000 CNA TERMINAL BLOCK N° Descrizione Caratteristiche Note Alarm relay C NA -NC selectable through JALL 30Vcc 1A resistive contact Alarm relay NA-NC Breakdown relay C NA -NC selectable through JGST 30Vcc 1A resistive contact Breakdown relay NA-NC Remote command of Reset Remote command of Res. -
Page 28: Lib600 Board Topography (Only For Am6000)
6.6 – LIB600 BOARD TOPOGRAPHY (ONLY FOR AM6000) 6.6.1 – LIB600 CNU TERMINAL BLOCK N° Description Features Notes Breakdown relay C. N.A./N.C. selectable Breakdown relay N.C./ N.A. through JGST Alarm relay C. N.A./N.C. selectable through JGST Alarm relay N.C./N.A. Line 4 B- Line 4 B+ LINE 4 / 8 / 12 / 16 Line 4 A-... -
Page 29: Test And Starting Operation
7 – TEST AND STARTING OPERATION The Control unit installation must be performed after having carefully read the instructions contained in the installation manual and the programming manual. Once mechanical installation of the control unit has been completed, perform the following operations: •... -
Page 30: Control Unit Periodical Maintenance
8 – CONTROL UNIT PERIODICAL MAINTENANCE Check that the green led “VOLTAGE” is on Check that all other control unit leds are off Press the function F4 key and enter the level 2 password to access the “TEST” menu. Use the arrow keys 56 to select the item “Led” (lamp test function), press the enter key to perform the test, check that all light indications are on for some seconds. -
Page 31: Power Supply - Current Calculation
9 – POWER SUPPLY – CURRENT CALCULATION The power supply must be able to continuously power all the internal system devices (and all external devices) during the stand-by period, that is in NON-alarm conditions. Use the table A to calculate the load in stand-by conditions. Use the table B to calculate the additional current which is necessary in Alarm conditions A 24 Vcc internal power supply for a total of 2,7 Ampere is available on the power supply for the system operation NON ALARM... - Page 32 NON ALARM ALARM condition condition Item Consumption Total Current Consumption Total current for each (each x Q) for each (each x Q) CONTROL UNIT AM6000 0.200 0.200 0.250 0.250 SIB-N |_________| |_________| Devices connected to the Siren output Current from loops Refer to table 2 Loop 1 |_________|...
- Page 33 Table 2 PERIPHERALS POWERD BY LOOPS Device type Quantity Total current Total current Normal condition Alarm condition Series 500 detectors Series 700 detectors M500K / KA buttons UL / FM single modules Series 700 single modules Series 700 double modules Series MA modules MMX-10 N CMX-10 R...
- Page 34 E-mail: notifier@notifier.it A Honeywell company Every care has been taken in the preparation of this data sheet but no liability can be accepted for the use of the information therein. Design features may be changed or amended without prior notice.
Need help?
Do you have a question about the Notifier AM Series and is the answer not in the manual?
Questions and answers