Table of Contents
Advertisement
Quick Links
THIS MANUAL MUST BE LEFT WITH THE
HOMEOWNER FOR FUTURE REFERENCE
Installation and servicing of air conditioning equipment
can be hazardous due to internal refrigerant pressure
and live electrical components. Only trained and
qualified service personnel should install or service
this equipment. Installation and service performed by
unqualified persons can result in property damage,
personal injury, or death.
For your safety, do not store or use gasoline or other
flammable vapors and liquids in the vicinity of this or any
other appliance. Such actions could result in property
damage, personal injury, or death.
This unit is designed for use with R-454B refrigerant only.
The installation of this appliance must conform to the requirements of the National Fire Protection Association; the National
Electrical Code, ANSI/NFPA No. 70 (latest edition) in the United States; the Canadian Electrical Code Part 1, CSA 22.1
(latest edition) in Canada; and any state or provincial laws or local ordinances. Local authorities having jurisdiction should
be consulted before installation is made. Such applicable regulations or requirements take precedence over the general
instructions in this manual.
508688L01
WARNING
WARNING
Save these instructions for future reference
INSTALLATION AND MAINTENANCE
INSTRUCTIONS
LRP15HPK SERIES UNITS
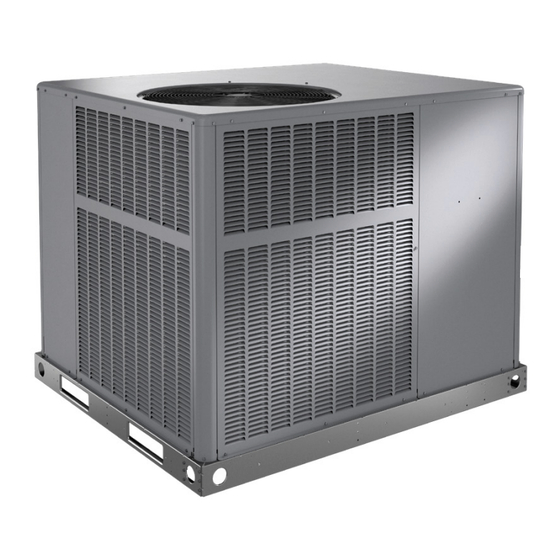
RESIDENTIAL PACKAGED UNITS
Air Conditioners and Heat Pumps
508688L01
08/2024
Table of Contents
Unit Dimensions ..........................................................4
Roof Curb Dimensions ................................................6
Adjustable Roof Curb Dimensions...............................8
Installation .................................................................11
Electrical Wiring .........................................................13
Duct System ..............................................................15
Condensate Drain......................................................16
Sequence of Operation..............................................17
Defrost System ..........................................................19
System Performance .................................................21
Maintenance ..............................................................21
Refrigerant Detection System.................................... 25
Wiring Diagrams ........................................................29
Decommissioning ......................................................30
*P508688L01*
CAUTION
Issue 2434
LENNOX INDUSTRIES
DALLAS, TEXAS
(P) 508688L01
Page 1 of 30
Advertisement
Table of Contents

Related Manuals for Lennox LRP15HPK Series


Summary of Contents for Lennox LRP15HPK Series
-
Page 1: Table Of Contents
INSTALLATION AND MAINTENANCE INSTRUCTIONS LRP15HPK SERIES UNITS RESIDENTIAL PACKAGED UNITS Air Conditioners and Heat Pumps 508688L01 08/2024 THIS MANUAL MUST BE LEFT WITH THE Table of Contents HOMEOWNER FOR FUTURE REFERENCE Unit Dimensions ............4 Roof Curb Dimensions ..........6 Adjustable Roof Curb Dimensions.......8 Installation ..............11... - Page 2 WARNING WARNING Maximum altitude of application is 10,000 feet (3,200 m) For appliances using A2L refrigerants connected via an above sea level. air duct system to one or more rooms, only auxiliary devices approved by the appliance manufacturer or declared suitable with the refrigerant shall be installed in connecting ductwork.
- Page 3 IMPORTANT IMPORTANT • Ensure that the REFRIGERATING SYSTEM is In addition to conventional charging procedures, the earthed prior to charging the system with refrigerant. following requirements shall be followed. • Label the system when charging is complete (if not • Ensure that contamination of different refrigerants already).
- Page 4 ETIPR..charge (lb) <4 108173-02 charge (kg) <1.8 Minimum Conditioned Area (ft N/A* Minimum Conditioned Area (m N/A* 11.2 14.0 Units with refrigerant charge below 4 lb.(1.8 kg) do not require a minimum conditioned room area. -Units supply duct must be connected via air duct system to one or more rooms, totaling minimum conditioned area. Table 1.
-
Page 5: Unit Dimensions
Unit Dimensions (Inches) - Small Base Air Conditioners & Heat Pumps 47.66 2.48 1.98 2.33 2.33 16.77 14.02 RETURN SUPPLY 18.52 11.49 11.49 16.07 TOP VIEW 47.66 POWER ENTRY POWER ENTRY 6.94 3.25 4.56 20.31 21.06 23.19 SIDE VIEWS CONDENSATE 40.89 21.63 DRAIN 3/4 NPT... - Page 6 Unit Dimensions (Inches) - Large Base Air Conditioners & Heat Pumps 56.13 2.11 2.39 2.33 2.33 19.49 19.49 RETURN SUPPLY 18.52 11.49 11.49 TOP VIEW 16.07 47.66 POWER ENTRY POWER ENTRY 6.94 3.25 10.06 25.81 26.56 SIDE VIEWS 28.68 44.89 21.63 CONDENSATE DRAIN 3/4 NPT...
-
Page 7: Roof Curb Dimensions
Roof Curb Dimensions (Inches (mm)) - Small Base Air Conditioners & Heat Pumps 3/4 (19) RETURN Opening for Power Entry OPENING Through Unit Base 5-1/2 x 5-5/8 in. (140 x 31 mm) 16-7/8 44-3/8 (429) (1127) 11-1/2 2-1/8 (287) (54) Insulated Panels 5-3/4... - Page 8 Roof Curb Dimensions (Inches (mm)) - Large Base Air Conditioners & Heat Pumps 3/4 (19) Opening for Power Entry Through Unit Base 5-1/2 x 5-5/8 in. 19-1/2 (140 x 31 mm) 44-3/8 (380) 11-1/2 2-1/8 (1127) (287) (54) RETURN Insulated OPENING Panels 19-1/2...
-
Page 9: Adjustable Roof Curb Dimensions
Adjustable Roof Curb Dimensions (Inches) - Small Base Air Conditioners & Heat Pumps (Knock-Down Style) CLIPLOCK CORNER DETAIL Top Edge Wood Nailer Strip CURB PROFILE Bottom Flange Typical Slot Typical Locking Tab NOTE: See Cliplock 1000 installation instructions for complete assembly and installation procedures and requirements. - Page 10 Adjustable Roof Curb Dimensions (Inches) - Large Base Air Conditioners & Heat Pumps (Knock-Down Style) CLIPLOCK CORNER DETAIL Top Edge Wood Nailer Strip Bottom Flange CURB PROFILE Typical Slot Typical Locking Tab NOTE: See Cliplock 1000 installation instructions for complete assembly and installation procedures and requirements.
- Page 11 Adjustable Roof Curb Dimensions (Inches) - Air Conditioners & Heat Pumps (Welded Style) Front Flange 8 (203) NOTE: Unit Base Rail Minimum Clips (4) Height 4 (102) Built-In Rain Sides and Diverter Back Flange (Not Shown) 6 (152) Built-In Drip Edge Unit Base Rail 3/4 (76) Unit Base Rail...
-
Page 12: Installation
Location The unit is designed to be located outdoors with sufficient WARNING clearance for free entrance to the air inlet and discharge Improper installation, adjustment, alteration, service, air openings. The location must also allow for adequate or maintenance can cause injury or property damage. service access. - Page 13 • If any hot work is to be conducted on the refrigerating For systems containing refrigerant, all repair and equipment or any associated parts, the appropriate fire maintenance to electrical components shall include initial extinguishing equipment shall be available to hand. safety checks and component inspection procedures such Have a dry powder or CO2 fire extinguisher adjacent as that capacitors are discharged in a safe manner to avoid...
- Page 14 Use of Unit During Construction • When breaking into the refrigerant circuit to make repairs – or for any other purpose – conventional Use of this unit as a construction heater or air conditioner is procedures shall be used. However, for flammable not recommended during any phase of construction.
-
Page 15: Electrical Wiring
Clearances All units require certain clearances for proper operation CAUTION and service. Refer to Table 1 for the minimum clearances to combustibles required for construction, servicing, and Before lifting a unit, make sure that the weight is proper unit operation. distributed equally on the cables so that it will lift evenly. -
Page 16: Duct System
The power supply must be sized and protected according to specifications supplied. CAUTION The unit must be grounded with a separate ground When connecting electrical power and control wiring conductor. See Figure 1 for typical field wiring connection. to the unit, waterproof-type connectors must be used The wiring diagram can be found on the unit inside the so that water or moisture cannot be drawn into the unit access panel. -
Page 17: Condensate Drain
The unit is shipped ready for horizontal flow (side duct This package unit is equipped with a 3/4” FPT coupling connections) or downflow (bottom duct connections). All for condensate line connection. Plumbing must conform units are equipped with a drain pan overflow switch that is to local codes. -
Page 18: Sequence Of Operation
Sequence of Operation Crankcase Heater (if used) Some models may be equipped with a crankcase heater RDS Control Check to prevent excessive migration of liquid refrigerant into the The RDS Non-Communicating Blower Control Board is compressor during off cycles. Power must be maintained equipped with a Test/Reset button. -
Page 19: Cooling System
This is normal operation. Read through the jumper settings blower continues to operate for 90 seconds after the section before adjusting the jumper to obtain the appropriate compressor is de-energized. The delay is 5 minutes on the blower speed. To change jumper positions, gently pull first start. -
Page 20: Defrost System
The thermostat automatically closes the R to G circuit, outdoor coil. This typically will translate into longer running which brings on the indoor blower. Upon satisfying cooling time between defrost cycles as more frost accumulates on demand, the thermostat will open the above circuits and the outdoor coil before the board initiates defrost cycles. - Page 21 Coil Sensor (heat/cool), outdoor ambient temperature, coil coil temperature sensor considers outdoor temperature (outdoor coil) and compressor run time to temperatures below -35°F (-37°C) or above 120°F (48°C) determine when a defrost cycle is required. as a fault. If the coil temperature sensor is detected as •...
-
Page 22: System Performance
System Performance Termination The defrost cycle ends when the coil temperature exceeds This equipment is a self-contained, factory optimized the termination temperature or after 14 minutes of defrost refrigerant system, and should not require adjustments to operation. If the defrost is terminated by the 14-minute system charge when properly installed. -
Page 23: Evaporator Coil
Evaporator Coil Prior to service, safety checks are necessary to minimize risk of ignition. Dirt and debris should not be allowed to accumulate on the evaporator coil surface or other parts in the air circuit. Service will be undertaken under a controlled procedure Cleaning should be as often as necessary to keep coil to minimize risk of flammable gas or vapor being present clean. - Page 24 Table 8. Heating Performance - HP / DF Models 70 Deg. F Return Air Air Temperature Entering Evaporator Coil, Degree F COOLING INPUT Pressure 0° 5° 10° 17° 20° 25° 35° 40° 47° 50° 55° 60° (1000 BTU) Suction +/2 PSIG Liquid+/-4 PSIG Subcooling...
- Page 25 Table 9. Blower Performance - AC 0 through 0.80 in. w.g. External Static Pressure Range Blower Control Jumper Speed Positions Model “ADJUST” Jumper “COOL” Speed - cfm “HEAT” Speed - cfm “CONTINUOUS FAN” Speed - cfm Setting 1100 1100 1000 NORM 1000 1100...
-
Page 26: Leak Detected
Leak Detected When the RDS Non-Communicating Blower Control Board detects a refrigerant leak: The RDS Non-Communicating Blower Control Board shuts off the (R) input (24VAC power) to the thermostat, which de-energizes the outdoor unit compressor and heat sources, such as gas and/or electric strip heat. No heating or cooling demands will be met. - Page 27 Red LED Diagnostic Codes TABLE 15. Additional Button Functions Red diagnostic codes indicate a specific RDS Non- State Press Action Communicating Blower Control Board issue. Yellow Initializing Short Skips remaining pre-purge after sen- diagnostic codes indicate the sensor’s position (if sors are recognized by the RDSC applicable).
-
Page 28: Additional Applications
Additional Applications Heating Demand 1 - Prompt a heating demand at the thermostat. In zoned applications, all dampers will remain open when the RDS Non-Communicating Blower Control Board is in 2 - Press the Test button on the RDS Non-Communicating Blower Control Board. - Page 29 Figure 9 . HP Wiring Diagram 508688L01 Issue 2434 Page 29 of 30...
-
Page 30: Wiring Diagrams
Decommissioning Before carrying out this procedure, it is essential that the technician is completely familiar with the equipment and all its detail. It is recommended good practice that all refrigerants are recovered safely. Prior to the task being carried out, an oil and refrigerant sample shall be taken in case analysis is required prior to re-use of recovered refrigerant.
Need help?
Do you have a question about the LRP15HPK Series and is the answer not in the manual?
Questions and answers