
Related Manuals for Heat Design R500/80F Series


Summary of Contents for Heat Design R500/80F Series
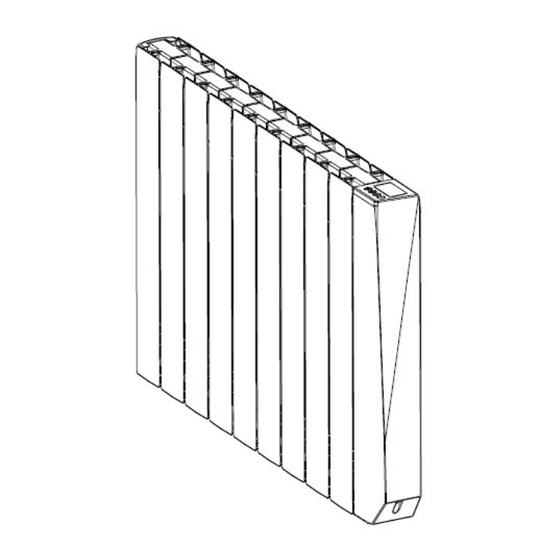
- Page 1 OIL FILLED HEATER MODELS : R500/80F Series PLEASE READ AND SAVE THESE INSTRUCTIONS This product is only suitable for well insulated spaces or occasional use.
-
Page 2: Important Safety Instructions
IMPORTANT SAFETY INSTRUCTIONS: This appliance can be used by children aged from 8 years and above and persons with reduced physical, sensory or mental capabilities or lack of experience and knowledge if they have been given supervision or instruction concerning use of the appliance in a safe way and understand the hazards involved. - Page 3 qualified persons in order to avoid a hazard. The heater must not be located immediately below an electrical socket-outlet. Don’t use this heater in the immediate surroundings of a bath, a shower or a swimming pool. Do not use this heater with a programmer, timer, separate remote-control system or any other device that switches the heater on automatically, since a fire risk exists if the heater is covered or...
- Page 4 manual. Means for disconnection having a contact separation in all poles must be incorporated in the fixed wiring in accordance with the wiring rules. I / ELECTRICAL CONNECTION Your heater must only be installed in a fixed position in accordance with national installation rules.
- Page 5 Outside volume Ground Hidden volume If you are not sure, we suggest that you to contact a professional electrician for assistance. Mounting the device To install your device: Make sure distances to walls and objects are respected. 1. Use the screws, dowels and brackets supplied by the manufacturer.
- Page 6 Caution: Before switching on the appliance make sure that the radiator is correctly fixed to the wall.
-
Page 7: Technical Specification
II / TECHNICAL SPECIFICATION Radiator supply: 230V~ 50Hz Power: 1000W, 1500W, 2000W,... - Page 8 TECHNICAL CHARACTERISTICS OF THE THERMOSTAT -Under wire control mode, 6 modes are available: 1) comfort, 2) comfort- 1, 3) comfort-2, 4) Economic, 5) anti-frozen 6) Power off -Performance of regulation: +/- 1ºC -Range of temperature control: + 7ºC to + 30ºC -Protection: IP24 III / OPERATION 1 / Description of the control panel...
- Page 9 To switch on or off your heater, press briefly the ON / OFF button. After pressing button, your heater turns into COMFORT mode. To change the modes, press the Mode button. Each time you change the MODE as follows: COMFORT MODE - ECONOMIC MODE- ANTIFREEZE MODE- PROGRAM MODE-PILOT WIRE MODE.
- Page 10 ECONOMIC MODE (0 to 24H) COMFORT MODE This is the normal operating mode of your radiator. The unit operates until the room temperature reaches the set temperature set previously. The pre-set temperature is 19ºC. Put your radiator in COMFORT MODE when the rooms are occupied.
- Page 11 Press ENTER. until minutes flash ("00"), then set the minutes by pressing the UP and DOWN buttons, 4. Press ENTER.week flashes ("1") Then UP and DOWN buttons select the day of the week 1 = Monday, 2 = Tuesday, 3 = Wednesday, 4 = Thursday, 5 = Friday, 6 = Saturday, 7 = Sunday, then press ENTER.
- Page 12 7. To edit a program (P1 to P9) Example: Edit the P1 program. a. Press the ENTER button for 3 seconds until the time flashes ("08"). b. Then press ENTER. flashes ("38"). c. Then press ENTER. flashes "1". d. Then press ENTER. e.
- Page 13 The next step is programming your radiator for each hour (from 00:00 to 24:00) of each day of the week (1 to 7). For each hour you must choose either COMFORT MODE or ECONOMIC MODE. Press UP to have your heater operate in COMFORT MODE during this time or DOWN to operate on the ECONOMIC MODE.
- Page 14 P3: Comfort mode from 6H Comfort mode from 6H to 9H59 and from 16H to to 9H59, from 12H to 14H59 22H59. and from 16H to 22H59. Economy mode from 10H to Economy mode from 15H59 and from 23H to 5H59 and from 5H59.
-
Page 15: Keyboard Lock
Comfort mode 8H to 17H59. Economy mode from 18H to 7H59. Example: Office during the day. PILOT WIRE MODE The appliance will be controlled by the external control box. Under wire control mode, 6 modes are available: 1) comfort, 2) comfort-1, 3) comfort-2, 4) Economic, 5) anti-frozen 6) Power off KEYBOARD LOCK The screen is locked and the buttons stop responding. - Page 16 Temperature compensation "+" Function for a higher temperature "-" function for a lower temperature. Adjust the temperature in steps of -5 to +5 degrees. If it is different from the temperature you find by other means of measurement, you can adjust this gap. A difference of 1℃ is normal and does not require adjustment.
- Page 17 In heating mode, when the room temperature drops 2℃ minutes, indicating that the window open mode is activated, the heating function stops. heating mode reactivated automatically after minutes. However, you can re-activate the heating mode by manually pressing the "On" button. In "On" mode, the function disappears and the heating functions normally.
- Page 18 Maximum continuous heat electronic heat charge control with room and/or outdoor output temperature feedback max,c Auxiliary electricity Fan assisted heat output consumption At nominal heat output Type heat output/room temperature control(select one) At minimum heat output Single stage heat and output and no room temperature control Two or more manual stages, no room temperature In standby mode...
- Page 19 With distance control option With adaptive start control With working time limitation With black bulb sensor Heat Design, 30 – 60 Hawthorn Road, Western Industrial Estate, Naas Road, Contact details : Dublin 12. D12 E2WF. T 01 – 4089192. Model identifier: R500/80-100F, R500/80-100F1...
-
Page 20: Maintenance
With distance control option With adaptive start control With working time limitation With black bulb sensor Heat Design, 30 – 60 Hawthorn Road, Western Industrial Estate, Naas Road, Contact details: Dublin 12. D12 E2WF. T 01 – 4089192. Maintenance : TURN OFF THE UNIT BEFORE ANY MAINTENANCE. - Page 21 By respecting this approach, you contribute to the preservation of natural resources and the protection of human health. Heat Design, 30 – 60 Hawthorn Road, Western Industrial Estate, Naas Road, Dublin 12. T: 01 408 9192 F: 01 408 9193...
Need help?
Do you have a question about the R500/80F Series and is the answer not in the manual?
Questions and answers