Table of Contents
Advertisement
Quick Links
Instruction Manual
No Frost
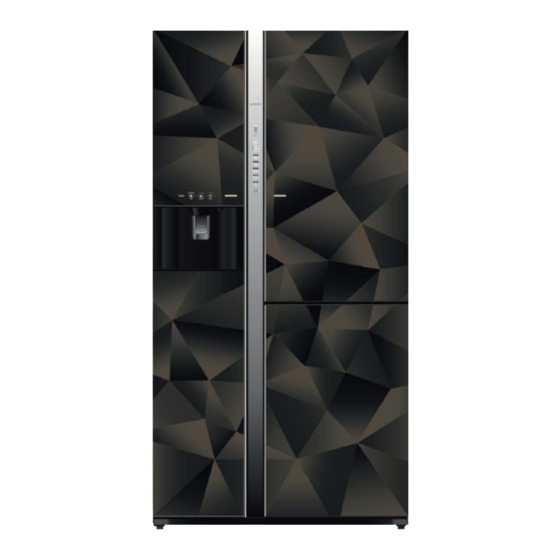
Model
Thank you very much for purchasing the HITACHI refrigerator.
Before using this please read the instruction manual carefully for
the correct usage.
Maintenance work must only be carried out at workshop
by well-trained maintenance worker
Refrigerator Installation
(English Version)
Contents
Preparation for Use
...........................................
...........................................
Operation
■
■
■
..................................
....................................
■
......................................
■
...........................................
■
.....................................
■
■
■
............................................
..........................
■
■
........................................
Maintenance and Troubleshooting
..........................................
■
..............................
■
.....................................
.................................
■
■
.............................................
■
■
..........................
■
For household use only
R600a
Refrigerant
2
..
5
...................
5
6
.........................
6
7
.................
8
.............
8
.................
8
.....................
9
.........................
9
10
10
11
11
11
...........
12
13
.......................
14
...............
15
..................
.
16
...................
17
18
...........
19
............
20
..
21
.......
21
24
..............
25
....
26
26
27
..........
28
28
29
........
31
32
33
........................
Advertisement
Chapters
Table of Contents

Related Manuals for Hitachi R-FM800XAGGV9X


Summary of Contents for Hitachi R-FM800XAGGV9X
-
Page 1: Table Of Contents
Ice Dispenser and water Dispenser ■ ..Auto Door ..........■ Thank you very much for purchasing the HITACHI refrigerator. Vacuum Compartment ■ ......Before using this please read the instruction manual carefully for Dew or Frost is generate ■... -
Page 2: Refrigerator
Do not install the refrigerator in a place exposed to rain. when using it in places with high humidity or moisture. ● This may impair electricity insulation and (Please consult with a retailer or HITACHI service center.) cause electric shock or fire. Power Cord and Power Plug ... - Page 3 WARNING During daily use ... To avoid fire, electric shock. ■ Do not use other electrical appliances ■ Do not use mechanical devices or in the food storage compartment, other means to accelerate the unless it is the type recommended by defrosting process, other than those the manufacturer.
- Page 4 Warnings and Cautions for Safety To avoid harm to the user, other persons or damage to property, please read and follow the warnings and cautions below and those given throughout this manual. CAUTION During daily use ... To avoid illness and injury. ■...
-
Page 5: Preparations Before Use
Preparations before Use Installation 1. Check the width of the doors of the house. Following shows the installation dimensions for this refrigerator. Be sure to check if you with refrigerator can pass the house doors. The refrigerator doors may have to be removed if the width or depth of the refrigerator are more than the width of the house doors. To remove the refrigerator door, please consult with the retailer. -
Page 6: Before Use
Preparation before Use (Continuation) Before Use A refrigerator is not an appliance that increases the freshness of food but it is an appliance to brake the food being spoiled to some extent. Please follow the User’s Guide carefully and take proper actions to keep food fresh. 1. -
Page 7: Location Of Food Storage
Location of Food Storage Freezer Shelves Freezer Compartment Refrigerator Compartment 2℃~5℃ -20℃~-18℃ ●Storage of frozen food and ice cream ,etc. Dairy Pocket ●Storage of milk products, such as cheese, butter ,etc. Ice Bank Refrigerator Door Pockets ●For ice cube storage made by "Automatic Ice Maker"... -
Page 8: How To Use Control Panel And Eco Monitoring Sensor
How to use Control panel and ECO Monitoring Sensor Names and Function of Display, Button,Each Component. The Control Panel is a touch panel made of glass. To change a setting, Just touch and switch the setting. ECO Monitoring Sensor P.19 “Tank Empty ”... -
Page 9: Temperature Control
How to use Control panel and ECO Monitoring Sensor Temperature Control ● The initial temperature setting of the refrigerator compartment is 3 levels, and the freezer compartment is 3 levels. ● The temperatures displayed on the control panel, are targetted temperatures, and may not be actual. The actual temperature is subject to food and ambient condition. -
Page 10: Quick Freezing
Other Functions “Quick Freezing” When you wish to store frozen food at a lower temperature than usual ,use this button. 1. Put food on the quick Freezing corner. 2. Touch "Quick Freezing” 3. Touch again "Quick Freezing, button, and start and stop the operation. -
Page 11: Child Lock
Other Functions “Child Lock” You can prevent mischief of all the buttons on the control panel by children. 1. Touch "Child Lock" button for 5 seconds(to lock). 2. To stop this function , Touch 5 seconds "Child Lock" again. Peep! Pipi! Lamp lights on. -
Page 12: Auto Door
Other Functions Auto Door You can open the door easily by touching the door lightly with your fingers thanks to the Auto Door function. Control Panel for the Auto Door (Automated). CAUTION Door open assist unit ● When an infant child may use the Auto Door of make mischief, please stop the Auto Door function. -
Page 13: Freezer Compartment
Freezer Compartment Automatic Ice Maker The 4 shelves in the upper part and Lamp Cover the 3 drawers in the lower part of Freezer LED Lamp the freezer compartment allow Ice Bank you to organize your food by size and intended use. Adjustable-height Shelves Quick Freezing Corner Fixed Shelf... -
Page 14: Refrigerator Compartment
Refrigerator Compartment has 3 shelves, and Vacuum Compartment The upper part of this compartment Refrigerator Compartment LED Lamp You can separate food by size and the way in which it is to be used. For information on temperature control read. Quick Cooling Corner Dairy Pocket Wine Shelf... -
Page 15: Vegetable Compartment
Vegetable Compartment Store vegetables efficiently according to their size and shape. The lower part has 3 drawers. Lamp Cover Upper Vegetable Drawer Vegetable Compartment LED Lamp Middle Vegetable Drawer Door Pocket Lower Vegetable Drawer Vegetable Compartment Door Vegetable Drawers ■ Middle and Lower Vegetable Drawers ■... -
Page 16: Vacuum Compartment
Vacuum Compartment Vacuum pump Handle Handle Vacuum release valve (blue) Lift the handle to unlock the valve and release the vacuum. You might hear a hissing sound as air enters the compartment Vacuum Compartment (With Aluminum Tray) Open/close vacuum compartment Open Close Lift the handle to unlock. -
Page 17: How To Use The Ice Dispenser And Water Dispenser
Vacuum Compartment Instructions for disassembly or assembly Be careful Please remove placed food from the vacuum box before disassembled Please do not detach any part other than the one described in the instruction. If you want to disssemble any part not described in the instruction for cleaning, please consult the business through the consultancy channels. -
Page 18: How To Fill The Water Tank
How to use Ice and Water Dispenser WARNING Be careful, as the Ice Dispenser rotates and may cause injury to the fingers, etc. Do not insert hands into the bottom of the Ice Bank in the Ice Dispenser. Do not use the Ice Dispenser with the Ice Bank detached. When someone else is using the refrigerator, refrain from opening the door or using the control panel. -
Page 19: How To Use The Ice Dispenser
How to use Ice and Water Dispenser CAUTION ● Do not fill the Water Tank with anything other than water. (Filling the Water Tank with fluids such as juice, sports drinks, tea, or hot water can damage your refrigerator. The Water Tank can withstand temperatures up to 50 Juice Isotonic... -
Page 20: When Using The Automatic Ice Maker
How to use Ice and Water Dispenser Ice Dispenser Notice NOTICE ● When using the "Ice Dispenser" for the first time, discard the first 2 glasses of ice cubes for cleaning. ● Hold your cup high with respect to the Dispenser Lever so as to prevent ice from scattering. ●... -
Page 21: How To Use The Water Dispenser
How to use Ice and Water Dispenser How to use the Water Dispenser Water Dispenser If "Tank Empty” lamp 2. To dispense water, simply press a 1. Touch the "Water" button. is turned on. cup against the "Dispenser Lever". ● Hold the cup up when pressing it against the "Dispenser Lever". - Page 22 How to use Ice and Water Dispenser Maintenance Water Filter In order to prevent grime and hard water stains from building up, make sure to rinse the Water Filter once per week. 1. Pull the Case to remove it from the lid. 2. Pull the tab to remove the Water 3.
-
Page 23: Water Tray
How to use Ice and Water Dispenser Maintenance Ice Bank 3. When installing the Ice Bank, be sure that there is no gap at the bottom of the Ice Bank. Auger If there is a gap, rotate the Auger 90 degrees and then install the Ice Bank. Be careful, as the Ice Dispenser rotates and may cause injury. -
Page 24: Maintenance (General Matter
Maintainance (General Matter) How to Maintain Your Refrigerator 1 Unplug the power cord. 2 Remove the food. 3 Wipe the refrigerator clean. ■ It is the best if smudges are wiped off immediately. It is also recommended to clean the areas of the refrigerator not clearly in view once a year. ■... -
Page 25: Maintenance (Vacuum Compartment
Maintainance (General Matter) How to Maintain Your Refrigerator Plug the power cord into the outlet. ■ Insert the power plug into the outlet securely, all the way to the end with the power cord facing downward. NOTICE ● Even if the power plug is plugged in immediately after being unplugged, the compressor will not run for 5 minutes. However, if the inside is not cold, it will start running in approximately 30 seconds. -
Page 26: Parts Removal
To install a shelf, push it in until it comes into contact with the end of the slot. Replacing Lamp inside Refrigerator Do not remove the cover of interior lamp ■ When the interior lamp is damaged, please contact the Hitachi service centre or retailers for replacing the lamp to avoid injury WARNING... -
Page 27: Take Urgent Action When Ice Jams
Parts Removal Take urgent action when ice jams ■ Be sure to unplug the power cord before carrying out any maintenance. WARNING Failure to unplug the power cord can result in electric shock or injury. How to remove a mass of ice from the Ice bank and Ice Dispenser Duct 1. -
Page 28: Troubleshooting
Troubleshooting Check the Following First If the refrigerator still does not operate properly, contact the retailer from where it was purchased. General Problems Problems Point to be checked Detailed Check Points and Countermeasures Page Does not cool at all. ● Is the power plug supplied ? ●... -
Page 29: Ice Dispenser And Water Dispenser
Troubleshooting General Problems Page Problem Point to be checked Detailed Check Points and Countermeasures ● Is the floor stable ? ● Install the refrigerator on a stable, level floor, or in a place with a stable board under it. ● Is there any object between the refrigerator leg and The refrigerator the floor where it is installed ? is noisy. - Page 30 Troubleshooting Ice Dispenser and Water Dispenser Page Problem Point to be checked Detailed Check Points and Countermeasures Is the Ice Bank placed correctly ? ● If there is a gap at the bottom of the Ice Bank, remove Ice is not dispensed. Is there any gap between the bottom of the Ice Bank the Ice Bank , rotate the “Auger”...
-
Page 31: Auto Door
Troubleshooting Ice Dispenser and Water Dispenser Page Problem Point to be checked Detailed Check Points and Countermeasures ● Is the “Cubes”or“Crushed”lamp is on ? ● Touch the “Water” button to select dispensing water. ● Is the “Child Lock” lamp on ? ●... -
Page 32: Vacuum Compartment
Troubleshooting Vacuum compartment Problem Point to be check Detailed Check Point and Countermeasure Page ● ● Is the Handle up? Push Handle down to the proper position. In case of any of these events. ● ● Has the Handle been pushed If not, there is no vacuum. -
Page 33: Dew Or Frost Is Generate
Troubleshooting Dew or Frost is generated General operation Please check here Possible causes and / or Recommened solutions The door of the freezer Check that the wrapping paper of the food is not getting compartment was not left caught in order not to make gap between door and door gasket when you close the door. -
Page 34: Service Center
Service Center ● When you request repair, please check the refrigerator well according to Trouble shooting on page 28-34. When still abnormal, Please contact the retailer or local Hitachi service center. Service Center TEL. No. Arcelik Hitachi Home Appliances Sales Vietnam Co., Ltd. -
Page 35: Hướng Dẫn Sử Dụng
Các lỗi thông thường ■ ....... ■ Lấy đá và nước bên ngoài ....Cảm ơn quí khách đã mua sản phẩm tủ lạnh Hitachi. Cửa tự động ■ ........ Vui lòng đọc kỹ sách hướng dẫn này để sử dụng sản phẩm cho đúng cách. - Page 36 Luôn luôn nối đất cho tủ lạnh và lắp Đi u này có th làm rò r đi n gây đặt Cầu dao chống rò điện khi đặt đi n gi t ho c cháy n . tủ lạnh ở nơi có độ ẩm cao. Tr.39 dùng Ổ...
- Page 37 ■ Chất Ether, khí propane, dung môi, bình xịt… các loại chất dễ bay hơi không được trữ trong tủ lạnh. ● Không lưu trữ bất cứ vật gì có thể tạo ra nhiệt hoặc dễ bắt lửa trong tủ lạnh. Trong trường hợp rò...
- Page 38 Không đặt thực phẩm nhô ra phía ngoài khay kệ. Cửa có thể không đóng kín hoặc ngăn cửa bị rơi ra ngoài. Chai lọ ở ngăn cửa khi bị rơi có thể gây thương tích. Không đặt tay vào bên dưới tủ lạnh. Nếu lau chùi, đặt tay bên dưới tủ...
- Page 39 *Nếu cần lắp đặt tủ lạnh ở khu vực nóng có tiếp xúc với khí Sulfide, cần xử lý 179.5 cm. chống gỉ cho hệ thống đường ống. Nên liên hệ trước với trung tâm bảo hành Hitachi. Nếu sản phẩm hư hỏng do khí này gây ra sẽ không được bảo hành.
- Page 40 30 giây Giữ thực phẩm hợp vệ sinh Rất nhiều hợp chất không vệ sinh được tìm thấy trong thực phẩm.
- Page 41 2℃~5℃ Ngăn trữ thực phẩm từ sữa -20℃~-18℃ Ngăn trữ thực phẩm từ sữa ● Trữ các thực phẩm bơ, sữa Ngăn chứa trên cửa ●Trữ các đồ uống kích cỡ nhỏ: sữa, nước trái cây. Khay đựng thực phẩm ●...
-
Page 42: Cách Sử Dụng Bảng Điều Khiển Cảm Ứng Và Cảm Biến Con Người Eco
Cách sử dụng Bảng điều khiển cảm ứng và Cảm biến con người Eco Tên và Chức năng của Màn hình, Nút, Từng thành phần. Bảng điều khiển cảm ứng được làm bằng kính. Để thay đổi cài đặt, chỉ cần chạm và điều chỉnh các cài đặt. Tr.42 Cảm biến nhận biết con người Eco Tr.53... -
Page 43: Điều Chỉnh Nhiệt Độ
Cách sử dụng Bảng điều khiển cảm ứng và Cảm biến con người Eco Điều chỉnh nhiệt độ ● Nhiệt độ cài đặt ban đầu của ngăn lạnh là ở mức 3 và một trong số ngăn đá cũng là mức 3. ●... -
Page 44: Operation
Operation Các chức năng khác "Cấp đông nhanh" 2. Nhấn nút "Quick Freezing" 1. Đặt thực phẩm ở khu vực Cấp đông nhanh 3. Nhấn lại nút "Quick Freezing"để dừng và bắt đầu vận hành chức năng vận hành chức năng cấp đông nhanh. cấp đông nhanh. -
Page 45: Chuông Báo Và Chức Năng Hiển Thị
Operation iếp tục) Các chức năng khác 1. Nhấn giữ nút "Child Lock" trong 5 giây (để khóa) 2. Để dừng chức năng này, nhấn giữ nút "Child Lock" trong 5 giây một lần nữa. Pipi! PeeP! Chức năng tiết kiệm năng lượng sẽ hoạt động tự động theo điều kiện dưới đây. 1. -
Page 46: Cửa Tự Động
Các chức năng khác Cửa tự động Bạn có thể dễ dàng mở cửa bằng cách dùng ngón tay chạm nhẹ vào cửa nhờ chức năng Cửa tự động. Bảng điều khiển của Cửa tự động (Được tự động). Bộ phận trợ ●... - Page 47 Ngăn đông Khu vực cấp đông nhanh r.43 r.44 2. Nhấn nút "Quick Freezing" (cấp đông nhanh) 2. Nâng phần phía trước của kệ lên một chút, sau đó kéo kệ ra về phía bạn. 3. Điều chỉnh kệ đến chiều cao phù hợp, gắn kệ...
- Page 48 Kệ chứa rượu Khay trứng Ngăn cửa giữa Water Tank r.43 Ngăn bảo quản chân không 2. Nâng phần phía trước của kệ lên một chút, sau đó kéo kệ ra về phía bạn. 3. Điều chỉnh kệ đến chiều cao phù hợp, gắn kệ vào cho đến khi kệ chạm vào khía bên trong. Dùng bảo quản các thực phẩm bơ, phô...
- Page 49 Bảo quản rau quả theo kích thước và hình dáng Các rau quả có mùi. Rau quả đang dùng dang dở. Khi bạn lo lắng về hơi nước ngưng tụ bên trong ngăn. Khi trữ quá ít rau quả hoặc quá nhiều rau quả đóng gói. Tùy vào số...
- Page 50 Bơm hút chân không Tay c m Tay c m Van t t ch đ chân không (màu xanh nư c bi n) Khi m khóa b ng vi c nâng tay c m lên, van t t ch đ chân không s d ng ch đ...
-
Page 51: Cách Sử Dụng Chức Năng Lấy Đá Và Nước Bên Ngoài
Phương pháp tháo rời hoặc lắpđặt. Vui lòng mang thực ph m đang đ t trên các b ph n chu n b tháo r i ra trư c r i b t đ u tháo r i các b ph n. Vui lòng không tháo các b ph n n m ngoài các b ph n đư c gi i thích đây. Khi b n c n ph i tháo các b ph n không đư... - Page 52 Hướng dẫn cách cấp nước thông thường Hướng dẫn cách tháo hộc và cấp nước Đổ đến mức chỉ định. Đặt hộc chứa vào đúng vị trí.
-
Page 53: Cách Sử Dụng Chức Năng Lấy Nước Bên Ngoài
Cách sử dụng chức năng lấy đá và nước bên ngoài Chú ý hộc Nếu đổ các loại nước khác như nước trái cây, trà, nước nóng có thể làm hư hại tủ của bạn. Hộc chứa có thể chịu được nhiệt độ lên tới 500C Nước ép trái cây Lưu ý... - Page 54 Cách sử dụng chức năng lấy đá và nước bên ngoài r.45 r.54 16 giây. r.56 Đ ngăn đá và nư c không b rơi ra ngoài,hãy gi ly th ng và sát v i ng c p đá ho c vòi nư c. Không l y đá...
- Page 55 Cách sử dụng chức năng lấy đá và nước bên ngoài Nếu đèn "Tank Empty" 1. Nhấn nút "Water". (Hết nước) sáng. Để đảm bảo vệ sinh nên đổ bỏ ly nước đầu tiên sau khi vừa lắp đặt tủ lạnh. 2 - 3...
- Page 56 nắp Không sử dụng chất tẩy rửa vì có thể làm hư lưới lọc. động "Ice Maker" (Làm đá). r.57 Nếu đá viên còn dính lại trên hộp, hãy dùng muỗng lấy ra. Hộp chứa đá bào Hộp chứa đá hộp...
- Page 57 Cách sử dụng chức năng lấy đá và nước bên ngoài Hộp chứa đá khe hở Khi cần sửa chữa Vị trí lấy đá Chấu gắn Khay Chấu gắn...
- Page 58 Tốt nhất nên lau chùi sạch sẽ các vết bẩn ngay khi xuất hiện. Những vị trí khuất không nhìn thấy cũng nên được lau chùi mỗi năm một lần. Các bộ phận dưới đây có thể vệ sinh bằng nước r.39 Adjuster Cover...
-
Page 59: Bảo Trì (Qui Trình Chung)
Bảo trì ( Ngăn bảo quản chân không Mỗi tháng 1 lần Kéo ngăn chân không ra Khi Vacuum Box Packing bẩn. bị dơ Để lấy thực phẩm trữ bên trong ngăn chân không (T.50), kéo ngăn ra. Việc tháo Vacuum Box Packing i Vacuum Box Case ra khỏ... -
Page 60: Cách Thay Thế Linh Kiện
Cách tháo linh kiện Thay đèn bên trong tủ lạnh Không tháo nắp che đèn bên trong tủ Khi đèn bị hư, để đảm bảo an toàn, vui lòng liên hệ với trung tâm bảo hành của Hitachi. - Page 61 Hình 1.1 r.57 Khởi động lại tủ lạnh và chờ một lúc cho đến khi nhiệt độ ngăn đông đạt đến nhiệt độ cài đặt. (Chế độ làm đá bào có thể không hoạt động nếu nhiệt độ dưới 0°C). Hình 1.2 Hình 2 Hình 1.3...
- Page 62 Trang ● ● ● ● ● ● ● ● ● ● ● Mức 3 Mức 1 hoặc 2 Mức 3. Mức 1 hoặc 2 ● ● ● ● ● ● ● ● ● ● ● ● Mức 4 hoặc 5 Mức 4 hoặc 5.
-
Page 63: Các Lỗi Thông Thường
Các lỗi thông thường Trang Âm thanh như tiếng nước chảy Tiếng gõ cửa Âm thanh như tiếng nước đang sôi Tiếng xèo xèo như đang nấu thức ăn Âm thanh như có vật gì bị kẹt trong máy Đây là âm thanh khi các bộ phận như Tiếng kêu lăng xăng động cơ... -
Page 64: Lấy Đá Và Nước Bên Ngoài
Lấy đá và nước bên ngoài Trang Bạn lấy đá trong suốt 1.5 phút? Để bảo vệ các linh kiện điện tử không bị quá nhiệt, hệ thống sẽ tạm dừng chức năng này trong 20 phút để các linh kiện nguội dần. Nếu sử dụng chức năng lấy đá... -
Page 65: Cửa Tự Động
Lấy đá và nước bên ngoài Trang Đèn báo "Cubes" (Đá viên) hoặc Chạm vào nút "Water" để chọn chức năng lấy nước. "Crushed" (Đá bào) có đang bật sáng? Nếu bị đông đá, điều chỉnh nhiệt độ ngăn lạnh mức 1 hoặc 2. -
Page 66: Ngăn Bảo Quản Chân Không
Ngăn bảo quản chân không Trang Tay cầm có bị đẩy lên phía trên không? Ấn tay cầm xuống đúng vị trí. Khi m , không có ti ng "Whoosh" Tay cầm đã ấn xuống hết mức chưa? N u không khóa ch t h t c s không t o ra đư c tr ng thái chân không, đ... - Page 67 Đọng sương hoặc tuyết Cửa ngăn đá có đang bị để hở? Ngăn đá có bị mở thường xuyên hoặc mở lâu hơn mức cần thiết? Cửa ngăn mát tạm thời bị để mở Ngăn mát có bị mở thường xuyên hoặc mở...
- Page 68 Trong trường hợp hệ thống làm lạnh bị hư hỏng, hãy tránh xa nguồn lửa và thiết bị điện, mở cửa sổ thông gió. Sau đó, hãy liên hệ với Trung Tâm Dịch Vụ Bảo Hành Hitachi.
- Page 72 (AB)
Need help?
Do you have a question about the R-FM800XAGGV9X and is the answer not in the manual?
Questions and answers