Advertisement
Quick Links
Advertisement

Related Manuals for SUNFLX SF 8000


Summary of Contents for SUNFLX SF 8000
- Page 1 USER MANUAL Solar Storage Inverter SF 8000 | SF 10000...
-
Page 2: Table Of Contents
4.9 Final Assembly ...........................12 4.10 Start up the Inverter ......................... 13 5. Operation ..............................13 5.1 System Commissioning by Sunflx Cloud APP .................. 13 5.2 Power ON/OFF ..........................13 5.3 Operation and Display Panel ......................14 5.4 LCD Display Icons ..........................15 5.5 LCD Setting ............................17... -
Page 3: About This Manual
1. About This Manual 1.1 Purpose Thanks for choosing Sunflx’s SF 8000 and SF 10000 Series Solar Storage Inverter. This manual describes the assembly, installation, operation and troubleshooting of this unit. Please read this manual carefully before installations and operations. Keep this manual for future reference. -
Page 4: Introduction
3. Introduction The Sunflx’s SF Series solar storage inverter is a combination of high frequency inverter, AC charger and high efficiency MPPT solar controller. It adopts DSP control and features high response speed, reliability, and industrial standard through an advanced control algorithm. -
Page 5: Basic System Architecture
AC loads. 5. Solar Storage Inverter: The core energy conversion device of the entire system. The actual application scenario determines the specific system wiring method. 6. Sunflx Cloud APP:WIFI & Bluetooth monitoring APP used for viewing and configuring parameters. www.sunflx.com... -
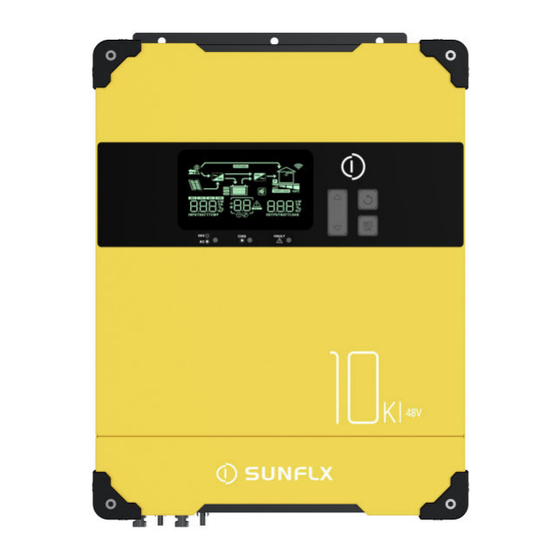
Page 6: Product Overview
14. RS485 communication port (BMS) 6. Power on/off switch 15. Dry Contact 7. AC input 16. PV 2- Terminal 8. Main output 17. PV 2+Terminal 9. Second output 18. PV 1- Terminal 10. Battery - input 19. PV 1+Terminal www.sunflx.com... -
Page 7: Installation
Do not install the inverter in areas with potential explosive hazards. Do not install the inverter with lead-acid batteries in confined spaces. CAUTION Do not install the inverter in direct sunlight. Do not install or use the inverter in a humid environment. www.sunflx.com... -
Page 8: Mount The Inverter
4.4 Cable & Circuit Breaker Requirement PV INPUT Max. PV Model Cable Diameter Circuit Breaker Input Current SF 8000 4 mm²/ 1 x 12AWG 2P 25A SF 10000 4 mm²/ 1 x 12AWG 2P 25A AC INPUT (Single Phase) Max. Input... -
Page 9: Battery Connection
Use a proper copper terminal to crimp a suitable cable for battery. Connect the battery cable to the correct battery terminal. Tighten the cable with a nut using a special tool. 4. Connect all battery packs as below chart if battery need series connection. www.sunflx.com... -
Page 10: Ac Input & Output Cable Connection
2. Remove insulation sleeve 10mm for six conductors. And shorten phase L and neutral conductor N 3 mm. 3. Insert AC input wires according to polarities indicated on terminal block and tighten the terminal screws. Be sure to connect PE protective conductor ( ) first. L →Ground (yellow-green) L →LINE (brown or black) N →Neutral (blue) www.sunflx.com... -
Page 11: Pv Connection
Please ensure that the cable used meets the requirements. Thin or poor-quality cables pose a serious safety hazard. 4.7 PV Connection Connect solar array positive and negative MC4 connector to Inverter PV+ and PV- Terminal according to the diagram below. www.sunflx.com... - Page 12 8 pcs in serial and 2 sets in parallel 16 pcs 9280W 419.76 Vdc 9 pcs in serial and 2 sets in parallel 18 pcs 10440W 472.23 Vdc Note:The total solar Voltage = Voc* (in serial number) must be ≤ 500Vdc www.sunflx.com...
-
Page 13: Grounding Connection
The grounding cable should be at least 4 mm² in diameter and positioned as close as possible to the grounding point. 4.9 Final Assembly After connecting all wirings, please put bottom cover back by screwing two screws as shown below. www.sunflx.com... -
Page 14: Start Up The Inverter
Smart Dongle can connect with MONITOR port on inverter , enabling users to monitor operational status and configure parameters of the inverter using a mobile phone application. User can scan the QR code or Search ”Sunflx Cloud” to download the Mobile APP in Google Play and APP Store. -
Page 15: Operation And Display Panel
Output is powered by utility in Line mode. Green Flashing Output is powered by battery or PV in battery mode. Solid On Battery is fully charged. Green Flashing Battery is charging. Solid On Fault occurs in the inverter. Flashing Warning condition occurs in the inverter. www.sunflx.com... -
Page 16: Lcd Display Icons
5.4 LCD Display Icons Working status LCD Indicates (Home page) Battery discharging Inverter mode AC input bypass MPPT working Battery charging www.sunflx.com... -
Page 17: Function Description
Configuration Program and Fault Information Indicates the setting programs. Indicates the warning and fault codes. Indicates overload. Mode Operation Information Indicates unit connects to the mains. Indicates unit connects to the PV panel. Indicates load is supplied by utility power. www.sunflx.com... -
Page 18: Lcd Setting
Utility provides power to the loads only when any one condition happens: - Solar energy is not available - Battery voltage drops to low-level warning voltage or the setting point in program 12. www.sunflx.com... - Page 19 DC cut-off voltage can be set up in program 26, 27 and 29. Restart disable (default) Restart enable Auto restart when overload occurs Restart disable (default) Restart enable Auto restart when over temperature occurs www.sunflx.com...
- Page 20 02 is smaller than that in program in 11, the inverter will apply charging current from program 02 for utility charger. Available options in SF 8000/ SF 10000 model: Setting voltage point back utility source when selecting“SBU priority”or “...
- Page 21 Year setting range: 0-99 RTC time Setting Set the year, month, day, Month setting range: 0-12 hour, minute, and second in sequence. After setting each value, press SET/OK to confirm and set the next Day setting range: 0-31 value. www.sunflx.com...
- Page 22 When enabled, the unit will Bypass disable (default) Bypass enable transfer to line mode if overload occurs in battery mode. Record enable (default) Record disable Record Fault code SF 8000/ SF 10000 default setting: 56.4V Bulk charging voltage (C.V voltage) www.sunflx.com...
- Page 23 If self-defined is selected in program 5, this program can be set up. Setting range is from 48.0V to 61.0V for SF 8000/ SF 10000 model. Increment of each click is 0.1V. SF 8000/ SF 10000 default setting: 54.0V Floating charging voltage If self-defined is selected in program 5, this program can be set up.
-
Page 24: Display Setting
LCD display AC input frequency and voltage. Solar icon 1s ON 1s OFF LCD display PV input current, input voltage, MPPT power and total power generation. Battery icon 1s ON 1s OFF LCD display battery charging current, battery voltage and charging power. www.sunflx.com... -
Page 25: Operating Mode Description
AC output. batteries. Charging by PV energy. *Power saving mode: If enabled, the output of inverter will be off when connected load is pretty low or not detected. No charging. www.sunflx.com... - Page 26 “HOME Load” output port (AC input bypass). Line Mode Charging by utility. The unit will provide output power from the grid. It will also charge the battery at line mode. www.sunflx.com...
-
Page 27: Battery Equalization Description
1. Setting equalization interval in program 35. 2. Active equalization immediately in program 36. When to equalize In float stage, when the setting equalization interval (battery equalization cycle) is arrived, or equalization is active immediately, the controller will start to enter Equalize stage. www.sunflx.com... - Page 28 Battery Voltage Setting : Below the default battery voltage setting for Multiple battery types. Please note if you choose User-defined battery ,please follow below sequence: www.sunflx.com...
- Page 29 Battery Discharging Voltage: [13] Setting voltage point back to battery mode>[12] Setting voltage point back to utility source>[29] Low DC Cut-off Voltage Lead-Acid Flooded Li-ion battery User-defined battery Parameter/Battery type AGM/GEL SF 8000/ SF 10000 Model Nominal DC Input Voltage 48Vdc 48Vdc 48Vdc 48Vdc Cold Start Voltage 46Vdc 46Vdc...
-
Page 30: Fault Reference Code
Over DC voltage in AC output Current sensor failed Output voltage is too low PV voltage is over limitation 5.10 Warning Indicator Warning Warning Event Audible Alarm Icon flashing Code Fan is locked when inverter Beep three times every is on. second www.sunflx.com... -
Page 31: Clearance And Maintenance For Anti-Dust Kit
Step 2: Then, dust proof case can be removed and take out air filter foam as shown in below chart. Step 3: Clean air filter foam and dust proof case. After clearance, re-assemble the dust-kit back to the inverter. NOTICE The anti-dust kit should be cleaned from dust every one month. www.sunflx.com... -
Page 32: Specifications
7. Specifications User- Model SF 8000 SF 10000 Settable Nominal Battery Voltage 48Vdc 48Vdc Battery type Lithium LiFePO4/Lead-Acid/Flood /User defined AC INPUT Nominal AC Input Voltage/Waveform 230Vac/Sinusoidal (utility or generator) AC Input Range 90~280Vac (Appliances) ; 170Vac~280Vac (UPS) ... - Page 33 No Load Power Consumption <70W@48Vdc Parallel Capacity GENERAL Operating Temperature Range -10°C to 50°C Storage temperature -15°C~ 60°C Humidity 5% to 95% Relative Humidity (Non-condensing) Altitude <2000m Noise ≤60dB Protection Degree IP21, Indoor Only Cooling Method Intelligent Fan Net Dimension (L*W*H) 605*440*143mm www.sunflx.com...
- Page 34 Work with WIFI & Bluetooth YES, by RS232 Monitoring Dongle Work with Lithium Battery BMS YES, by RS485 CERTIFICATION Certification/Standard CE(IEC61000,IEC62109);IEC61683,IEC60068 ; RoHS Output power derating: When AC input voltage drops to 170V, the output power will be derated. AC charging curve www.sunflx.com...
-
Page 35: Trouble Shooting
Check whether the air flow of the unit is blocked or whether the ambient Internal temperature of inverter temperature is too high. Fault code 02 component is over 100°C. Fault code 03 Battery is over-charged. Return to repair center. www.sunflx.com... - Page 36 Return to repair center. Fault code 51 Over current or surge. Restart the unit, if the error Fault code 52 Bus voltage is too low. happens again, please return to repair center. Fault code 55 Output voltage is unbalanced. VERSION: 24.11.06 www.sunflx.com...
Need help?
Do you have a question about the SF 8000 and is the answer not in the manual?
Questions and answers