Advertisement
Table of Contents
Contents
NexiGo AS200 Manual
PRODUCT INTRODUCTION
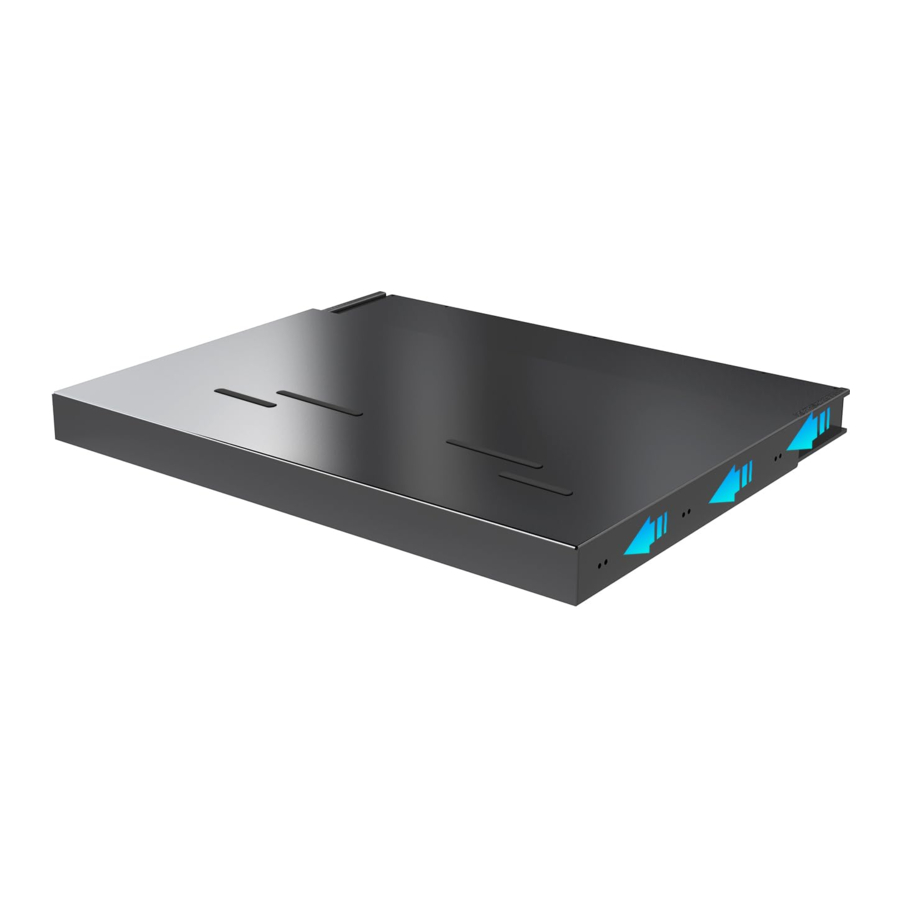
The NexiGo Sliding Tray is an automated platform designed for use with ultra-short throw projectors. The tray can be re-positioned. forward/backward with the buttons on the back of the device. Its integrated memory enables it to automatically return to a pre-set position every time the projector powers on.
WHAT'S IN THE BOX?

BUTTON INSTRUCTIONS

- Forward: Move tray forward.
- Backward: Move tray backward.
- Power: Connect tray to a power source.
- Signal: Connect tray to your projector.
SPECIFICATIONS
| Maximum Load Capacity | 55.12 lbs |
| Maximum Forward Slide Distance | 12.99 inches |
| Device Dimensions | 24.02 x 14.49 x 2.36 inches |
| Product Weight | 25.66 lbs |
INSTALLATION GUIDE
HOW TO MOUNT THE SLIDING TRAY?
Mounting to a Table or Credenza
- Place the SlidingTray in the appropriate position on the table or credenza, and insert the long sides of the two Bracket Plates into the bottom of the Sliding Tray (with the short sides of the Bracket Plates facing downward), marking the lengths at which the bracket plates need to be inserted.

- Turn over the Sliding Tray. With the holes on the bottom of the tray. Place the long end of each bracket plate on the bottom of the tray, with the short end of the bracket plate pointing outward, as shown below.


- To fasten the Bracket Plates to the tray, insert an M5×16mm Screw
![]() into each of the six holes and tighten until snug.
into each of the six holes and tighten until snug.
![information]() M5×16mm Screw
M5×16mm Screw ![]() can be inserted into any place of each hole of the bracket plate.
can be inserted into any place of each hole of the bracket plate.

- Place the Sliding Tray on the surface where you intend to keep it. Fix the bracket to the back of your table or credenza using the M4×15mm Self-Tapping Screws
![]() .
.

 into each of the six holes and
  M5×16mm Screw


HOW TO SET UP THE SLIDING TRAY FOR USE WITH THE PROJECTOR?
Setting a Position Preset
- Power the Sliding Tray with the provided Power Cable.

- Set your projector on the tray and power on it.

- Adjust the distance of the Sliding Tray using the forward and backward buttons on the back of the tray. When the projected screen is in the right position, wait 30 seconds to save that position as a preset.

- Power off both the tray and the projector. Please wait 30 more seconds before proceeding to the next step.


Connecting the Projector to the Sliding Tray
- Connect the Sliding Tray to your projector using the provided USB Cable.

- Power on the tray to return it to its initial position. If it doesn't return to its initial position, please start over the preset process or contact customer support for more assistance.

- Turn on your projector to return the Sliding Tray to the preset position. The tray will now automatically move into the preset position when you power your projector on and return into its initial position when you power your projector off.

- Remove the adhesive backing from the four L-Brackets and place them at each corner of your projector. These brackets will serve as a reference point if you ever need to move the projector back into place.

- Use the Reusable Cable Ties to bundle all cables together.
![information]() Please carefully repeat all of the steps above when moving the tray to different locations.
Please carefully repeat all of the steps above when moving the tray to different locations.


CONTACT INFORMATION
Tel: +1(458) 215-6088
Email: cs@nexigo.com
Website: www.nexigo.com
Get in touch with FREE online services.

facebook.com/letsnexigo
IMPORTANT SAFETY NOTES
![warning]() HAZARD: Small Parts. Keep out of reach from children under 5 years of age.
HAZARD: Small Parts. Keep out of reach from children under 5 years of age.- Make sure that the NexiGo Sliding Tray is powered off during installation.
- Avoid placing your hands into any gaps in the tray to prevent injury.
- Keep the area in front of the tray clear and free from obstructions.
- Do not attempt to force the tray.
- Do not attempt to disassemble or repair the product yourself. If you encounter any technical issues, seek professional assistance.
- Due to the significant weight of the product, it is advised to handle it with care to prevent any potential incidents.
- Please take precautions to avoid any risk of finger pinching when using the product.
- Avoid exposing the tray to moisture or liquids to reduce the risk of fire and/or electric shock.
- Only use attachments and accessories directly specified by the manufacturer.
- Only use a power source with the voltage specified in this manual to avoid potential hazards.
- Avoid setting up the tray in areas prone to vibration or other disturbances to ensure stable operation.
 HAZARD: Small Parts. Keep out of reach from children under 5 years of age.
Documents / Resources
References
Download manual
Here you can download full pdf version of manual, it may contain additional safety instructions, warranty information, FCC rules, etc.
Advertisement

Need help?
Do you have a question about the AS200 and is the answer not in the manual?
Questions and answers