Advertisement
Available languages
Available languages
®
GilmanCreekFurniture.com
Thank you for your purchase!
Date purchased: __________
Please Save These Instructions
IMPORTANT
READ CAREFULLY all safety and other instructions before using your new Power
Reclining Sectional.
Please keep this manual for future reference.
®
GilmanCreekFurniture.com
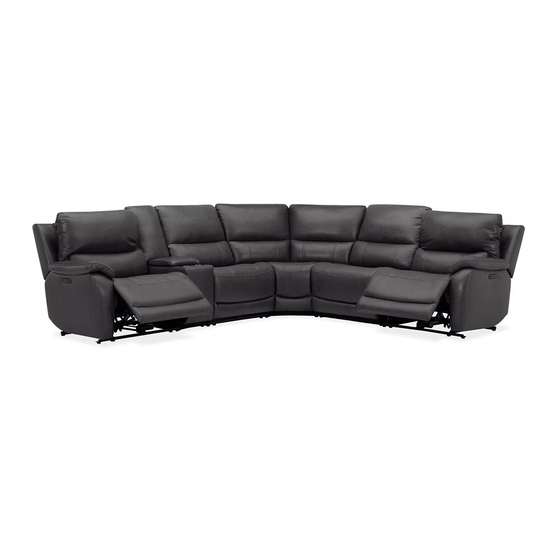
Wylder Power Reclining Sectional
Operating Instructions Manual
CALL US FIRST! PLEASE ALLOW US TO SOLVE YOUR ISSUE.
STOP
If any questions or concerns, please contact us directly via:
Email: costcoservice@gilmancreek.com
Toll-Free: (888) 509-5381
PLEASE DO NOT CONTACT COSTCO
Call Us First! DO NOT RETURN TO STORE.
For immediate help with assembly or product information call our toll-free number:
1-888-509-5381
Monday – Friday: 9:00 am to 6:00 pm Eastern Time
Our staff is ready to help.
Damaged or missing parts ship from our facility in 1-2 business days.
IMPORTANT
READ CAREFULLY all safety and other instructions before using your new Power
Reclining Sectional.
Please keep this manual for future reference.
ITM. / ART. 1695583
Advertisement
Table of Contents

Related Manuals for Gilman Creek Wylder 1695583


Summary of Contents for Gilman Creek Wylder 1695583
- Page 1 ITM. / ART. 1695583 ® ® GilmanCreekFurniture.com GilmanCreekFurniture.com Wylder Power Reclining Sectional Operating Instructions Manual CALL US FIRST! PLEASE ALLOW US TO SOLVE YOUR ISSUE. STOP If any questions or concerns, please contact us directly via: Thank you for your purchase! Email: costcoservice@gilmancreek.com Toll-Free: (888) 509-5381 PLEASE DO NOT CONTACT COSTCO...
- Page 2 • Do not use this product if it is damaged. Do not use attachments or substitute parts. Gilman Creek® is proud of our designs and craftsmanship. We • This product is intended for indoor residential use only. • Provide a clear path for operation of the back and footrest. Place tables and area rugs at a hope you feel the same as you enjoy your distance to allow the footrest to fully extend without rubbing or interference.
-
Page 3: Important Safety Instructions
Important Safety Instructions: How to File Product Warranty Claim Important: Read these instructions thoroughly before using. When filing a claim please do the following to save you & us Do not plug in until instructed. time in solving your issue. –To reduce the risk of burns, fire, electric shock, serious injury or WARNING •... - Page 4 ® ® ITM. / ART. 1695583 ITM. / ART. 1695583 Wylder Wylder GilmanCreekFurniture.com GilmanCreekFurniture.com COMPONENTS LIST COMPONENTS LIST REPLACEMENT PARTS LIST REPLACEMENT PARTS LIST Name Component Qty Name Component Qty Name Component Qty Name Component Qty Left Facing Corner Seat Power Switch / Mechanism Power Seat...
- Page 5 Wing brackets will slide down into the brackets on the outside pinched, remove the back and repeat the steps above. of the back. 9. If you are unable to install the back properly, contact your Gilman Creek® dealer for assistance. Email: CostcoService@GilmanCreek.com Toll Free Call: 888-509-5381...
- Page 6 ® ® ITM. / ART. 1695583 ITM. / ART. 1695583 Wylder Wylder GilmanCreekFurniture.com GilmanCreekFurniture.com Assembly Step Assembly Step Once you have locked in the base and the back secure Affix back cover to bottom of the frame using the built in self cable connection in back of the recliner.
- Page 7 ® ITM. / ART. 1695583 Wylder GilmanCreekFurniture.com Assembly Step Repeat Steps 2-5 for all 5 Pieces of your Sectional. WARNING – To reduce the risk of injury: • Provide a clear path for operation of the back and footrest. Place tables and area rugs at a distance to allow the footrest to fully extend without rubbing or interference. •...
- Page 8 ® ITM. / ART. 1695583 Wylder GilmanCreekFurniture.com Assembly Step Connect each piece of the sectional together by guiding and locking hooks into place. NOTICE – To reduce the risk of product damage: • Lift from the base rail. Do not lift from the upholstery or the bottom of the footrest. •...
- Page 9 ® ® ITM. / ART. 1695583 ITM. / ART. 1695583 Wylder Wylder GilmanCreekFurniture.com GilmanCreekFurniture.com Assembly Step Assembly Step Connect all power cables along the sectional. Connect all power cables along the sectional. Bottom view Side view Self Fastener Sure Connect Bottom view NOTICE NOTICE...
- Page 10 ® ® ITM. / ART. 1695583 ITM. / ART. 1695583 Wylder Wylder GilmanCreekFurniture.com GilmanCreekFurniture.com Assembly Step Operating Instructions Connect power cable to back of sectional and plug into power outlet. NOTICE • After 1 minute of continuous operation, allow the system to rest for 9 minutes. Power Switch / USB Port B &...
- Page 11 ® ® ITM. / ART. 1695583 ITM. / ART. 1695583 Wylder Wylder GilmanCreekFurniture.com GilmanCreekFurniture.com Care Instructions FCC marking: • When a spill/stain occurs wipe immediately with a clean dry cloth. Carefully remove the This device complies with Part 15 of the FCC Rules. majority of the stain then follow the steps below.
-
Page 12: Manuel D'utilisation
ITM. / ART. 1695583 ® ® GilmanCreekFurniture.com GilmanCreekFurniture.com Canapé sectionnel à inclinaison électrique Wylder Manuel D’utilisation APPELEZ-NOUS D’ABORD! LAISSEZ-NOUS RÉGLER VOTRE PROBLÈME. Pour toute question, communiquez Merci pour votre achat! avec nous directement : ARRÊT Courriel : costcoservice@gilmancreek.com Sans frais : 1 888 509-5381 NE PAS COMMUNIQUER AVEC COSTCO Date d'achat: __________ Appelez-nous d’abord! NE RETOURNEZ PAS AU MAGASIN. - Page 13 • Vérifier régulièrement l’état des blocs et cordons d’alimentation ainsi que des prises et des connecteurs. Garder Gilman Creek® est fière de ses conceptions et confections. Nous vous les blocs et les cordons d’alimentation loin des sources de chaleur. Ne jamais utiliser si le bloc ou cordon d’alimentation ou encore la prise ou le connecteur sont endommagés.
-
Page 14: Étiquette D'identification
Consignes de sécurité importantes Réclamations de garantie Important : Lire attentivement ces instructions avant l’utilisation. Lors de votre réclamation, suivre les étapes ci-dessous pour Attendre le moment indiqué avant de brancher. accélérer le traitement de votre demande. AVERTISSEMENT –Pour réduire le risque de brûlures, d’incendie, de décharge électrique ou de •... -
Page 15: Liste Des Pièces
® ® ITM. / ART. 1695583 ITM. / ART. 1695583 Wylder Wylder GilmanCreekFurniture.com GilmanCreekFurniture.com LISTE DES PIÈCES LISTE DES PIÈCES LISTE DES PIÈCES DE REMPLACEMENT LISTE DES PIÈCES DE REMPLACEMENT Image Qté Image Qté Image Qté Image Qté Dossier Mécanisme de Interrupteur motorisé... - Page 16 fixation présents sur chacune des pièces. Ces supports se glissent dans ceux situés du côté externe répéter les étapes précédentes. du dossier. 9. Si vous ne parvenez pas à installer correctement le dos, contactez votre revendeur Gilman Creek® pour obtenir de l'aide. Courriel : CostcoService@GilmanCreek.com...
- Page 17 ® ® ITM. / ART. 1695583 ITM. / ART. 1695583 Wylder Wylder GilmanCreekFurniture.com GilmanCreekFurniture.com Étape d’assemblage Étape d’assemblage Après avoir raccordé le dossier au siège, brancher les câbles Fixez le couvercle arrière au bas du cadre à l'aide de la bande à...
- Page 18 ® ITM. / ART. 1695583 Wylder GilmanCreekFurniture.com Étape d’assemblage Répéter les étapes 2 à 5 pour les cinq sections du canapé modulaire. AVERTISSEMENT – Pour réduire le risque de blessures : • Prévoir un dégagement pour l’utilisation du dossier et du repose-pieds. Placer les tables et les tapis à une distance telle qu’il est possible d’ouvrir complètement le repose-pieds sans frottement ni interférence.
- Page 19 ® ITM. / ART. 1695583 Wylder GilmanCreekFurniture.com Étape d’assemblage Relier toutes les sections du canapé modulaire en glissant les supports de fixation les uns dans les autres. NOTICE – Pour réduire le risque de dommages au meuble : • Soulever les sections par les rails du cadre. Ne pas soulever par le revêtement ou le bas du repose-pieds.
- Page 20 ® ® ITM. / ART. 1695583 ITM. / ART. 1695583 Wylder Wylder GilmanCreekFurniture.com GilmanCreekFurniture.com Étape d’assemblage Étape d’assemblage Raccorder tous les câbles le long du meuble. Raccorder tous les câbles le long du meuble. Vue du dessous Vue du côté Auto-fixant Vue du dessous Bien sûr, connectez-vous...
- Page 21 ® ® ITM. / ART. 1695583 ITM. / ART. 1695583 Wylder Wylder GilmanCreekFurniture.com GilmanCreekFurniture.com Étape d’assemblage Consignes d’utilisation Brancher le câble sur la prise située à l’arrière du meuble, puis sur la prise murale. AVIS • Après 1 minute de fonctionnement en continu, arrêter le système pendant 9 minutes. Interrupteur d’alimentation avec port USB Bien sûr, connectez-vous Instructions de l’interrupteur (B et L)
- Page 22 ® ® ITM. / ART. 1695583 ITM. / ART. 1695583 Wylder Wylder GilmanCreekFurniture.com GilmanCreekFurniture.com Consignes d’entretien Déclaration réglementaire (FCC) • En cas de déversement, essuyer immédiatement et avec soin le plus gros du dégât à l’aide Cet appareil est conforme à la partie 15 des règlements de la FCC. d’un linge propre et sec, puis suivre les étapes ci-dessous.
- Page 23 ITM. / ART. 1695583 ® ® GilmanCreekFurniture.com GilmanCreekFurniture.com Seccional reclinable Wylder Power Manual de instrucciones ¡LLÁMENOS PRIMERO! PERMÍTANOS RESOLVER SU ALTO PROBLEMA. Si tiene alguna pregunta o duda, póngase en ¡Gracias por su compra! contacto con nosotros directamente a través de: Correo electrónico: costcoservice@gilmancreek.com Teléfono gratuito:(888) 509-5381 (desde Estados Unidos) POR FAVOR NO CONTACTE A COSTCO...
- Page 24 Ahora es el orgulloso propietario de una sección reclinable • No se ponga de pie, ni se siente, ni coloque peso adicional sobre los reposabrazos, el respaldo o el reposapiés eléctrica de última generación de Gilman Creek®. Acaba de cuando este abierto.
-
Page 25: Etiqueta De Identificación
Instrucciones de seguridad importantes: Cómo presentar un reclamo de garantía Importante: Lea detenidamente estas instrucciones antes de utilizarlo. Cuando presente un reclamo, por favor haga lo siguiente para ahorrarse a usted y ahorrarnos nosotros tiempo para No lo enchufe hasta que se le indique. resolver su problema. - Page 26 ® ® ITM. / ART. 1695583 ITM. / ART. 1695583 Wylder Wylder GilmanCreekFurniture.com GilmanCreekFurniture.com LISTA DE COMPONENTES LISTA DE COMPONENTES PIEZAS DE REPUESTO LISTA DE PIEZAS DE REPUESTO Componente Componente Componente Componente Nombre Cantidad Nombre Cantidad Nombre Cantidad Nombre Cantidad Interruptor de Respaldo de lado Respaldo del...
- Page 27 fijados a cada pieza. Los soportes de las alas se deslizarán hacia abajo en los pasos anteriores. los soportes en la parte exterior del respaldo. 9. Si no puede instalar la parte posterior correctamente, comuníquese con su distribuidor de Gilman Creek® para obtener ayuda. Correo electrónico: CostcoService@GilmanCreek.com...
- Page 28 ® ® ITM. / ART. 1695583 ITM. / ART. 1695583 Wylder Wylder GilmanCreekFurniture.com GilmanCreekFurniture.com Paso de Ensamble Paso de Ensamble Una vez que haya encajado la base y el respaldo, asegure Fije la cubierta posterior a la parte inferior del marco usando la la conexión del cable en la parte trasera del sillón reclinable.
- Page 29 ® ITM. / ART. 1695583 Wylder GilmanCreekFurniture.com Paso de Ensamble Repita los Pasos 2-5 para las 5 Piezas de su Seccional. ADVERTENCIA – Para reducir el riesgo de lesiones • Deje un camino libre para el funcionamiento del respaldo y el reposapiés. Coloque las mesas y alfombras a una distancia que permita que el reposapiés se extienda completamente sin roces ni interferencias.
- Page 30 ® ITM. / ART. 1695583 Wylder GilmanCreekFurniture.com Paso de Ensamble Conecte cada pieza del seccional guiando y bloquean- do los ganchos en su lugar. AVISO – Para reducir el riesgo de dañar el producto: • Levante desde el riel de la base. No lo levante por la tapicería ni por la parte inferior del reposapiés.
- Page 31 ® ® ITM. / ART. 1695583 ITM. / ART. 1695583 Wylder Wylder GilmanCreekFurniture.com GilmanCreekFurniture.com Paso de Ensamble Paso de Ensamble Conecte todos los cables de alimentación a lo largo del Conecte todos los cables de alimentación a lo largo del seccional. seccional.
- Page 32 ® ® ITM. / ART. 1695583 ITM. / ART. 1695583 Wylder Wylder GilmanCreekFurniture.com GilmanCreekFurniture.com Paso de Ensamble Instrucciones de funcionamiento Conecte el cable de alimentación a la parte posterior del seccional y enchúfelo a la toma de corriente. AVISO • Después de 1 minuto de funcionamiento continuo, deje reposar el sistema durante 9 minutos. Interruptor de encendido / Puerto USB Instrucciones de uso del interruptor B &...
- Page 33 ® ® ITM. / ART. 1695583 ITM. / ART. 1695583 Wylder Wylder GilmanCreekFurniture.com GilmanCreekFurniture.com Instrucciones de cuidado Marcado FCC: • En caso de derrame o mancha, limpie inmediatamente con un paño limpio y seco. Retire Este dispositivo cumple con la Parte 15 de las normas de la FCC. con cuidado la mayor parte de la mancha y siga los pasos que se indican a continuación.
Need help?
Do you have a question about the Wylder 1695583 and is the answer not in the manual?
Questions and answers
I need a power cord for this recliner. It shows here as number 6 Gilman creek wylder sectional recliner sofa