Advertisement
Quick Links
IMPORTANT, À CONSERVER POUR DE FUTURS BESOINS DE RÉFÉRENCE : À LIRE SOIGNEUSEMENT
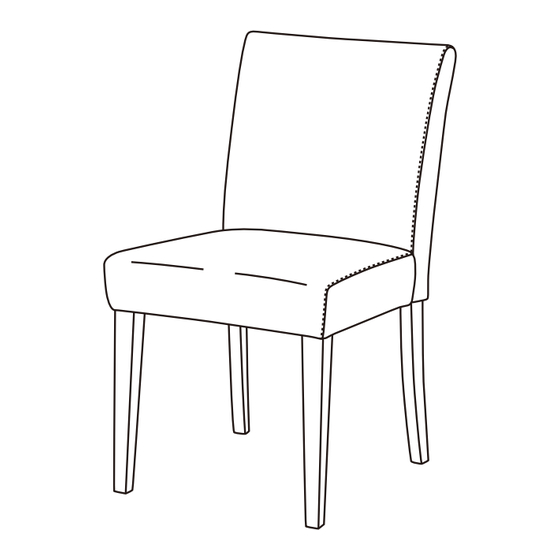
Lot de 2 chaises de salle à manger en cuir gris
Paquete de 2 sillas de comedor de piel gris
Assembly and Care Instructions
Instructions de montage et d'entretien
Instrucciones de ensamble y cuidado
Thank you for your purchase! If you encounter a problem,PLEASE DO NOT RETURN THIS ITEM.
Contact us at costcoservice@gilmancreek.com or (888)509-5381
Merci pour votre achat! Si vous rencontrez un problème, VEUILLEZ NE PAS RETOURNER CET ARTICLE.
Contactez-nous à costcoservice@gilmancreek.com ou (888)509-5381
¡Gracias por la compra! Si encuentra un problema, POR FAVOR NO DEVUELVA ESTE ARTÍCULO.
Contáctenos en costcoservice@gilmancreek.com o (888)509-5381 Teléfono no válido en México.
305 W High Ave. Ste. 1006 High Point, NC 27260 www.gilmancreek.com
CAUTION:
PLEASE READ ALL INSTRUCTIONS CAREFULLY BEFORE STARTING
ASSEMBLY PROCESS. IT IS RECOMMENDED TO USE TWO PEOPLE
WHEN ASSEMBLING AND REMOVING THE INSIDE BACKS OR THE
BASE OF THE FURNITURE.
IMPORTANT, RETAIN FOR FUTURE REFERENCE : READ CAREFULLY
IMPORTANTE: CONSERVE PARA FUTURA REFERENCIA. LEA CUIDADOSAMENTE
ITM. / ART.1570194
2-Pack Grey Leather Dining Chairs
ATTENTION :
BIEN LIRE TOUTES LES INSTRUCTIONS AVANT DE MONTER LE
PRODUIT. IL EST RECOMMANDÉ D'UTILISER DEUX PERSONNES
LORS DU MONTAGE ET DU RETRAIT DE L'INTÉRIEUR DU DOS OU
DE LA BASE DU MEUBLE.
1
PRECAUCIÓN:
LEA TODAS LAS INSTRUCCIONES CUIDADOSAMENTE ANTES
DE COMENZAR EL PROCESO DE MONTAR. SE RECOMIENDA
UTILIZAR DOS PERSONAS AL MONTAR Y QUITAR LOS RESPALDOS
INTERIORES O LA BASE DEL MUEBLE.
MADE IN CHINA / FABRIQUÉ EN CHINE / HECHO EN CHINA
xxxxxxxxxxxxxxx
xxxxxxxxxxxxxxx
xxxxxxxxxxxxxxx
xxxxxx
xxxxxxxxxxxxxxxxxxxxxxx
xxxxxxxxxxx
xxxxxx
xxxxxxxxxxxxxxxxxxxxxxx
xxxxxxxxxxx
xxxxxxxxxxx
xxxxxx
xxxxxxxxxxxxxxxxxxxxxxx
xxxxxxxxxxxx
xxxxx
xxxxxxxxxxxxxxx
xxxxxxxxxxxxxxx
xxxxxxxxxxxx
xxxxx
xxxxxxxxxxxxxxx
xxxxx
xxxxxxxxxxxx
ID tag
ID tag
ID tag
Advertisement

Related Manuals for Gilman Creek 1570194


Summary of Contents for Gilman Creek 1570194
- Page 1 IMPORTANT, RETAIN FOR FUTURE REFERENCE : READ CAREFULLY IMPORTANT, À CONSERVER POUR DE FUTURS BESOINS DE RÉFÉRENCE : À LIRE SOIGNEUSEMENT IMPORTANTE: CONSERVE PARA FUTURA REFERENCIA. LEA CUIDADOSAMENTE ITM. / ART.1570194 2-Pack Grey Leather Dining Chairs Lot de 2 chaises de salle à manger en cuir gris...
- Page 2 Hardware List Liste du matériel Lista de herrajes Front legs A x 2 Les pattes avant Patas delanteras B x 1 Seat cushion Coussin de siege Cojín del asiento C x 1 Back cushion Coussin de dossier Cojín de respaldo Bolts H1 x 8 Boulons...
- Page 3 A x 2 H1 x 8 H2 x 8 H3 x 8 H4 x 1 1.Open the dust cover on the bottom of the seat, take out the front feet and hardware accessories. 1.Ouvrez le cache anti-poussière au bas du siège, sortez les pieds avant et les accessoires matériels.
- Page 4 2.Attach seat (A) to back (B), using bolts (H1), spring washers (H3), flat washers (H2), and allen wrench (H4). Note: Do not fully tighten yet. 2.Fixez le siège (A) au dossier (B) à l'aide des boulons (H1), des rondelles élastiques (H3), des rondelles plates (H2) et de la clé Allen (H4). Remarque: ne serrez pas encore complètement.
- Page 5 4. Press down firmly to make sure all four feet are level with the floor. 4. Appuyez fermement pour vous assurer que les quatre pieds sont au même niveau que le sol. 4. Presione firmemente hacia abajo para asegurarse de que las cuatro patas estén niveladas con el piso.
- Page 6 dust cover (H1) (H3) (H4) (H2) Note: Fully tighten all bolts. Remarque : serrez complètement tous les boulons. Nota: Apriete completamente todos los pernos. 5.Use allen wrench (H4) to fully tighten the bolts, then close the zipper. 5.Utilisez une clé Allen (H4) pour serrer complètement les boulons, puis fermez la fermeture éclair.
- Page 7 Foot levelers Niveleurs de pied Niveladores de pie 6.Adjust the balance of the chair again with adjusting the foot levers if needed. Assembly complete. Enjoy. 6.Réglez à nouveau l'équilibre du fauteuil en ajustant les pédales si nécessaire. Assemblage terminé. Prendre plaisir. 6.Vuelva a ajustar el equilibrio de la silla ajustando las palancas de pie si es necesario.
- Page 8 CARE & MAINTENANCE OF COVER SOIN ET ENTRETIEN DU TISSU CUIDADO Y MANTENIMIENTO DE LA TELA · · eriodic dusting will prolong the life of the leather. · General cleaning can be done with a damp, clean and soft cloth. ·...
- Page 9 hen filing the claim please send clear photos of the problem and barcoded tag found beneath the footrest or on the underside of the item. ors du dépôt de la réclamation, veuillez envoyer des photos claires du problème et une étiquette à code-barres trouvée sous le repose-pieds ou sur le dessous de l'article.
- Page 10 USTRALIA: Our goods come with guarantees that cannot be excluded under the Australian Consumer Law. You are entitled to a replacement or refund for a major failure and for compensation for any other reasonably foreseeable loss or damage. You are also entitled to have the goods repaired or replaced if the goods fail to be of acceptable quality and the failure does not amount to a major failure.
Need help?
Do you have a question about the 1570194 and is the answer not in the manual?
Questions and answers
Can I connect right recliner console power recliner and stationary seat then the wedge than left recliner