Advertisement
Specifications

| Specification | Measurement |
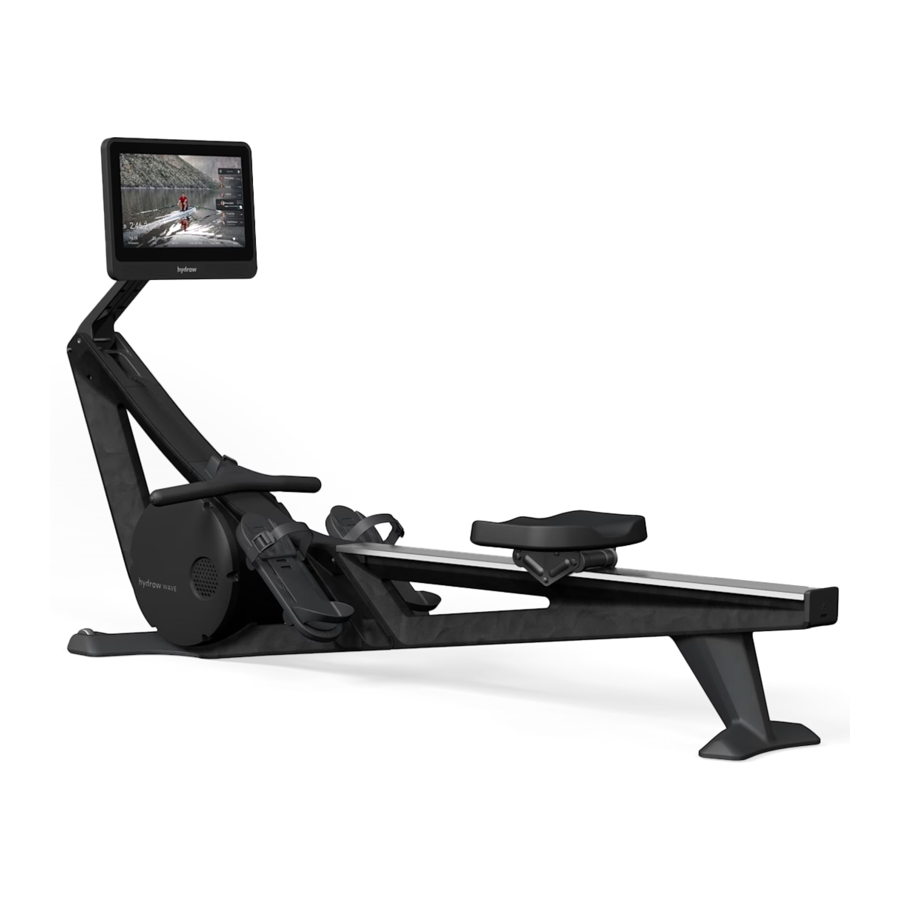
| Dimensions | L x W x H: 80" x 19" x 43" (204 cm x 49 cm x 110 cm) |
| Dimensions with upright storage system* | L x W x H: 26.5" x 30" x 82" (67 cm x 76 cm x 209 cm) *Always use the upright storage system to stabilize the Hydrow Wave for vertical storage. |
| Hydrow Wave weight | 102 lbs (46.3 kg); 128 lbs (58.2 kg) boxed |
| Height limit | Fits up to a 36" inseam (91 cm) |
| Weight limit | Holds up to 375 lbs (170 kg) |
| Connectivity | Bluetooth 5.0 and ANT+, Wi-Fi 802.11 a/b/g/n/ac, Ethernet RJ45 (100 mbps) |
| Drag mechanism | Dynamic and responsive computer-controlled resistance |
| Electrical | 100-240 VAC, 50-60 Hz, Power (Peak): 190 W, Power (Avg): 27 W, Power (Idle): 1.1 W |
| Footrest adjustment | Adjustable for correct foot placement |
| Handle | Ergonomic design for low-stress grip |
| Handle strap | High quality polyester webbing for super smooth and quiet operation |
| Materials | Plastic frame with aluminum feet and monitor arm |
| Seat | Ergonomically designed cushion with a 2-roller and 2-idler system for smooth operation and easy maintenance |
| Speakers | Amplifier x2 channel, 3 W, 8 ohms, front facing for immersive experience |
| Touchscreen resolution | 1920 x 1080 pixels Full HD |
| Touchscreen size | 16" (41 cm) |
| Touchscreen technology | Capacitive Touch Panel (CTP) |
| Usage class | Class SA per EN ISO 20957-1 and 20957-7 for high accuracy and commercial use |
Hydrow Wave qualifies as commercial grade, highly accurate fitness equipment per ISO 20957-1 and ISO 20957-7 and is rated class SA. Accuracy was determined by connecting Hydrow Wave to a load cell that verified that Hydrow Wave's reported watts were within the tolerance of the Class A criteria. Accuracy was characterized at a 104 drag setting with a 1.4 m stroke length.
Assembly and Setup
We recommend scanning this QR code (or visiting hydrow.com/assembly) for the most up-to-date assembly steps and video.

Pick a spot
- Place your Hydrow Wave indoors only, on a level, solid surface. We recommend using our floor-protecting Machine Mat.
- Keep your Hydrow Wave touchscreen out of direct sunlight during use and storage.
- The Hydrow Wave is 80" x 19" x 43" (204 cm x 49 cm x 110 cm). Make sure to test your full range of motion, and leave at least 2 feet (61 cm) of clearance around the rower.
- The Hydrow Wave power cord is 12 feet (3.7 m) long. Do not attempt to stretch the cord. If you plan to connect your Hydrow Wave to Ethernet instead of Wi-Fi, please also consider the length and placement of the Ethernet cable.
![]()
- Place your Hydrow Wave within Wi-Fi range, close to your Wi-Fi router or near a signal booster/extender. (To check signal strength at any location, try streaming video to your phone.)

Unpack the box
- With the This Side Up label facing up, open the Hydrow Wave box carefully with a small knife or blade.
- Open the monitor box, seat box, and hardware pack, and set aside the parts and packaging.
- Remove the remaining small parts from the Hydrow Wave box and set aside all parts and packaging.
- Unpack the rear frame (B).
![]()
rear frame (B)
![]()
The rear frame (B) is bulky. Take care when lifting. - Unpack the front frame (A) but do NOT remove it from the cardboard stand.
![]()
front frame (A) and cardboard stand - do NOT remove from stand
![]()
The front frame (A) is very heavy and bulky. Take care when lifting.


Attach the front foot
- With the front frame (A) still in the cardboard stand, remove plastic as necessary until you can see the bolt holes on the front frame (A).

- Position the front foot (C) on the front frame (A) so that the bolt holes are aligned.
![]()
front foot (C) - bottom view - Use the hex key (I) to secure the front foot (C) to the front frame (A) with the front foot bolts (K) and washers (J).
![]()
- hex key (I)
- washers (J)
- 4 front foot bolts (K)
- frame bolt (L)
- 4 footrest bolts (M)
- monitor arm bolt (N)
- monitor arm pin (O)
- 4 thumbscrews (P)


- You may have to use the long side of the hex key (I) to secure the bolts (K).
![]()

- Carefully cut the cable ties (do NOT cut the handle strap) and remove the cardboard stand from the front frame (A).
![]()
- Turn the front frame (A) over so that the front foot (C) sits flat on the floor.
![]()
![]()
The front frame (A) is heavy and bulky. Take care when lifting.


Connect the frames
- Line up the frames (A, B) with the feet facing away from each other.
- Lift the inner ends of the frames (A, B) and slide the bottom of the front frame (A) over the silver pin in the bottom of the rear frame (B).


- Slowly lower the front frame (A) and rear frame (B) together until the hook at the top of the rear frame (B) settles in place.
![]()
- It might take a few tries to get the alignment right.
- When done correctly, only the front foot (C) and rear foot should touch the floor.
![]()
- Use the hex key (I) to secure the frames with the frame bolt (L).


Attach the footrests
- Slide each footrest tube (D) into a footrest support hole and roughly center it.

- Install the right footrest (E) on the right side of the front frame (A):

- Make sure the numbers 1-7 at the top of the footrest (E) are right-side up.
![]()
left and right footrests (E) - Make sure you are facing away from the rear frame (B) when identifying the right and left sides of the front frame (A).
- Slide the open holes in the footrest (E) over the footrest tubes (D) while holding the footrest tubes (D) in place.
![]()
2 footrest tubes (D)
![]()
Take care not to pinch your fingers.
- Make sure the numbers 1-7 at the top of the footrest (E) are right-side up.
- Repeat the previous step for the left footrest (E).
- With one hand on each footrest (E), push the footrests (E) together.
- Use the hex key (I) to secure the footrests (E) with 2 footrest bolts (M) on each side.
- There should be only a slight gap between the footrest and frame when attached.


Position the handle
- Cut the plastic ties attaching the handle to the front frame (A).
- Do NOT cut the handle strap!
- Be careful not to scratch the front frame (A) when cutting.

- Pull the handle over the top of the front of the front frame (A), making sure the handle strap lies flat and is not twisted.
- Place the handle in the handle rest.

Attach the monitor arm
- Use the hex key (I) to remove the two bolts from the monitor arm (F),
![]()
monitor arm (F)
then pop off the cosmetic cover. Set cover and bolts aside.
![]()
- Locate the cables sticking out of the top of the front frame (A), and thread them through the hole at the bottom of the monitor arm (F).

- We recommend feeding the cable heads through one at a time.
- Attach the monitor arm (F) to the front frame (A).

- Align the larger hole in the bottom of the monitor arm (F) with the larger hole in the top of the front frame (A).
- Use the hex key (I) to attach the monitor arm (F) to the front frame (A) with the monitor arm bolt (N) in the larger bolt hole.
- Insert the monitor arm pin (O) into the smaller bolt hole by hand to finish securing the monitor arm (F) to the front frame (A).
- Thread the cables through the hole at the top of the monitor arm (F) so that the cables lie flat on the monitor arm (F).

- Replace the cosmetic cover:
- Hook the top of the cosmetic cover into the top of the monitor arm (F) and push the rest of the cosmetic cover into place.
- Use the hex key (I) to reattach the two bolts from Step 1 into the underside of the monitor arm (F).


Attach the monitor
- Locate the slot on the back of the monitor (G)
![]()
monitor (G)
just above the triangular inset.

- Carefully slide the tab on the monitor arm plate (F) into the slot on the back of the monitor (G).
- Make sure the monitor's weight is fully supported before letting go.
- Attach the monitor (G) to the monitor arm plate (F) with the 4 thumbscrews (P) by hand.

- Connect the two wires hanging from the monitor arm (F) and plug them into the back of the monitor (G).
- Make sure the cables are fully connected prior to use.

- Make sure the cables are fully connected prior to use.


Attach the seat
- At the very end of the rear frame (B), locate the tab at the base of the end cap and gently pull the tab out while sliding the cap upwards.

- Slide the seat (H)
![]()
seat (H) - bottom view
onto the rear frame (B).

- Make sure the seat's ridged end faces forward, with the scooped end toward the back.
- Seat will slide forward. This is normal.
- Slide the end cap back on.


Power on
- Connect the power cord (Q)
![]()
power cord (Q)
to your Hydrow Wave on the front frame (A) just above the front foot (C).

![]()
Ensure the power cord is completely connected prior to use. A loose connection may result in loss of power during a workout. - Connect the other end of the power cord to a wall outlet.
- Toggle the power switch (just above the power outlet) to ON.
- 0 = OFF; I = ON
- Hydrow Wave is designed as an always-on device; you do not need to turn it off between uses.


- Touchscreen will turn black after 5 minutes of inactivity.
- Tap the touchscreen to wake up your Hydrow Wave.
Operating Instructions
Connect to the internet
- Follow the on-screen instructions to connect your Hydrow Wave to Wi-Fi.
- 10+ mbps Wi-Fi is recommended when using your Hydrow Wave.
- If you have trouble connecting to the internet, please see our troubleshooting guides at hydrow.com/support.
- Alternatively, you can connect an Ethernet cable to the Ethernet port on the back of your Hydrow Wave's monitor (G) and then to your Ethernet jack or router.
- Wait while your Hydrow Wave automatically installs the latest software updates.
Log in
Configure your profile and membership:
- Log in with your Hydrow screen name and password, or follow the on-screen prompts to create a new Hydrow profile.
- Follow the on-screen prompts to configure your Hydrow membership.
Watch the Hydrow tutorial videos
Proper form is essential to maximizing workouts and preventing injury. Please watch all tutorials before using your Hydrow Wave. They are available on the Help tab on your Hydrow Wave, or at hydrow.com/hydrow101. We also offer virtual Personal Coaching sessions at hydrow.com/personal-coaching/.

Do not use Hydrow Wave without watching the Hydrow 101 tutorials. Improper use due to failure to comply with tutorial video instructions may result in damage or injury.
Strap in
Always wear athletic footwear when using your Hydrow Wave, and ensure your shoes are tied without laces dangling past the soles of your shoes.
Never use your Hydrow Wave without strapping your feet securely into the footrests unless explicitly instructed during a workout.
- Slide your feet into the footrests, noticing where the foot strap crosses your foot.
- Remove your foot and move the footrests up or down so the foot straps go over the balls of your feet or the bottom laces on your shoes. The straps should rest just above the widest part of the foot.
- Reinsert your foot and pull the straps on each footrest to secure them. They should be snug, but not tight enough to squeeze your foot.
Get rowing
- Tap Row on the Home screen to begin.
- Tap the Settings icon to adjust the audio mix, your connected devices, and drag.
- Drag defaults to 104 to mimic the natural resistance of water. All tests were performed at 104.
- Adjust the overall volume with the physical buttons on the right side of the monitor (G).
![]()

Maintenance and Care
The Hydrow Wave's safety level can be maintained only if it is examined regularly for wear, including, but not limited to, its handle, handle strap, foot straps, track, power cable, and seat. If any worn or defective parts are found upon inspection, immediately cease using the Hydrow Wave until repairs or replacements are made.
Do not allow any cleaning solutions, water, or other liquids to enter the body of the Hydrow Wave.
Ensure the Hydrow Wave power cord is fully seated before each use.
 NOTE Servicing of internal components must be done by an authorized service representative, or your warranty will be voided.
Cleaning
After each row:
- Clean your Hydrow Wave (especially the seat and handle) thoroughly using a damp cloth.
- Clean the touchscreen using wipes designated for screen cleaning on electronics.
- Use a damp cloth to clean the seat track thoroughly by wiping its full length. Clean the top, sides, and underside of the rail to remove any sweat, dust, or other buildup for a smooth rowing experience.
NOTE DO NOT use lubricants or degreasers (such as WD-40) on the seat rollers or rail. If you have any difficulties with smooth sliding of the seat after cleaning please contact Hydrow Member Services.
Monthly:
- Use a dry cloth to remove any dust from the Hydrow Wave (especially the circular air vents on both sides of the flywheel).
- Remove the seat (H) and clean the entire track and rollers as described above. See the previous Attach the seat section for instructions on removing the seat (H).
Every six months:
- Refer this guide and tighten all bolts mentioned in the Assembly and Setup section.
Updates
Available software updates will be installed on your Hydrow Wave automatically when it is powered on but not in use. If your Hydrow Wave is powered off, you'll be prompted to install updates when you power it on.
Repairs and replacements
If you need to order replacement parts or your Hydrow Wave needs service or repair, contact our Hydrow Member Services team.
Storage
- See hydrow.com/support for complete storage recommendations.
- Store your Hydrow Wave indoors in a safe, dry place, away from direct sunlight.
- To collapse your Hydrow Wave's monitor arm (F) for storage or moving:
- Turn off and unplug your Hydrow Wave.
- While supporting the monitor arm (F) with one hand, remove the monitor arm pin (O) with the other hand.
- Slowly collapse the monitor arm (F).
- Replace the monitor pin (O) into the front frame (A).
- When moving your Hydrow Wave between floors or buildings, we suggest also removing the monitor (G) and storing it securely. See the Attach the monitor section and follow the steps in reverse order to detach the monitor.
![]()
Do not store your Hydrow Wave upright without the the upright storage system compatible with your rower. ![warning]() NOTE upright storage systems are NOT interchangeable between products. Please see shop.hydrow.com to find the upright storage system compatible with your rower.
NOTE upright storage systems are NOT interchangeable between products. Please see shop.hydrow.com to find the upright storage system compatible with your rower.
Limited Warranty
Please refer to our full warranty details at: hydrow.com/warranty
Need Help?
Basic troubleshooting
See hydrow.com/support for our full suite of support and troubleshooting articles.
Reboot your Hydrow Wave
- Toggle your Hydrow Wave's power switch to OFF.
- Leave your Hydrow Wave powered off for at least 15 seconds.
- Toggle the power switch back ON.
Touchscreen won't turn on
- Make sure both cables are firmly connected to the back of your Hydrow Wave's monitor.
- Make sure your Hydrow Wave is plugged into a working outlet and turned on.
Seat clicks or feels bumpy when sliding
- See the Maintenance and Care section in this guide.
Connectivity or video playback issues
- Toggle your Hydrow Wave's power switch to OFF.
- Power off any extenders, your router, and your modem. Leave all devices off for 30 seconds, then power on all devices in reverse order.
- Toggle your Hydrow Wave's power switch to ON.
- If problems persist, please see our full suite of network troubleshooting at hydrow.com/support.
Audio won't play
- Audio only plays during a workout. Begin any workout to test if your audio is working.
- Confirm the volume is turned up using the physical buttons on the right side of the monitor (G).
- Check your Hydrow Wave's Bluetooth menu on the Settings screen to see if another device is connected and receiving audio.
Give feedback
- Tap the Feedback icon to report an issue or provide feedback.
![]()
- Fill out the feedback form.
- Tap Send to send the info directly to the Hydrow Member Services team.

SAVE THESE INSTRUCTIONS.
For patent information, see hydrow.com/patents.
Get support
To contact Hydrow Member Services, you can do any of the following:
- Visit our Help Center at hydrow.com/support
- Email us at support@hydrow.com
- For phone support, please visit hydrow.com/support to find your local support number.
- Tap the Feedback icon
![]() on the touchscreen.
on the touchscreen.
 on the touchscreen.
![]() @hydrow
@hydrow
Important Safety Instructions
To reduce your risk of injury, read all instructions and precautions before using the equipment. Misuse of the equipment may cause damage or void the warranty. Save this guide for future reference. Please see hydrow.com/userguides for the latest version of this guide.
The following instructions are required for our safety certifications and are an indication of our thorough dedication to your wellbeing.
Read and follow all warnings and instructions before using this rower. It is the owner's responsibility to make sure all users are familiar and in compliance with these safety instructions. Use only as described. Hydrow is not responsible for any damage or injury caused by improper use that is not in accordance with these instructions.

To reduce the risk of electric shock, always unplug the Hydrow Wave from the outlet when using the upright storage system, before cleaning, and before replacing any parts.
Heart rate monitoring systems may be inaccurate.
Over-exercising may result in serious injury or death. If you feel faint, stop exercising immediately.
To reduce the risk of damage or injury:
- Children under the age of 13 should not use the Hydrow Wave. Use of the Hydrow Wave by or near children from ages 13 to 18 requires close supervision.
- Consult your healthcare provider before beginning any new exercise routine. Incorrect or excessive exercise can result in serious injury. The Hydrow Wave, its instructions, and its guidance do not constitute (and are not intended as a substitute for) medical advice, diagnosis, treatment, or other professional advice. Reliance on any information provided through Hydrow is solely at your own risk.
- Do not use your Hydrow Wave without watching the Hydrow 101 tutorials. Improper use due to failure to comply with tutorial video instructions may result in damage or injury.
- Close supervision is necessary when the Hydrow Wave is used by or near persons with reduced physical, sensory, or mental capabilities.
- Keep children and pets away from the Hydrow Wave.
- Inspect your Hydrow Wave regularly for wear, including on its handle, handle strap, foot straps, track, feet, power cord, and seat. If any worn or defective parts are found upon inspection, immediately cease using the Hydrow Wave until repairs or replacements are made.
- Do not wear loose clothing that can get caught in the seat or track. Make sure that your shoes are tied and that the laces do not dangle past the sole of your shoe.
- Do not use outdoors.
- Use the Hydrow Wave only for its intended use as described in this guide. Do not use attachments not recommended by the manufacturer.
- Never operate the Hydrow Wave with the air openings blocked. Keep the air openings free of lint, hair, and other debris.
- Never drop or insert any object into any opening (in the housing or body of the Hydrow Wave).
- A tip-over of the Hydrow Wave could cause death or serious injury. ALWAYS use both the wall mount and stand included with the upright storage system to stabilize the Hydrow Wave for vertical storage.
- Never operate the Hydrow Wave if it has a damaged power cord or plug, is not working properly, has been dropped or damaged, or has been exposed to water.
- The Hydrow Wave is for use on a circuit having a rating between 100 V to 240 V and is factory-equipped with a specific electric cord and plug to permit connection to a proper electric circuit. Make sure that the Hydrow Wave is connected to an outlet with the same configuration as the plug. No adapter should be used with this product.
Changes or modifications to this unit not expressly approved by Hydrow could void the manufacturer's warranty.
Familiarize yourself with all warnings on the Hydrow Wave before use. If any label is damaged or missing, contact us immediately at hydrow.com/support for a replacement.
SAVE THESE INSTRUCTIONS
Documents / Resources
References
![hydrow.com]() PublicSupport
PublicSupport![hydrow.com]() PublicSupport
PublicSupport![hydrow.com]() PublicSupport
PublicSupportHydrow Personal Coaching - Hydrow
The Hydrow Pro, Wave and Core Indoor Rowing Machines
The Hydrow Pro, Wave and Core Indoor Rowing Machines
![hydrow.com]() PublicSupport
PublicSupport
Download manual
Here you can download full pdf version of manual, it may contain additional safety instructions, warranty information, FCC rules, etc.
Advertisement


Need help?
Do you have a question about the WAVE and is the answer not in the manual?
Questions and answers