Advertisement
Quick Links
Contents
G-Raxx Basic Element ................................................................................................................................... 2
G-Raxx Dolly Platform Base .......................................................................................................................... 2
G-Raxx Base Element .................................................................................................................................... 3
Connection of G-Raxx base frames ............................................................................................................... 3
Front Frame ................................................................................................................................................... 4
Connection of front frames ............................................................................................................................. 5
G-Raxx Frame Adapter .................................................................................................................................. 6
Front Panels ................................................................................................................................................... 6
Bartop ............................................................................................................................................................. 7
Front Banner/Brand Sign Front ...................................................................................................................... 8
Side Applications ............................................................................................................................................ 8
Side Panels .................................................................................................................................................... 9
Worktops ........................................................................................................................................................ 9
Worktop Adapter .......................................................................................................................................... 10
Accessories ..................................................................................................................................................... 11
Quiver Board ................................................................................................................................................ 11
Bartop Tray .................................................................................................................................................. 11
Hook in tray, large ........................................................................................................................................ 11
Speedrack .................................................................................................................................................... 12
Shelves Set .................................................................................................................................................. 12
Bottle Display ............................................................................................................................................... 12
Ice Box with Sliding Top Set ........................................................................................................................ 13
Slide Drawer ................................................................................................................................................. 13
LED RGB Light Bar ...................................................................................................................................... 15
LED Light Bar ............................................................................................................................................... 16
Worktop Lamp .............................................................................................................................................. 16
Sliding door set ............................................................................................................................................ 17
Lock for sliding door set ............................................................................................................................... 18
Extender Tray ............................................................................................................................................... 19
Bartop Extension .......................................................................................................................................... 19
Water Station ................................................................................................................................................... 21
Instruction RGBW Remote Controller Mi-Light FUT096 .................................................................................. 22
Exploded view .................................................................................................................................................. 24
Cleaning Instructions ....................................................................................................................................... 25
Electric components ........................................................................................................................................ 25
G-Rack UG & Co KG • Speckenbeker Weg 130e • D-24113 Kiel • Tel.: +49 431 648060
Fax: +49 431 64806-50 • Email: info@g-rack.de • www.g-rack.de
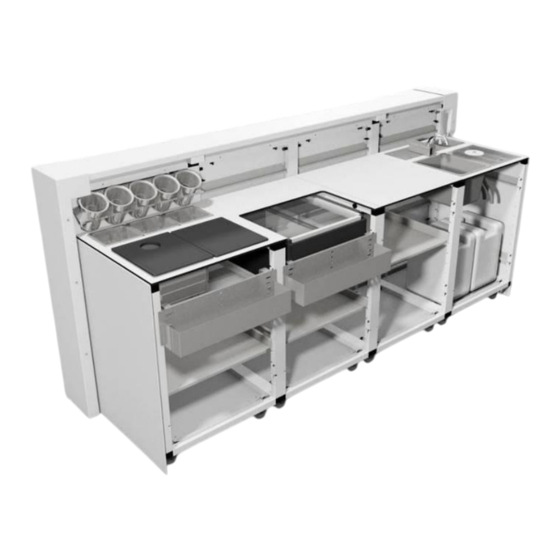
Example Bar 2,4 m
1/25
21.05.2024
Assembly instructions | G-Raxx
Advertisement

Related Manuals for G-Rack G-Raxx


Summary of Contents for G-Rack G-Raxx
- Page 1 Instruction RGBW Remote Controller Mi-Light FUT096 .................. 22 Exploded view ..............................24 Cleaning Instructions ............................25 Electric components ............................25 G-Rack UG & Co KG • Speckenbeker Weg 130e • D-24113 Kiel • Tel.: +49 431 648060 Fax: +49 431 64806-50 • Email: info@g-rack.de • www.g-rack.de 1/25...
- Page 2 When the G-Raxx is in place pull down the clasp. G-Rack UG & Co KG • Speckenbeker Weg 130e • D-24113 Kiel • Tel.: +49 431 648060 Fax: +49 431 64806-50 • Email: info@g-rack.de • www.g-rack.de...
- Page 3 Connection of G-Raxx base frames Connect the frames by screwing the bolts at the horizon- tal tubes. G-Rack UG & Co KG • Speckenbeker Weg 130e • D-24113 Kiel • Tel.: +49 431 648060 Fax: +49 431 64806-50 • Email: info@g-rack.de • www.g-rack.de 3/25...
- Page 4 Make sure that the rod is properly engaged. G-Rack UG & Co KG • Speckenbeker Weg 130e • D-24113 Kiel • Tel.: +49 431 648060 Fax: +49 431 64806-50 • Email: info@g-rack.de • www.g-rack.de...
- Page 5 Use the black wing bolts for connecting front frames! G-Rack UG & Co KG • Speckenbeker Weg 130e • D-24113 Kiel • Tel.: +49 431 648060 Fax: +49 431 64806-50 • Email: info@g-rack.de • www.g-rack.de 5/25...
- Page 6 Put the front panels/side panels in front of the G-Raxx frame as shown. G-Rack UG & Co KG • Speckenbeker Weg 130e • D-24113 Kiel • Tel.: +49 431 648060 Fax: +49 431 64806-50 • Email: info@g-rack.de • www.g-rack.de 6/25...
- Page 7 There are wing screws underneath the bartop on the cus- tomer side. outside inside G-Rack UG & Co KG • Speckenbeker Weg 130e • D-24113 Kiel • Tel.: +49 431 648060 Fax: +49 431 64806-50 • Email: info@g-rack.de • www.g-rack.de 7/25...
- Page 8 It is necessary that they touch the floor. If not, screw the feet to adjust the height. G-Rack UG & Co KG • Speckenbeker Weg 130e • D-24113 Kiel • Tel.: +49 431 648060 Fax: +49 431 64806-50 • Email: info@g-rack.de • www.g-rack.de...
- Page 9 Also the mounting of the extender tray must be done before fixing the worktop. G-Rack UG & Co KG • Speckenbeker Weg 130e • D-24113 Kiel • Tel.: +49 431 648060 Fax: +49 431 64806-50 • Email: info@g-rack.de • www.g-rack.de...
- Page 10 600mm wor top is fitted on top of the adapters, and is secured with the wings bolts, without the use of a G-Raxx underneath. G-Rack UG & Co KG • Speckenbeker Weg 130e • D-24113 Kiel • Tel.: +49 431 648060 Fax: +49 431 64806-50 • Email: info@g-rack.de • www.g-rack.de...
- Page 11 310 x 150 mm or one barmat 500- 600 mm. G-Rack UG & Co KG • Speckenbeker Weg 130e • D-24113 Kiel • Tel.: +49 431 648060 Fax: +49 431 64806-50 • Email: info@g-rack.de • www.g-rack.de...
- Page 12 Put the display onto the rails. You can use the bottle display without and with shelf. G-Rack UG & Co KG • Speckenbeker Weg 130e • D-24113 Kiel • Tel.: +49 431 648060 Fax: +49 431 64806-50 • Email: info@g-rack.de • www.g-rack.de...
- Page 13 Pull out the drawer rails. G-Rack UG & Co KG • Speckenbeker Weg 130e • D-24113 Kiel • Tel.: +49 431 648060 Fax: +49 431 64806-50 • Email: info@g-rack.de • www.g-rack.de...
- Page 14 G-Rack UG & Co KG • Speckenbeker Weg 130e • D-24113 Kiel • Tel.: +49 431 648060 Fax: +49 431 64806-50 • Email: info@g-rack.de • www.g-rack.de...
- Page 15 Instructions how to use the LED-RGB Remote Controller you find at the end of this instructions. Stainless steel clamps G-Rack UG & Co KG • Speckenbeker Weg 130e • D-24113 Kiel • Tel.: +49 431 648060 Fax: +49 431 64806-50 • Email: info@g-rack.de • www.g-rack.de 15/25...
- Page 16 The worktop lamp can only be used when no bartop extension is mounted. G-Rack UG & Co KG • Speckenbeker Weg 130e • D-24113 Kiel • Tel.: +49 431 648060 Fax: +49 431 64806-50 • Email: info@g-rack.de • www.g-rack.de 16/25...
- Page 17 4 bolts underneath. Put the upper rail on the base frame as shown. G-Rack UG & Co KG • Speckenbeker Weg 130e • D-24113 Kiel • Tel.: +49 431 648060 Fax: +49 431 64806-50 • Email: info@g-rack.de • www.g-rack.de...
- Page 18 Plug the lock into the two holes of the doors. The key must be at the right. G-Rack UG & Co KG • Speckenbeker Weg 130e • D-24113 Kiel • Tel.: +49 431 648060 Fax: +49 431 64806-50 • Email: info@g-rack.de • www.g-rack.de...
- Page 19 Push the support plate in an upward motion against the lower side of the bartop. G-Rack UG & Co KG • Speckenbeker Weg 130e • D-24113 Kiel • Tel.: +49 431 648060 Fax: +49 431 64806-50 • Email: info@g-rack.de • www.g-rack.de...
- Page 20 Put the drip plate with cover plate on top of the support plate. G-Rack UG & Co KG • Speckenbeker Weg 130e • D-24113 Kiel • Tel.: +49 431 648060 Fax: +49 431 64806-50 • Email: info@g-rack.de • www.g-rack.de 20/25...
- Page 21 Restricted pump delivery. Check discharge lines, fit- tings, valves and spray nozzles for clogging or for clogging or undersizing. G-Rack UG & Co KG • Speckenbeker Weg 130e • D-24113 Kiel • Tel.: +49 431 648060 Fax: +49 431 64806-50 • Email: info@g-rack.de • www.g-rack.de 21/25...
- Page 22 Note: Due to the various apps available, deviations in operation and individual functions are possible. G-Rack UG & Co KG • Speckenbeker Weg 130e • D-24113 Kiel • Tel.: +49 431 648060 Fax: +49 431 64806-50 • Email: info@g-rack.de • www.g-rack.de...
- Page 23 21.05.2024 Assembly instructions | G-Raxx Control panel on hand-held transmitter G-Rack UG & Co KG • Speckenbeker Weg 130e • D-24113 Kiel • Tel.: +49 431 648060 Fax: +49 431 64806-50 • Email: info@g-rack.de • www.g-rack.de 23/25...
- Page 24 Bartop 600 Worktop 2-1 Worktop 2-5 Worktop 2-2 Side Application left Side Application right G-Rack UG & Co KG • Speckenbeker Weg 130e • D-24113 Kiel • Tel.: +49 431 648060 Fax: +49 431 64806-50 • Email: info@g-rack.de • www.g-rack.de 24/25...
- Page 25 Make sure the bar is not connected to the electric power supply. G-Rack UG & Co KG • Speckenbeker Weg 130e • D-24113 Kiel • Tel.: +49 431 648060 Fax: +49 431 64806-50 • Email: info@g-rack.de • www.g-rack.de...
Need help?
Do you have a question about the G-Raxx and is the answer not in the manual?
Questions and answers