Advertisement
Quick Links
Advertisement

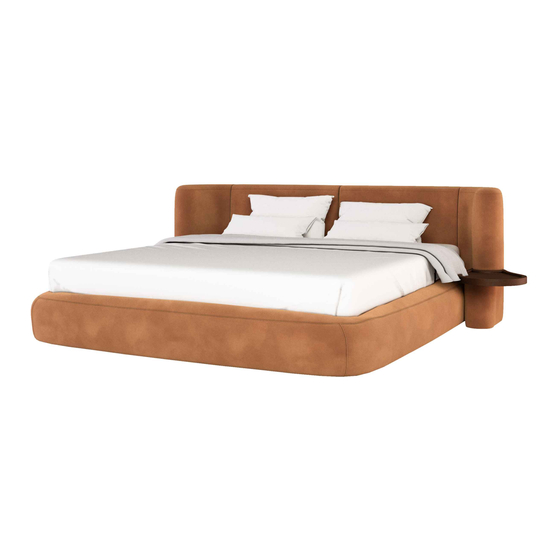
Summary of Contents for baxter CLARA BED
- Page 1 LETTO - CLARA - BED...
- Page 2 CLARA LETTO/ CLARA BED Christophe Delcourt 236 x 245 h 86 Letto Rete 160x 200 cm, 62 " x 78" Spring 160 x 200 cm, 62 " x 78" 280 x 245 h 86 Letto con comodino Rete 160 x 200 cm, 70 "...
- Page 3 300 x 245 h 86 Letto con comodino Rete 180 x 200 cm, 70 " x 78" Bed with night table Spring 180 x 200 cm, 70 " x 78" 276 x 245 h 90 Letto Rete 200 x 200 cm, 78" x 78" Spring 200 x 200 cm, 78"...
- Page 4 300 x 245 h 86 Letto con comodino Rete 180 x 200 cm, 70 " x 78" Bed with night table Spring 180 x 200 cm, 70 " x 78" 276 x 245 h 90 Letto Rete 200 x 200 cm, 78" x 78" Spring 200 x 200 cm, 78"...
- Page 5 COMPONENTI Tutte le versioni n° 01 - Giroletto - testata n° 01 - Giroletto - fascia destra n° 01 - Giroletto - fascia sinistra n° 01 - Giroletto - pediera n° 04 - Piedini in legno n° 04 - Piedini in plastica Ø50mm + feltro n°...
- Page 6 COMPONENTS All version n° 01 - Bedframe - headboard n° 01 - Bedframe - right side n° 01 - Bedframe - left side n° 01 - Bedframe - footboard n° 04 - Wood feet n° 04 - Adjustable feet Ø50mm + felt pad n°...
- Page 7 Avvitare le piastre in metallo al giroletto con le viti testa svasata M8x40mm. Avvitare gli angolari in plastica con le viti testa flangiata M6x25mm. ( Figura 1 - Fase 1 ) Screw the metal brackets to the bedframe with the M8x40mm flared head screws.
- Page 8 Avvitare il piedino regolabile alla rete e appoggiarla all'interno del giroletto. (Figura 8;9;10;11 - Fase 7) Screw the adjustable foot to the slatted bed base and lay it on the bedframe. (Picture 8;9;10;11 - Step 7) Appoggiare il materasso sulla rete. (Figura 12 - Fase 8) Lay the mattress on the spring.
- Page 9 Figura 1 - Picture 1 Fase 1 - Step 1 Pianta / Plan Supporto plastica rete Plastic support Vite testa flangiata M6x25 mm Flange head screw M6x25 mm Piastra Metal bracket Vite testa svasata M8 x 40 mm Flared head screw M8 x 40 mm...
- Page 10 Figura 2 - Picture 2 Fase 2 - Step 2 Vista assonometria / Isometric view Avvitare i piedini alle piastre in metallo. Screw wood feet to the metal brackets. Piastra metallo Metal brackets Piedino in legno Wood foot Piedino in plastica Plastic foot Fase 3 - Step 3 Vista laterale / Lateral view...
- Page 11 Figura 3 - Picture 3 Fase 4 - Step 4 Vista frontale / Front view Testata letto Headboard Pianta / Plan Testata letto Headboard Giroletto Bedframe...
- Page 12 MONTAGGIO COMODINI SMALL TABLE ASSEMBLY INSTRUCTIONS...
- Page 13 Figura 5 - Picture 5 Fase 5 - Step 5 Vista assonometria / Isometric view Inserire il comodino nell'alloggiamento predisposto nella testata. Insert the small table in the hole provided. Testata Headbaord Giroletto Bedframe Piastra supporto comodino Metal support Comodino Small table...
- Page 14 Figura 6 - Picture 6 Fase 6 - Step 6 Vista assonometria / Isometric view Avvitare il comodino dal basso con le viti a testa flangiata M6x12. Screw the small table with M6x12mm flange head screws. Comodino Small table Vite testa flangiata M6 x 12 mm Flange head screw M6 x 12 mm istruzioni di montaggio letto | bed assembly instructions...
- Page 15 MONTAGGIO RETI SLATTED BED BASE ASSEMBLY INSTRUCTIONS...
- Page 16 Figura 8 - Picture 8 Fase 7 - Step 7 Vista assonometrica / Isometric view Avvitare il piedino regolabile al centro della rete e posizionarla all'interno del giroletto. Screw the adjustable foot to the slatted bed base and lay it on the bedframe. Rete letto Slatted bed base Bussola...
- Page 17 Figura 9 - Picture 9 Fase 7 - Step 7 Vista assonometrica / Isometric view Solo per reti singole Only for slatted bed base split in two Avvitare le piastre in metallo al giroletto Screw the metal brackets to the bedframe Staffa metallica Metal bracket Viti testa svasata...
- Page 18 Figura 10 - Picture 10 Fase 7 - Step 7 Vista assonometrica / Isometric view Avvitare il piedino regolabile al supporto reti Screw the adjustable foot to the slatted bed base support Barra centrale rete Slatted bed base support Piedino regolabile Adjustable foot Avvitare il supporto reti alle piastre Screw the slatted bed base support to the metal brackets...
- Page 19 Figura 11 - Picture 11 Fase 7 - Step 7 Vista assonometrica / Isometric view Rete letto Slatted bed base istruzioni di montaggio letto | bed assembly instructions...
- Page 20 Figura 12 - Picture 12 Fase 8 - Step 8 Vista laterale / Lateral view Parete Wall Appoggiare il materasso sulla rete Lay the mattress on the spring Pavimento Floor Fase 9 - Step 9 Vista frontale / Front view istruzioni di montaggio letto | bed assembly instructions...
- Page 21 T. 031 35999 F. 031 35 99999 www.baxter.it Via Costone 8 - 22040 Lurago d'Erba (CO)


Need help?
Do you have a question about the CLARA BED and is the answer not in the manual?
Questions and answers