
Related Manuals for Midea MUAMR-H14


Summary of Contents for Midea MUAMR-H14
- Page 1 R290 HEAT PUMP Service manual MUAMR-H14 / MUAMR-H14T CL45220 a CL45229 English www.mundoclima.com...
- Page 2 CONTENTS Part 1 General Information ................3 Part 2 Component Layout and Refrigerant Circuits........5 Part 3 Control and Field Settings..............18 Part 4 Diagnosis and Troubleshooting ............61...
- Page 3 R290 MUAMR-H14 Series...
-
Page 4: General Information
Part 1 General Information 1 Product Lineup ....................4 2 Nomenclature....................4... -
Page 5: Product Lineup
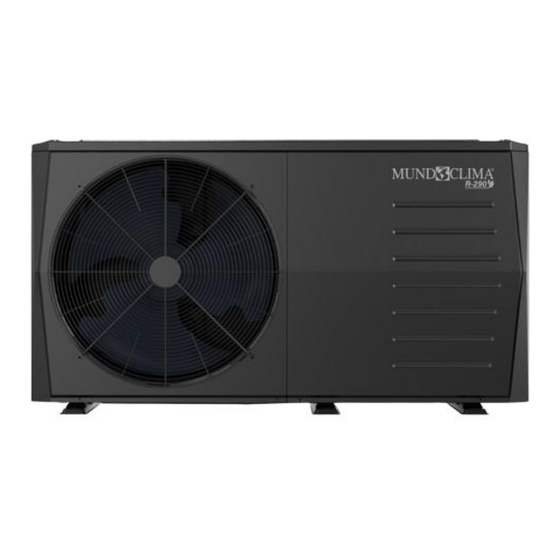
R290 MUAMR-H14 Series 1 Product Lineup Power 220-240V/1N/50Hz 380-415V/3N/50Hz Supply MUAMR-12 MUAMR-14 MUAMR-16 Model MUAMR-04-H14 MUAMR-06-H14 MUAMR-08-H14 MUAMR-10-H14 MUAMR-12-H14 MUAMR-14-H14 MUAMR-16-H14 -H14T -H14T -H14T Appearance Note: Please note that these photos are for reference only, actual products may vary. 2 Nomenclature... -
Page 6: Refrigerant Circuits
Part 2 Component Layout and Refrigerant Circuits 1 Layout of Functional Components..............6 2 Piping Diagrams..................... 14... - Page 7 R290 MUAMR-H14 Series 1 Layout of Functional Components 1.1 4-6kW Pin valve...
- Page 8 R290 MUAMR-H14 Series...
- Page 9 R290 MUAMR-H14 Series 1.2 8-10kW Pin valve...
- Page 10 R290 MUAMR-H14 Series R290 MUAMR-H14 Series...
- Page 11 R290 MUAMR-H14 Series 1.3 12-16kW 1Ph Pin valve...
- Page 12 R290 MUAMR-H14 Series R290 MUAMR-H14 Series...
- Page 13 R290 MUAMR-H14 Series 1.4 12-16kW 3Ph Pin valve...
- Page 14 R290 MUAMR-H14 Series R290 MUAMR-H14 Series...
-
Page 15: Piping Diagrams
R290 MUAMR-H14 Series 2 Piping Diagrams Refrigerant piping graphic example: High temperature, high pressure gas High temperature, high pressure liquid Low temperature, low pressure gas liquid mixture Low temperature, low pressure gas Note: The refrigerant flow direction shown in the figure is the main refrigerant flow direction for reference only. - Page 16 R290 MUAMR-H14 Series R290 MUAMR-H14 Series 2.2 Cooling mode 4-6kW 8-16kW...
-
Page 17: Key Components
R290 MUAMR-H14 Series 2.3 Key components Compressor Temperature sensor (Compressor discharge) Temperature sensor (Compressor suction) High pressure switch High pressure sensor 4-way valve Low pressure sensor Temperature sensor (Outdoor air) Finned tube Heat exchanger Temperature sensor (Heat exchanger) Temperature sensor (Heat exchanger outlet refrigerant) - Page 18 R290 MUAMR-H14 Series R290 MUAMR-H14 Series Electronic expansion valve (EXV): To Control refrigerant flow and reduces refrigerant pressure. Liquid resevoir: To hold excess fluid refrigerant when the system is in operation. Plate heat exchanger: To transfer heat between two fluids. This has a major advantage over a conventional heat exchanger in that the fluids are exposed to a much larger surface area because the fluids are spread out over the plates.
-
Page 19: Table Of Contents
Part 3 Control and Field settings 1 Stop Operation ....................20 2 Standby Control ..................... 20 3 Startup Control ....................21 4 Normal Operation Control ................24 5 Protection Control ..................26 6 Special Control....................31 7 User Interface Field Settings ................. 32 8 USB Function Field Settings ................ - Page 20 R290 MUAMR-H14 Series R290 MUAMR-H14 Series Notice The whole system diagram is illustrated as below for the understanding of the locations of key components and sensors. This is for reference only, it may vary from different scenarios and depend on the actual installation.
-
Page 21: Stop Operation
R290 MUAMR-H14 Series 1 Stop Operation The stop operation occurs for one of the following reasons: 1. Abnormal shutdown: in order to protect the compressors, if an abnormal state occurs the system makes a stop with thermo off operation and an error code is displayed on the outdoor unit PCB digital displays and on the user interface. -
Page 22: Startup Control
R290 MUAMR-H14 Series R290 MUAMR-H14 Series 3 Startup Control 3.1 Compressor Startup Delay Control In initial startup control and in restart control (except in oil return operation and defrosting operation), compressor startup is delayed such that a minimum of the set re-start delay time 3minutes has elapsed since the compressor stopped, in order to prevent frequent compressor on/off and to equalize the pressure within the refrigerant system. - Page 23 R290 MUAMR-H14 Series 12-16kw compressor startup program when cooling mode ambient temperature is above 12°C & when heating mode ambient temperature is above 0°C 12-16kw compressor startup program when cooling mode ambient temperature is below 12°C & when heating mode ambient temperature...
- Page 24 R290 MUAMR-H14 Series R290 MUAMR-H14 Series 3.3 Startup Control for Heating and Domestic Hot Water Operation Component control during startup in heating and domestic hot water modes Component Wiring diagram label 4-16kW Control functions and states Compressor startup program selected according to...
-
Page 25: Normal Operation Control
R290 MUAMR-H14 Series 4 Normal Operation Control 4.1 Component Control during Normal Operation Component control during heating and domestic hot water operations Component Wiring diagram label Control functions and states 4-16kW Controlled according to load requirement from Inverter compressor COMP ●... -
Page 26: Electronic Expansion Valve Control
R290 MUAMR-H14 Series R290 MUAMR-H14 Series 4.5 Electronic Expansion Valve Control The position of the electronic expansion valve (EXV) is controlled in steps from 0 (fully closed) to 480 (fully open). At power-on: The EXV first closes fully, then moves to the standby position (480 (steps)). After compressor runs the EXV is controlled according to suction superheat discharge temperature,pressure, discharge temperature and compressor speed. -
Page 27: Protection Control
R290 MUAMR-H14 Series 5 Protection Control 5.1 High Pressure Protection Control This control protects the refrigerant system from abnormally high pressure and protects the compressor from transient spikes in pressure. High pressure protection control Normal operation > 3.5MPa < 2.6MPa... - Page 28 R290 MUAMR-H14 Series R290 MUAMR-H14 Series 5.3 Discharge Temperature Protection Control This control protects the compressor from abnormally high temperatures and transient spikes in temperature. High discharge temperature protection control Normal operation Discharge temperature > 115°C Discharge temperature < 95°C High discharge temperature protection, error code P4 is displayed When the discharge temperature rises above 115°C the system displays P4 protection and the unit stops running.
- Page 29 R290 MUAMR-H14 Series 5.5 Voltage Protection Control This control protects the M-Thermal Split from abnormally high or abnormally low voltages. Figure 3-5.6: Compressor voltage protection control Normal operation Voltage ≥ 265V 180V≤Voltage < 256V for 30s or Voltage ≤ 172V Compressor voltage protection, error code H7 is displayed When the phase voltage of AC power supply is at or above 265V, the system displays H7 protection and the unit stops running.
- Page 30 R290 MUAMR-H14 Series R290 MUAMR-H14 Series Anti-freezing control in Cooling mode Cooling mode Min(Twout,Twin,T1)<4 and lasts 5s Compressor stops, water pump keeps running at the maximum output for 5 mins Min(Twout,Twin,T1) 8 Anti-freezing protection in cooling mode Turn to Off Status and running anti-freezing...
- Page 31 R290 MUAMR-H14 Series Anti-freezing control in Off status/ Heating mode/ DHW mode Off Status / Heating mode / DHW mode Turn to Off Status 1.T4<3 ,and Min(Twout,Twin,T1)<4 lasts 5s 2.Min(Twout,Twin,T1)<2 Compressor stops, water pump keeps running at the maximum output for 5 mins Min(Twout,Twin,T1)<8...
-
Page 32: Special Control
R290 MUAMR-H14 Series R290 MUAMR-H14 Series 6 Special Control 6.1 Oil Return Operation In order to prevent the compressor from running out of oil, the oil return operation is conducted to recover oil that has flowed out of the compressor and into the refrigerant piping. When the oil return operation is being conducted, the outdoor unit refrigerant system main PCB displays code d0. -
Page 33: User Interface Field Settings
R290 MUAMR-H14 Series 7 User Interface Field Settings 7.1 Introduction During installation, the parameters setting should be configured by the installer to suit the installation configuration, climate conditions and end-user preferences. The relevant settings are accessible and programmable through the FOR SERVICEMAN menu on the user interface. -
Page 34: Menu Structure
R290 MUAMR-H14 Series R290 MUAMR-H14 Series 7.2 Menu Structure For serviceman 7 Other heating source For serviceman 1 DHW setting 7.1 IBH function 1.1 DHW mode 1 DHW setting 7.2 IBH locate 1.2 Disinfect 2 Cooling setting 7.3 dT1_IBH_ON 1.3 DHW priority 3 Heating setting 7.4 t_IBH_DELAY... - Page 35 R290 MUAMR-H14 Series 7.3 FOR SERVICEMAN Menu For serviceman allows installers to input the system configuration and set the system parameters. Press simultaneously for 3 seconds to enter the authorization page. Press to navigate cursor and press to adjust the numerical values. The password is 234. Press to enter For serviceman menu.
- Page 36 R290 MUAMR-H14 Series R290 MUAMR-H14 Series 7.3.1 DHW heating setting 7.3.1.1 DHW mode DHW mode defines whether hot water demand is needed. Setting Description Enable DHW mode if DHW tank is installed. Disable DHW mode if DHW tank is not installed. In this case, no need to define other settings in DHW setting.
- Page 37 R290 MUAMR-H14 Series 7.3.1.3 DHW priority, DHW priority time set, t_DHWHP_RESTRICT, t_DHWHP_MAX DHW priority defines whether domestic hot water or space heating/cooling takes priority. Setting Description When DHW demand and space heating/cooling demand both exist, heat pump will heat the water according to...
- Page 38 R290 MUAMR-H14 Series R290 MUAMR-H14 Series Heating/Cooling turns to DHW turns to PRIORITY PRIORITY t_DHWHP_RESTRICT t_DHWHP_MAX Heating/Cooling TIME SET && DHW mode ON || DHW mode OFF && T5<MIN(T5S, T5STOP)- T5≥MIN(T5S, dT5_ON T5STOP) A min B min && Heating/Cooling mode...
- Page 39 R290 MUAMR-H14 Series PUMP_D RUNNING TIME defines the period that DHW pump operates for each timer Diagram below illustrates the effects of PUMP_D RUNNING TIME when Pump_D is installed and PUMP_D TIMER is enable. Status PUMP_D RUNNING TIME Time PUMP_D DISINFECT defines whether DHW pump operation is activated in disinfection mode.
- Page 40 R290 MUAMR-H14 Series R290 MUAMR-H14 Series T4DHWMIN defines the ambient temperature below which the heat pump will not operate in DHW mode. Diagram below illustrates the effects of T4DHWMAX and T4DHWMIN. Heat pump ON with lowest TBH and Heat pump ON...
- Page 41 R290 MUAMR-H14 Series Heat pump ON with lowest Heat pump ON compressor frequency T4CMIN T4CMAX Abreviations: T4: Outdoor ambient temperature 7.3.2.4 dT1SC dT1SC defines water temperature hysteresis of activating heat pump. When T1 – T1S ≥ dT1SC and heat pump is within operating ambient temperature range, heat pump provides chilled water to space cooling terminals.
- Page 42 R290 MUAMR-H14 Series R290 MUAMR-H14 Series 7.3.3 Heating setting 7.3.3.1 Heating mode Heating mode defines whether space heating demand is needed. Setting Description Enable heating mode if space heating terminals are installed. Disable heating mode if space heating terminals are not installed. In this case, no need to define other settings in Heating mode.
- Page 43 R290 MUAMR-H14 Series 7.3.3.5 dTSH dTSH defines room temperatue hysteresis of activating heat pump. dTSH is only applicable if 1 is selected for Room temp. in the Temp. type setting. When TS – Ta ≥ dTSH and heat pump is within operating ambient temperature range, heat pump provides hot water to the...
- Page 44 R290 MUAMR-H14 Series R290 MUAMR-H14 Series T4AUTOHMAX defines the ambient temperature above which the heat pump will not provide hot water for space heating in auto mode. Diagram below illustrates the effects of T4AUTOCMIN, T4AUTOHMAX, T4CMAX and T4HMIN. Heat pump ON with lowest...
- Page 45 R290 MUAMR-H14 Series Figure below illustrates the effects of different combinations in Temp. type setting. For single zone control WATER FLOW TEMP. ROOM TEMP. DOUBLE ZONE Zones control Zone 1: Water temperature control Zone 1: Room temperature control For double zone control WATER FLOW TEMP.
- Page 46 R290 MUAMR-H14 Series R290 MUAMR-H14 Series If Room thermostat setting is defined as MODE SET, the interface appears: Mode set priority defines whether cooling mode or heating mode takes priority. Setting Description When heating and cooling switch signal are closed simultaneously, heat pump runs in heating mode.
- Page 47 R290 MUAMR-H14 Series Diagram below illustrates the effects of T4_IBH_ON, T4HMIN and T4HMAX. Heat pump Heat pump ON with lowest Heat pump ON IBH ON and IBH ON compressor frequency T4HMIN T4_IBH_ON T4HMAX Abreviations: T4: Outdoor ambient temperature IBH: Electric heater T4HMIN: The ambient temperature below which the heat pump will not operate in heating mode.
- Page 48 R290 MUAMR-H14 Series R290 MUAMR-H14 Series 7.3.7.3 EnSWITCHPDC, GAS_COST, ELE_COST EnSWITCHPDC defines whether heat pump and additional heating source switch automatically based on economic performance and system high efficiency. Setting Description Disable EnSWITCHPDC function, T4_AHS_ON need to be defined manually. Additional heating source may work with heat pump depends on the water temperature and heat pump status.
- Page 49 R290 MUAMR-H14 Series t_TBH_DELAY defines the delayed start-up time of tank booster heater. Tank booster heater will turn on t_TBH_DELAY minutes later after compressor starts. T4_TBH_ON defines the ambient temperature below which the tank booster heater is on. Note: Only when t_TBH_DELAY, T4_TBH_ON are met at the same time then tank booster heater turns on.
- Page 50 R290 MUAMR-H14 Series R290 MUAMR-H14 Series 7.3.8.1 T1S_H.A._H, T5S_H.M_DHW Holiday away setting is used to set the outlet water temperature to prevent water pipes freezing when away from home in cold weather seasons. T1S_H.A._H defines heat pump leaving water temperature for space heating mode during holiday away mode.
- Page 51 R290 MUAMR-H14 Series 7.3.11.1 Point check The POINT CHECK menu is used to check the operation of individual components. Use to scroll to the components you want to check and press to toggle the on/off state of the component. If a valve does not turn on/off or a pump/heater does not operate when their on/off state is toggled, please check the connection between component and main PCB and make sure components’...
- Page 52 R290 MUAMR-H14 Series R290 MUAMR-H14 Series 7.3.11.3 Circulated pump running Circulated pump running operation is used to check the operation of the circulation pump. When circulation pump running is turned on, all running components will stop. 60 seconds later, the SV1 will be off, the SV2 will be on.
- Page 53 R290 MUAMR-H14 Series The DHW running operation is used to check the operation of the system in DHW mode. During DHW running test running, the default target temperature of the domestic water is 55°C. The TBH(tank boost heater) will turn on after the compressor runs for 10min. The TBH will turn off 3 minutes later. Heat pump will operate until the water temperature increase to a certain value or the next command is received.
- Page 54 R290 MUAMR-H14 Series R290 MUAMR-H14 Series Abbreviations: T1: Leaving water temperature dT1SH: Water temperature hysteresis of activating heat pump. t_interval_H: The delayed start-up time of compressor in heating mode. 7.3.12.2 Floor drying up For newly-installed under-floor heating systems, floor drying up is necessary to remove moisture from the floor slab and subfloor to prevent warping or rupture of the floor.
- Page 55 R290 MUAMR-H14 Series 7.3.13 Auto restart Auto restart sets whether or not the unit re-applies the mode and unit status settings when the power returns following a power failure. If 7.3.6 Room thermostat setting is defined as not 0, Auto restart function will not be applicable.
- Page 56 R290 MUAMR-H14 Series R290 MUAMR-H14 Series 7.3.15 Input definition INPUT DEFINE defines sensors and functions to fulfill with installation. M1 M2 defines the function of M1M2 port Setting Description Remote ON/OFF control of heat pump Remote ON/OFF control of tank booster heater Remote ON/OFF control of auxiliary heating source Smart grid defines whether SMART GRID control signal is connected to hydronic PCB.
- Page 57 R290 MUAMR-H14 Series 7.3.17 HMI address setting HMI setting sets the wired controller is master or slave. (0=MASTER, 1=SLAVE) When HMI SET is set to SLAVE, the controller can only switch the operation mode, turn on or off, set the temperature, and cannot set other parameters and functions.
-
Page 58: Operation Parameter
R290 MUAMR-H14 Series R290 MUAMR-H14 Series 7.3.18.4 F-PIPE LENGTH F-PIPE LENGTH select the total length of the liquid pipe. Setting Description Total length of the liquid pipe < 10m Total length of the liquid pipe ≥ 10m 7.3.18.5 PUMP_I_SLIENT OUTPUT PUMP_I_SLIENT OUTPUT can decrease water pump maximum output in order to decrease the noise of heat pump. - Page 59 R290 MUAMR-H14 Series...
-
Page 60: Usb Function Field Settings
R290 MUAMR-H14 Series R290 MUAMR-H14 Series 8 USB Function Field Settings USB function helps you to transmit parameters and program easily. When USB disk connect to CN4 port of main control PCB, the USB function interface appears automatically on the wired controller. - Page 61 R290 MUAMR-H14 Series Sub-function 3: Please make sure there is only one applicable hydraulic system program in the USB disk before using this function. Sub-function 4: Please make sure there is only one applicable refrigerant system program in the USB disk before using this function.
-
Page 62: Troubleshooting
Part 4 Diagnosis and Troubleshooting 1 Service Information ..................62 2 Electric wiring diagram ................. 66 3 Electric Control Box Layout ................70 4 Outdoor Unit PCBs ..................73 5 Error Code Table .................... 83 6 Troubleshooting .................... 86 7 Discharge / Suction pressure and temperature range ....... 145 8 Appendix to Part 4 .................. -
Page 63: Service Information
R290 MUAMR-H14 Series 1 Service Information DANGER! These instructions are exclusively intended for qualified contractors and authorised installers Work on the refrigerant circuit with flammable refrigerant in safety group A2L may only be carried out by authorised heating contractors. These heating contractors must be trained in accordance with EN 378 Part 4 or IEC 60335-2-40, Section HH. - Page 64 R290 MUAMR-H14 Series R290 MUAMR-H14 Series substance that may corrode refrigerant-containing components, unless the components are constructed of materials that are inherently resistant to corrosion or are suitably protected from corrosion 1.4 Check of Electrical Devices Repair and maintenance of electrical components should include initial safety checks and component inspection procedures.
- Page 65 R290 MUAMR-H14 Series This unit uses hydrofluorocarbon that can only be disposed of by qualified specialists 1.8.2 Packaging Dispose of the packaging properly. Observe all relevant regulations 1.8.3 Refrigerant Removal, Evacuation, Charge, Recovery, and Unit Decommissioning WARNING!...
- Page 66 R290 MUAMR-H14 Series R290 MUAMR-H14 Series recovery equipment, check and verify that it works properly and has been properly maintained, and that any associated electrical components are sealed to prevent ignition in the event of a refrigerant leakage. Consult the manufacturer in case of any doubt.
-
Page 67: Electric Wiring Diagram
R290 MUAMR-H14 Series 2 Electric wiring diagram 1Ph 4-16kW... - Page 68 R290 MUAMR-H14 Series R290 MUAMR-H14 Series...
- Page 69 R290 MUAMR-H14 Series 3Ph 12-16kW...
- Page 70 R290 MUAMR-H14 Series R290 MUAMR-H14 Series...
-
Page 71: Electric Control Box Layout
R290 MUAMR-H14 Series 3 Electric Control Box Layout MUAMR-04-H14, MUAMR-06-H14 Inverter Control Box (Inverter PCB’s inside) Power terminal blocks Main Control PCB Main Control Box MUAMR-08-H14, MUAMR-10-H14 Inverter Control Box (Inverter PCB’s inside) Power terminal blocks Main Control PCB Main Control Box... - Page 72 R290 MUAMR-H14 Series R290 MUAMR-H14 Series MUAMR-12-H14, MUAMR-14-H14, MUAMR-16-H14 Inverter Control Box (Inverter PCB’s inside) Power terminal blocks Main Control PCB Main Control Box MUAMR-16-H14T, MUAMR-14-H14T, MUAMR-12-H14T Inverter Control Box (Inverter PCB’s inside) Power terminal blocks Main Control PCB Main Control Box...
- Page 73 R290 MUAMR-H14 Series Note: 1. Main Control PCB consists of Refrigerant system and hydronic system, which is sealed in the hermetic electric control box and placed vertically for safty consideration. 2. The hermetic electric control box of inverter PCB is available to be took out entirely. If there’s something wrong with inverter PCB, it’s suggested to unscrew the cover to identify whether inverter PCB failed (Refer to Appendix to part 4: Guide...
-
Page 74: Outdoor Unit Pcbs
R290 MUAMR-H14 Series R290 MUAMR-H14 Series 4 Outdoor Unit PCBs 4.1 Main Control PCB MUAMR-04-H14, MUAMR-06-H14, MUAMR-08-H14, MUAMR-10-H14, MUAMR-12-H14, MUAMR-14-H14, MUAMR-16-H14 Main Control PCB of 4-16kW... - Page 75 R290 MUAMR-H14 Series Label Port Code Content Rated Voltage CN21 POWER Port for power supply 230VAC S1,S2,S3,S5 Dip switch 0-5V DC ,S6,SW9 CN33 EEV1 Port for electrical expansion valve1 0-12V DC H-SEN Port for high pressure sensor 0-5V DC CN46...
- Page 76 R290 MUAMR-H14 Series R290 MUAMR-H14 Series (Port9,10,11,12) - Port for zone 2 pump(P_c)/ zone 1 pump(P_o)/ solar energy pump(P_s)/ pipe pump(P_d) (Port13) - Control port for tank booster heater (Port14) - Control port for internal backup heater 1 (Port15) - Control port for internal backup heater...
-
Page 77: Inverter Pcb
R290 MUAMR-H14 Series 4.2 Inverter PCB 4-6kW Inverter PCB MUAMR-04-H14, MUAMR-06-H14 Voltage Label Port Code Content CN32 DC fan power ports Above 156V DC (varying according to frequency) CN12 Port for communication with Main Control PCB 0-5V DC CN25 H-pro... - Page 78 R290 MUAMR-H14 Series R290 MUAMR-H14 Series 8-10kW Inverter PCB MUAMR-08-H14, MUAMR-10-H14 Voltage Label Port Code Content CN32 DC fan power ports Above 156V DC (varying according to frequency) CN12 Port for communication with Main Control PCB 0-5V DC CN25 H-pro...
- Page 79 R290 MUAMR-H14 Series 12-16kW 1Ph Inverter PCB MUAMR-12-H14, MUAMR-14-H14, MUAMR-16-H14 Voltage Port Code Content Label Power output U of inverter PCB to compressor Above 156V DC (varying according to frequency) Power output V of inverter PCB to compressor Above 156V DC (varying according to frequency)
- Page 80 R290 MUAMR-H14 Series R290 MUAMR-H14 Series 12-16kW 3Ph Inverter PCB MUAMR-16-H14T, MUAMR-14-H14T, MUAMR-12-H14T Voltage Label Port Code Content Power input L1 of inverter PCB Phase to phase voltage 380VAC Power input L2 of inverter PCB Phase to phase voltage 380VAC...
- Page 81 R290 MUAMR-H14 Series 3Ph 9kW IBH PCB MUAMR-16-H14T, MUAMR-14-H14T, MUAMR-12-H14T Voltage Label Port Code Content CN22 L1 L2 L3 Power input L1/L2/L3 of IBH PCB Phase to phase voltage 380VAC 3KW-3 Power input L3 of 3KW IBH Phase to phase voltage 380VAC...
-
Page 82: Dip Switch Settings
R290 MUAMR-H14 Series 4.4 Digital Display Output Digital display output in different operating states Outdoor unit state Parameters displayed on Main Control PCB DSP1 On standby Normal operation The current frequency of compressor Error or protection Error or protection code 4.5 DIP Switch Settings... - Page 83 R290 MUAMR-H14 Series 5 Error Code Table Water circuit error Error code Description Displayed on water flow failure (10 times of E8) User Interface and Main Control PCB water flow protection User Interface and Main Control PCB Communication error Error code...
-
Page 84: Error Code Table
R290 MUAMR-H14 Series Voltage error Error code Description Displayed on Phase loss or phase reversal User Interface and Main Control PCB For 3Ph models Power overvoltage and Power undervoltage protection User Interface and Main Control PCB Protection code Error code... - Page 85 R290 MUAMR-H14 Series PFC low voltage protection Main Control PCB For 3Ph models PFC power factor is less than 0.8 Main Control PCB For 3Ph models PFC valid value overcurrent protection Main Control PCB For 3Ph models PFC1 channel hardware overcurrent protection...
-
Page 86: Troubleshooting
R290 MUAMR-H14 Series 6 Troubleshooting 6.1 Warning WARNING! All electrical work must be carried by competent and suitably qualified, certified accredited professionals and in accordance with all applicable legislation (all national, local and other laws, standards, codes, rules, regulations and other legislation that apply in a given situation). - Page 87 R290 MUAMR-H14 Series 6.2 E0, E8 Troubleshooting 6.2.1 Digital display output 6.2.2 Description Error code Description water flow failure water flow protection 5 times of No-water detection failures in a No-water detection failures within 5 row before pump on times before pump on...
- Page 88 R290 MUAMR-H14 Series Layout of main component E0(**%) /E8(**%) is diplayed on the User Interface. The percentage indicates possible cause of water flow failure, which is illustrated as note 1. User Interface Correct Dip switch...
- Page 89 R290 MUAMR-H14 Series 6.2.3 Procedure E0 / E8: Water flow failure Check the error code E0(**%) /E8(**%) displayed on the User Interface, and the Check the details of Note 1 percentage is between 5%-80% Check the water pump indicator lights, and it...
- Page 90 R290 MUAMR-H14 Series Note 1 : The meaning of percentage of water pump output(displayed on the user interface) Percentage Water pump model Brand Description Para 25/9 IPWM-130-1 WILO IPWM connection port short circuited APM25-9-130/180 SHIMGE PWM feedback signal loss Para 25/9 IPWM-130-1...
- Page 91 R290 MUAMR-H14 Series Note 3: The possible error and solutions of water pump water pump failure The possible causes of and solutions Description Possible cause Solution Water pump leak Replace the sealing ring Water inlet and outlet pipe connected Connect the pipe correctly.
- Page 92 R290 MUAMR-H14 Series Note 4: The possible error and solutions of water flow switch failure water flow switch failure The possible causes of and solutions Description Possible cause Solution The water flow in the pipe is not Adjust the direction of water flow in...
- Page 93 R290 MUAMR-H14 Series 6.3 E2 Troubleshooting 6.3.1 Digital display output 6.3.2 Description Error code Description Communication fault between User Interface and Main Control PCB Main Control PCB side: Communication failure with User Interface lasts 2 mins Triggering User Interface side: No communication reply from Main Control PCB for 1 min...
- Page 94 R290 MUAMR-H14 Series 6.3.3 Procedure E2: Communication fault between User Interface and the unit Communication cables from port X/HA, Reconnect the communication cables Y/HB was disconnected, or misconnected correctly Communication cables from port X/HA, Replace the communication cables Y/HB have short circuited or damaged...
- Page 95 R290 MUAMR-H14 Series 6.4 H0 Troubleshooting 6.4.1 Digital display output 6.4.2 Description Error code Description Communication error of Main Control PCB Triggering Communication failure lasts 1 min 6.4.3 Procedure H0: Communication error of Main Control PCB Replace the Main Control PCB...
- Page 96 R290 MUAMR-H14 Series 6.5 H1 Troubleshooting 6.5.1 Digital display output 6.5.2 Description Error code Description Communication error between Main Control PCB and inverter PCB Triggering Communication failure lasts 1 min CN43 COMM (Main Control PCB) LED2 & BUS voltage(P-N) (1 Ph Inverter PCB)
- Page 97 R290 MUAMR-H14 Series 6.5.3 Procedure For 1Ph models H1:Communication error between Main Control PCB and Inverter PCB Check whether power supply for ODU is abnormal.( The normal Adjust power supply range is 190-264V Check whether the LED2 on If yes, replace...
- Page 98 R290 MUAMR-H14 Series For 3Ph models H1:Communication error between Main Control PCB and Inverter PCB 1. 1. Check whether power supply for ODU is abnormal.( The normal 1.Adjust power supply range is around 342-456V) 2.Connect L1,L2,L3 correctly and firmly 2. Check whether there is loss of...
- Page 99 R290 MUAMR-H14 Series 6.6 Hd Troubleshooting 6.6.1 Digital display output 6.6.2 Description Error code Description Communication fault between master unit and slave unit. For cascade system, the communication failure between master Triggering unit and slave unit lasts 2mins and above...
- Page 100 R290 MUAMR-H14 Series R290 MUAMR-H14 Series 6.6.3 Procedure Hd:The communication fault between master unit and slave unit. Check “Unit Status-Operation parameter- Online unit number” on the User Interface, and the number is consistant with the actual unit number Communication cables between port...
- Page 101 R290 MUAMR-H14 Series R290 MUAMR-H14 Series 6.7 E5, E6, E9, EA, FC1, H2, H3 Troubleshooting 6.7.1 Digital display output 6.7.2 Description Code Description Port Location T3 Outdoor unit heat exchanger CN34 bottom temperature sensor error T4 Ambient temperature sensor error...
- Page 102 R290 MUAMR-H14 Series R290 MUAMR-H14 Series 6.7.3 Procedure E5, E6, E9, EA, FC1, H2, H3: Temperature sensor error Temperature sensor connection on Main Reconnect the temperature sensor Control PCB is loose, misconnected, correctly and keep it dry broken or moistorized...
- Page 103 R290 MUAMR-H14 Series R290 MUAMR-H14 Series 6.8 E3, E4, E7, Eb, EC, Ed, HA, H9 Troubleshooting 6.8.1 Digital display output 6.8.2 Description Code Description Port Location (Main Control PCB) T1 Electric Heater/AHS water outlet CN39 temperature sensor error T5 Water tank temperature sensor...
- Page 104 R290 MUAMR-H14 Series R290 MUAMR-H14 Series Note 1: Dip switch settings or User Interface settings Code Description Main Control PCB can not detect the right sensor value. IBH function is on(Dip switch S1-3/4 is set IBH available, and User Interface- For Serviceman - Other heat source –...
- Page 105 R290 MUAMR-H14 Series R290 MUAMR-H14 Series 6.8.3 Procedure E3, E4, E7, Eb, EC, H9: Temperature sensor error Check the Dip switch settings or User Reset dip switch, and reboot the unit, make sure parameter are set available Interface settings as illustrated above...
- Page 106 R290 MUAMR-H14 Series R290 MUAMR-H14 Series 6.9 H5 Troubleshooting 6.9.1 Digital display output 6.9.2 Description Code Description Location Ta room temperature sensor error Inserted on PCB of User Interface 6.9.3 Procedure H5:Ta Temperature sensor error Replace User Interface...
- Page 107 R290 MUAMR-H14 Series R290 MUAMR-H14 Series 6.10 H8, P21, P27 Troubleshooting 6.10.1 Digital display output 6.10.2 Description Code Description Port Location(Main Control PCB) H-SEN High pressure sensor error L-SEN Low pressure sensor error CN46 H-SEN and L-SEN connected reversely CN3/...
- Page 108 R290 MUAMR-H14 Series R290 MUAMR-H14 Series 6.10.3 Procedure H8, P21: Pressure sensor error Temperature sensor connection on Main Reconnect the temperature sensor Control PCB is loose, misconnected, correctly and keep it dry broken or moistorized Measure the output voltage of sensor, and it’s consistant with the curve(Refter...
- Page 109 R290 MUAMR-H14 Series R290 MUAMR-H14 Series 6.11 E1 Troubleshooting 6.11.1 Digital display output 6.11.2 Description Error code E1 (For 3Ph models) Description Phase loss or phase reversal Triggering At least one of L1/L2/L3/N misconnected or disconnected Relative Terminal ports and...
- Page 110 R290 MUAMR-H14 Series R290 MUAMR-H14 Series 6.12 H7 Troubleshooting 6.12.1 Digital display output 6.12.2 Description Error code Description Power overvoltage and Power undervoltage protection Input voltage<170V or Input voltage≥265V Triggering (The unit will back to normal if input voltage≥180V or input voltage ≤250V) 6.12.3 Procedure...
- Page 111 R290 MUAMR-H14 Series R290 MUAMR-H14 Series 6.13 P0 Troubleshooting 6.13.1 Digital display output 6.13.2 Description Error code Description Low pressure protection The Main Control PCB detected that the low pressure was < 0.13Mpa and lasts 5 Triggering seconds...
- Page 112 R290 MUAMR-H14 Series R290 MUAMR-H14 Series 6.13.3 Procedure P0: Low pressure protection Check “Unit Status-Operation parameter- Replace the Main Control PCB or low P1 comp. pressure & P2 comp. pressure” pressure sensor on the User Interface, and P1=P2 The unit was installed in a site that is...
- Page 113 R290 MUAMR-H14 Series R290 MUAMR-H14 Series 6.14 P1 Troubleshooting 6.14.1 Digital display output 6.14.2 Description Error code Description High pressure switch protection The Main Control PCB detected that the high pressure was ≥ 3.5 Mpa Triggering High pressure switch The location of high pressure switch refer to Part 2 Component Layout and Refrigerant...
- Page 114 R290 MUAMR-H14 Series R290 MUAMR-H14 Series 6.14.3 Procedure P1 occurs in Cooling mode The unit was installed in a site that is Place the unit somewhere broad, with narrow, with bad ventilation, or in a high good ventilation, or in a medium temperature.
- Page 115 R290 MUAMR-H14 Series R290 MUAMR-H14 Series P1 occurs in Heating/DHW mode Check and clean pipe and filter, make Check “Unit Status-Error info.” on sure water pressure and water flow rate the User Interface, and E8/E0 code also is in the proper range as above.
- Page 116 R290 MUAMR-H14 Series R290 MUAMR-H14 Series 6.15 P3 Troubleshooting 6.15.1 Digital display output 6.15.2 Description Error code Description Overcurrent protection Triggering The Main Control PCB detected that the input current is higher than protection value Teminal block 6.15.3 Procedure P3 occurs in heating/DHW mode...
- Page 117 R290 MUAMR-H14 Series R290 MUAMR-H14 Series Reboot the unit, hold the electronic expansion valve coil to feel whether it is Request aftersales service working, and listen the “Click” sound when the valve turn on/off. Power off the unit, confirm whether...
- Page 118 R290 MUAMR-H14 Series R290 MUAMR-H14 Series P3 occurs in cooling mode Measure the input voltage of terminal bolck, Adjust the power supply based on the and it’s<198V rated voltage range Measure the voltgae between terminal block and inverter PCB power supply port, compare it with “Unit Status-Operation...
- Page 119 R290 MUAMR-H14 Series R290 MUAMR-H14 Series 6.16 P4 Troubleshooting 6.16.1 Digital display output 6.16.2 Description Error code Description The protection for overhigh discharge temperature of Compressor The Main Control PCB detected that the compressor discharge temperature was ≥ Triggering 115℃...
- Page 120 R290 MUAMR-H14 Series R290 MUAMR-H14 Series 6.16.3 Procedure Pull out Tp temperature sensor from compressure fixed sleeve, leave it in the air for 10 mins, if the temperature Replace Tp temperature sensor difference between sensor and air is greater than 5℃, the sensor failed...
- Page 121 R290 MUAMR-H14 Series R290 MUAMR-H14 Series 6.17 Pd Troubleshooting 6.17.1 Digital display output 6.17.2 Description Error code Description The protection for overhigh condensing temperature The Main Control PCB detected that the condensing temperature was ≥65℃ Triggering Relative ports and locations...
- Page 122 R290 MUAMR-H14 Series R290 MUAMR-H14 Series 6.17.3 Procedure Pd: The protection for overhigh condensing temperature Check “Unit Status-Operation parameter- Replace the Main Control PCB or high P1 comp. pressure & P2 comp. pressure” pressure sensor on the User Interface, and P1=P2...
- Page 123 R290 MUAMR-H14 Series R290 MUAMR-H14 Series 6.18 HP Troubleshooting 6.18.1 Digital display output 6.18.2 Description Error code Description Low pressure protection in cooling mode The Main Control PCB detected that the suction pressure P2<0.35Mpa for 5 seconds in Triggering cooling mode...
- Page 124 R290 MUAMR-H14 Series R290 MUAMR-H14 Series 6.18.3 Procedure HP: Low pressure protection in cooling mode Check whether Tw_out sensor felt out Install the Tw_out sensor back to the from installation port, or the detected installation port, so they can detect the temperature was obviously lower than actual temperature.
- Page 125 R290 MUAMR-H14 Series R290 MUAMR-H14 Series 6.19 bA Troubleshooting 6.19.1 Digital display output 6.19.2 Description Error code Description T4 sensor out of operation range protection In heating/ DHW mode, the error occurs when T4≥65℃ or T4<-25℃ Triggering In cooling mode, the error occurs when T4≥65℃ or T4<-5℃...
- Page 126 R290 MUAMR-H14 Series R290 MUAMR-H14 Series 6.19.3 Procedure bA: T4 sensor out of operation range protection The actual ambient temperature ≥65℃ The actual ambient temperature is out of or <-25℃ in heating mode; or the actual range, so the protection program ambient temperature≥65℃...
- Page 127 R290 MUAMR-H14 Series R290 MUAMR-H14 Series 6.20 PP, Hb Troubleshooting 6.20.1 Digital display output 6.20.2 Description Error code The protection for abnormal temperature Description difference between outlet water and inlet 3 times of PP and Twout<7℃ water Twout-Twin≥3℃ and lasts 15 mins in cooling mode Triggering Twin-Twout≥3℃...
- Page 128 R290 MUAMR-H14 Series R290 MUAMR-H14 Series 6.20.3 Procedure PP/Hb in cooling mode Outlet pipe and inlet pipe connected Re-connect the pipes correctly reversely Tw_in sensor and Tw_out sensor connected reversely on plate heat Re-connect the sensors correctly exchanger or on Main control PCB...
- Page 129 R290 MUAMR-H14 Series R290 MUAMR-H14 Series PP/Hb in heating mode Outlet pipe and inlet pipe connected Re-connect the pipes correctly reversely Tw_in sensor and Tw_out sensor connected reversely on plate heat Re-connect the sensors correctly exchanger or on Main control PCB...
- Page 130 R290 MUAMR-H14 Series R290 MUAMR-H14 Series 6.21 P5 Troubleshooting 6.21.1 Digital display output 6.21.2 Description Error code Description The big temperature difference between outlet water temp. and inlet water temp. Twout-Twin≥30℃ in heating/DHW mode Triggering Twout-Twin≥17℃ in cooling mode 6.21.3 Procedure P5:The big temperature difference between...
- Page 131 R290 MUAMR-H14 Series R290 MUAMR-H14 Series 6.22 F1 Troubleshooting 6.22.1 Digital display output 6.22.2 Description Error code Description The protection for undervolotage of DC bus For single phase inverter PCB, the DC bus voltage≤200VDC Triggering For three phase inverter PCB, the DC bus voltage≤350VDC...
- Page 132 R290 MUAMR-H14 Series R290 MUAMR-H14 Series 6.22.3 Procedure For single phase: F1: The protection for undervolotage of DC bus Power off the unit, and identify whether inverter PCB failed. (Refer to Appendix to Replace the inverter control box part 4: Guide for identifying inverter PCB failure) Power on the unit, when it’s standby,...
- Page 133 R290 MUAMR-H14 Series R290 MUAMR-H14 Series For three phase: F1: The protection for undervolotage of DC bus Power off the unit, and identify whether inverter PCB failed.(Refer to Appendix to Replace the inverter control box part 4: Guide for identifying inverter PCB failure) Power on the unit, when it’s standby,...
- Page 134 R290 MUAMR-H14 Series R290 MUAMR-H14 Series 6.23 C7 Troubleshooting 6.23.1 Description Error code Description Overhigh temperature protection for IPM module IPM module tempeature ≥ 95℃ Triggering 6.23.2 Digital display output 6.23.3 Procedure C7:Overhigh temperature protection for IPM module The unit was installed in a site that is...
- Page 135 R290 MUAMR-H14 Series R290 MUAMR-H14 Series 6.24 H4, L** Troubleshooting 6.24.1 Digital display output 6.24.2 Description Error code Description Note 3 times of “L1*” in 60 mins Chcek the specfic code on digital display panel on the Inverter module protection...
- Page 136 R290 MUAMR-H14 Series R290 MUAMR-H14 Series Bus voltage excessively high error Phase loss error of three-phase power supply For 3Ph models Abnormal phase current sampling bias Fan motor code mismatch error IPM protection (FO) Module type mismatch Motor failed to start...
- Page 137 R290 MUAMR-H14 Series R290 MUAMR-H14 Series 6.24.3 Procedure H4, L**: Inverter module protection Power off the unit, the compressor connection cables was disconnected, or Reconnect the cables correctly misconnected Use a digital multimeter to measure the resistance between each two of Replace the compressor compressor terminals.
- Page 138 R290 MUAMR-H14 Series R290 MUAMR-H14 Series 6.25 H6, HH, J** Troubleshooting 6.25.1 Digital display output 6.25.2 Description Error code Description Note Fan failure 10 times of H6 in 120mins Chcek the specfic code on digital display panel on the Fan module failure...
- Page 139 R290 MUAMR-H14 Series R290 MUAMR-H14 Series 6.25.3 Procedure H6, HH: Fan failure Power off the unit, the fan connection cables was disconnected, or Reconnect the cables correctly misconnected Use a digital multimeter to measure the resistance between each two of fan Replace the fan terminals.
- Page 140 R290 MUAMR-H14 Series R290 MUAMR-H14 Series 6.26 HF Troubleshooting 6.26.1 Digital display output 6.26.2 Description Error code Description Outdoor unit EEPROM error The driving program of inverter PCB is detected as being mismatched with Dip Triggering switch Relative ports Dip switch S5 S6...
- Page 141 R290 MUAMR-H14 Series R290 MUAMR-H14 Series 6.27 Pb Troubleshooting 6.27.1 Digital display output 6.27.2 Description Error code Description Pb is the indicator that shows the system is running in anti-freezing control Triggering Refer to Part 3 - Protection control – Anti-freezing protection control...
- Page 142 R290 MUAMR-H14 Series R290 MUAMR-H14 Series 6.28 C2 Troubleshooting 6.28.1 Digital display output 6.28.2 Description Error code Description Relay adhesion on IBH PCB Relay: Poor contact,relay deformation, relay aging, etc. Triggering External factors : overcurrent, over high ambient temperature,etc. Relays and...
- Page 143 R290 MUAMR-H14 Series R290 MUAMR-H14 Series 6.29 C3, C4 Troubleshooting 6.29.1 Digital display output 6.29.2 Description Error code Current transformer failure or circuit Description C3≥3 times failure of IBH PCB Incorrect Dip switch S1, cables with IBH connected improperly; Triggering Overvoltage, IBH failure etc.
- Page 144 R290 MUAMR-H14 Series R290 MUAMR-H14 Series 6.29.3 Procedure C3,C4 Confirm the Dip Switch S1 on main Correct Dip switch S1 control PCB, and it’s correct. The cables between IBH PCB(CN52) and Main Contorl PCB(CN9), the cabels of Reconnect the cables correctly...
- Page 145 R290 MUAMR-H14 Series R290 MUAMR-H14 Series 7 Discharge / Suction pressure and temperature range The following parameter ranges are used to roughly determine whether the system is running properly: Discharge temperature(Tp) on heating/DHW mode T4<-10℃ Twout+10<Tp<Twout+30 -10℃≤T4<10℃ Twout+10<Tp<Twout+30 10℃≤T4<25℃ Twout+10<Tp<Twout+25 T4≥25℃...
-
Page 146: Discharge / Suction Pressure And Temperature Range
R290 MUAMR-H14 Series R290 MUAMR-H14 Series 8 Appendix to Part 4 8.1 Temperature Sensor Resistance Characteristics Applied to T3 Outdoor unit heat exchanger bottom temperature sensor T4 Ambient temperature sensor Th Retur-air temperature sensor T2 Plate heat exchanger outlet refrigerant temperature sensor... -
Page 147: Appendix To Part 4
R290 MUAMR-H14 Series R290 MUAMR-H14 Series Temp. (°C) Resistance (kΩ) Temp. (°C) Resistance (kΩ) Rmax R(t)Normal Rmin Rmax R(t)Normal Rmin 10.8 10.473 10.147 2.004 1.883 1.766 10.3 1.934 1.816 1.702 9.848 9.551 9.255 1.867 1.752 1.641 9.418 9.125 8.834 1.802 1.69... - Page 148 R290 MUAMR-H14 Series R290 MUAMR-H14 Series Applied to Tp Discharge temperature sensor R90℃=5KΩ±3%,B25/50=3950K±3% Temp. (°C) Resistance (kΩ) Temp. (°C) Resistance (kΩ) Rmax R(t)Normal Rmin Rmax R(t)Normal Rmin 2002.628 1642.059 1281.49 318.604 271.634 224.664 1881.964 1544.968 1207.972 302.08 257.867 213.653 1769.292 1454.213...
- Page 149 R290 MUAMR-H14 Series R290 MUAMR-H14 Series Temp. (°C) Resistance (kΩ) Temp. (°C) Resistance (kΩ) Rmax R(t)Normal Rmin Rmax R(t)Normal Rmin 65.58 58.228 50.877 11.858 11.134 10.411 62.678 55.724 48.77 11.432 10.749 10.066 59.919 53.34 46.762 11.024 10.38 9.735 57.295 51.071 44.847...
- Page 150 R290 MUAMR-H14 Series R290 MUAMR-H14 Series Temp. (°C) Resistance (kΩ) Temp. (°C) Resistance (kΩ) Rmax R(t)Normal Rmin Rmax R(t)Normal Rmin 3.045 2.901 2.758 1.625 1.511 1.397 2.962 2.819 2.676 1.586 1.473 1.36 2.881 2.739 2.597 1.548 1.436 1.324 2.802 2.662 2.521...
- Page 151 R290 MUAMR-H14 Series R290 MUAMR-H14 Series Applied to TW_in Plate heat exchanger inlet watertemperature sensor TW_out Plate heat exchanger outlet water temperature sensor T5 Water tank temperature sensor TW2 Zone 2 water flow temperature sensor R50=17.6KΩ±3%,B0/100=3970K±2% Temp. (°C) Resistance (kΩ) Temp.
- Page 152 R290 MUAMR-H14 Series R290 MUAMR-H14 Series Temp. (°C) Resistance (kΩ) Temp. (°C) Resistance (kΩ) Rmax R(t)Normal Rmin Rmax R(t)Normal Rmin 53.854 51.165 48.476 10.231 9.818 9.405 51.485 48.959 46.432 9.887 9.481 9.075 49.234 46.86 44.486 9.556 9.157 8.758 47.094 44.863 42.632...
- Page 153 R290 MUAMR-H14 Series R290 MUAMR-H14 Series Temp. (°C) Resistance (kΩ) Temp. (°C) Resistance (kΩ) Rmax R(t)Normal Rmin Rmax R(t)Normal Rmin 2.787 2.606 2.425 1.477 1.364 1.251 2.711 2.533 2.356 1.44 1.329 1.219 2.637 2.463 2.288 1.405 1.296 1.187 2.565 2.394 2.224...
- Page 154 R290 MUAMR-H14 Series R290 MUAMR-H14 Series 8.2 Pressure and Output voltage characteristics of Pressure sensor Pressure and Output voltage characteristics of Pressure sensor 5.00 Low pressure sensor High pressure sensor 4.50 y = 2x + 0.5 y = 0.87x + 0.5 4.00...
- Page 155 R290 MUAMR-H14 Series R290 MUAMR-H14 Series 8.3 Guide for identifying inverter PCB failure Before measuring the inverter PCB, please confirm steps below in advance : 1) Cut off the power supply ; 2) Wait for 10 mins for capacitor discharging in order to avoid the electric shock 3) Remove all connections wires 4) To identify whether inverter PCB of 1Ph models failed, follow the guide to test inverter circuit.
- Page 156 R290 MUAMR-H14 Series R290 MUAMR-H14 Series Inverter circuit (Fan module/ Compressor module): Test point Order Normal Abnormal +(Red) -(Black) 0.3-0.7V 0 /infinate Note: 1. If any one of test value abnormal, the inverter PCB failed. Request aftersales service and replace the inverter control box.
- Page 157 SALVADOR ESCODA S.A.U. ROSSELLÓ 430-432 08025 BARCELONA ESPAÑA / SPAIN www.mundoclima.com...
Need help?
Do you have a question about the MUAMR-H14 and is the answer not in the manual?
Questions and answers