Toro SnowMaster 724 ZXR Operator's Manual
Hide thumbs
Also See for SnowMaster 724 ZXR:
- Operator's manual (44 pages) ,
- Operator's manual (20 pages) ,
- Operator's manual (20 pages)
Table of Contents
Advertisement
Quick Links
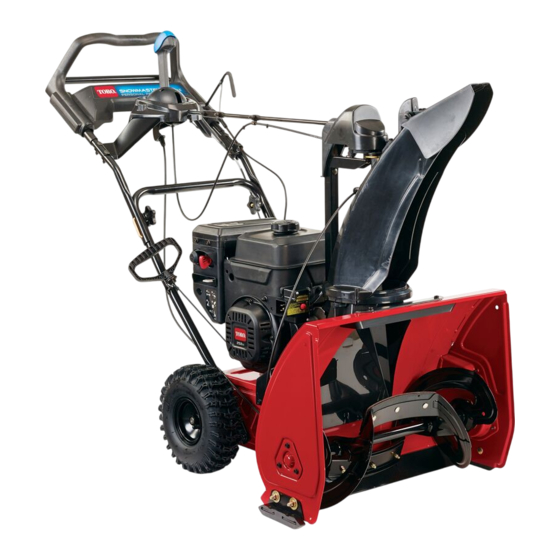
SnowMaster® 724 ZXR Snowthrower
Model No. 36001—Serial No. 316000001 and Up
Introduction
This machine is intended to be used by residential
homeowners. It is designed for removing snow
from paved surfaces, such as driveways and
sidewalks, and other surfaces for traffic on
residential or commercial properties. It is not
designed for removing materials other than snow,
nor is it designed for clearing off gravel surfaces.
Read this information carefully to learn how to operate
and maintain your machine properly and to avoid
injury and machine damage. You are responsible for
operating the machine properly and safely.
You may contact Toro directly at
machine and accessory information, help finding a
dealer, or to register your machine.
Whenever you need service, genuine Toro parts, or
additional information, contact an Authorized Service
Dealer or Toro Customer Service and have the model
and serial numbers of your machine ready.
identifies the location of the model and serial numbers
on the machine. Write the numbers in the space
provided.
1. Model and serial number location
Model No.
Serial No.
This manual identifies potential hazards and has
safety messages identified by the safety alert symbol
© 2025—The Toro® Company
8111 Lyndale Avenue South
Bloomington, MN 55420
www.Toro.com
Figure 1
Figure 1
Register at www.Toro.com.
(Figure
2), which signals a hazard that may cause
serious injury or death if you do not follow the
recommended precautions.
1. Safety alert symbol
This manual uses 2 words to highlight information.
Important calls attention to special mechanical
information and Note emphasizes general information
for
worthy of special attention.
For models with stated power, the net power of
the engine was laboratory rated by the engine
manufacturer in accordance with SAE J1940. As
configured to meet safety, emission, and operating
requirements, the actual engine horsepower on this
class of snow thrower will be significantly lower.
g030108
Original Instructions (EN)
Form No. 3396-366 Rev B
Operator's Manual
Figure 2
*3396-366*
Printed in the USA
All Rights Reserved
g000502
Advertisement
Table of Contents

Related Manuals for Toro SnowMaster 724 ZXR


Summary of Contents for Toro SnowMaster 724 ZXR
-
Page 1: Introduction
SAE J1940. As additional information, contact an Authorized Service configured to meet safety, emission, and operating Dealer or Toro Customer Service and have the model requirements, the actual engine horsepower on this and serial numbers of your machine ready. -
Page 2: Table Of Contents
Safety WARNING CALIFORNIA • Read and understand the contents of the manual Proposition 65 Warning before you start the engine. Make sure that The engine exhaust from this product everyone using this product knows how to use the product and understands the warnings. contains chemicals known to the State of California to cause cancer, birth defects, •... -
Page 3: Safety And Instructional Decals
Safety and Instructional Decals Note: Safety and instruction decals are located near areas of potential danger. Replace damaged decals. decal131-1785 131-1785 1. Auger drive—squeeze the lever to engage; release the lever 4. Thrown object hazard—keep bystanders away. to disengage. 2. Warning—read the Operator's Manual. 5. -
Page 4: Setup
Setup Loose Parts Use the chart below to verify that all parts have been shipped. Procedure Description Qty. – No parts required Unfold the handle. Bolt (1/4–20 X 1.50 inch) Install the discharge chute. Washer-faced lock nut (1/4–20 inch) – No parts required Unfolding the Handle No Parts Required... -
Page 5: Installing The Discharge Chute
Installing the Discharge Filling the Engine with Oil Chute No Parts Required Parts needed for this procedure: Procedure Bolt (1/4–20 X 1.50 inch) Your machine comes with oil in the engine. Washer-faced lock nut (1/4–20 inch) Model Max fill 36001 0.54 L (18 fl oz) Procedure Oil type: automotive detergent oil with an API service... -
Page 6: Checking The Tire Pressure
Checking the Tire Pressure No Parts Required g030449 Procedure The tires are overinflated at the factory for shipping. Reduce the tire pressure equally in both tires to between 103 and 137 kPa (15 and 20 psi). g030442 Figure 6 1. Low oil level—add oil 2. -
Page 7: Product Overview
Product Overview Operation Before Operation Safety • Use extension cords and receptacles as specified by the manufacturer for all machines with electric-starting motors. • Do not operate the machine without wearing adequate winter garments. Avoid loose fitting clothing that can get caught in moving parts. Wear slip resistant footwear that will improve footing on slippery surfaces. -
Page 8: Checking The Engine-Oil Level
• Use extension cords and receptacles as specified by the manufacturer for all machines with electric-starting motors. • Do not attempt to clear snow from a gravel or crushed rock surface. This product is intended for use only on paved surfaces. •... -
Page 9: Starting The Engine
Starting the Engine Temperature Suggested Number of Primes -23°C (-10°F) and above Note: Fully insert the key to start the engine. Turning Below -23°C (-10°F) the key to the middle position does not start the engine. Engaging the Auger g030452 g030453 Figure 11 Disengaging the Auger... -
Page 10: Shutting Off The Engine
Shutting Off the Engine pavement, then lift the handles quickly to bump the front of the machine onto the pavement. To shut off the engine, remove the key from the Disengage the auger. ignition or move the key to the middle position. Repeat steps 1 through 4, if necessary, until a stream of snow comes out of the discharge Adjusting the Discharge... -
Page 11: Preventing Freeze-Up After Use
Preventing Freeze-up after • Let the engine run for a few minutes to prevent moving parts from freezing. Shut off the engine, wait for all moving parts to stop, and remove ice and snow from the machine. • Clean off any snow and ice from the base of the chute. -
Page 12: Maintenance
Maintain or replace safety and instruction labels, as necessary. • Do not change the governor settings on the engine. • Purchase only genuine Toro replacement parts and accessories. Checking the Engine Oil Level Service Interval: Before each use or daily... -
Page 13: Checking And Adjusting The Skids
Checking and Adjusting the Skids Service Interval: Yearly Check the skids to ensure that the auger does not contact the paved surface. Adjust the skids as needed to compensate for wear (Figure 15). Loosen the skid bolts. Slide a 5 mm (3/16 inch) board underneath the scraper. -
Page 14: Changing The Engine Oil
g030122 Figure 17 1. Oil-drain plug After draining the used oil, return the machine to g030128 the operating position. Figure 16 Install the oil drain plug and tighten it securely. 1. The wear indicator hole 2. The wear indicator hole Clean around the oil fill cap. -
Page 15: Replacing The Spark Plug
Replacing the spark plug while the engine is hot can result in burns. Wait until the engine is cool to replace the g030449 spark plug. Use a Toro spark plug or equivalent (Champion® RN9YC or NGK BPR6ES). Remove the boot (Figure 20). -
Page 16: Adjusting The Transmission Cable
If the drive belt slips or squeals under heavy load, adjust the auger cable. Loosen the nut on the lower cable clamp, but do not remove it (Figure 22). g030446 Figure 23 1. Nut 2. Cable g030444 Figure 22 Pull the cable down to remove most of the slack 1. -
Page 17: Storage
Storage affected areas before painting, and use a rust preventative to prevent the metal parts from rusting. Storing the Snowthrower Tighten any loose fasteners. Repair or replace any damaged parts. WARNING Cover the machine and store it in a clean, dry place out of the reach of children. - Page 18 Notes:...
- Page 19 Notes:...
Need help?
Do you have a question about the SnowMaster 724 ZXR and is the answer not in the manual?
Questions and answers