
Related Manuals for YESOUL YS-PIT1


Summary of Contents for YESOUL YS-PIT1
- Page 1 Before u si ng th i s product, caref ully rea d a n d YESOUL Inversion Table proper ly keep t hi s m a n ua l. YESOUL Inversion Table Product model: YS-PIT1 PIT1 Product Manual Item NO. :PIT1...
- Page 2 Specifications Product Name YESOUL Inversion Table PIT1 Product Model YS-PIT1 Item No. PIT1 Net Weight 49.6 Pounds Gross Weight 55 Pounds Maximum Weight Capacity 330 Pounds Carton size 39 x 26 x 6 inches Product Size 44.5 x 31 x 60 inches...
- Page 3 Notes f or safe use Thank you for choosing our products. Proper use of this equipment is your safety and health guarantee. Please read the following before using It is very important to read the manual completely before installation and use. Only proper installation, maintenance and use of this equipment can make the exercise safer.
- Page 4 Name Name Name Specification Picture...
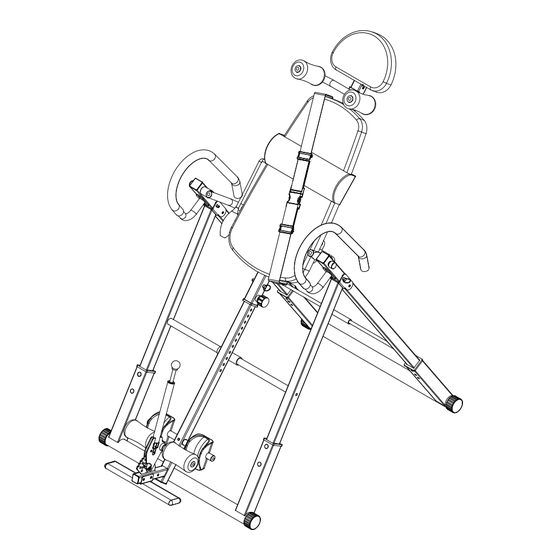
- Page 5 Parts drawing: Step 1: A、 Open the left and right supports 1 # and 2 #, fix the left and right supports on the 5 # support base with 22 # M8 * 60 carriage screws, 27 # M8 flat pads, and 28 # M8 lock nuts.
- Page 6 Step 2: A. Open the support of the inverted machine and insert the 20 # steel ball plug with ring into the hole at the front and rear support connection. B. Adjust the appropriate movement angle. The 10 # rear gear rod is inserted into the holes on both sides of the rear support as needed (the side with the punching hole is fully in place, and the other end with the hook is stuck on the square tube to fix it) or not inserted In this way, you can completely stand upside...
- Page 7 Step 3: A. Use 24 # M8 * 50 screws, 26 # M8 * 20 screws, 27 # M8 flat washers, 28# M8 lock nuts to fix the 12 # head pad holder on the 3 # backrest rame. B. Use 23 # M6 * 16 screws to attach the 16 # head pad and 17 # back pad, and install the 13 # woven tape and 14 # woven tape in the X picture and Y picture at the same time on the iron plate above the 3 # backrest frame.
- Page 8 Step 4: A、Insert the 11 # foam tube into the large hole on the height adjustment frame, and fix it with 26 # M8 * 20 screws and 27 # M8 flat pads, and put 15 # foam into the foam tube from both ends. B、...
- Page 9 Step 5 A 、 Installation of shoulder U-shaped frame: Use 27 # M8 flat pad and 28 # M8 lock nut to fix 7 # shoulder U-shaped frame on the height adjustment tube, and put the into the U-shaped circle On the tube. foam B、Installation of U-shaped clamping feet: Put the 31# U-shaped clamping feet into the 11# foam tube from both ends.
- Page 10 Instructions for use of presser foot: Press down the ball bar, adjust it forward and backward to a comfortable angle, and insert the 21 # pull ring bolt. Instructions for use of pressure balloons: Hold the pressure balloon with your hand and squeeze it to inject air into the 18 # waist pad.
- Page 11 Getting started Stretching exercises: No matter how you exercise, it is best to do stretching exercises first. Warm muscles stretch more easily, so warm up for 5-10 minutes first. Then stop and do stretching exercises 1 to 5 times as follows, each leg for 10 seconds or more, and do it again after the exercise.
- Page 12 Handstand diagram:...
Need help?
Do you have a question about the YS-PIT1 and is the answer not in the manual?
Questions and answers