
Related Manuals for GetPro HIGH QULITY MEDICINE CABINET

Summary of Contents for GetPro HIGH QULITY MEDICINE CABINET
- Page 1 626-679-3588 service@getprohome.com www.getprohome.com 162 Atlantic St, Pomona, CA 91768 INSTALLATION MANUAL HIGH QULITY MEDICINE CABINET PRODUCT INSTRUCTION VIDEO...
-
Page 2: Before Installation
BEFORE INSTALLATION Thank you for choosing BESTGO products. To ensure the best experience, pleaseread carefully and follow the instructions provided below before assemblingand installing the product. Inspect the product immediately upon receipt for any transit damage or missing parts. The voltage for your BESTGO product should be between 100V and 120V If the voltage exceeds 120V, please use a transformer. -
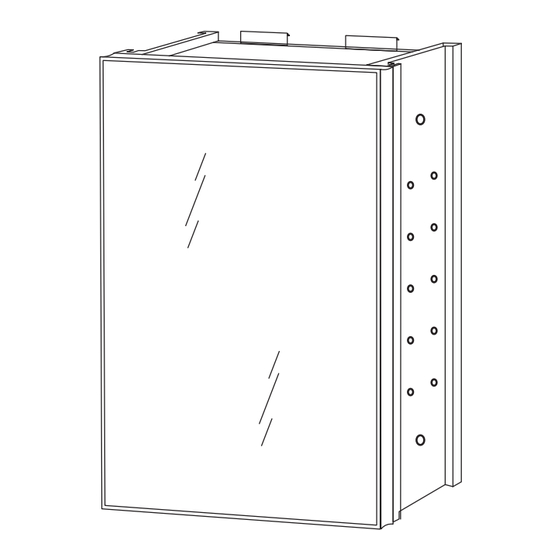
Page 3: Specifications
SPECIFICATIONS /Plug-in TOOLS REQUESTED www.getprohome.com 626-679-3588 service@getprohome.com... -
Page 4: Step 1
SURFACE-MIOUNT INSTALLATION Step 1 Suface-Mount Installation the first step is to install the left and right mirrors. Please follow the bellow steps to install. Install side mirrors, Install the top buckle Attention the tape face back Install the bottom buckle Tear off the tape for a more secure installation Back... - Page 5 20 inch Installation Step 2 Measure the size of the medicine cabinet Step 3 Level and mark the cabinet's location on the wall. Fix Top Mounting Bracket on the Wall Wall Measure the distance between the holes in the Top Mounting Bracket. www.getprohome.com 626-679-3588 service@getprohome.com...
- Page 6 Step 4 Hanging the Cabinet on the top mounting bracket. Make sure top brackets are locked in the grooves. Wall Step 5 Move the cabinet to the right position and screw in the bottom supporting bracket and fix it. www.getprohome.com 626-679-3588 service@getprohome.com...
- Page 7 Step 6 According to you own needs and preferences, adjust and install the height of the glass shelves, first insert the transparent glass clip, then put the glass shelves on the clip, pay attention to the level of the glass. Step 7 If the cabinet door does not close well or unbalanced, it is necessary to adjust the hinge.
-
Page 8: Of The Medicine Cabinet
ALL COMBINATION MEDICINE CABINETS THE INSTALLATION METHOD ARE THE SAME. 80"/60"/40" Installation Step 1 Unpack all the packaging, take out the medicine cabinet, and put it together to measure the total size of the medicine cabinet combination Step 2 Level and mark the cabinet's location on the wall. Fix Top Mounting Bracket on the Wall Wall Measure the distance... - Page 9 Hanging the Cabinet on the top mounting Step 3 bracket. Make sure top brackets are locked in the grooves. Wall Step 4 Move the cabinet to the right position and screw in the bottom supporting bracket and fix it. www.getprohome.com 626-679-3588 service@getprohome.com...
- Page 10 Step 5 According to you own needs and preferences, adjust and install the height of the glass shelves, first insert the transparent glass clip, then put the glass shelves on the clip, pay attention to the level of the glass. Step 6 If the cabinet door does not close well or unbalanced, it is necessary to adjust the hinge.
- Page 11 RECESSED INSTALLATION www.getprohome.com 626-679-3588 service@getprohome.com...
- Page 12 20 inch Installation The opening size of an recessed medicine cabinet 19 3/8” Width (492mm) 29 3/16” ( 742mm) Height ≥4 5/16”(≥110mm) Depth According to the actual size of the medicine cabinet for the wall cutout WALL www.getprohome.com 626-679-3588 service@getprohome.com...
- Page 13 While supporting the door release Step 1 (the leaver under the hinge arm), slide the door offthe frame. www.getprohome.com 626-679-3588 service@getprohome.com...
- Page 14 Step 2 Put the cabinet into the wall, use a level to level, and mark the positions of the upper and lower holes, ready to drill holes WALL WALL Step 3 Take out the cabinet, drill a hole in the marked position, and drive in the plastic nail! WALL WALL...
- Page 15 Put it into the cabinet again, use a level to level it, Step 4 and fasten the upper and lower 3 vacancies with screws (Insert the fixed screw through the decorative cover and tighten the screw) WALL Step 5 Install the cabinet door back to the cabinet body, Align the hook with the hinge bump and press the half of the hinge,make it achieve the locking effect!
-
Page 16: Table Of Contents
Step 7 Step 6 According to you own needs and Install the top and bottom preferences, adjust and install the decorative covers height of the glass shelves, first of the medicine cabinet, insert the transparent glass clip, then please follow the bellow step put the glass shelves on the clip, pay attention to the level of the glass. - Page 17 The opening size of an recessed medicine cabinet 40"/60"/80" Installation According to the actual size of the medicine cabinet for the wall cutout 2X 40” 39 1/16” (992mm) Width WALL 29 3/16” (742mm) Height ≥4 5/16” ( ≥110mm) Depth 60” 58 3/4”...
- Page 18 While supporting the door release Step 1 (the leaver under the hinge arm), slide the door offthe frame. www.getprohome.com 626-679-3588 service@getprohome.com...
-
Page 19: Step 2
Step 2 Put the cabinet into the wall, use a level to level, and mark the positions of the upper and lower holes, ready to drill holes WALL WALL www.getprohome.com 626-679-3588 service@getprohome.com... - Page 20 Step 3 Take out the cabinet, drill a hole in the marked position, and drive in the plastic nail! WALL www.getprohome.com 626-679-3588 service@getprohome.com...
- Page 21 Step 4 Put in the cabinet again, and use the level to level, Fasten the upper and lower three vacancies with screws. (Insert the set screw through the decorative cover and tighten the screw) Finally use the link screws,connect the two adjacent cabinets securely. www.getprohome.com 626-679-3588 service@getprohome.com...
- Page 22 Install the cabinet door back to the cabinet body, Step 5 Align the hook with the hinge bump and press the half of the hinge,make it achieve the locking effect! Step 6 Install the top and bottom decorative covers of the medicine cabinet, please follow the bellow step www.getprohome.com 626-679-3588 service@getprohome.com...
-
Page 23: Step 7
Step 7 According to you own needs and preferences, adjust and install the height of the glass shelves, first insert the transparent glass clip, then put the glass shelves on the clip, pay attention to the level of the glass. Step 8 If the cabinet door does not close well or unbalanced, it is necessary to adjust the hinge. - Page 24 HOME SERVICES Missing Part or Defective?
Need help?
Do you have a question about the HIGH QULITY MEDICINE CABINET and is the answer not in the manual?
Questions and answers