
Related Manuals for ecactus WEIHENG WH-THA 502

Summary of Contents for ecactus WEIHENG WH-THA 502
- Page 2 System Wiring Diagram ..................................23 EMERGENCIES ...........................26 Emergency Procedures ..................................26 First Aid Procedures ....................................26 Firefighting Measures ....................................27 ECACTUS CONFIGURATION & WI-FI RELOAD ..............28 Preparations ........................................28 Wi-Fi Reset & Restore .....................................29 Change Password & Delete Account ..........................30 EMS CONFIGURATIONS ......................33 TROUBLESHOOTING .......................34 CLEANING AND MAINTENANCE ..................38...
- Page 3 Datasheet ...........................................39 LABELS ............................42...
- Page 4 Copyright Statement JIANGSU WEIHENG INTELLIGENT TECHNOLOGY CO., LTD. (hereinafter referred to as eCactus, eCactus is the sub-brand of WEIHENG focusing on providing household energy storage solutions) owns the copyright to this manual. All rights reserved. Please properly store the manual and strictly follow all safety and operating instructions provided.
- Page 5 Copia-TH User Manual GENERAL INTRODUCTION 1 GENERAL INTRODUCTION System Introduction WH-THA Series is a high-quality hybrid inverter which can convert solar energy to AC energy and store energy into battery. The hybrid inverter can be used to optimize self-consumption, store in the battery for future use or feed- in to public grid.
- Page 6 Your hybrid inverter warranty will be voided if you open the hybrid inverter cover or change any component without eCactus’s authorization. Care must be taken to protect the inverter from static damage. The WEIHENG Limited Warranty does not cover any damage caused by static.
- Page 7 Copia-TH User Manual GENERAL INTRODUCTION An error message will be sent to the ECOS app in the event of a ground fault, and the status indicator on the product will turn red. 1.3 Packing List WH-THA502/602/802/103/123/133 1 × Wi-Fi Terminal Document 1 ×...
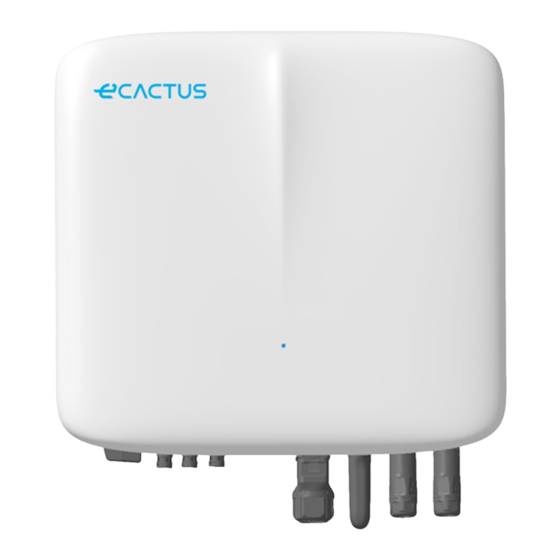
- Page 8 Copia-TH User Manual GENERAL INTRODUCTION 1.4 System Overview LED INDICATOR STATUS LED INDICATOR Standby Flashing blue LED, 2-second intervals Checking Flashing blue LED, 0.5-second intervals Normal Solid blue LED DSP fault Solid red LED Battery com. fault Flashing red LED, 2-second intervals Meter com.
- Page 9 Torque 2.5 N·m communication port Wi-Fi dongle Torque 2.5 N·m EPS connectors Torque 2.5 N·m Grid connectors Torque 2.5 N·m Ground screw Torque 2.5 N·m 1.5 Limitation of Liability eCactus assumes no direct or indirect liability for any product damage or property...
- Page 10 Copia-TH User Manual GENERAL INTRODUCTION losses caused by the following. ◆ Product modifications, design changes, or parts replaced without ’s eCactus authorization; ◆ Modifications or attempted repairs or removal of serial numbers or seals by non- technicians; eCactus ◆ System designs and installations not in compliance with standards or regulations;...
- Page 11 Copia-TH User Manual INSTALLATION 2 INSTALLATION The product must be installed on a flat surface or platform with a load-bearing capacity of at least 120 kg. The installation location should be well-ventilated and away from flammable or explosive materials. 2.1 Installation Location and Environment 2.1.1 General This hybrid inverter is rated for outdoor installation and can be installed both indoors and outdoors.
- Page 12 Copia-TH User Manual INSTALLATION 2.1.2 Location Restrictions The hybrid inverter should not be installed: (1) Within 600 mm of any heat source, such as hot water units, gas heaters, air conditioning units, or any other similar appliances; (2) Within 600 mm of any exit; (3) Within 600 mm of any window or ventilation opening;...
- Page 13 Copia-TH User Manual INSTALLATION Top -------------------------------------------------------300 mm Bottom ---------------------------------------------------500 mm Front -----------------------------------------------------300 mm Left and right sides ---------------------------------------200 mm The clearance is a recommendation. Reserve sufficient clearance around the product to ensure sufficient space for installation, maintenance and heat dissipation. If there is a local standard for the installation of energy storage systems, please define the clearance refer to the standard.
- Page 14 Copia-TH User Manual INSTALLATION 2.1.4 Choosing an Installation Location Carefully select an appropriate installation location based on the following rules to protect the hybrid inverter and facilitate maintenance. Rule 1. The hybrid inverter should be installed on a solid surface capable of supporting its size and weight.
- Page 15 Copia-TH User Manual INSTALLATION Install the hybrid inverter away from strong magnetic fields to avoid electromagnetic interference. When installing the hybrid inverter next to radio or wireless communication equipment operating below 30 MHz: 1. Install the inverter at least 30 m away from the wireless equipment. 2. Attach a low-pass EMI filter or a multi-winding ferrite core to the hybrid inverter DC input cable or AC output cable.
- Page 16 Copia-TH User Manual INSTALLATION Installation Tools: Screwdriver Multimeter Wire stripper Claw hammer Hammer drill Diagonal pliers Insulating gloves Protective gloves Crimping pliers STEP 1 Please use the mounting bracket as a template and drill 5 holes in the right positions. STEP 2 Use the included wall anchors in the accessory box to secure the mounting...
- Page 17 Copia-TH User Manual INSTALLATION STEP 3 Hold the inverter from both sides of the heatsink and attach it to the mounting bracket. NOTE: Make sure the inverter heat sink is properly aligned with the mounting bracket joint. 2.3 Cable Connections 2.3.1 PV Connections Please make sure you fulfill all the requirements below before connecting PV panels/strings to the inverter:...
- Page 18 Copia-TH User Manual INSTALLATION Crimp the terminal; 2. Insert the terminal into the connector and lock the nut; Torque 2.0 N·m Note: The connectors will make a clicking sound when inserted correctly into the PV plugs. 2.3.2 Battery Connections Please be mindful of any electric shock or chemical hazards. Always connect •...
- Page 19 Copia-TH User Manual INSTALLATION 2. Insert the terminal into the connector and lock the nut; Torque 2.0 N·m Note: The connectors will make a clicking sound when inserted correctly into the BAT plugs. 2.3.3 EPS Connections NOTE Some external factors may cause the backup switching time to exceed 10 ms, and loads reliant on a constant stable energy supply should not be connected.
- Page 20 Copia-TH User Manual INSTALLATION EPS connection process is as below: STEP 1 STEP 2 Use crimping pliers to Arrange the terminals on the cable crimp the terminals and insert them in order STEP 3 STEP 4 Use a hex key to Insert the main cable body crimp the inner into the rubber insulator...
- Page 21 Copia-TH User Manual INSTALLATION • Follow the below GRID cable requirements. Legend Description Value Outside Diameter 15–20 mm Individual Cable Length 25–30 mm Insulated Cable Length 15–17 mm Conductor Core 6 mm² NOTE Use a black wire to indicate the neutral conductor, a red wire (preferred) or a brown wire for the line conductor, and a yellow-green wire for the protective earth bonding line.
- Page 22 Copia-TH User Manual INSTALLATION 10AWG yellow-green wire ≥2.5mm² yellow-green OT5-4 terminal OT5-4 terminal cable 2.3.6 Inverter Box and Battery Box Connections...
- Page 23 Make sure that any batteries selected are included on the WH-THA list of approved batteries before purchase, or the system may not work as intended. Please contact your installer or the eCactus service team for confirmation if you’re not sure whether your chosen battery is an approved battery.
- Page 24 Copia-TH User Manual INSTALLATION 2.3.7.2 Meter Connections Make sure the AC cable is completely isolated from AC power before connecting the Meter and CT. cable requirements as below. • Three Phase Meter Legend Description Value Outer Diameter 5-6mm Individual Cable Length 22-32mm Insulated Cable Length 7-8mm...
- Page 25 Copia-TH User Manual INSTALLATION • Three Phase Meter connection process is as below: STEP 1 STEP 2 Insert the cable into the corresponding Disassemble the plug connector and terminal, use a slotted screwdriver to crimp unscrew the terminals in the order shown in the cable, and torque it to 1.2 ±...
- Page 26 Copia-TH User Manual INSTALLATION COM definitions below No. Function No. Function COM/DRM0 CANL_OUT REFGEN 12 CANH_OUT DRM1/5 13 IN+ 4 DRM2/6 14 IN- 5 DRM3/7 15 RLY1_IN 6 DRM4/8 16 OUT_12V METER_485B 17 RLY2_IN 8 METER_485A 18 RLY2_OUT 9 VPP_485A 19 GND_COM 10 VPP_485B 20 VCC_COM...
- Page 27 Copia-TH User Manual INSTALLATION tighten the plastic nut. Torque 2.5 N·m 2.3.9 System Wiring Diagram Please use an appropriate breaker based on the following specifications: NOTE 1. Electrical short circuits on the grid side will damage the inverter if an AC breaker is not installed.
- Page 28 Copia-TH User Manual INSTALLATION Choose the correct breaker: System Connection Diagrams ...
- Page 29 Copia-TH User Manual INSTALLATION The following diagram illustrates an example use case where the neutral wire is separate from the PE in the distribution box. Please follow local wiring regulations.
- Page 30 Turn off the main grid breaker directly feeding the inverter and turn off all inverter switches if the WH-THA inverter appears to be malfunctioning. Please immediately contact eCactus for detailed instructions. WARNING: Do not open the inverter upper cover plate by yourself.
- Page 31 Copia-TH User Manual EMERGENCIES 3.3 Firefighting Measures Extinguishing media: Dry powder, sand, carbon dioxide (CO2), or water. Fire precautions and protective measures: Flammable properties: Lithium-ion batteries contain a flammable liquid electrolyte that may vent, ignite, or produce sparks when subjected to high temperatures (>...
- Page 32 Copia-TH User Manual ECACTUS CONFIGURATION & WI-FI RELOAD 4 ECACTUS CONFIGURATION & WI-FI RELOAD This part demonstrates the eCactus configuration step by step. • 4.1 Preparations The hybrid inverter must be connected to PV power only. 2. A router connected to the Internet is required to connect to the ECOS application center.
- Page 33 If everything is set up properly, the Wi-Fi LED on the inverter will change from slowly flashing to quick flashing and then become solid, indicating that eCactus has successfully connected to the Wi-Fi network. Wi-Fi Reset & Restore Wi-Fi Reset: Reconfigure the Wi-Fi dongle, and Wi-Fi settings will be reprocessed and saved.
- Page 34 ECACTUS CONFIGURATION & WI-FI RELOAD Wi-Fi Wi-Fi Reset Reset Please use your eCactus ECOS app to reset the Wi-Fi configuration. Navigate to Settings and My Devices, access the Wi-Fi Configuration page, and follow the instructions to complete the Wi-Fi process.
- Page 35 Copia-TH User Manual ECACTUS CONFIGURATION & WI-FI RELOAD Change Password You can change your password by navigating to “Settings” >> “Security” >> “Change Password” and entering your Original Password to set a new password. If you forget your password, you can reset your password by tapping “Forgot Password”...
- Page 36 Copia-TH User Manual ECACTUS CONFIGURATION & WI-FI RELOAD Delete Account You can delete your account and data by navigating to “Settings” >> “Security”>> “Delete Account.” Please read the statement carefully before deleting your account. Notice: You have 7 days to log back in and cancel your deletion request. Once deleted, your account and all associated data will be erased and cannot be recovered.
- Page 37 2. Load Shifting: Batteries will be charged and discharged as configured. 3. Backup: eCactus will not discharge the battery unless the power grid is off. When this happens, eCactus will provide residential power through the batteries. Working Modes: Navigate to the Customize tab and select one of the three operation modes via the eCactus ECOS app.
- Page 38 Copia-TH User Manual TROUBLESHOOTING 6 TROUBLESHOOTING Issue Solution Red LED flashing every Meter Communication Fault. Please check 0.5 seconds whether the power supply & communication cables are properly connected in accordance with local standards. Red LED flashing every Battery Communication Fault. Please check 2 second whether the PCS is properly connected to the battery box, and make sure that the battery...
- Page 39 Copia-TH User Manual TROUBLESHOOTING Issue Solution Code DSP_11 Grid voltage fault. Please check whether the grid voltage is within the normal range. Code DSP_12 Grid current fault. Please check whether the EPS load power is within the normal range. Code DSP_13 Grid frequency fault.
- Page 40 Copia-TH User Manual TROUBLESHOOTING Issue Solution be deleted and will not be recoverable. Please think twice before deleting your account. How can I share my The first ECOS registered will be recognized as the ECOS account with my master account, and others can scan the device family members? code shared by the master account.
- Page 41 Copia-TH User Manual TROUBLESHOOTING Issue Solution returning to other mobile network after successfully configuring interfaces after WLAN. configuring ECOS via WLAN?
- Page 42 Copia-TH User Manual CLEANING AND MAINTENANCE 7 CLEANING AND MAINTENANCE Power off the system before cleaning or performing any maintenance. Shut down procedures: Step 1: Disconnect the backup load where applicable, and then turn off the backup breaker. Step 2: Turn off the grid breaker. Step 3 : Turn off the PV switch.
- Page 43 Copia-TH User Manual ANNEX 8 ANNEX 8.1 Datasheet Hybrid Spec. Series name:CopiaTH Model THA502 THA602 THA802 THA103 THA123 THA133 PV Input Absolute max Voltage [d.c.V] 1000 MPPT Voltage Range [d.c.V] 180...980 Max. DC Input Power [W] 7500 9000 12000 15000 20000 20000 Start-up Voltage [d.c.V]...
- Page 44 Copia-TH User Manual ANNEX Rated AC Current from 16.2 19.2 25.6 26.0 26.0 26.0 Grid[a.c.A] Max. AC Current from 16.2 19.2 25.6 26.0 26.0 26.0 Grid[a.c.A] Inrush current[a.c.A] 16 a.c.A (peak), 11.3 us (duration) Max. output fault current[a.c.A] 52 (peak), 37 (rms) AC output Maximum output overcurrent protection[a.c.A] AC input power factor...
- Page 45 Copia-TH User Manual ANNEX Battery Input reverse polarity protection PV reverse polarity protection Surge protection Over heat protection General Data Dimension (W/D/H)[mm] 510*205*480 Dimension of Packing 700*360*605 (W/D/H)[mm] Net weight [kg] 30.8 Gross weight [kg] Operation Temp [°C] -25...+60 Relative Humidity[%] 0...95 Altitude [m] <= 3000...
- Page 46 Copia-TH User Manual LABELS 9 LABELS...
- Page 47 Copia-TH User Manual LABELS...
- Page 48 Copia-TH User Manual LABELS...
Need help?
Do you have a question about the WEIHENG WH-THA 502 and is the answer not in the manual?
Questions and answers