
Related Manuals for DiO DiOVDP-B03


Summary of Contents for DiO DiOVDP-B03
- Page 1 FR NL ES PT DE IT DiOVDP-B03 Quick start guide / Guide de démarrage rapide / Beknopte handleiding Guía de inicio rápido / Guia de instalação rápido / Kurzanleitung Manuale di inizio veloce www.DiOHome.com...
- Page 2 English ......Français ......Nederlands ......Español ......Português ......Deutsch ......Italiano ......
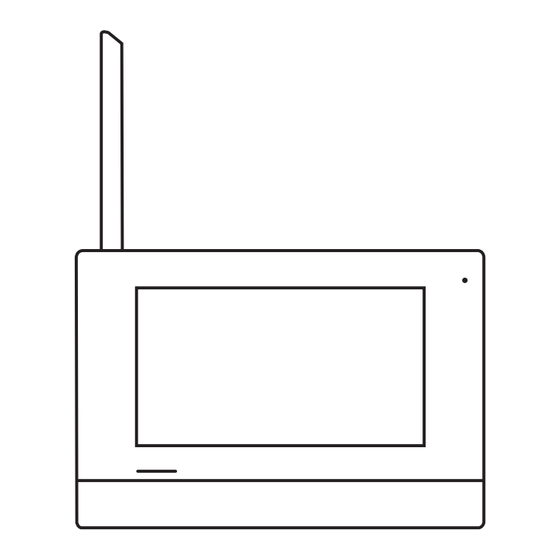
- Page 3 Introduction Read the instructions carefully before using the device Thank you for using this product. This product contains an LCD monitor and an outdoor camera. Its installation and maintenance are very simple Safety 1. Please read these instructions carefully before installing and using the product. 2.
- Page 4 Bit 1: 14 A Bit 2: 14 B Bit 3: 14 C Bit 4: 14 D Lock Power Lock Power Solar panels...
- Page 6 ON(1) OFF(0) charge...
- Page 7 Pairing indoor unit and outdoor unit Matchin g Sliding left or right to Power On Touch the settings icon select the “pairing” icon, click it If pairing is successful, Press Registration Pairing… “paired” button will button appear Pairing indoor unit and camera Matchin g Sliding left or right to Power On...
- Page 8 Add Slave indoor unit User Sliding left or right to Power on of slave Touch the settings icon select the “User” icon, indoor unit click it Matchin g Click "Slave", then Click "Pairing" icon on If pairing is successful, "User" and finally save the master ans slave “paired”...
- Page 9 Follow the steps: Adjust the contrast of the screen, Adjust the brightness of the screen, Adjust the color of the screen, Adjusting the speaker volume First click “SOUND” icon, then slide to the icon “VOLUME” Door release It’s available to open the door during a call, in communication or while monitoring the door station.
- Page 12 Setting Language The default language can be customized. you can change it to the language you need 1- When “CONFIRM” symbol is displayed in the “screen”, the setting is activated. Click the item again to cancel. 2- When the setting has finished, touch " your language " to save the settings and exit Setting User User...
- Page 13 Reset The device restores the device to factory settings Information View device version information Format SD Card Forma t SD card Formatting the card will delete all informations stored on the card Screen saver Screen saver Turn off the screen time when the device is inactive. Device Sliding left or right to Displays the current...
- Page 14 Delete Date/ Time Delet e records Video file Image file Delete folder Setting date and time You can correct the current date and time at any time Touch the setting target of month, date, year, hour and minute individually. Slide up or down to change the value. When the setting has finished, touch “DATE / TIME”...
- Page 16 Click the «DIO ONE» Mobile WIFI settings: selected with the same APP icon Click the «+» icon WIFI as outdoor unit Click «Access control» Searching for nearby and select DiOVDP-B03 devices, if discovering Connecting… devices then click it Added successfully...
- Page 17 1 Registration management card: Blue : management card (2 pcs), Red:user card (2 pcs, for lock opener) , Black: user card (2 pcs, for gate opener) 1.During standby mode, press SET button until hear a sound. 2. The LED show blue, and the red LED flicker. 3.Swipe the card, hear the "DI----DI DI"...
- Page 18 4 Registration user card: (for Gate opener) 1. During standby mode, swipe the management card. the LED light turns blue 2. Hold and press call button during 5s to 10s, heard the "DI DI" sound and the red led flicker 3.Swipe the new card, hear the "DI DI"...
- Page 19 Specifications - technical data 2.4G Operating Frequency 2400~2483.5MHz (IEEE 802.11b/g/n) General 868M Operating Frequency 859-894MHz (IEEE 802.11ah) Unobstructed Effective Range 200m(max.) TX power 14~18dBm RX Sensitivity -85dBm Operating Temperature -10°C~ +50°C Storage Temperature -20°C~ +60°C ≤85%RH Operating Humidity Outdoor unit Imaging Sensor Type 1/3’’...
- Page 20 Introduction Lisez attentivement les instructions avant d'utiliser l'appareil Merci d'avoir utilisé ce produit. Ce produit contient un moniteur LCD et une caméra extérieure. Son installation et son entretien sont très simples Sécurité 1. Veuillez lire attentivement ces instructions avant d'installer et d'utiliser le produit. 2.
- Page 21 Description du produit Antenne Indicateur de sourdine Microphone Carte TF Mise sous/hors tension DC IN Microphone Capteur de vision nocturne Caméra Zone de détection badge rfid Carte de nom Bouton d'appel Bit 1: 14 A Haut-parleur Bit 2: 14 B Pas de fonction Bit 3: 14 C Alimentation ON/OFF...
- Page 23 ON(1) OFF(0) charge...
- Page 24 Utiliser Appairage unité intérieure et unité extérieure Matchin g En faisant glisser vers Appuyez sur l'icône des la gauche ou la droite Allumer paramètres pour sélectionner l'icône « appairage », cliquez dessus Si l'appairage est réussi, Appuyez sur le bouton Jumelage… le bouton « appairé » d'inscription apparaîtra Appairage de l’unité...
- Page 25 Ajouter une unité intérieure esclave User En faisant glisser vers Mise sous tension Appuyez sur l'icône des la gauche ou la droite de l'unité intérieure paramètres pour sélectionner l'icône esclave « Utilisateur », cliquez dessus Matchin g Cliquez simultanément Cliquez sur "Esclave", Si l'appairage est réussi, sur l'icône « Pairing »...
- Page 26 Suis les étapes: Ajustez le contraste de l'écran, Ajustez la luminosité de l'écran, Ajustez la couleur de l'écran, Régler le volume du haut-parleur Cliquez d’abord sur l’icône « SON », puis glissez jusqu’à l’icône « VO- LUME » Ouverture de porte Il est disponible pour ouvrir la porte pendant un appel, en communica- tion ou pendant la surveillance du poste de porte.
- Page 27 Fonctions disponibles pendant la surveillance Ou tdoor 1 • Ajustement des images (échelle de l'image/luminosité/couleur/ contraste) • Contrôle du volume • Enregistrement manuel Pour mettre fin à la surveillance * Faites glisser vers la gauche ou la droite pour changer d'extérieur Touchez l'icône « retour »...
- Page 29 Réglage de la langue La langue par défaut peut être personnalisée. vous pouvez le changer dans la langue dont vous avez besoin 1- Lorsque le symbole « CONFIRMER » s'affiche sur « l'écran », le réglage est activé. Cliquez à nouveau sur l'élément pour annuler. 2- Une fois le paramétrage terminé, touchez «...
- Page 30 Réinitialiser L'appareil restaure l'appareil aux paramètres d'usine Information Afficher les informations sur la version de l'appareil Formater la carte SD Forma t SD card Le formatage de la carte supprimera toutes les informations stockées sur la carte Économiseur d'écran Screen saver Éteignez l'heure de l'écran lorsque l'appareil est inactif.
- Page 31 Supprimer Date/ Time Delet e records Fichier vidéo Fichier d'image Supprimer le dossier Réglage de la date et de l'heure Vous pouvez corriger la date et l'heure actuelles à tout moment Touchez individuellement la cible de réglage du mois, de la date, de l'année, de l'heure et des minutes.
- Page 33 Cliquez sur l'icône de Paramètres WIFI mo- bile : sélectionnés avec l'application «DIO ONE» Cliquez sur l'icône «+» le même WIFI que l'unité extérieure Cliquez sur « Contrôle Recherche d'appareils d'accès » et sélection- à proximité, si vous dé- De liaison… nez DiOVDP-B03...
- Page 34 1 Carte de gestion des inscriptions : Bleu : carte de gestion (2 pcs), Rouge :carte utilisateur (2 pièces, pour ouvre-serrure), Noir : carte utilisateur (2 pcs, pour ouvre-portail) 1.En mode veille, appuyez sur le bouton SET jusqu'à entendre un son. 2.
- Page 35 4 Carte d'utilisateur d'enregistrement : (pour l'ouvre-porte) 1. En mode veille, glissez la carte de gestion. la lumière LED devient bleue 2. Maintenez et appuyez sur le bouton d'appel pendant 5 à 10 secondes, entendez le son « DI DI » et la LED rouge clignote.
- Page 36 Spécifications - données techniques Fréquence de fonctionnement 2 400 ~ 2 483,5 MHz (IEEE 802.11b/g/n) Général 2,4 G Fréquence de fonctionnement 859-894 MHz (IEEE 802.11ah) de 868 M Portée efficace dégagée 200 m (maximum) Puissance d'émission 14~18dBm Sensibilité RX 14~18dBm Température de fonctionnement Max 50°C Température de stockage -20°C~ +60°C...
- Page 37 Invoering Lees de instructies zorgvuldig door voordat u het apparaat gebruikt Bedankt voor het gebruik van dit product. Dit product bevat een LCD-monitor en een buitencamera. De installatie en het onderhoud ervan zijn zeer eenvoudig Veiligheid 1. Lees deze instructies zorgvuldig door voordat u het product installeert en gebruikt. 2.
- Page 38 Bit 1: 14 A Bit 2: 14 B Bit 3: 14 C Bit 4: 14 D Lock Power Lock Power Solar panels...
- Page 40 ON(1) OFF(0) charge...
- Page 41 Gebruik Binnenunit en buitenunit koppelen Matchin g Schuif naar links of Raak het instellingenpic- Aanzetten rechts om het koppe- togram aan lingspictogram te selec- teren en klik erop Als het koppelen is Druk op de registra- Koppelen… gelukt, verschijnt de tieknop knop ‘gekoppeld’...
- Page 42 Slave-binnenunit toevoegen User Schuif naar links of re- Schakel de slave-binne- Raak het instellingenpic- chts om het pictogram nunit in togram aan "Gebruiker" te selecte- ren en klik erop Matchin g Klik op "Slave", ver- Als het koppelen is Klik tegelijkertijd op het volgens op "Gebruiker"...
- Page 43 Volg de stappen: Pas het contrast van het scherm aan, Pas de helderheid van het scherm aan, Pas de kleur van het scherm aan, Het luidsprekervolume aanpassen Klik eerst op het pictogram “GELUID” en schuif vervolgens naar het pictogram “VOLUME” Deurontgrendeling Het is beschikbaar om de deur te openen tijdens een gesprek, tijdens communicatie of terwijl u het deurstation in de gaten houdt.
- Page 46 Taal instellen De standaardtaal kan worden aangepast. je kunt het wijzigen in de taal die je nodig hebt 1- Wanneer het “BEVESTIG”-symbool op het “scherm” wordt weergegeven, is de instelling geactiveerd. Klik nogmaals op het item om te annuleren. 2- Wanneer de instelling is voltooid, raakt u "uw taal" aan om de instellingen op te slaan en af te sluiten Gebruiker instellen User...
- Page 47 Opnieuw instellen Het apparaat herstelt het apparaat naar de fabrieksinstellingen Informatie Informatie over de apparaatversie bekijken SD-kaart formatteren Forma t SD card Als u de kaart formatteert, wordt alle informatie die op de kaart is opgeslagen verwijderd Screensaver Screen saver Schakel de schermtijd uit wanneer het apparaat inactief is.
- Page 48 Verwijderen Date/ Time Delet e records Video bestand Beeldbestand Verwijder map Datum en tijd instellen U kunt de huidige datum en tijd op elk moment corrigeren Raak het insteldoel van maand, datum, jaar, uur en minuut afzonderlijk aan. Schuif omhoog of omlaag om de waarde te wijzigen. Wanneer de instelling is voltooid, raakt u “DATUM / TIJD”...
- Page 50 Mobiele WIFI-instellin- Klik op het «DIO ONE» Klik op het pictogram gen: geselecteerd met APP-pictogram «+» dezelfde WIFI als de buitenunit Klik op «Toe- Zoeken naar appa- gangscontrole» en raten in de buurt. Als u Verbinden… selecteer DiOVDP-B03 apparaten ontdekt, klik...
- Page 51 1 Registratiebeheerkaart: Blauw : managementkaart (2 stuks), Rood :gebruikerskaart (2 stuks, voor slotopener), Zwart : gebruikerskaart (2 stuks, voor poortopener) 1. Druk tijdens de stand-bymodus op de knop SET totdat u een geluid hoort. 2. De LED is blauw en de rode LED flikkert. 3.
- Page 52 4 Registratie gebruikerskaart: (voor poortopener) 1. Veeg in de stand-bymodus over de managementkaart. het LED-lampje wordt blauw 2. Houd de belknop ingedrukt gedurende 5 tot 10 seconden. Je hoort het "DI DI"-geluid en de rode led flikkert 3. Veeg over de nieuwe kaart, hoor het "DI DI" -geluid en de gebruikerskaart is succesvol ingesteld.
- Page 53 Specificaties - technische gegevens 2.4G bedrijfsfrequentie 2400~2483,5 MHz (IEEE 802.11b/g/n) Algemeen 868M bedrijfsfrequentie 859-894 MHz (IEEE 802.11ah) Onbelemmerd effectief bereik 200m (max.) TX-vermogen 14~18dBm RX-gevoeligheid 14~18dBm Bedrijfstemperatuur Maximaal 50°C Bewaar temperatuur -20°C~+60°C ≤85% RV luchtvochtigheid regelen Buitenunit Type beeldsensor 1/3'' CMOS Kijkhoek ongeveer 105°...
- Page 54 Introducción Lea atentamente las instrucciones antes de utilizar el dispositivo. Gracias por usar este producto. Este producto contiene un monitor LCD y una cámara para exteriores. Su instalación y mantenimiento son muy sencillos Seguridad 1. Lea atentamente estas instrucciones antes de instalar y utilizar el producto. 2.
- Page 55 Descripción del Producto Antena Indicador de silencio Micrófono Tarjeta TF Encendido/apagado ENTRADA CC Micrófono Sensor de visión nocturna Cámara RFID Área de detección Tarjeta de nombre Botón de llamada Bit 1: 14 A Altavoz Bit 2: 14 B Sin función Bit 3: 14 C Encendido/Apagado Bit 4: 14 D...
- Page 57 ON(1) OFF(0) charge...
- Page 58 Usar Emparejamiento de la unidad interior y la unidad exterior Matchin g Deslizándose hacia la Toca el ícono de confi- izquierda o hacia la de- Encendido guración recha para seleccionar el icono de “empareja- miento”, haga clic en él Si el emparejamiento se Presione el botón de Emparejamiento…...
- Page 59 Agregar unidad interior esclava User Deslizándose hacia la Encendido de la unidad Toca el ícono de confi- izquierda o hacia la de- interior esclava guración recha para seleccionar el ícono “Usuario”, haga clic en él Matchin g Haga clic en "Esclavo", Haga clic en el icono Si el emparejamiento se luego en "Usuario"...
- Page 60 Sigue los pasos: Ajustar el contraste de la pantalla, Ajustar el brillo de la pantalla, Ajustar el color de la pantalla, Ajustar el volumen del altavoz Primero haga clic en el ícono “SONIDO”, luego deslícese hasta el ícono “VOLUMEN” Liberación de la puerta Está...
- Page 61 Funciones disponibles durante la monitorización Ou tdoor 1 • Ajuste de imágenes (escala de imagen/brillo/color/contraste) • Control del volumen • Grabación manual Para finalizar el seguimiento * Deslice hacia la izquierda o hacia la Toque el icono "volver" en la pantalla. derecha para cambiar al exterior ** Nivel de batería de la unidad exterior Cámaras de vigilancia...
- Page 63 Ajustes de Idioma El idioma predeterminado se puede personalizar. puedes cambiarlo al idioma que necesites 1- Cuando aparece el símbolo “CONFIRMAR” en la “pantalla”, se activa la configuración. Haga clic en el elemento nuevamente para cancelar. 2- Cuando la configuración haya finalizado, toque "su idioma" para guardar la configuración y salir Configuración de usuario User...
- Page 64 Reiniciar El dispositivo restaura el dispositivo a la configuración de fábrica. Información Ver información de la versión del dispositivo Formatear tarjeta SD Forma t SD card Al formatear la tarjeta se eliminará toda la información almacenada en ella. Protector de pantalla Screen saver Apague el tiempo de pantalla cuando el dispositivo esté...
- Page 65 Borrar Date/ Time Delet e records Archivo de vídeo Archivo de imagen Eliminar carpeta Configuración de fecha y hora Puedes corregir la fecha y hora actuales en cualquier momento. Toque el objetivo de configuración de mes, fecha, año, hora y minutos individualmente.
- Page 67 Configuración de WIFI Haga clic en el icono de móvil: seleccionado con la APLICACIÓN «DIO Haga clic en el icono el mismo WIFI que la ONE» «+» unidad exterior Haga clic en «Control Buscando dispositivos en él de acceso» y selec- cercanos, si descubre Conectando…...
- Page 68 1 Tarjeta de gestión de inscripciones: Azul : tarjeta de gestión (2 unidades), Rojo : tarjeta de usuario (2 unidades, para abridor de cerraduras), Negro : tarjeta de usuario (2 unidades, para abridor de puerta) 1. Durante el modo de espera, presione el botón SET hasta escuchar un sonido.
- Page 69 4 Tarjeta de usuario de registro: (para abridor de puerta) 1. Durante el modo de espera, pase la tarjeta de administración. la luz LED se vuelve azul 2. Mantenga presionado y presione el botón de llamada durante 5 a 10 segundos, escuchó el sonido "DI DI" y el LED rojo parpadea 3.
- Page 70 Especificaciones - datos técnicos 2400~2483,5MHz (IEEE 802.11b/g/n) General Frecuencia de funcionamiento 2,4G Frecuencia de funcionamiento 859-894MHz (IEEE 802.11ah) de 868M Alcance efectivo sin obstáculos 200 m (máx.) poder TX 14~18dBm Sensibilidad RX 14~18dBm Máximo 50°C Temperatura de funcionamiento Temperatura de almacenamiento -20°C~ +60°C ≤85% HR Humedad de funcionamiento...
- Page 71 Introdução Leia atentamente as instruções antes de usar o dispositivo Obrigado por usar este produto. Este produto contém um monitor LCD e uma câmera externa. Sua instalação e manutenção são muito simples Segurança 1. Leia estas instruções cuidadosamente antes de instalar e usar o produto. 2.
- Page 72 Bit 1: 14 A Bit 2: 14 B Bit 3: 14 C Bit 4: 14 D Lock Power Lock Power Solar panels...
- Page 74 ON(1) OFF(0) charge...
- Page 75 Usar Emparelhamento da unidade interna e da unidade externa Matchin g Deslizando para a Toque no ícone de confi- esquerda ou direita Ligar gurações para selecionar o ícone “emparelhamento”, clique nele Se o emparelhamento Pressione o botão Emparelhamento… for bem-sucedido, o Registro botão “emparelhado”...
- Page 76 Adicionar unidade interna Slave User Deslizando para a Toque no ícone de confi- Ligar a unidade interna esquerda ou direita secundária gurações para selecionar o ícone “Usuário”, clique nele Matchin g Clique em “Slave”, Clique no ícone "Empa- Se o emparelhamento depois em “User”...
- Page 77 Siga os passos: Ajuste o contraste da tela, Ajuste o brilho da tela, Ajuste a cor da tela, Ajustando o volume do alto-falante Primeiro clique no ícone “SOUND” e depois deslize até o ícone “VO- LUME” Liberação de porta Está disponível para abrir a porta durante uma chamada, em comunica- ção ou durante a monitorização da estação externa.
- Page 80 Configuração de idioma O idioma padrão pode ser personalizado. você pode alterá-lo para o idioma que você precisa 1- Quando o símbolo “CONFIRMAR” é exibido na “tela”, a configuração é ativada. Clique no item novamente para cancelar. 2- Quando a configuração terminar, toque em "seu idioma" para salvar as configurações e sair Configuração de usuário User...
- Page 81 Reiniciar O dispositivo restaura o dispositivo para as configurações de fábrica Informação Ver informações sobre a versão do dispositivo Formatar cartão SD Forma t SD card Formatar o cartão excluirá todas as informações armazenadas no cartão Protetor de tela Screen saver Desligue o tempo de tela quando o dispositivo estiver inativo.
- Page 82 Excluir Date/ Time Delet e records Arquivo de vídeo Arquivo de imagem Excluir pasta Definir data e hora Você pode corrigir a data e hora atuais a qualquer momento Toque na meta de configuração de mês, data, ano, hora e minuto individualmente.
- Page 84 Configurações de WIFI Clique no ícone do APP móvel: selecionadas «DIO ONE» Clique no ícone «+» com o mesmo WIFI da unidade externa Clique em «Controle Procurando dispositivos de acesso» e selecione próximos, se estiver Conectando… DiOVDP-B03 descobrindo disposi- tivos, clique nele...
- Page 85 1 Cartão de gerenciamento de registro: Azul : cartão de gerenciamento (2 unidades), Vermelho :cartão de usuário (2 unidades, para abridor de fechadura), Preto : cartão de usuário (2 unidades, para abridor de portão) 1.Durante o modo de espera, pressione o botão SET até ouvir um som.
- Page 86 4 Cartão de usuário de registro: (para abridor de portão) 1. Durante o modo de espera, passe o cartão de gerenciamento. a luz LED fica azul 2. Segure e pressione o botão de chamada durante 5s a 10s, ouvi o som "DI DI" e o LED vermelho pisca 3.
- Page 87 Especificações - dados técnicos Em geral Frequência operacional 2.4G 2.400 ~ 2.483,5 MHz (IEEE 802.11b/g/n) Frequência operacional 868M 859-894 MHz (IEEE 802.11ah) 200 m (máx.) Alcance efetivo desobstruído Potência de transmissão 14~18dBm Sensibilidade RX 14~18dBm Temperatura de operação Máx. 50°C Temperatura de armazenamento -20°C~ +60°C ≤85% UR...
- Page 88 Einführung Lesen Sie die Anweisungen sorgfältig durch, bevor Sie das Gerät verwenden Vielen Dank, dass Sie dieses Produkt verwenden. Dieses Produkt enthält einen LCD-Monitor und eine Außenkamera. Die Installation und Wartung ist sehr einfach Sicherheit 1. Bitte lesen Sie diese Anleitung sorgfältig durch, bevor Sie das Produkt installieren und verwenden. 2.
- Page 89 Produktbeschreibung Antenne Stummschaltanzeige Mikrofon TF-Karte Strom ein/aus DC-EINGANG Mikrofon Nachtsicht-Sensor Kamera ID-Karte Erfassungsbereich Namenskarte Anruf-Taste Lautsprecher Bit 1: 14 A Keine Funktion Bit 2: 14 B Strom EIN/AUS Bit 3: 14 C Antenne Bit 4: 14 D Entsperrzeit Taste für die Registrierung Installation Lock Power...
- Page 91 ON(1) OFF(0) charge...
- Page 92 Verwenden Innengerät und Außengerät koppeln Matchin g Wischen Sie nach links Berühren Sie das Eins- oder rechts, um das tellungssymbol „Pairing“-Symbol aus- zuwählen, und klicken Sie darauf Klicken Sie auf die Wenn das Pairing Schaltfläche „Regis- Paarung… erfolgreich war, wird die trierung“.
- Page 93 Fügen Sie ein Slave-Innengerät hinzu User Wischen Sie nach links Einschalten des Berühren Sie das Eins- oder rechts, um das Slave-Innengeräts tellungssymbol „Benutzer“-Symbol aus- zuwählen, und klicken Sie darauf Matchin g Klicken Sie auf „Slave“, Klicken Sie gleichzeitig Wenn das Pairing dann auf „Benutzer“...
- Page 94 Folge den Schritten: Passen Sie den Kontrast des Bildschirms an. Passen Sie die Helligkeit des Bildschirms an. Passen Sie die Farbe des Bildschirms an, Anpassen der Lautsprecherlautstärke Klicken Sie zuerst auf das Symbol „SOUND“ und dann auf das Symbol „LAUTSTÄRKE“. Türfreigabe Es ist möglich, die Tür während eines Anrufs, während der Kommunika- tion oder während der Überwachung der Türstation zu öffnen.
- Page 95 Verfügbare Funktionen während der Überwachung Ou tdoor 1 • Anpassen von Bildern (Bildmaßstab/Helligkeit/Farbe/Kontrast) • Lautstärkeregelung • Manuelle Aufnahme Um die Überwachung zu beenden * Nach links oder rechts schieben, um Berühren Sie das „Zurück“-Symbol auf dem Bildschirm. den Außenbereich zu wechseln ** Batteriestand des Außengeräts Überwachungskameras •...
- Page 97 Sprache einstellen Die Standardsprache kann angepasst werden. Sie können es in die gewünschte Sprache ändern 1- Wenn das Symbol „BESTÄTIGEN“ auf dem „Bildschirm“ angezeigt wird, ist die Einstellung aktiviert. Klicken Sie erneut auf das Element, um den Vorgang abzubrechen. 2- Wenn die Einstellung abgeschlossen ist, berühren Sie „Ihre Sprache“, um die Einstellungen zu speichern und den Vorgang zu beenden Benutzer einstellen User...
- Page 98 Zurücksetzen Das Gerät setzt das Gerät auf die Werkseinstellungen zurück Information Informationen zur Geräteversion anzeigen SD-Karte formatieren Forma t SD card Durch das Formatieren der Karte werden alle auf der Karte gespei- cherten Informationen gelöscht Bildschirmschoner Screen saver Schalten Sie die Bildschirmzeit aus, wenn das Gerät inaktiv ist. Gerät Zeigt die aktuellen Wischen Sie nach...
- Page 99 Löschen Date/ Time Delet e records Videodatei Bilddatei Lösche Ordner Datum und Uhrzeit einstellen Sie können das aktuelle Datum und die aktuelle Uhrzeit jederzeit korrigieren Berühren Sie die Einstellungsziele Monat, Datum, Jahr, Stunde und Minute einzeln. Schieben Sie nach oben oder unten, um den Wert zu ändern.
- Page 101 Klicken Sie auf das lungen: ausgewählt mit App-Symbol «DIO ONE» «+»-Symbol demselben WLAN wie das Außengerät Klicken Sie auf „Zugriffs- Suche nach Geräten in Sie darauf kontrolle“ und wählen der Nähe. Wenn Geräte Verbinden… Sie DiOVDP-B03 aus erkannt werden, klicken Erfolgreich hinzugefügt...
- Page 102 1 Registrierungsverwaltungskarte: Blau : Verwaltungskarte (2 Stück), :Benutzerkarte (2 Stück, für Schlossöffner) , Schwarz : Benutzerkarte (2 Stück, für Toröffner) 1. Drücken Sie im Standby-Modus die SET-Taste, bis Sie einen Ton hören. 2. Die LED leuchtet blau und die rote LED flackert. 3.
- Page 103 4 Registrierung Benutzerkarte: (für Toröffner) 1. Ziehen Sie im Standby-Modus über die Verwaltungskarte. Das LED-Licht wird blau 2. Halten Sie die Anruftaste 5 bis 10 Sekunden lang gedrückt. Sie hören den „DI DI“-Ton und das Flackern der roten LED 3. Ziehen Sie die neue Karte durch, hören Sie den „DI DI“- Ton, die Benutzerkarte wurde erfolgreich eingerichtet.
- Page 104 Spezifikationen – technische Daten 2,4 G Betriebsfrequenz 2400–2483,5 MHz (IEEE 802.11b/g/n) Allgemein 868M Betriebsfrequenz 859–894 MHz (IEEE 802.11ah) Ungehinderte effektive 200 m (max.) Reichweite Sendeleistung 14~18 dBm RX-Empfindlichkeit 14~18 dBm Betriebstemperatur Maximal 50°C Lagertemperatur -20°C~ +60°C ≤85 % relative Luftfeuchtigkeit Betriebsfeuchtigkeit Außengerät Bildsensortyp...
- Page 105 introduzione Leggere attentamente le istruzioni prima di utilizzare il dispositivo Grazie per aver utilizzato questo prodotto. Questo prodotto contiene un monitor LCD e una fotocamera esterna. La sua installazione e manutenzione sono molto semplici Sicurezza 1. Leggere attentamente queste istruzioni prima di installare e utilizzare il prodotto. 2.
- Page 106 Bit 1: 14 A Bit 2: 14 B Bit 3: 14 C Bit 4: 14 D Lock Power Lock Power Solar panels...
- Page 108 ON(1) OFF(0) charge...
- Page 109 Utilizzo Associazione unità interna e unità esterna Matchin g Scorrendo verso sinistra Tocca l'icona delle im- o verso destra per Accensione postazioni selezionare l'icona di "abbinamento", fare clic su di essa Se l'associazione ha Premere il pulsante Accoppiamento… esito positivo, verrà Registrazione visualizzato il pulsante "accoppiato".
- Page 110 Aggiungi unità interna slave User Scorrendo verso sinistra Accensione dell'unità Tocca l'icona delle im- o verso destra per sele- interna slave postazioni zionare l'icona "Utente", fare clic su di essa Matchin g Fare clic contempo- Se l'associazione ha Fare clic su "Slave", raneamente sull'icona quindi su "Utente"...
- Page 111 Segui i passi: Regola il contrasto dello schermo, Regola la luminosità dello schermo, Regola il colore dello schermo, Regolazione del volume dell'altoparlante Per prima cosa fare clic sull'icona "SUONO", quindi scorrere sull'icona "VOLUME" Rilascio della porta È disponibile per aprire la porta durante una chiamata, in comunica- zione o durante il monitoraggio del posto esterno.
- Page 114 Impostazione della lingua La lingua predefinita può essere personalizzata. puoi cambiarlo nella lingua che ti serve 1- Quando il simbolo “CONFERMA” viene visualizzato sullo “schermo”, l'impostazione è attivata. Fare nuovamente clic sull'elemento per annullare. 2- Al termine dell'impostazione, toccare "la tua lingua" per salvare le impostazioni e uscire Impostazione utente User...
- Page 115 Ripristina Il dispositivo ripristina il dispositivo alle impostazioni di fabbrica Informazione Visualizza le informazioni sulla versione del dispositivo Formatta la scheda SD Forma t SD card La formattazione della scheda cancellerà tutte le informazioni memo- rizzate sulla scheda Salvaschermo Screen saver Disattiva il tempo di visualizzazione quando il dispositivo è...
- Page 116 Eliminare Date/ Time Delet e records File video File immagine Elimina cartella Impostazione data e ora Puoi correggere la data e l'ora correnti in qualsiasi momento Toccare l'impostazione target di mese, data, anno, ora e minuto individualmente. Scorrere verso l'alto o verso il basso per modificare il valore.
- Page 118 Impostazioni Wi-Fi Fare clic sull'icona mobile: selezionate con dell'APP «DIO ONE». Fare clic sull'icona «+». lo stesso Wi-Fi dell'unità esterna Fare clic su «Controllo Ricerca di dispositivi fare clic su di esso accesso» e selezionare nelle vicinanze, se ven- Connessione…...
- Page 119 1 Scheda di gestione della registrazione: : scheda di gestione (2 pezzi), Rosso :tessera utente (2 pezzi, per apriserratura), Nero : tessera utente (2 pz, per apricancello) 1.Durante la modalità standby, premere il pulsante SET finché non si sente un suono. 2.
- Page 120 4 Registrazione tessera utente: (per Apricancello) 1. In modalità standby, strisciare la scheda di gestione. la luce LED diventa blu 2. Tenere premuto e premere il pulsante di chiamata per 5-10 secondi, sentire il suono "DI DI" e lo sfarfallio del LED rosso 3.Scorri la nuova carta, ascolta il suono "DI DI", la carta utente è...
- Page 121 Specifiche - dati tecnici Frequenza operativa 2.4G 2400~2483,5 MHz (IEEE 802.11b/g/n) Generale Frequenza operativa 868M 859-894 MHz (IEEE 802.11ah) Portata effettiva senza ostacoli 200 metri (massimo) Potenza TX 14~18dBm Sensibilità RX 14~18dBm temperatura di esercizio Massimo 50°C Temperatura di conservazione -20°C~+60°C ≤85%UR Umidità...
- Page 122 Déclaration de conformité : Par la présente, Chacon déclare que l'équipement radio de type DiOVDP-B03 est conforme à la directive 2014/53/UE. Le texte intégral de la déclaration UE de conformité est disponible à l'adresse Internet suivante : https://www.chacon.com/conformity...
- Page 123 Declaração de conformidade : Por meio deste, Chacon declara que o equipamento de rádio tipo DiOVDP-B03 está em conformidade com a Diretiva 2014/53/UE. O texto completo da declaração de conformidade da UE está disponível no seguinte endereço de Internet: https://www.chacon.com/conformity...
- Page 124 Chacon S.A • Avenue mercator 2 • 1300 Wavre • Belgium V1.6 240613...
Need help?
Do you have a question about the DiOVDP-B03 and is the answer not in the manual?
Questions and answers