Advertisement
Life Gets Better With
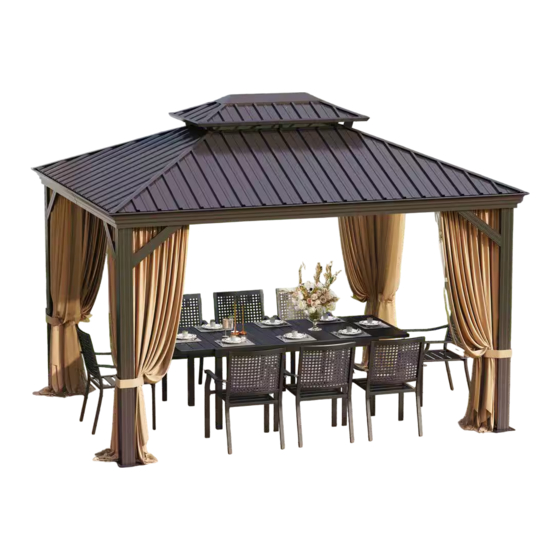
USE AND CARE GUIDE
GA-101
Questions, problems, missing parts? Before returning to the store,
please contact our Customer Service
service@alphamarts.com
THANK YOU
We appreciate the trust and con dence you have placed in PHI VILLA through the purchase of our product. We strive to continually create quality
products designed to enhance your home. Visit us online to see our full line of products available for your home improvement needs.
Thank you for choosing PHI VILLA!
Advertisement
Table of Contents

Related Manuals for PHI VILLA GA-101


Summary of Contents for PHI VILLA GA-101
- Page 1 THANK YOU We appreciate the trust and con dence you have placed in PHI VILLA through the purchase of our product. We strive to continually create quality products designed to enhance your home. Visit us online to see our full line of products available for your home improvement needs.
-
Page 2: Before Starting Assembly
Before starting assembly: • Read all instructions th roughly. • Open and check boxes for parts list. • If any parts are broken or missing call or email customer service. • Keep all packaging until you are satis ed with your product. •... -
Page 3: Prepare The Work Area
• Pre Assembly Note • • • • 1.Three more people are required for 5.Wearing protective glovse is assembly. recommended 2.You will need one or more stepladders. 6.Use the hex keys in the box. 3.For ease of construction, you may 7.Please use a Phillips screwdriver. -
Page 4: Pre-Assembly
roughly. oxes for parts list. Pre-assembly ken or missing call or email customer service. until you are satis ed with your product. cepted without original packaging. PACKAGE CONTENTS e ample space for assembly. NOTE: Hardware not shown to actual size. Pole Beam Beam... - Page 5 Pre-assembly Solidifying Bar Solidifying Bar Finishing Bar Finishing Bar Net Frame Net Frame Corner Cover Corner Solidifyng Bar Corner Solidifyng Bar Base Base Finishing End Inside Roof Connector Outside Roof Connector Joint Cover Union Bar Roof Panel Roof Panel Roof Panel Roof Panel Roof Panel Roof Panel...
- Page 6 Pre-assembly Roof Panel Roof Panel Roof Panel Side Curtain Mosquito Sidewall Hook Joint Cover Connecting Patch Roof Net Solidifying Bar Spacer Metal Bracket Metal Bracket Allen Key Wrench Screws Screws Screws Screws Lamp hook Screws Screws Screws Screws...
- Page 7 Assembly Set up poles (Part A) with stand plates (Part J) using screws 1# as shown in diagram.
- Page 8 Assembly Connect Part B1 and Part B into one beam using union bar (Part P) with screws 1#. Connect parts (C1&C, D1&D) to the nished beam (part B1& part B) using screws 1# as shown in diagram.
- Page 9 Assembly Connect Part B3 and Part B2 into one beam using union bar(Part P) with screws 1# as shown in diagram. Connect parts (C3&C2,D3&D2) to the nished beam (part B3& part B2) using screws 1# as shown in diagram.
- Page 10 Assembly Use screws (1# & 8#) to connect poles and beams together as shown in diagram. Af x the frame with corner solidifying bars (Parts H & H1) using screws 1# as shown in diagram.
- Page 11 Assembly Finish connecting beams using 4 corner covers (Part K) and screws 4# as shown In diagram. Af x middle beams using joint cover (Part K1) and screws 4# as shown in diagram. Put 6 hooks(Part U) Put 7 hooks (Part U) to each slot of joint bar to each slot of joint bar (Part C1&...
- Page 12 Assembly Set up roof frame Connect the inside roof connect(Part L) with the corner roof bar (Part E) using screws 1#. Attach corner roof bar(Part E) to main frame using screw 1#...
- Page 13 Assembly Attach roof bar(Part E1) to inside roof connector(Part L) and main frame using screws1#...
- Page 14 Assembly Connect outside roof connector ( Part M) to inside roof ( Part L ) using screw 1# as shown in diagram. Insert lamp hook ( Part 5 ) into outside roof connector (Part M)
- Page 15 Assembly Attach net frames( Part G3 & G4) with nishing end(Part N) using screw 1#,you may need to bent the frame ends a little to make it match the joint.
- Page 16 Assembly Cover metal bracket(Part Z&Z1) to roof panels as shown in diagram...
- Page 17 Assembly Mind Roof Panel Falling! Do NOT stand under the roof except the installer with safety hat! Push the roof panels ( Part S,S1,S2) to upper roof as shown in diagram.
- Page 18 Assembly Mind Roof Panel Falling! Do NOT stand under the roof except the installer with safety hat! Attach nishing bar ( Part G1 & G2 ) with nish end (Part N) using screws 1# to corner roof bar (Part E) as shown in diagram. you may need to bent the bar ends a little to make it match the joint.
- Page 19 Assembly Mind Roof Panel Falling! Do NOT stand under the roof except the installer with safety hat! Af x solidifying bars ( Part F1 & F2 ) together to roof bar ( Part E1 ) using Af x solidifying bars ( Part F1 & F2 ) iron angle (Part W1) and screws 1# to roof corner bar ( Part E ) using as shown in diagram.
- Page 20 Assembly Overal roof View: Mind Roof Panel Falling! Do NOT stand under the roof except the installer with safety hat! Connect roof as below please put the panels on the frame anti-clockwisely...
- Page 21 Assembly Short side view Mind Roof Panel Falling! Do NOT stand under the roof except the installer with safety hat! Attention: Put on one roof panel and fasten it accordingly before attaching second roof panel. Af x roof panels using screws and spacers (Part Y) as shown in diagram.
- Page 22 Assembly Long side view Mind Roof Panel Falling! Do NOT stand under the roof except the installer with safety hat!
- Page 23 Assembly Mind Roof Panel Falling! Do NOT stand under the roof except the installer with safety hat!
- Page 24 Assembly Total 13 hook holes on each side curtain, holes distribution as above...
- Page 25 Assembly Hang up mosquito sidewalls and solid sidewalls as shown in diagram.
- Page 26 Assembly Hang the hook attached to the curtain on Pole (Part A) In the end,Check all screws are xed tightly before using.
- Page 27 Assembly...
Need help?
Do you have a question about the GA-101 and is the answer not in the manual?
Questions and answers