Advertisement
Quick Links
Advertisement

Related Manuals for Prunus J-177

Summary of Contents for Prunus J-177
- Page 1 J-177 Retro Clock Radio User Manual...
- Page 2 Ⅰ PRECAUTIONS 1. If the radio will not be used for an extended period, please remove the battery. 2. Don’t get the radio wet or use it in a moist environment. E.g. Keep it out of the rain and use it carefully in bathrooms and kitchens.
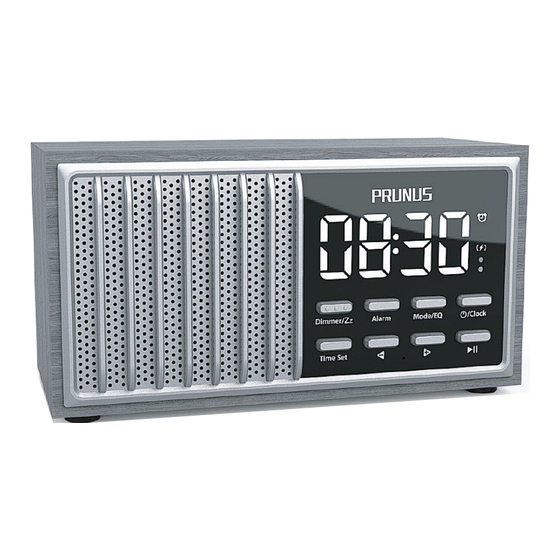
- Page 3 Ⅱ PRODUCT INTRODUCTION 1.Functional Components ⑩ ⑨ ① ② ③ ④ ⑯ ⑤ ⑥ ⑰ ⑦ ⑧ ⑮ ⑪ ⑫ ⑬ ⑭...
- Page 4 ① Dimmer/Zz: ⑩ Bluetooth Indicator Adjust display brightness ⑪ TF Card Slot /Snooze for 5minutes ⑫ USB Drive Slot ② Alarm ⑬ AUX Jack ③ Mode/EQ ⑭ DC Charging Port ④ /Clock ⑮ Telescopic Antenna ⑤ Time Set ⑯ Speaker ⑥...
- Page 5 USB Drive, AUX 4) Speaker Power: 8W 5) Battery Capacity: 1800mAh 6) Charging Standard: DC5V 1A 7) Size: 25.5 x 7 x 8cm 8) Weight: 515g 9) Packing List: J-177 Radio x 1, Charging Cable x 1, User Manual x 1...
- Page 6 Ⅲ POWER SUPPLY Use the type-C charging cable(included) to charge this radio. The charging indicator light will light up during charging and turn off once charging is complete. (Low battery prompt: "Low Battery" voice prompt when battery is low.) Tips: 1.
- Page 7 Ⅳ HOW TO USE 1. Power ON/OFF 1) Press and hold <④/Clock> for 3 seconds to power on/off. 2) When the device is powered on, briefly press <④ /Clock> to switch from the working mode(Bluetooth/ TF card/USB drive/AUX/FM mode) to the clock mode (only display time), or switch from the clock mode back to the working mode.
- Page 8 2. Mode Switch In working mode, press <③ Mode/EQ> repeatedly to cycle through and switch ③ between modes, including Bluetooth mode, TF card mode, FM mode, USB drive mode, and AUX IN mode. Note: 1. When there is no TF card or USB drive inserted, TF card mode and USB drive mode will be automatically skipped.
- Page 9 "BLUE" on the display blinks. 2) Enable Bluetooth on your device, such as your phone, then search and connect to the device named “J-177”. After a successful connection, the radio will emit a "beep" sound, and the "BLUE" on the display will stop blinking.
- Page 10 ◆ Hands-Free Calling: In the connected state, you can answer incoming calls by briefly pressing the <⑧ > > . Press it again briefly to end the call. To decline an incoming call, press and hold the <⑧ > >. ⑧...
- Page 11 4. FM Mode 1) Repeatedly press <③ Mode/EQ> to switch to FM mode. 2) Press and hold <⑧ > > to search stations and save available stations automatically. 3) After the search is complete, you can briefly press <⑥ -> or <⑦ +> to select saved stations. 4) Press <⑧...
- Page 12 ◆ How to Get Better Reception? 1. Adjust the telescopic antenna while listening to FM. 2. When you're indoors, approach it to the window and try to keep it away from the electronic devices, such as computers, TVs, refrigerators and mobile phones.
- Page 13 5. TF Card/USB Drive Mode 1. Insert the TF Card (32GB or less)/USB Drive loaded with audio files into <⑪ TF Card Slot> or <⑫ USB Drive Slot>. The radio will play music automatically once the audio files are detected. 2.
- Page 14 Note: 1. Having too many files on the TF card/USB drive can make the device unable to recognize songs. Only save music files on the TF card/USB drive. 2. If there are no music files stored on the TF card/USB drive, the radio will automatically switch to another mode.
- Page 15 6. AUX IN Mode 1) Insert one end of AUX cable (not included) into <⑬ AUX Jack> and the another end into earphone jack of your device. 2) Repeatedly short press <③ Mode/EQ> to switch to AUX IN mode, and you will hear “auxiliary connection”. 3) Open the music app/software to play music.
- Page 16 OTHER FEATURES 1. Time Setting 1) In clock mode, briefly press <⑤ Time Set>, and the “hour” digit will flash. 2) Briefly press <⑥ -> and <⑦ +> to set hour. 3) Briefly press <⑧ > > to confirm and then “minute” digit will flash.
- Page 17 2. Alarm a. Activate/Deactivate Alarm In clock mode, press and hold <②Alarm> to activate and deactivate the alarm. When the alarm is activated, the icon will appear, and it will disappear when the alarm is deactivated. ② ⑥ ⑦ ⑧ b.
- Page 18 c. Turn Off Alarm When the alarm rings, press any button other than <① Dimmer/Zz> to stop it. The alarm will be deactivated for the day and will ring again the next day. d. Snooze ① When the alarm rings, press the <① Dimmer/Zz>...
- Page 19 f. Adjusting Display Brightness In clock mode, press the <① Dimmer/Zz> briefly to switch between three levels (off, medium, bright) of display brightness. ① Note: In the off state, the display screen will automatically light up (at medium brightness) if the device is operated or when the alarm goes off.
- Page 20 If the radio fails, please scan this QR code. Then click “Ask a question” and log into Amazon to contact us. We will provide you with the best service. You can also send your messages to our customer service e-mail: prunus-technik@hotmail.com America Local Customer Support Number: (805) 712-2661...
Need help?
Do you have a question about the J-177 and is the answer not in the manual?
Questions and answers