Advertisement
Quick Links
EN
It is essential to read these instructions.
Thank you for purchasing this product.
- Read these instructions carefully for optimum
performance and safety before use.
- Keep this manual for future reference.
Operating & Installation
Heat Pump Tumble Dryer
Model No.
Contents
Safety Precautions
Checking Your Dryer
Choosing the Right Location
Moving and Installing
Connecting the Hoses
Test Run
Before Drying
Control Panel
Drying rack
Fragrant capsule
Drying
Program List
Drying Tips
Changing Program Settings
Changing Appliance Settings
Maintenance
Troubleshooting
Error Display
Specifications
AWH9901B3DB0-0B0
Instructions
(Household Use)
NH-XV21X1
2
6
7
8
10
11
13
14
16
17
18
20
22
24
28
29
32
35
36
Advertisement

Related Manuals for Panasonic nanoeX NH-XV21X1


Summary of Contents for Panasonic nanoeX NH-XV21X1
- Page 1 Operating & Installation Instructions Heat Pump Tumble Dryer (Household Use) NH-XV21X1 Model No. Contents Safety Precautions Checking Your Dryer Choosing the Right Location Moving and Installing Connecting the Hoses Test Run Before Drying Control Panel Drying rack Fragrant capsule Drying Program List Drying Tips Changing Program Settings...
- Page 2 Safety Precautions WARNING May cause serious injury or death Children must not use it alone. This appliance is not intended for use by persons (including children) with reduced physical, sensory or mental capabilities, or lack of experience and knowledge, unless they have been given supervision or instruction concerning use of the appliance by a person responsible for their safety.
- Page 3 In case of failure or damaged power cord, Accumulated dust stop use and ask the electrical technician. may cause fire. Securely insert the ground prong. Wipe the power plug Ask the electrical technician for a new socket. periodically. Use a socket appropriate for this Keep away from appliance.
- Page 4 Safety Precautions (continued) CAUTION May cause failure or injury Do not disassemble, repair or Do not climb on the appliance. modify it by yourself. Do not dry items soiled with flammable materials. Items that have been soiled with substances such as cooking oil, acetone, alcohol, petrol, kerosene, spot removers, turpentine, waxes, wax removers and cosmetic oils must not be dried in the appliance even after having been washed.
- Page 5 May cause failure or injury Keep away from heat and Do not obstruct. direct sunlight. Do not obstruct the openings of the bottom Plate with carpet, etc. Install the appliance correctly. For machine-dryable items only. Full opening Door Do not touch when it is hot. The appliance must not be installed behind a lockable door, a sliding door or a door with a hinge on the opposite...
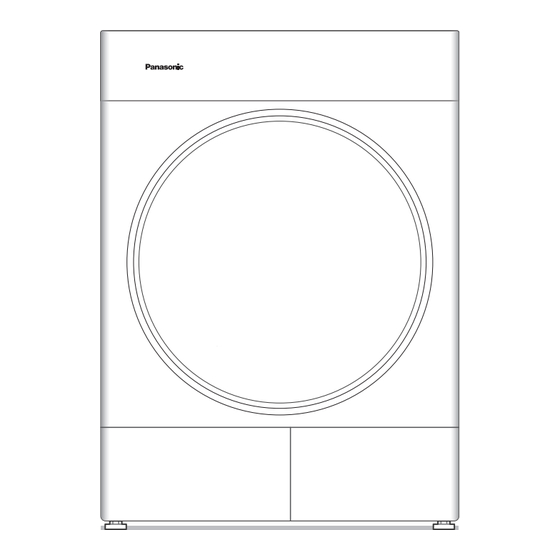
- Page 6 Checking Your Dryer Part names Control panel (P. 14) Drum Door Power cord and plug* *The plug shape varies Filter frame with the region. Front cover plate/Water filler/Thread filter Adjustable feet (P. 30-31) (P. 9) Drain hose connector (P. 10) - Maximum mass of dry cloth:10.5 kg Accessories...
- Page 7 Choosing the Right Location Make sure to ask a service person for installation. Do not install the appliance by yourself. Follow this installation method. If you do not, Panasonic will not be liable for any accidents or damages. Appliance dimensions Check the location.
- Page 8 Side Backward Forward Note - If Panasonic Stacking Kit is not installed, stacking for use is prohibited. Note - During stacking installation, please do - After handling, please let the unit stand not put it on the platform above the for at least one hour before connecting ground to prevent it from falling.
- Page 9 Moving and Installing (continued) Levelling the appliance Spirit level (not supplied) Loosen and adjust Tighten NOTE...
- Page 10 Connecting the Hoses Installation of drain hose Connect the hoses properly to prevent water leaks. - Left drainage - Rear drainage Take out the plug of the drain hose connector Plug Drain hose connector Insert the drain hose into the drain hose - Right drainage connector.
- Page 11 Test Run Select Quick Dry Start...
- Page 12 Test Run (continued) Checking after test run Problem Causes and Measures Install stably Abnormal sounds Error display See P. 35...
- Page 13 Before Drying Preparing laundry Dry separately White Coloured clothes clothes Reverse Observe care labels. Clothes likely to pill Classify the clothes for care or dry them according to the fabric and texture to avoid clothes damage. If clothes with different thicknesses or multi-layer fabrics are dried at the same time, the drying effect will be different.
- Page 14 Control Panel Mode Program Dry Program Power button Child Lock (P. 28) (P. 24) (P. 24) (P. 25) (P. 25) Start/Pause (P. 26) button (P. 27) (P. 27) (P. 27) Touch operation Operation buttons are capacitive. If water, detergent or softener gets on, turn off...
- Page 15 Display Filter blocking (P. 30-31) During the drying and care process Water box is short of water (P. 22) Function enabled (P. 22) Dry mode Remaining time Error display (P. 35) (e.g. U11) NOTE Turn off back on Turn off No operation auto power off...
- Page 16 Drying rack - When drying wool and wool blend clothes, please select the wool program and use it with the drying rack, otherwise it may cause fuzzing of wool products. (Spread the clothes as much as possible, otherwise the drying effect will be affected.) - The drying rack can also be used to dry clothes and shoes that are prone to fuzzing and are not suitable for rolling, and can be used with the My Favourite program.
- Page 17 Fragrant capsule In drying, fragrance capsules can be used together to add pleasant fragrance to clothes. (Fragrant capsules are consumables and can be purchased from our company) Take out the filter frame. Rotate the fragrance capsule to control the fragrance concentration.
- Page 18 Drying Basic Method Settings Settings NOTE Do not let laundry get caught in Do not overfill the drum with the door. laundry.
- Page 19 Settings Select a program. (P. 20) Changing the settings. Start...
- Page 20 Program List Max load Description Total time (kg) Program Coat, towel, underwear, plush 1:00 toys and other Hygiene clothing. Coat, sweater, towel, underwear, 0:35 pet products and Deodorisation other clothing. Coat, underwear, bedding, plush toys 2:00 Allergy and other clothing. Lightweight cotton shirts and ironing 0:45...
- Page 21 Max load Program Description Total time (kg) Cotton, linen and (Eco)2:30 10.5 cotton mixed clothes. (Speed)1:50 Cotton Wool and wool blend clothes. (The drying rack must be used. Spread the clothes one piece 0:20 ~ 3:00 as much as possible, otherwise the drying effect Wool will be affected.)
- Page 22 Drying Tips The following conditions indicate that the water box is short of water. - This program is suitable for care of dry (Except for "Hygiene" and "Allergy" clothing and cannot be used for drying program) clothing. - Please make sure that there is enough pure water in the water box before running the program.
- Page 23 Putting blankets into the drum Bedding Dryable items 100 % cotton or 100 % synthetic Sheets, bedspreads, undersheets Blankets NOTE Not dryable items Electric blankets Down Jacket Wool Silk Long pile Fake fur Please select "Down Jacket" program for down clothing, otherwise it may NOTE damage the clothing.
- Page 24 Changing Program Settings Preparing Sort the laundry and put it into Mode Dry Time the drum. (P. 13) After selecting Select dry mode "Wool" and "My Favourite" programs, press this button to set the dry time. In "Wool" program, the time is increased (P.
- Page 25 Temp Timer Set how many hours later to Change the drying temperature. finish operation. (Up to 24 hours) 1:00 (e.g.) High 9:00 Auto start (e.g.) Temperature circulates from 40 ℃ to 65 ℃, and is 55 ℃ by default, and press once to increase by 5 ℃.
- Page 26 Changing Program Settings (continued) Preparing Sort the laundry and put it into Easy Iron the drum. (P. 13) In order to reduce the wrinkles of clothing and the temperature in the drum, the drum will rotate intermittently for up to 2 hours. (P.
- Page 27 Gentle Dry + Dry clothing gently with warm air. Lights Dims (Off) (On) Speed Quick dry function. Lights Dims (Off) (On) Eco function. Lights Dims (Off) (On)
- Page 28 Changing Appliance Settings Setting the Child Lock Cancelling the buzzer Hold Hold 3 sec. 5 sec. Lights (On) To cancel: To reset: Same procedure Same procedure Dims (Off)
- Page 29 Maintenance Humidity sensor Lint filter It is recommended to clean the Power plug Door seal humidity sensor at least once a month. Drum Filter frame Thread filter Door 1. Open the door. 2. Clean the surface of the humidity sensor with a damp sponge. Appliance The humidity sensor is located inside the drum.
- Page 30 Maintenance (continued) The lint filters Thread filter Clean the lint filter after each Please clean the thread filter drying. regularly every month. Open the door and slide the Gently press the upper part slide bar at the top of the of the front cover to pop it door to the right.
- Page 31 Frame filter Water filler Clean the foreign matters or To avoid the filter is blocked by dust, particles accumulated on the please clean it regularly. filter frame, if any. Open the door and remove Gently press the upper part the filter frame at the lower of the front cover to pop it part of the door frame.
- Page 32 Troubleshooting Symptoms Points to be checked Possible cause Touch the buttons During an operation No reaction Child Lock (Off) (P. 28) Check Power cut Timer No operation Close the door. Unplug and insert again. (30 sec.) Press “Start” . Turn the breaker Start Possible cause Odour of rubber...
- Page 33 Symptoms Points to be checked - This is not a fault; After the "Easy Iron" function is set, Intermittent operation. the inner drum will rotate slowly intermittently. - Even if the filter is cleaned, the indicator light may flash, The filter is not blocked, which is not a fault;...
- Page 34 Troubleshooting (continued) Symptoms Points to be checked Possible cause Remaining time is corrected during operation. During a dry Approximate Corrected Displayed time During the running of the program, the display time will vary with the change of clothing weight, Changes humidity and ambient temperature until the end of the running.
- Page 35 Error Display Error Display Points to be checked Check Start Unable to drain Lint Door is open Start Is the ambient temperature abnormal? →Please power off and operate the unit until the ambient temperature is 5 ℃~35 ℃. Abnormal ambient temperature ※If "H86"...
- Page 36 Rated voltage (V) 220-240 Rated frequency (Hz) Maximum energy rated power input (W) Product dimensions 596×667×845 (W x D x H) (mm) Product weight (kg) Maximum mass of dry 10.5 cloth (kg) https://www.panasonic.com Printed in China © Panasonic Corporation 2024 08-2024...
Need help?
Do you have a question about the nanoeX NH-XV21X1 and is the answer not in the manual?
Questions and answers