Advertisement
Quick Links
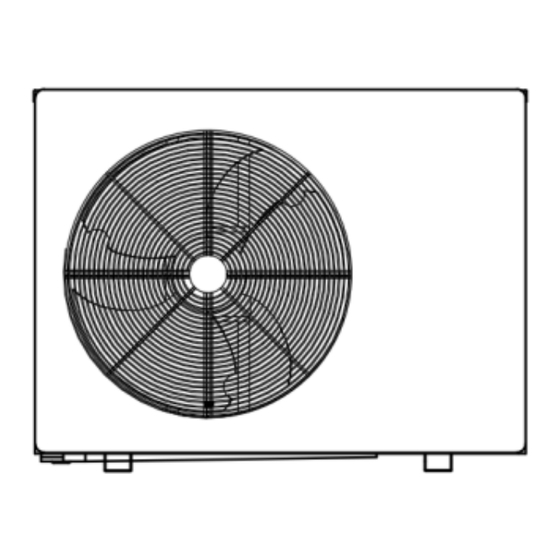
MMHP-008B1, MMHP-012B1, MMHP-016B1, MMHP-020B1
(220~240V/50HZ/single phase) MMHP-012B2, MMHP-016B2, MMHP-020B2,
MMHP-026B2 (380~440V/50HZ/three phase)
Eurotherm HP R32 Air Source Heat Pump Manual
Heat Pump for Heating & Cooling & DHW
Please read this manual carefully before using it and keep it in a safe place
R3
Advertisement

Related Manuals for solardirekt24 MMHP-008B1

Summary of Contents for solardirekt24 MMHP-008B1
- Page 1 MMHP-008B1, MMHP-012B1, MMHP-016B1, MMHP-020B1 (220~240V/50HZ/single phase) MMHP-012B2, MMHP-016B2, MMHP-020B2, MMHP-026B2 (380~440V/50HZ/three phase) Eurotherm HP R32 Air Source Heat Pump Manual Heat Pump for Heating & Cooling & DHW Please read this manual carefully before using it and keep it in a safe place...
- Page 2 Note 1. Please read the instruction manual carefully before installation or operation. 2. The heat pump must be installed by a professional installer. 3. Please follow the instruction manual strictly when installing the heat pump 4. If any update on the product, this instruction manual is subject to change without notice 5.
- Page 3 User Instructions 2. Make sure that the leakage protection switch Please use an electrical leakage switch, is securely connected. If the wiring is not secure, otherwise, there may be electric shock, fire, etc. it may cause electric shock, heat, or fire. Test Button 3.
- Page 4 Please read the labels on the machine carefully. If abnormal conditions such as abnormal noise, odor, smoke, temperature rise, electric leakage, fire, etc. are found during use, please cut off the power immediately and contact our local customer service center or dealer in time to repair it. Contact the local fire and emergency department immediately if necessary.
- Page 5 for a long time, it is recommended that the user drain the water out of the water system and disconnect the power supply. 8) Please perform regular maintenance on the machine as required by the instructions to ensure the device is in good operating condition. 2.
- Page 6 ensure the technician is aware of potentially flammable atmospheres. Ensure that the leak detection equipment being used is suitable for use with flammable refrigerants, i.e. non- sparking, adequately sealed or intrinsically safe. v. Presence of fire extinguisher If any hot work is to be conducted on the refrigeration equipment or any associated parts, appropriate fire extinguishing equipment shall be available to hand.
- Page 7 7) Repairs sealed components: a) During repairs to sealed components, all electrical supplies shall be disconnected from the equipment being worked upon prior to any removal of sealed covers, etc. If it is absolutely necessary to have an electrical supply to equipment during servicing, then a permanently operating form of leak detection shall be located at the most critical point to warn of a potentially hazardous situation.
- Page 8 The refrigerant charge shall be recovered into the correct recovery cylinders. The system shall be “flushed” with OFN to render the unit safe. This process may need to be repeated several times. Compressed air or oxygen shall not be used for this task. Flushing shall be achieved by breaking the vacuum in the system with OFN and continuing to fill until the working pressure is achieved, then venting to the atmosphere, and finally pulling down to a vacuum.
- Page 9 The label shall be dated and signed. Ensure that there are labels on the equipment stating the equipment contains flammable refrigerant. 16) Recovery When removing refrigerants from a system, either for servicing or decommissioning, it is recommended good practice that all refrigerants are removed safely. When transferring refrigerant into cylinders, ensure that only appropriate refrigerant recovery cylinders are employed.
- Page 10 Operation Instruction 1. Control Panel Current Mode Temperature Setting Water Temperature Time or fault display area Timer Power ON/OFF Down Power ON/OFF Change Mode Heating/Cooling/DHW 2. Operation Instruction Power On/Off Long press 2s to turn on Long press 2s to turn off When the lock symbol is the heat pump the heat pump...
- Page 11 Temperature Setting If there is no operation or press the on/off button within 5 seconds, the setting temperature will be saved automatically and return to the homepage Press the up button Press the down button to raise the temperature to lower the temperature Time Setting Press the clock button for Press the clock key again,...
- Page 12 Status Search Enter the status search Adjust the status parameter serial Long press the down number in combination with the up button for 5 s to enter page and down keys the status search page ECO Mode Unlock the case while holding down the ECO symbol lit up button + down button to enter ECO energy-saving mode...
- Page 13 3. Temperature and Climate Curve Setting Setting Climate Temperature Curve Enter the temperature curve Press the key for 1s to Set temperature Press and hold the M setting status to enable or enter the temperature flashing button again for 5s disable the curve setting interface Press the upper key...
- Page 14 4.2 Connection (Intelligent Mode) Manual Intelligent Distribution Network Wifi signal flashes In the unlocked state, press and hold the on/off button + up button Enter distribution network status at the same time to enter the intelligent distribution mode Step 1 Open the "Smart Life"...
- Page 15 to the phone), click next, confirm that the line controller has selected AP distribution mode, an icon in the slow flashing state “ ”, click "Confirm that the indicator is in slow flashing,” then connect the phone Wi-Fi to the device hotspot (as shown below), confirm that the connection hotspot is correct to continue to the next step then directly begin to connect the device interface, find the device →...
- Page 16 Operation Parameter Query Query Code Description Range Compressor Running Frequency 0 ~ 150 Hz Fan Motor Running Frequency 0 ~ 999 Hz Electronic expansion valve steps 0 ~ 480 P EVI valve steps 0 ~ 480 P AC Input Voltage 0 ~ 500 V AC Input Current 0 ~ 50 A...
- Page 17 Dimension 1. Dimension Dimensions Model L×W×H(mm) Dimensions MMHP-008B1 1100×445×850 Model L1×W1×H1(mm) MMHP-010B1 1100×445×850 MMHP-018B1 1110×445×1450 MMHP-012B1 1100×445×850 MMHP-018B2 1110×445×1450 MMHP-016B1 1110×480×850 MMHP-026B2 1110×445×1450 MMHP-016B2 1110×480×850...
- Page 18 2. Explosive Diagram Number Description Number Description Front Panel Components Piping Components Left-side Plate Gas-liquid Separator Evaporator Assembly Accumulator Electric Reactor Condenser Plate Electrical Components Inverter Circulating Water Pump Junction Plate 1 Condenser Top Cover Mounting Plate 2 Intermediate Heat Exchanger Unit Base Plate Mounting Plate 1 Compressor...
- Page 19 The material and thickness of the insulation pipe meet the specified requirements. Otherwise, heat loss and condensation will be caused. b) Please refer to this manual's “Electrical Installation” description section for wire size selection. Model The water inlet/outlet size MMHP-008B1 DN25 (1’’) MMHP-012B1 DN25 (1’’) MMHP-012B2 DN25 (1’’)
- Page 20 2. Heat Pump Installation 2.1 The machine installation space meets the following schematic requirements to ensure regular air circulation and maintenance; 2.2 The location of the machine should be kept away from heat, steam, or flammable gases; 2.3 Do not install the machine in places with strong wind or dust; 2.4 Do not install the machine where it is often passed through the air suction side and air exhaust side;...
- Page 21 If installed on a wall or a roof, the bracket must be firmly fixed to prevent damage caused by an earthquake or strong wind; The positioning dimension of the outdoor unit installation base is 810*394mm. It is required to install four-position foot bolts with a diameter of 10mm—at the bottom of the installation of the outdoor unit.
- Page 22 Remark 1. The same piping design is allowed to distribute the water evenly. 2. The system must be equipped with an automatic water supply valve, and the highest point of the water system must be equipped with an automatic pressure relief valve; 3.
- Page 23 5. Selection and Installation of Water System Accessories Selection Of Circulating Pump 5.1.1 The machine must be installed with a circulating pump to be used. The heat pump provides the power port of the circulating pump (single-phase power supply). Please refer to the circuit diagram for wiring.
- Page 24 MMHP-006B1 MMHP-012B1 MMHP-016B1MMHP-020B1 Model Power Supply 220~240 V/ 1/ 50 Hz Max Input Current (A) 27.50 35.50 Fuse Rated Current(A) Air Switch (mA) Power Cable (mm ² ) 4.00 4.00 6.00 6.00 Model MMHP-012B2 MMHP-016B2 MMHP-026B2 MMHP-020B2 Power Supply 380~415 V/ 3/ 50 Hz Max Input Current (A) 10.5 13.2...
- Page 25 Mainboard Output Definitions...
- Page 26 Seq. Port Description Seq. Port Description Hot Water Electric Heating Low-Pressure Sensors Four-Way Valve Outer Coil Temperature Liquid Injection Valve Return Air Temperature Reservation Exhaust Temperature Reservation Inner Coil Temperature Water Return Valve Economizer Inlet Temperature Crankshaft Heating Economizer Outlet Temperature Chassis Heating Outdoor Ambient Temperature Auxiliary Electric Heating...
- Page 27 Expansion Board Output Definition Port Description Port Description OUT1 Circulating Pump COM1 RS485 Communication 2 OUT2 Indoor Circulation Pump COM2 RS485 Communication 1 OUT3 Air-Conditioning Valve Off COM3 RS485 Communication 3 OUT4 Air-Conditioning Valve On COM4 Indoor Circulation Pump OUT5 Hot Water Valve On COM5 Reservation...
- Page 28 Wire Diagram...
- Page 30 Commissioning and Maintenance 1. Precautions Before Commissioning Is the machine adequately installed? Is the wiring and pipe correct? Whether the water pipelines are empty or not? Whether the heat insulation has been perfected? Is the ground wire connected reliably? Whether the power supply voltage matches the rated voltage of the machine? Is there any obstacle in the air inlet and outlet of the machine? Is the safety valve installed correctly? Whether the leakage protector can operate effectively?
- Page 31 Power Outage If there is a power outage during operation, the machine will stop running. Before the power outage, the controller automatically memories the ON/OFF status of the device. After re- powering, the controller will send an ON/OFF signal to the device according to the state of memory before the power outage to ensure that the device recovers from the previous status from abnormal power failure.
- Page 32 Trouble Analysis Error code Fault Description Failure Causes Wrong-Phase Protection Power supply phase sequence error Power Supply Lack Of Phase The power supply is out of phase 1. Circulating pump failed, or water system blocked 2. Water flow switch failed, or opposite installed direction Outside Water Flow Switch Fault 3.
- Page 33 Cooling Subcooling Protection Normal anti-freeze protection Board Change Out Temperature Fault Damaged motherboard or sensor Damage to the mainboard or water Water Level Switch Malfunction level sensor Anti-Freeze Sensor Malfunction Damaged motherboard or sensor Water Outlet Sensor Failure Damaged motherboard or sensor Reservation Reservation Damage to the mainboard or water...
- Page 34 board damaged Damaged DC pump or poor signal Water Pump Feedback Failure line contact Abnormal Communication between Compressor One Driver and Main Poor or broken signal cable contact Control Board Abnormal Communication between Compressor Two Driver and Main Poor or broken signal cable contact Control Board Abnormal Communication between Fan Motor One Driver and Main Control...
- Page 35 Bit4: PIM supply voltage failure Bit5: Pre-charge circuit voltage failure Bit6: EEPROM failure (for EE models with system parameters stored) Bit7: AC input overvoltage fault Bit8: Microelectronic Failure Bit9: Compressor type code failure Bit10: Current sampling signal overcurrent (hardware overcurrent) Bit11~Bit15: NA Bit0: IPM overcurrent/IPM module protection Bit1: Compressor drive failure/software control abnormality/compressor...
- Page 36 Specification Note: We reserve the right to discontinue or change at any time, specifications or designs without notices and without incurring obligations.
- Page 37 After-sale Service Relevant state regulations carry out the after-sales service of our products. Within the scope of the warranty period, If the machine is not working correctly under reasonable use, please contact the seller. The user must designate a person to manage and use the unit reasonably and correctly by our company’s “Instructions for Use.”...
- Page 38 Controller Supplement 1. Controller Icon Icon Status Functions or meanings Remark Lights out Currently in off or non-hot water mode Display on/off status Constant flashing Currently in hot water mode on Display on/off status Lights out Currently in off or non-heating mode Display on/off status Constant flashing Currently in heating mode...
- Page 39 Constant flashing High, medium and low water levels are displayed Constant flashing The water supply valve Constant flashing Photovoltaic mode/solar heating 1 Hz flashing Start PV timing Flashing Currently in shutdown and refrigerant recovery state Constant flashing Currently on and defrosting Constant flashing Enter maintenance status Constant flashing...
- Page 40 2.3.1.1 (When there is no curve setting) when the line controller is on and unlocked, press "△" or " ▽" key, then press "△" or "▽ "△" or "▽" key to adjust the current mode set temperature; press and hold the "△" or "▽" key for more than 0.5 seconds to quickly increase or decrease, stop operation after 5S or press the on/off key to return to normal display;...
- Page 41 key to exit. LCD display: pump icon " " flashing 2.9 Operation parameters query: 2.9.1 Enter to view: long press " ▽ " 3S under the regular interface to enter the operating parameters query, enter the parameter query state, the temperature display area shows the parameter serial number, the timing area shows the parameter content.
- Page 42 2.13.2.4 Short press the " " key, "1", "ON" icon at the bottom left of the screen, the hour display area flashes, it means enter the "first group of timing Start" setting state, digital flashing at hour, press "△" or "▽" key to modify the time, then press "Timer" key to confirm the modification and go to the minute Setting, digital flashing at the minute, press "△"...
- Page 43 Press and hold the " " key for more than 5 seconds to restore the factory settings and exit. Press and hold the " " key for more than 5 seconds to display self-test, all the display fields in turn after the end of the display self-test; display self-test after the end of the clock chip and memory chip, WIFI module detection.
- Page 44 the set value. 2.20 Photovoltaic timing (valid for home machines) Under the main interface long press the " "+" "+" "key for 3 seconds to enter the PV timing settings, press and immediately release " " key can switch the hour part, minute part, hour part and minute part of the end time of the two time periods in turn, flashing display when switching to the corresponding value, while displaying the corresponding time period and flashing display "ON"...
- Page 45 3. Temperature Compensation Curve Heating High Water Temperature Climate Temperature Compensation Curve HH1-HH8 制热高水温气候温度补偿曲线- HH1HH8 Ambient Temperature ℃ Heating Low Water Temperature Climate Temperature Compensation Curve CH1-CH8 Ambient Temperature ℃...
- Page 46 Cooling High Water T emperature Climate Temperature Compensation Curve CH1-CH8 Ambient Temperature ℃ Cooling Low Water Temperature Climate Temperature Compensation Curve CL1-CL8 - ℃ Ambient Temperature ℃...
Need help?
Do you have a question about the MMHP-008B1 and is the answer not in the manual?
Questions and answers