Advertisement
Quick Links
Advertisement

Related Manuals for EGO EasyPRO MK2

Summary of Contents for EGO EasyPRO MK2
- Page 1 EasyPRO MK2 Operation Guide...
- Page 2 MAINTENANCE GUIDELINES Careful and regular maintenance is necessary to optimize the potential functional lifespan of the LED Video Panels. 1. Read the installation and operation instructions for correct operation of the LED Video Panels. 2. Although the LED Video Panels are designed and built to withstand some impact forces when installed correctly, take care to avoid impact damage when handling or transporting them, especially corners and edges, which are particularly frangible during transportation.
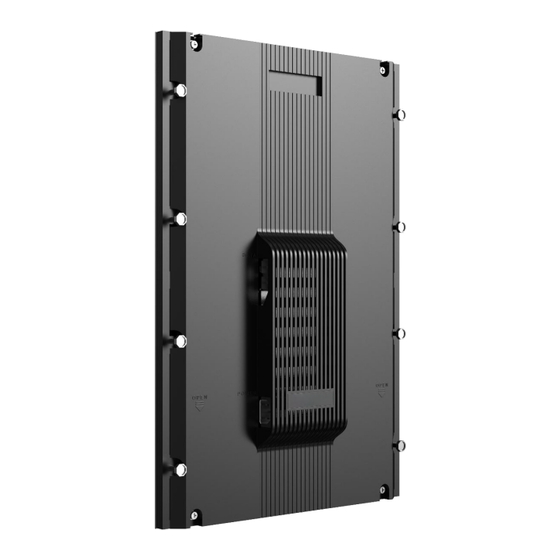
- Page 3 PANEL OVERVIEW 480mm 320mm 46.5mm Magnet Back Cover DATA Cables Ports Power Cables Port Safety Rope Connection Hole...
- Page 4 PARTS LIST Descriptions Specs Pictures Vacuum Maintenance Tool Screwdriver Laser Level Hex Wrench Adjustable Spanner...
- Page 5 CABINET MAINTENANCE 1. Remove the problem cabinet by vacuum maintenance tool then replace a good cabinet. 2. Slide the back cover downward then remove it to maintenance the cabinet. Release the screws to replace the module or receiving card.
- Page 6 1440mm Connection Tube 960mm 640mm 480mm 960mm Stand Base Support Frame 3 in 1 3 in 1 4 in 1 4 in 1 Pull Rod Crossbar...
- Page 7 STACKING - STANDARD 1. According to the screen size select the stand bases and connection tube, then splice them in sequence. Check and adjust the level while splicing. 2.Place the support frame on the stand bases in order then screw them tight.
- Page 8 STACKING - STANDARD 3. Select the corresponding support frames of second layer according to the size of screen, then fixed them with the first layer by screws. Repeat the previous steps to complete the assembly of second layer support frames. 4.
- Page 9 STACKING - STANDARD 5. Connect the power cable and DATA cable on cabinets before installation. One power cable and one DATA cable on each cabinet. 6. Place the cabinets to the beam at the bottom of structure. Recommend to install the cabinets from middle to reduce the install error.
- Page 10 STACKING - STANDARD 7. Repeat the previous steps to install the first layer cabinets. Place the second layer cabinets on the first layer cabinets. Observe and adjust the flatness and connect the cables while installing. 8. Repeat the previous steps to install the other cabinets to structure.
- Page 11 STACKING - OPTIONAL 1. Select the corresponding crossbar then fixed it with bases support frames by using screws and nuts. 2. The crossbar will increase the ground clearance height of first layer cabinets. Then continue the STANDARD OPERATION STEPS NO.5~8 to complete the installation.
- Page 12 WALL MOUNTING 1. Measure the installation position of the screen and confirm the staring position. Keep the measuring equipment vertical and horizontal then fixed the structure to the wall. 2. Connect the power cable and DATA cable on cabinets before installation. One power cable and one DATA cable on each cabinet.
- Page 13 WALL MOUNTING 3. Place the cabinets to the beam at the bottom of structure. Recommend to install the cabinets from middle to reduce the install error. Please observe and adjust the flatness and also connect the cables between cabinets while installing. 4.
- Page 14 WALL MOUNTING 5. Repeat the previous steps to install the other cabinets to structure.
Need help?
Do you have a question about the EasyPRO MK2 and is the answer not in the manual?
Questions and answers