Advertisement
Quick Links
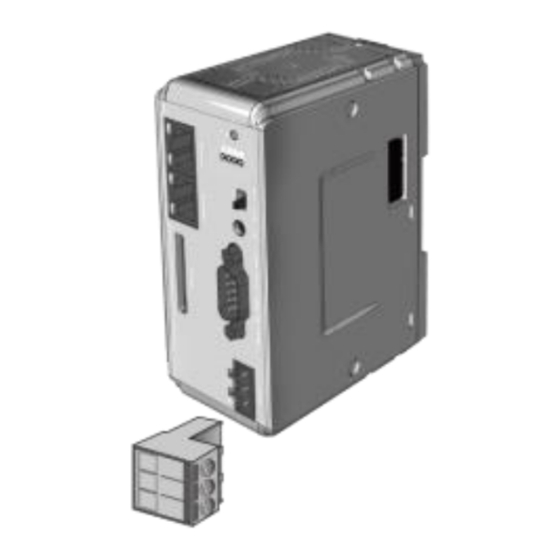
cMT-CTRL01 series
1
Installation and Startup Guide
This document covers the installation of cMT-CTRL01 Series HMI, for the detailed specifications and
operation, please refer to Datasheet, Brochure and EasyBuilder Pro User Manual. Please read all
warnings, precautions, and instructions on the device carefully before use.
Install Environment:
The
HMI product has been tested to conform to European CE requirements. This
Electrical
means that the circuitry is designed to resist the effects of electrical noise. This does not
guarantee noise immunity in severe cases. Proper wire routing and grounding will
Environment
insure proper operation.
(1) Make sure that the units are installed correctly and that the operating limits are
followed. Avoid installing units in environments where severe mechanical vibration
or shocks are present.
(2) Do not operate the unit in areas subject to explosion hazards due to flammable
Environmental
gases, vapors or dusts.
(3) Do not install the unit where acid gas, such as SO2 exists.
Considerations
(4) This device should be mounted in the vertical position and for use on the flat
surface enclosure.
(5) For use in Pollution Degree 2 Environment and dry location.
(6) Relative Humidity: 10% ~ 90% (non-condensing)
Operating Altitude
(Atmospheric
Below 3,000 m (9842.52 ft.), atmospheric pressure is 70.1 kPa.
Pressure)
IP 20
IP rating
Cleaning
Clean the device using dry cloths. Do not use liquid or spray detergents for cleaning.
Considerations
Protection impairment if used in a manner not specified by the manufacturer.
Warning
Déficit de protection si utilisé d'une manière non spécifiée par le fabricant.
2
Unpacking the Unit
Unpack and check the delivery. If damage is found, please contact the supplier.
NOTE:
Place the operator panel on a stable surface during installation. Dropping it or letting it
fall may cause damage.
The package includes:
(1) Installation Instruction, 2-sided A4 *1
(2) cMT-CTRL01 *1
(3) Power Connector *1
(4) Spare Clips *2
3
Installation Instructions
Clip assembly: Insert one side of the
clip into the hole on the case. Press
down firmly in the direction shown in the
figure on the right until hearing the clip
snap into the case.
Clip removal: Insert a flathead
Installation Instruction
screwdriver into the gap on the clip and then lift up the screwdriver. Placing a finger on the clip when
lifting the screwdriver can prevent the clip from jumping away. The clip can also be removed directly by
hand.
Rail mounting: DIN rail 35mm
Panel mounting:Use two M4 or #8 panhead screws,mounting hole size is 4.6mm
Plan for adequate space around the unit and inside the enclosure, for ventilation and cables. Consider
the heat from other devices inside the enclosure. The ambient temperature around the unit must be 0 ~
55°C
The aluminum flat-sheet at the side of the unit is a heat sink. Please be careful not to touch the heat
sink since its heat can rise to 70°C in maximum when the unit is running. Planning for a 3cm space
between the aluminum flat-sheet and other devices is recommended.
4
Power Connections
Power Connector Specifications:
Spécifications du connecteur d'alimentation:
Wire AWG: 24~12
AWG de fil: 24 ~ 12
Wiring Conductor Minimum
Température minimale du conducteur de
Temperature: 75°C
câblage: 75°C
Screw Torque: 4.5 lbf-in (max.)
Couple de vis: 4.5 lbf-in (max.)
Copper conduct only
Conducteur en cuivre seulement
Connect positive DC line to the '+' terminal and the DC ground to the
NOTE:
'-' terminal.
System Settings
5
cMT-CTRL01 is equipped with two
Ethernet ports, and the default IP address
of each port:
LAN1: DHCP (for CODESYS)
LAN2: DHCP (for Gateway)
Connect through LAN2: Connect
cMT-CTRL01 with your computer using a
RJ-45 cable directly, or use a router. Launch EasyBuilder Pro
on your computer, open Download window as shown in part
6 in this document to find this cMT-CTRL01's IP address,
open a browser on the computer, and then enter the IP
address
After connecting cMT-CTRL01 successfully, use the default
password "111111" to log in and configure cMT-CTRL01.
Click the System Settings button and configure
cMT-CTRL01.
The interface can be used to download or upload project files.
Advertisement

Summary of Contents for weintek cMT-CTRL01 Series
- Page 1 70°C in maximum when the unit is running. Planning for a 3cm space between the aluminum flat-sheet and other devices is recommended. This document covers the installation of cMT-CTRL01 Series HMI, for the detailed specifications and operation, please refer to Datasheet, Brochure and EasyBuilder Pro User Manual. Please read all warnings, precautions, and instructions on the device carefully before use.
- Page 2 This product is limited warranted against defects in design and manufacture. Battery Specification: UL Certification Battery, Type CR1220, Rated 3V, Max. Abnormal Charging The proven defective product will either be repaired or replaced, at Weintek’s discretion. Current 10mA, Working Temperature: max. 70°C...


Need help?
Do you have a question about the cMT-CTRL01 Series and is the answer not in the manual?
Questions and answers