
Related Manuals for Mcombo 6160-7634


Summary of Contents for Mcombo 6160-7634
- Page 1 OWNER'S MANUAL LIFT RECLINER (Large Regular) 6160-7634 www.mcombo.com / sales@mcombo.com NEWACME LLC Mcombo.com Amazon.com/mcombo...
- Page 2 SUPPORT shields or other safety features of this product. • Fabric Care You will not refuse or neglect any retrofit kits that MCombo may provide to enhance • Faux Leather Care and preserve the safe use of this product. • Electronics Care •...
- Page 3 • Do not use pillow, blanket, or other cover between occupant and chair surface when heat is engaged. • Do not a�empt to disconnect the power plug by pulling the power cord. Always hold the power Read the safety and other instruc�ons thoroughly before using your MCombo® product. Failure to plug and pull it out.
- Page 4 We are not and cannot be held responsible for any damage or injury incurred due to improper or unsafe use of the MCombo Product. We specifically disclaim responsibility for any bodily injury or property damage that may occur during any use that does not comply with applicable federal, state, USB Power or local laws or ordinances.
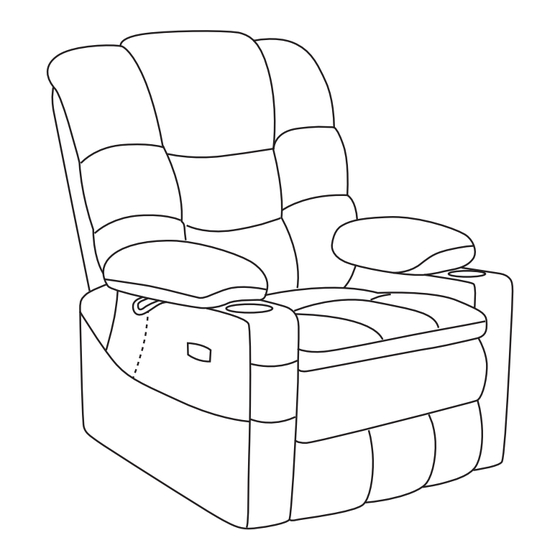
- Page 5 No�ce 1. Ensure the armrest which has USB charge port is located on right of base. • Use MCombo parts only for all replacements. 2. Slide the le� and right armrest into the brackets of the base. 3. Press each armrest down as far as it will go (Figure).
- Page 6 Step2 - Backrest Assembly Step3 - Li� Connec�ons 1. Align the brackets of backrest at the clips of seat-back (Figure). 1. Connect the chairs according to the following wiring diagram (Figure). 2. A�ach the chair-back to the velcro on the bo�om of the chair base. 2.
- Page 7 Step4 - An�-back-�pping Part Assembly Step5 - Final Check 1. Place the An�-back-�pping parts (G) near the bo�om of base. 1. Make sure both metal brackets on each armrest are mounted on the base. 2. Align the screws with the holes then �ghten the wing screws (Figure). (There are two metal brackets on each side of the base, it looks like assembly finished when you insert armrest into only one bracket instead of two, however all pressure will apply to one bracket, that is one likely reason that the armrest fall apart from the seat.)
- Page 8 If you discover a problem at any point during the setup and posi�oning of your li� chair,stop and contact the MCombo Customer Support immediately. To avoid personal injury and/or product damage, do not plug the unit into the electrical outlet un�l the problem is corrected and do not...
- Page 9 IV. CARE AND MAINTENANCE Massage Remote Opera�on Instruc�on Your MCombo product will provide years of superior performance and sa�sfac�on with regular care and maintenance. To maintain the finish quality of your "assistant", please follow the guidelines and cleaning procedures provided below.
- Page 10 ● Keep all the electronics free from moisture and temperature extremes. ● Check electrical components frequently for signs of corrosion and replace as necessary. ● Contact MCombo Customer Support if damage is present, do not fix it by yourself. • Make sure the light of the massage remote is on.
- Page 11 • If there is a burning smell, unplug the remote and contact MCombo support to replacement. NOTE: If the li� recliner s�ll does not operate properly, please contact the MCombo® Customer Support for help and never a�empt to make any repairs or adjustments yourself.
- Page 12 Step2 - Remove Bolts Step3 - Remove Old Li� Motor Repeat “Step 2” with the other end of the li� motor. ( 2 ) Twist the paper clip ( 1 ) The original posi�on of the paper clip Step4 - Replace the New Li�...
- Page 13 Step5 - Install Bolts Step6 - Final Check Insert bolts and paper clips at both ends of the li� motor. Check & Confirm 1.Make sure bolts and paper clips are fully inserted. 2.Make sure the li� motor is installed in the correct direc�on. 3.Make sure the wires are not crushed by the seat frame.
- Page 14 VI. DISASSEMBLY INSTRUCTION Step3 - Disassemble Armrests NOTE: No�ce • Need to remove the backrest first. • It is best to remove armrest by two people. • Ensure the chair is in seated posi�on and its footrest return to original posi�on. •...
- Page 15 • If you have any problem to return the product, please contact us immediately, we will do our best to MCOMBO® will pay standard shipping rates on all warranted parts for the first year. We can also sell you replacement part for a discount price when your product is out of warranty policy.
- Page 16 IX. MCOMBO CUSTOMER SUPPORT If for any reason, we have fallen short of your expecta�ons, or if you have any ques�ons and suggests, please refer to the following contact informa�on, we will do our best to work with you to make sure you are en�rely sa�sfied.
Need help?
Do you have a question about the 6160-7634 and is the answer not in the manual?
Questions and answers