Advertisement
Quick Links
100000000_2000000000_Rev A
100305186_2000558066_Rev H
Installation & Operation Manual
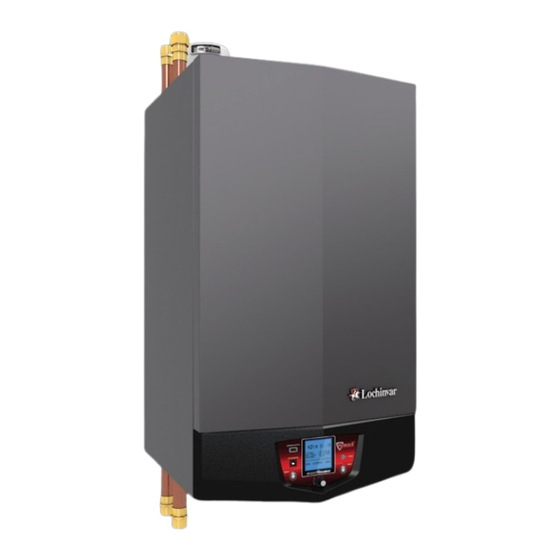
Models: 55 - 399
Series: 100 & 101
This manual must only be used by
⚠WARNING
a qualified heating installer / service
technician. Read all instructions,
including this manual and the
Knight Wall Hung Fire Tube Boiler
Service Manual, before installing.
Perform steps in the order given.
Failure to comply could result in
severe personal injury, death, or
substantial property damage.
Save this manual for future reference.
Advertisement

Related Manuals for Lochinvar Knight 100 Series


Summary of Contents for Lochinvar Knight 100 Series
- Page 1 100000000_2000000000_Rev A 100305186_2000558066_Rev H Installation & Operation Manual Models: 55 - 399 Series: 100 & 101 This manual must only be used by ⚠WARNING a qualified heating installer / service technician. Read all instructions, including this manual and the Knight Wall Hung Fire Tube Boiler Service Manual, before installing.
- Page 2 Contents HAZARD DEFINITIONS ..........2 6. HYDRONIC PIPING PLEASE READ BEFORE PROCEEDING ..... 3 System Water Piping Methods ......... 34 THE KNIGHT WALL HUNG FIRE TUBE BOILER -- HOW IT Low Water Cutoff Device ..........34 WORKS ................4-5 Chilled Water System ............34 RATINGS ................
- Page 3 Installation & Operation Manual Please read before proceeding Installer – Read all instructions, including ⚠WARNING DO NOT install units in rooms or ⚠WARNING this manual and the Knight Wall Hung environments that contain corrosive Fire Tube Boiler Service Manual, before contaminants (see Table 1B).
- Page 4 Installation & Operation Manual The Knight Wall Hung Fire Tube Boiler - How it works... 17. Air intake adapter 1. Stainless steel heat exchanger Allows for the connection of the PVC air intake pipe to Allows system water to flow around specially designed tubes the boiler.
- Page 5 Installation & Operation Manual The Knight Wall Hung Fire Tube Boiler - How it works... (continued) FRONT OF UNIT DIR #2000557744 00 Bottom View Front View DIR #2000544036 00 Top View (inside unit) DIR #2000557169 00 Front View (inside unit) Left Side (inside unit)
- Page 6 Maximum allowed working pressure is located on the rating plate. NOTICE Notes: 1. As an Energy Star Partner, Lochinvar has determined that 7. Ratings have been confirmed by the Hydronics Section of Knight Wall Hung Fire Tube boilers meet the Energy Star AHRI.
- Page 7 Installation & Operation Manual Determine boiler location Installation must comply with: DO NOT install the boiler in a room likely to freeze. • Local, state, provincial, and national codes, laws, This appliance is certified as an indoor regulations, and ordinances. ⚠WARNING appliance.
- Page 8 Installation & Operation Manual Determine boiler location Figure 1-1 Closet Installation - Minimum Required Clearances For closet installations, CPVC, ⚠WARNING polypropylene, or stainless steel LEFT vent material MUST BE used in 0” MINIMUM 6” MINIMUM a closet structure due to elevated temperatures.
- Page 9 Installation & Operation Manual Determine boiler location (continued) Residential garage installation Provide clearances: Clearances from combustible materials Precautions 1. Hot water pipes—at least 1/4" (6 mm) from combustible Take the following precautions when installing the appliance materials. in a residential garage. If the appliance is located in a 2.
- Page 10 Installation & Operation Manual Determine boiler location When using an existing vent system to Table 1B Corrosive Contaminants and Sources install a new boiler: Products to avoid: Failure to follow all instructions can result ⚠WARNING Spray cans containing chloro/fluorocarbons in flue gas spillage and carbon monoxide emissions, causing severe personal injury Permanent wave solutions or death.
- Page 11 Installation & Operation Manual Determine boiler location (continued) When removing a boiler from existing common vent system: Do not install the Knight Wall Hung g. Any improper operation of the common venting system ⚠ DANGER should be corrected so the installation conforms with the Fire Tube boiler into a common vent National Fuel Gas Code, ANSI Z223.1/NFPA 54, and/or with any other appliance.
- Page 12 Installation & Operation Manual Prepare boiler To gain access and remove the venturi - All Remove boiler from wood pallet Models: 1. After removing the outer shipping carton from the boiler, remove the parts box. 1. If boiler is already installed, you must turn off the 2.
- Page 13 Installation & Operation Manual Prepare boiler (continued) Reassemble the appliance and complete After converting to LP, check combustion ⚠WARNING per the Start-up procedure in Section 10 installation - All Models of this manual. Failure to check and verify 1. Reconnect the rubber boot on the air inlet to the venturi combustion could result in severe personal inlet and tighten the band clamp at this connection.
- Page 14 Installation & Operation Manual Prepare boiler ⚠WARNING The boiler is too heavy for a single person Figure 2-3 Mounting the Boiler to lift. A minimum of two people is needed for mounting the boiler onto the WALL: bracket. WOOD OR METAL STUDS ON 16”...
- Page 15 Installation & Operation Manual General venting Direct venting options - Sidewall Vent DIR #2000543112 00 DIR #2000543099 00 Figure PVC/CPVC Concentric Sidewall Figure 3-1 Two-Pipe Sidewall Termination Termination Direct venting options - Vertical Vent DIR #2000543107 00 DIR #2000543103 00 DIR #2000543106 00 Figure 3-3 Two-Pipe Vertical Figure 3-5 Vertical Vent, Sidewall...
- Page 16 Installation & Operation Manual General venting Install vent and combustion air piping The Knight Wall Hung Fire Tube boiler must be vented and supplied with combustion and ventilation air as ⚠ DANGER described in this section. Ensure the vent and air piping and the combustion air supply comply with these instructions regarding vent system, air system, and combustion air quality.
- Page 17 Installation & Operation Manual General venting (continued) Air intake / vent location Optional room air is intended for NOTICE commercial applications. Combustion air The total length of piping for vent or air must not exceed the piping to the outside is recommended for limits given in the General Venting - Sizing Section.
- Page 18 100 feet The 2", 3" and 4" Concentric and Sidewall Vent Kits Table 3E Equivalent Length Guidelines - Polypropylene available from Lochinvar, IPEX, and Centrotherm (see Tables 3B and 3C) are approved for use on the Knight Vent Ø Vent Pipe 45°...
- Page 19 Installation & Operation Manual General venting (continued) Materials Air inlet pipe materials: When a sidewall or vertical rooftop combustion air supply The air inlet pipe(s) must be sealed. Choose acceptable system is disconnected for any reason, the air inlet pipe combustion air inlet pipe materials from the following list: must be resealed to ensure that combustion air will be free of contaminants and supplied in proper volume.
- Page 20 Installation & Operation Manual General venting PVC/CPVC Work from the boiler to vent or air termination. Do not exceed the lengths given in this manual for the air This product has been approved for use with the PVC/CPVC or vent piping. vent materials listed in Table 3G.
- Page 21 Installation & Operation Manual General venting (continued) Polypropylene Table 3H Approved Polypropylene Vent Manufacturers This product has been approved for use with polypropylene Manufacturers Model Type venting from the manufacturers listed in Table 3H. DuraVent PolyPro Single Wall / Flex All terminations must comply with listed options in this Centrotherm InnoFlue...
- Page 22 Installation & Operation Manual General venting Stainless steel vent Use only the materials, vent systems, and terminations ⚠WARNING from listed manufacturers. DO NOT mix vent This product has been approved for use with stainless systems of different types or manufacturers. Failure steel venting from the manufacturers listed in Table 3L.
- Page 23 Installation & Operation Manual Sidewall direct venting Vent/air termination – sidewall Sidewall vent kit When venting out a sidewall using PVC, CPVC, or polypropylene Follow instructions below when ⚠WARNING vent material, an optional sidewall vent termination kit can be determining vent location to avoid ordered (FIG.
- Page 24 Installation & Operation Manual Sidewall direct venting Vent/air termination – sidewall Figure 4-5B Field Supplied Fittings with Vent Termination Figure 4-3 Clearance to Forced Air Inlets (Sidewall Vent Kit Shown) Coupling TO BOILER IF LESS COUPLING INTAKE AIR THAN 10’ CONNECTION 12”...
- Page 25 Installation & Operation Manual Sidewall direct venting (continued) Vent/air termination – sidewall Cut a hole for the vent pipe. For either combustible or noncombustible construction, size the vent pipe Prepare wall penetrations - Sidewall hole with at least a 1/2 inch clearance around the vent vent kit pipe outer diameter: The PVC/CPVC and polypropylene sidewall vent terminations...
- Page 26 Description and usage Lochinvar offers optional concentric combustion air and vent pipe termination kits (see the General Venting Section for part numbers). Both combustion air and vent pipes must attach to the termination kit. The termination kits must terminate outside the structure and must be installed as described in the General Venting - Air Intake / Vent Location Section, and as shown below in FIG.
- Page 27 Installation & Operation Manual Sidewall direct venting (continued) Sidewall termination – optional concentric vent Figure 4-10A 2 and 3 Inch Concentric Vent Dimensions Figure 4-10B 4 Inch Concentric Vent Dimensions (reference the General Venting Section) (reference the General Venting Section) "A"...
- Page 28 Installation & Operation Manual Sidewall direct venting Sidewall termination – optional concentric vent Figure 4-12 Concentric Vent Sidewall Attachment NOTE: 100140480 shown for illustration purposes. Multi-venting sidewall terminations DO NOT use field supplied couplings CAUTION to extend pipes. Airflow restriction When two (2) or more direct vent appliances are vented near will occur and may cause intermittent each other, each appliance must be individually vented (see...
- Page 29 Installation & Operation Manual Vertical direct venting Vent/air termination – vertical Figure 5-1A PVC/CPVC/Polypropylene Vertical Termination of Air and Vent Follow instructions below when ⚠WARNING determining vent location to avoid ALTERNATE INTAKE LOCATIONS: INTAKE PIPES MAY BE LOCATED possibility of severe personal injury, death ANYWHERE WITHIN 24”...
- Page 30 Installation & Operation Manual Vertical direct venting Vent/air termination – vertical Existing vent as a chase Figure 5-2A Vertical Terminations with Multiple Boilers Follow all existing termination and clearance requirements and allowable pipe lengths. Use only approved venting materials 12” MINIMUM (STAINLESS STEEL 36” MINIMUM) VERTICALLY FROM VENT listed in the General Venting Section of this manual.
- Page 31 Vertical direct venting (continued) Vertical termination – optional concentric vent Lochinvar offers an optional concentric combustion air Figure 5-4 Concentric Vent Vertical Installation and vent pipe termination kit. Both combustion air and vent pipes must attach to the termination kit. The kit must terminate outside the structure and must be installed as shown in this section.
- Page 32 Installation & Operation Manual Vertical direct venting Vertical termination – Concentric vent kit Figure 5-5 Do Not Install U-Bend to Rain Cap Multi-venting vertical terminations When two (2) or more direct vent appliances are vented near each other, each appliance must be individually vented (see FIG.
- Page 33 Installation & Operation Manual Vertical direct venting (continued) Vertical termination - Alternate concentric venting This appliance may be installed with a concentric vent Figure 5-7A Concentric Vent Example 1 arrangement where the vent pipe is routed through an existing unused venting system or by using the existing unused venting system as a chase for vent and combustion FLUE EXHAUST air routing.
- Page 34 Installation & Operation Manual Hydronic piping The 55 - 285 models are equipped with optional water connections from the top or bottom. These models ship from System water piping methods the factory configured for bottom connections. A relief valve and fittings are provided in the install kit shipped with the The Knight Wall Hung Fire Tube is designed to function boiler and are to be field installed on the top outlet connection in a closed loop pressurized system not less than 12 psi.
- Page 35 When using more than one temperature Figure 6-2 Bottom Connections Installation demand it is necessary to protect the lower temperature loop from overheating. To help aid with this protection, Lochinvar offers the Multi-Temperature Loop Control Board Kit. AUTO AIR VENT...
- Page 36 Field supplied. Full port ball valves are required. Failure space heating. to use full port ball valves could result in a restricted flow Lochinvar offers the Squire which is a series of indirect rate through the boiler. water heaters. The Squire features a stainless steel vessel 7.
- Page 37 Installation & Operation Manual Hydronic piping (continued) Figure 6-3 Pressure Drop vs. Flow Factory Provided Circulators UPML UPMXL Table 6A - Boiler Flow Requirements Temperature Rise and Head Loss Based on Boiler Output in Btu/hr Factory Minimum Flow Minimum Maximum Model Provided 20°F...
- Page 38 Installation & Operation Manual Hydronic piping Figure 6-4 Single Boiler - Single Temperature with Zone Valves - DHW Priority ZONE #1 PRESSURE PRESSURE REDUCING VALVE GAUGE ZONE #2 ZONE #3 ZONE #4 BACKFLOW PREVENTER WATER ZONE VALVES METER (TYPICAL) MAKE UP KE UP WATER SYSTEM SUPPLY SENSOR...
- Page 39 Installation & Operation Manual Hydronic piping (continued) Figure 6-5 Single Boiler - Single Temperature Zoned with Circulators - DHW Priority ZONE 1 PRESSURE PRESSURE GAUGE REDUCING VALVE ZONE 2 ZONE 3 ZONE 4 BACKFLOW FLOW CHECK PREVENTER VALVE WATER (TYPICAL) METER MAKE UP WATER UP WA...
- Page 40 Installation & Operation Manual Hydronic piping Figure 6-6 Multiple Boilers - Single Temperature Zoned with Circulators - DHW Priority RECOMMENDED WATER PIPE DIAMETER - CASCADE Model Units Units Units Units Units Units Units 1 1/4'' 1 1/2'' 1 1/2'' 1 1/4'' 1 1/2'' 2 1/2'' 2 1/2'' 1 1/2'' 2 1/2'' 2 1/2'' 2 1/2''...
- Page 41 Installation & Operation Manual Hydronic piping (continued) Figure 6-7 Single Boiler - Multiple Temperatures - DHW Priority PRESSURE TEMPERATURE TEMPERATURE TEMPERATURE REDUCING VALVE LOOP #1 LOOP #2 LOOP #3 BACKFLOW PREVENTER MIXING VALVES PRESSURE (TYPICAL) GAUGE WATER METER SYSTEM SUPPLY MAKE SENSOR WATER...
- Page 42 Installation & Operation Manual Hydronic piping Figure 6-8 Multiple Boilers - Multiple Temperatures - DHW Piped as a Zone RECOMMENDED WATER PIPE DIAMETER - CASCADE Model Units Units Units Units Units Units Units 1 1/4'' 1 1/2'' 1 1/2'' 1 1/4'' 1 1/2'' 2 1/2'' 2 1/2'' 1 1/2'' 2 1/2'' 2 1/2'' 2 1/2''...
- Page 43 Installation & Operation Manual Hydronic piping (continued) Figure 6-9 Multiple Boilers - Single Temperature Zoned with Valves RECOMMENDED WATER PIPE DIAMETER - CASCADE Model Units Units Units Units Units Units Units 1 1/4'' 1 1/2'' 1 1/2'' 1 1/4'' 1 1/2'' 2 1/2'' 2 1/2'' 1 1/2'' 2 1/2'' 2 1/2'' 2 1/2''...
- Page 44 Installation & Operation Manual Hydronic piping Figure 6-10 Single Boiler - Full Flow - Single Temperature - Zoned with Zone Valves - DHW Priority ZONE 1 PRESSURE PRESSURE REDUCING VALVE GAUGE ZONE 2 ZONE 3 ZONE 4 BACKFLOW PREVENTER WATER ZONE VALVES METER (TYPICAL)
- Page 45 Installation & Operation Manual Hydronic piping (continued) Figure 6-11 Single Boiler - Full Flow - Single Temperature Zoned with Valves - DHW Piped as a Zone ZONE 1 PRESSURE REDUCING VALVE PRESSURE ZONE 2 ZONE 3 ZONE 4 GAUGE BACKFLOW PREVENTER WATER ZONE VALVES...
- Page 46 Installation & Operation Manual Hydronic piping Figure 6-12 Single Boiler - Full Flow - Single Temperature Zoned with Circulators - DHW Piped as a Zone ZONE 1 PRESSURE PRESSURE GAUGE REDUCING VALVE ZONE 2 ZONE 3 ZONE 4 BACKFLOW PREVENTER FLOW CHECK WATER VALVE...
- Page 47 Installation & Operation Manual Gas connections Connecting gas supply piping 3. Purge all air from the gas supply piping. 1. Reference FIG.'s 7-1 and 7-2 to pipe gas to the boiler. 4. Before placing the boiler in operation, check the boiler Install a field supplied sediment trap / drip leg and its gas connection for leaks.
- Page 48 Installation & Operation Manual Gas connections Propane Gas: Use two wrenches when tightening gas ⚠WARNING piping at boiler (FIG. 7-2) Using one wrench to prevent the boiler gas line Knight Wall Hung Fire Tube boilers ⚠WARNING connection from turning. Failure to are typically shipped ready to fire on support the boiler gas connection pipe to natural gas.
- Page 49 Installation & Operation Manual Gas connections (continued) Table 7A Natural Gas Pipe Size Chart Capacity of Schedule 40 Metallic Pipe in Cubic Feet of Natural Gas Per Hour (based on .60 specific gravity, 0.30" w.c. pressure drop) Pipe Length of Pipe in Straight Feet Size (Inches) 1 1/4...
- Page 50 Installation & Operation Manual Gas connections Gas Pressure When re-tightening the set screw, be sure ⚠WARNING to tighten securely to prevent gas leaks. The gas pressure must remain between 4 inches w.c. (natural), Do not check for gas leaks with an open 8 inches w.c.
- Page 51 Installation & Operation Manual Field wiring Installation must comply with: ELECTRICAL SHOCK HAZARD – For your ⚠WARNING safety, turn off electrical power supply before 1. National Electrical Code and any other national, state, making any electrical connections to avoid provincial, or local codes or regulations. possible electric shock hazard.
- Page 52 A system supply sensor must be installed. Connect this 2. The tank sensor included with the Lochinvar Squire output to the 0 - 10V input on the boiler pump speed control. Indirect DHW tank is the only sensor suitable for use Factory supplied pump wiring - brown (+) blue (-).
- Page 53 Installation & Operation Manual Field wiring (continued) Flow switch Runtime contacts 1. A flow switch is used to guarantee flow through the The SMART SYSTEM control closes a set of dry contacts boiler before allowing it to fire. The flow switch must be whenever the burner is running.
- Page 54 Installation & Operation Manual Field wiring Wiring of the cascade (cont'd) If outdoor air reset is desired, the outdoor air sensor should be wired to the Low Voltage Connection Board at the terminals marked for the outdoor air sensor (FIG. 8-3). If the outdoor air sensor is connected, the Leader control will calculate the water temperature set point based on the programmed reset curve parameters.
- Page 55 Installation & Operation Manual Field wiring (continued) Figure 8-3 Low Voltage Field Wiring Connections...
- Page 56 Installation & Operation Manual Condensate disposal Condensate drain 11. A condensate removal pump is required if the boiler is below the drain. When installing a condensate pump, 1. This boiler is a high efficiency appliance that produces select one approved for use with condensing boilers and condensate.
- Page 57 Installation & Operation Manual Start-up Boiler water Pre-Commissioning Cleaning Do not use petroleum based cleaning or 1. Prior to fill and start-up, flush the entire heating system. CAUTION sealing compounds in the boiler system. 2. Clean the entire heating system with an approved pre- Gaskets and seals in the system may be commissioning cleaner (comparable to Sentinel X300 or damaged.
- Page 58 Installation & Operation Manual Start-up Fill and test water system Use glycol only if needed for freeze protection fluid. Propylene glycol is the recommended freeze protection 1. Fill system only after ensuring the water meets the fluid. requirements of this manual. Make sure to flush the boiler system before adding glycol.
- Page 59 Installation & Operation Manual Start-up (continued) Final checks before starting the boiler Check thermostat circuit(s) 1. Disconnect the two external wires connected to each of the q Read the Knight Wall Hung Fire Tube Boiler Service heat/loop demand terminals on the connection board. Manual to familiarize yourself with SMART SYSTEM 2.
- Page 60 Installation & Operation Manual Start-up Parameters in the setup wizard DHW TYPE This parameter determines whether the Fire Tube boiler treats DATE / TIME the indirect DHW tank as a separate load or as a zone on the The control uses an internal clock for the night setback primary loop.
- Page 61 Installation & Operation Manual Start-up (continued) Start the boiler Check flame and combustion Turn the main power off to the boiler by placing the ON/ Read and follow the operating instructions in FIG.'s 10-2 and OFF switch in the OFF position. 10-3.
- Page 62 Installation & Operation Manual Start-up Set space heating operation Set domestic hot water (DHW) operation Verify DHW mode Determine controlling sensor There are two (2) modes of operation for DHW. In Normal For space heating systems, the temperature control can be Mode, when a DHW demand begins, the control will start based on one of three sensors;...
- Page 63 Installation & Operation Manual Start-up (continued) Figure 10-2 Operating Instructions_ Models 55 - 285...
- Page 64 Installation & Operation Manual Start-up Figure 10-3 Operating Instructions_ Model 399 FOR YOUR SAFETY READ BEFORE OPERATING WARNING: If you do not follow these instructions exactly, a fire or explosion may result causing property damage, personal injury, or loss of life. A.
- Page 65 Installation & Operation Manual Operating information General When multiple temperature loops are used, ⚠ CAUTION mixing valves are required for the protection How the boiler operates of any low temperature loops. SMART SYSTEM Multi-temp loop control The Knight Wall Hung Fire Tube boiler uses an advanced stainless steel heat exchanger and electronic control module The Knight Wall Hung Fire Tube boiler is capable of producing that allows fully condensing operation.
- Page 66 Installation & Operation Manual Operating information Anti-cycling Ramp delay After the burner turns off, the control will delay the next For systems with lower flow, the SMART SYSTEM can burner cycle for a set time period (time is adjustable by the limit the firing rate (when enabled) when a space heating installer).
- Page 67 Installation & Operation Manual Operating information (continued) Protection features Low voltage blocking The blower and gas valve require a minimum amount of Outlet temperature, flue temperature, voltage in order to operate properly. If an ignition attempt is temperature rise limiting made when the line voltage is temporarily low (such as during a The outlet temperature is monitored by the boiler outlet brownout), the control could enter a manual reset lockout.
- Page 68 Installation & Operation Manual Operating information Boiler temperature regulation If the current outlet temperature is below the new MRHL set point, locate the pinhole (SERVICE button) above the Operating temperature (target) RESET button on the display board. Insert a thin probe (such as a paper clip) into the hole and press the button The SMART SYSTEM control module senses water continuously for five (5) seconds to place the boiler into...
- Page 69 Installation & Operation Manual Operating information (continued) Cascade Sequence of the cascade When multiple boilers are installed, they can be wired To equalize the run time of all boilers on the Cascade, the together in a cascade sequence. A maximum of eight boilers firing sequence will automatically be changed at set intervals.
- Page 70 Installation & Operation Manual Operating information Sequence of operation OPERATION DISPLAY 1. Upon a call for heat, the gas pressure switch(es) must be closed. 2. Once the gas pressure switch(es) are closed, the control turns on the appropriate pumps (system and boiler pumps for space heating, DHW pump for DHW).
- Page 71 Installation & Operation Manual Operating information (continued) Sequence of operation (continued) OPERATION DISPLAY 7. If flame is detected, it holds the firing rate steady for a few seconds to let the flame stabilize, then it begins to modulate the firing rate based on a set point or some other command (such as a 0-10V BMS signal).
- Page 72 Installation & Operation Manual Operating information Knight Wall Hung Fire Tube boiler control module Use the control panel (FIG. 11-1) to set temperatures, operating conditions, and monitor boiler operation. Figure 11-1 Control Panel DIR #2000544469 00 The information on the bottom of the display shows the functions of the two SELECT keys (on either corner), and the NAVIGATION dial (in the center): MENU = Left SELECT Key SETPOINTS = NAVIGATION Dial - Pressing Down...
- Page 73 Installation & Operation Manual Operating information (continued) Figure 11-2 Status Display Screen (BOILER (CALL FOR STATUS) HEAT) (OPERATIONAL INFORMATION) (LEFT SELECT (RIGHT SELECT KEY) KEY) (NAVIGATION DIAL) Status Display Screens NOTE: All screens show burner status, heat demands, lockout/blocking, pump status, and soft keys. Section Display Description...
- Page 74 Installation & Operation Manual Operating information Status Display Screens (cont’d) NOTE: All screens show burner status, heat demands, lockout/blocking, pump status, and soft keys. Section Display Description a. SYSTEM TEMP b. TANK TEMP c. OUTDOOR TEMP DETAILS SCREEN 1 d. INLET TEMP e.
- Page 75 Installation & Operation Manual Operating information (continued) Status Display Screens (cont’d) NOTE: All screens show burner status, heat demands, lockout/blocking, pump status, and soft keys. Section Display Description a. CASCADE STATUS CASCADE STATUS b. CASCADE POWER (Operational c. PRESENT Information a.
- Page 76 Installation & Operation Manual Maintenance Maintenance and annual startup Table 12A Service and Maintenance Schedules Owner maintenance Service technician (see the Knight Wall Hung Fire Tube User’s (see the following pages for instructions) Information Manual for instructions) • Check boiler area General: •...
- Page 77 Installation & Operation Manual Maintenance (continued) If this boiler may be frozen, immediately shut off power and gas to the appliance and contact the factory ⚠ DANGER for further instructions. Operation when the heat exchanger, internal pipes, or pressure relief valves are frozen, will result in internal pressure build-up and a deadly steam explosion.
- Page 78 Installation & Operation Manual Maintenance Flue vent system and air piping Check boiler relief valve Visually inspect the entire flue gas venting system and air 1. Inspect the relief valve and lift the lever to verify flow. piping for blockage, deterioration or leakage. Repair any Before operating any relief valve, ensure that it is piped with joints that show signs of leakage.
- Page 79 Installation & Operation Manual Maintenance (continued) Inspect ignition and flame sense Check burner flame electrodes 1. Inspect flame through observation window. 1. Remove the ignition and flame sense electrodes from the 2. If the flame is unsatisfactory at either high fire or low fire, boiler heat exchanger access cover.
- Page 80 Installation & Operation Manual Maintenance Review with owner The boiler contains ceramic fiber ⚠WARNING materials. Use care when handling these 1. Review the Knight Wall Hung Fire Tube Boiler User’s materials per instructions in the Service Information Manual with the owner. Manual.
- Page 81 Installation & Operation Manual Diagrams Figure 13-1 Ladder Diagram 120VAC JUNCTION BOX NEUTRAL GROUND TERMINAL STRIP TERMINAL STRIP 120V SUPPLY "L" 120V SUPPLY "N" 120 VAC OUTLET INTEGRATED CONTROL BLOWER ON / OFF SWITCH SYSTEM SYSTEM X1-6 X1-1 PUMP "L" PUMP "N"...
- Page 82 Installation & Operation Manual Diagrams (continued) Figure 13-2 Wiring Diagram LOW VOLTAGE BOX DEPICTS 120 VAC OPTIONAL ITEMS HIGH VOLTAGE BOX DEPICTS DUAL SENSOR SINGLE HOUSING CONNECTION BOARD INTEGRATED BOX DEPICTS CONTROL 24 VAC DHW RECIRC CN5-15 JUNCTION OPTIONAL PUMP RELAY COIL ITEMS ALARM X1-3...
- Page 83 Installation & Operation Manual Notes...
- Page 84 Revision Notes: Revision A (Process #3000024795 / CN #5000) initial release. Revision B (PCP #3000029701 / CN #500019368) reflects the addition of factory supplied pump wiring information on pages 35 and 52. Revision C (PCP #3000031710 / CN #500020789) reflects an update to the ratings table on page 6.
Need help?
Do you have a question about the Knight 100 Series and is the answer not in the manual?
Questions and answers