
Related Manuals for PIKODER PiKoder/SSCng


Summary of Contents for PIKODER PiKoder/SSCng
- Page 1 PiKoder/SSCng Development board Building instructions Version 1.0 As of 07/2024 Gregor Schlechtriem webmaster@pikoder.de www.pikoder.de...
-
Page 2: Table Of Contents
Building instructions PiKoder/SSCng development board Table of contents General information Kit contents and tools Construction Mounting the capacitor C1 ..................7 Equipping the controller ..................8 Mounting the capacitor C2 ..................8 LED assembly ......................9 Equipping the pin headers ..................9 Installation Configuration USB with servos ................ -
Page 3: General Information
General information Before you start building the development board for the PiKoder/SSCng, please read these instructions through to the end. You will then know what is important and will avoid mistakes from the outset that can sometimes only be corrected with a lot of effort. -
Page 5: Kit Contents And Tools
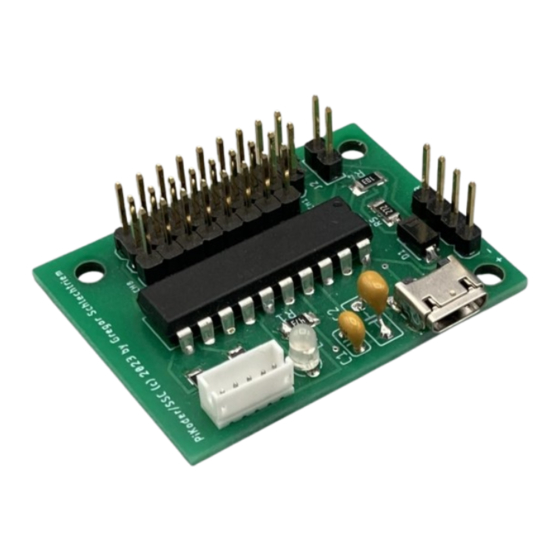
Kit contents and tools This kit contains all the components needed to build a development board for the PiKoder/SSCng, including the pre-programmed PIC16F1459 microcontroller. All components marked with (SMD) below are already mounted on the circuit board. Please first check that everything is complete using the following parts list: √... - Page 6 Building instructions PiKoder/SSCng development board To commission the PiKoder/SSCng you will also need: 1. USB cable 2. PC with application software (download from the Internet)
-
Page 7: Construction
Construction The following sections describe the assembly of the components on the board. The required SMD components are already assembled. All other components are on the assembly side and the assembly process itself is supported by the assembly print on the circuit board. -
Page 8: Equipping The Controller
Building instructions PiKoder/SSCng development board Equipping the controller Insert the controller into the corresponding position on the component side of the cir- cuit board. Pay attention to the notch (marked with a red arrow in the picture). To prevent the controller from falling out... -
Page 9: Led Assembly
Building instructions PiKoder/SSCng development board LED assembly Now fit the LED onto the circuit board. This is a polarized component that should be inserted with the short connecting wire pointing to the left (see red arrow). Equipping the pin headers... -
Page 11: Installation
User Manual. Configuration USB with servos If you use the PiKoder/SSCng to control servos via USB, you will need an additional power source with the supply voltage for the servos (see connection diagram on the right). Please make sure that J2 is not plugged in, otherwise the USB port could be destroyed by high compensation currents. -
Page 13: Connections
Building instructions PiKoder/SSCng development board Connections... - Page 15 Building instructions PiKoder/SSCng development board Circuit...
Need help?
Do you have a question about the PiKoder/SSCng and is the answer not in the manual?
Questions and answers