Advertisement
Quick Links
Advertisement

Summary of Contents for Kogan KAMWO25LSLA
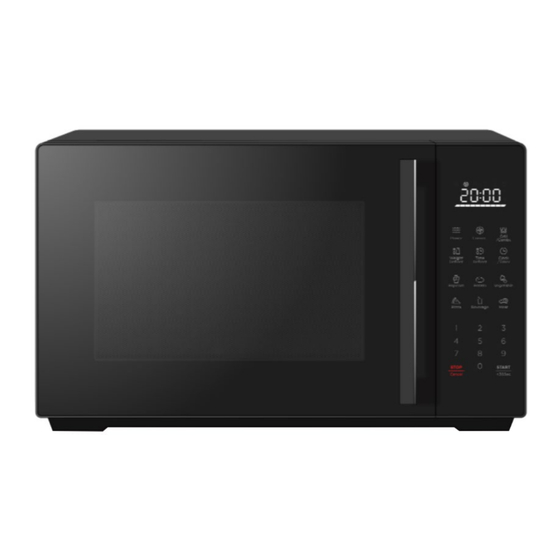
- Page 1 25L MICROWAVE KAMWO25LSLA...
- Page 2 Safety & Warnings Components Overview Installation Operation Cleaning & Care Specifications Troubleshooting Notes...
- Page 3 SAFETY & WARNINGS PRECAUTIONS TO AVOID POSSIBLE EXPOSURE TO EXCESSIVE MICROWAVE ENERGY • Do not attempt to operate this oven with the door open since this can result in harmful exposure to microwave energy. It is important not to break or tamper with the safety interlocks.
- Page 4 • Warning: It is hazardous for anyone other than a competent person to carry out any service or repair operation that involves the removal of a cover which give protection against exposure to microwave energy. • Warning: Liquids and other foods must not be heated in sealed containers since they are liable to explode.
- Page 5 To Reduce the Risk of Injury to Persons Grounding Installation DANGER: Electric Shock Hazard Touching some of the internal components can cause serious personal injury or death. Do not disassemble this appliance. WARNING: Electric Shock Hazard • Improper use of the grounding can result in electric shock. •...
- Page 6 COMPONENTS Remove the oven and all materials from the carton and oven cavity. Ensure the oven comes with the following accessories, Glass Tray (x1) Turntable Ring Assembly (x1) User Guide (x1) Note: The above images are for illustrative purposes only. Actual product may differ. OVERVIEW Control panel Door assembly...
- Page 7 All food and containers of food should be placed on the glass tray for cooking. If the glass tray or turntable ring assembly cracks or breaks, contact the help.Kogan.com for support. Never restrict the movement of the turntable. Countertop Installation Remove all packing material and accessories.
- Page 8 Installation Select a level surface that provide enough open space for the intake and/or outlet vents. 30cm 20cm 20cm Min85cm • The minimum installation height is 85cm. • The rear surface of appliance shall be placed against a wall. Leave a minimum clearance of 30cm above the oven, a minimum clearance of 20cm is required between the oven and any adjacent walls.
- Page 9 UTENSILS See the list below of "Materials you can use in a microwave oven" and "Materials to be avoid in a microwave oven". There may be certain non-metallic utensils that are not safe for microwaving. If in doubt, you can test the utensil in question following the procedure below. Utensil Test Fill a microwave-safe container with 1 cup of cold water (250ml), along with the utensil in question.
- Page 10 Parchment paper Use as a cover to prevent splattering or a wrap for steaming. Plastic Microwave-safe only. Ensure the utensil is marked "microwave safe". Some plastic containers may soften as the food gets hot. Plastic wrap Microwave-safe only. Use to cover food during cooking to retain moisture.
- Page 11 OPERATION Power Level This microwave features 11 power levels Level Power 100% Display PL10 Setting the Clock Press “CLOCK” once and then “00:00” will display. Press number keys to enter the time. The maximum value is 23:59. Example: To set the clock to 12:10, please press “1,2,1,0” in turn. Press “CLOCK”...
- Page 12 Microwave Cook Press “TIME COOK” once, the screen will display “00:00”. Press number keys to input the cooking time; the maximum cooking time is 99 minutes and 99 seconds. Press “POWER” once, the screen will display “PL10”. The default power is 100% power.
- Page 13 Weight Defrost Function Press “WEIGHT DEFROST”, the screen will display “dEF1”. Press numerical buttons to input weight to be defrosted. Input the weight ranged between 100~2000g. If the weight input is not within 100~2000 g, the input will be invalid. Press “START/+30SEC.”...
- Page 14 Press “POWER” and then “PL10”, will display. Press “8” to set the power level of PL8. Press “START/+30SEC.” to start cooking. Memory Function You can save the settings for a dish in the memory and recall it later. Press “0” to select memory 1-3 procedure. “1”, “2” and “3” will display in order. If the procedure has been set, press “START/ +30 SEC.”...
- Page 15 Auto Menu Press a menu key repeatedly to choose the weight of the menu. For example, press “POPCORN” twice and “100” will display. Press “START/ +30 SEC” to start cooking. Auto Menu Chart Menu Weight Display Power A-1 Popcorn 100g A-2 Potato 200g A-3 Pizza...
- Page 16 CLEANING & CARE • Turn off the microwave and remove the power plug from the wall socket before cleaning. • Keep the inside of the microwave clean. When food splatters or spilled liquids adhere to microwave walls, wipe with a damp cloth. Mild detergent may be used if the microwave gets very dirty.
- Page 17 Running a microwave with no food inside it is extremely Oven started dangerous. Kogan suggest you either employ the child lock accidentally with no function or leave a glass of water inside the microwave when food in it.
- Page 18 If you have any other issues, questions or problems with your oven, please contact the help.Kogan.com for further support. Disposal This marking indicates that this appliance should not be disposed with other household wastes. To prevent possible harm to the environment or human health from uncontrolled waste disposal, recycle it responsibly to promote the sustainable reuse of material resources.
- Page 19 NOTES...
- Page 20 Need more information? We hope that this user guide has given you the assistance needed for a simple set-up. For the most up-to-date guide for your product, as well as any additional assistance you may require, head online to help.kogan.com...


Need help?
Do you have a question about the KAMWO25LSLA and is the answer not in the manual?
Questions and answers