Advertisement
Quick Links
Advertisement

Subscribe to Our Youtube Channel
Related Manuals for TECHCON TS588R

Summary of Contents for TECHCON TS588R
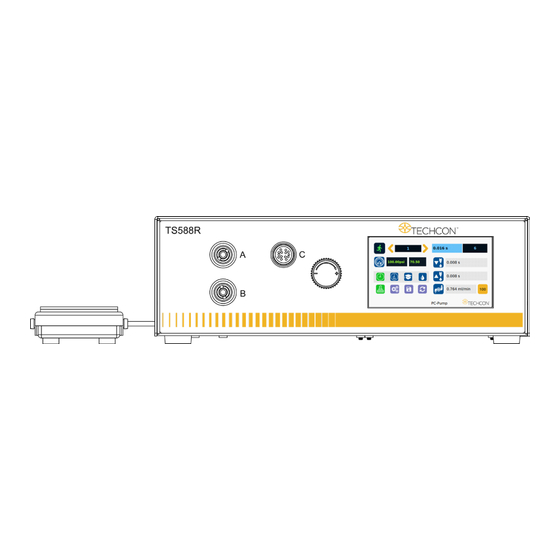
- Page 1 TS588R Smart Controller for PC Pumps User Guide 7508-0510 Copyright © 2024 Techcon/OK International...
- Page 2 TS588R Smart Controller for PC Pumps User Guide CONTENTS SAFETY ............................4 Intended Use ........................ 4 Safety Precautions ..................... 4 SYMBOL DEFINITIONS ......................5 SPECIFICATIONS ........................6 FEATURES ..........................6 OPERATION ..........................7 Connecting The Unit....................8 Login..........................8 Calibration ........................9 5.3.1...
- Page 3 TS588R Smart Controller for PC Pumps User Guide INTERNET OF THINGS (IoT) VIA TCP BUILDER ............. 38 Required Preparations ..................38 Obtain the IP address and setting up server on Controller..... 38 Remote Connection ....................41 Communication ......................42 6.3.1 Retrieving a profile manually using TCP/IP ..........
- Page 4 Use this equipment only as described in this User Guide. Techcon/OK International cannot be responsible for injuries or damage resulting from unintended applications of its equipment. Unintended uses may result from taking the following actions: •...
- Page 5 TS588R Smart Controller for PC Pumps User Guide SYMBOL DEFINITIONS Symbol Description Symbol Description Run (Activate) Setup Pressure Port A&B Counter Reset Timed Mode Exit Interrupt Mode Accept Change Teach Mode Pressure Calibration Purge Mode Save Reset Time in Teach...
- Page 6 TS588R Smart Controller for PC Pumps User Guide SPECIFICATIONS 290 mm x 212 mm x 98 mm Size (11.4” x 8.3” x 3.9”) Weight 2.8 kg (6.17 lbs) Input Voltage 24VDC Output Voltage Range 0-24 VDC Rated Power Air Input 100 psi (6.9 bars) Max.
- Page 7 TS588R Smart Controller for PC Pumps User Guide OPERATION Figure 2.0 Items Description Air Filter Valve (not included) Syringe of material (not included) Display Power Adapter Foot Switch CAUTION: A 5-micron filter (TSD800-6) must be installed with the unit to ensure...
- Page 8 TS588R Smart Controller for PC Pumps User Guide Connecting The Unit Please refer to figures 1 & 2 above. Step 1: Connect the power cord and foot switch to the back of the unit. Step 2: Connect the valve air hose to either Port A or Port B.
- Page 9 TS588R Smart Controller for PC Pumps User Guide Calibration 5.3.1 Pressure Calibration Note: Pressure calibration must be performed when the unit is activated for the first time. Step 1: Using a pressure gauge, verify that the input pressure line is delivering approximately 100 psi.
- Page 10 TS588R Smart Controller for PC Pumps User Guide Step 7: Touch the 100 icon to set the pressure to 100. WARNING: Do not turn the knob all the way clockwise. 100 psi upper bound should be set as soon as the display output pressure goes from 99 to 100 psi. Continuing to turn...
- Page 11 TS588R Smart Controller for PC Pumps User Guide Note: Volume mode must be set in home page prior to pump calibration Step 1: Touch the Pump Series icon to select the correct pump that is being connected to the unit Note: The default setting is for pump series 100.
- Page 12 TS588R Smart Controller for PC Pumps User Guide Step 5: Touch the Setup icon to enter the setup screen. Note: Controller mode must be set to controller ‘C’ in the set-up menu Step 6: Touch the CAL icon to enter the Pump Calibration screen.
- Page 13 TS588R Smart Controller for PC Pumps User Guide Step 8: Touch the Check Mark icon to save and exit. Step 9: Touch the “1 Rev” icon to run the pump for one full revolution. Note: The dispensed material must be collected and accurately weighed.
- Page 14 TS588R Smart Controller for PC Pumps User Guide Step 14: Touch the X icon to save and exit. 5.3.3 Profile Calibration Normally after performing Pump Calibration, the pump is ready to dispense accurately. However, if the dispense cycle requires a partial revolution to achieve the target volume, the output volume may have a slight variation because the unique shape of the stator cavity is not uniform.
- Page 15 TS588R Smart Controller for PC Pumps User Guide Step 2: Touch the Setup icon to enter the setup screen. Step 3: Touch the CAL icon to enter the calibration screen. Step 4: Touch Profile Calibration at the top of the screen.
- Page 16 TS588R Smart Controller for PC Pumps User Guide Step 6: Touch the Check Mark icon to save and exit. Step 7: Touch the R icon to run the pump according to the dispense parameters. Note: The dispensed material must be collected and accurately weighed.
- Page 17 TS588R Smart Controller for PC Pumps User Guide Step 11: Touch the X icon to exit. 5.3.4 Timed Mode Calibration Step 1: Touch the Setup icon to enter the setup screen. NOTE: Make sure timed mode is selected (as shown, icon will be a small beaker).
- Page 18 TS588R Smart Controller for PC Pumps User Guide Step 3: Touch the D icon to enter the density of the dispensed material in gram/cm Step 4: Touch the Check Mark icon to save and exit. Step 5: Touch the R icon to run the pump according to the dispense parameters.
- Page 19 TS588R Smart Controller for PC Pumps User Guide Step 8: Touch the Check Mark icon to save. Note: The Calibration Point value (circled above) can be increased or decreased to ‘fine- tune’ the dispensing volume manually. If this value is changed, step 5 must be completed afterwards.
- Page 20 TS588R Smart Controller for PC Pumps User Guide Flow Rate Setting Each PC Pump series has a recommended maximum flow rate. Make sure to check the PC Pump flow rate specs before operating. The standard flow rate setting does not allow the operator to enter a flow rate value higher than the recommended flowrate.
- Page 21 TS588R Smart Controller for PC Pumps User Guide Step 4: Touch the Up and Down arrows to set the desired flow rate for reverse (suckback) in ml/minute. Step 5: If maximum or higher than recommended max flow rate is desired, touch the High Flowrate checkbox and the High Flow Rate message will appear.
- Page 22 TS588R Smart Controller for PC Pumps User Guide Step 8: Touch the Check Mark icon to save and exit. WARNING: Running the pump at higher than recommended maximum flow rate for a long duration will reduce the stator life. Pressure Adjustment Note: Pressure on port A and B provides constant regulated pressure.
- Page 23 TS588R Smart Controller for PC Pumps User Guide To Change Pressure Unit Display Note: The default pressure unit is PSI. To change the pressure units to BAR, follow the instructions below. Step 1: Touch the Setup icon to enter the setup screen.
- Page 24 TS588R Smart Controller for PC Pumps User Guide Automatic Dispense Cycle Setting 5.8.1 Timed Mode Step 1: Touch the “Timed” mode icon to set the dispense time. The icon will turn green. Step 2: Touch the “Dispense” icon to enter the time setup screen.
- Page 25 TS588R Smart Controller for PC Pumps User Guide 5.8.2 Volume Mode Step 1: Touch the Setup icon to enter the setup screen. Step 2: Touch the “Volume” icon to switch to volume mode. Step 3: Press the X icon to save and exit.
- Page 26 TS588R Smart Controller for PC Pumps User Guide Teach Mode Setting In Teach mode, the dispense time will be accumulated as long as the foot switch is depressed. This is helpful in determining the required dispense time when dispense output is known.
- Page 27 TS588R Smart Controller for PC Pumps User Guide Step 2: Touch the Run Method icon. Step 3: Enter the delay time (ex. 1000 ms). Step 4: Touch the Continuous Run icon. Step 5: Touch the Check Mark icon to save and exit.
- Page 28 TS588R Smart Controller for PC Pumps User Guide Note: If the controller is set to activate memory cell 1, and the delay time is set at 1000 ms, the controller will activate memory 1 contiuously with 1000 ms delay between each activation.
- Page 29 TS588R Smart Controller for PC Pumps User Guide 5.11.2 To run in Single Sequence Mode Step 1: Touch the Setup icon to enter the setup screen. Step 2: Touch the Run Method icon. Step 3: Enter number of memories to be run in sequence (ex. 1 to 3).
- Page 30 TS588R Smart Controller for PC Pumps User Guide Step 4: Touch the Sequence Mode icon. Step 5: Touch the Check Mark icon to save and exit. The screen will look similar to the screen below: Notes: A: If there is no delay time entered in the setting, the operator has to press the foot switch after each memory cell is completed to activatte the next memory cell.
- Page 31 TS588R Smart Controller for PC Pumps User Guide The screen will look similar to the screen below: Note: If the sequence mode is set to activate memory cell 1 – 3, and the delay time is set at 1000 ms, the controller will activate memory 1 to 3 continuously with 1000 ms delay between each activation.
- Page 32 TS588R Smart Controller for PC Pumps User Guide Step 2: Touch the Counter Reset icon to reset the counter. Step 3: Touch the Check Mark icon to confirm. Step 4: Touch the X icon to exit. 5.13 Over Current Protection This controller is equipped with over curricular protection for the motor.
- Page 33 TS588R Smart Controller for PC Pumps User Guide Step 2: Touch the “OC/SP” icon and toggle to OC. Step 3: Slide the “Over Current” bar to set desired value. 5.14 Speed Sensitivity Alarm The controller is equipped with a Slow/Fast motor speed detection feature. This...
- Page 34 TS588R Smart Controller for PC Pumps User Guide If the system detects the pump slowing down during the dispensing run, “PUMP ERROR! Check Pump” will appear on the display Note: when error messages appear, check the valve for any clogging. Clean the valve thoroughly if necessary.
- Page 35 The sensitivity alarm will need to be adjusted based on the user’s material properties, pump type, and programmed flow rate. 5.15 Robotic Mode Techcon controllers have a dedicated mode called Robotic Mode, which is designed for fast-paced communication between the controller and an external PLC or Techcon series robot.
- Page 36 Note: The GUI will not update and/or provide feedback on dispensing run time when running robotic mode. WARNING: For fast-paced processes in which a PLC or Techcon robot is used, users may encounter inconsistencies in their dispensing runs if their controller mode is not switched to robotic mode.
- Page 37 TS588R Smart Controller for PC Pumps User Guide Step 2: Touch the Change Password icon. Step 3: Enter the old password, then enter the new password. Step 4: Touch the Check Mark icon to save. Step 5: Touch the X icon to exit.
- Page 38 • Collect data Required Preparations Step 1: Connect the TS588R controller to your local network using an ethernet cable. Step 2: Prepare a computer with access to the internet. Step 3: Install “TCP Builder” for configuring the valve controller using RCP on TCP.
- Page 39 TS588R Smart Controller for PC Pumps User Guide Step 3: Type “ipconfig,” then press Enter. Step 4: Record the IPv4 address shown in the “IPv4 Address” line on the above screen. For this example, the Server IP address is: 172.16.40.151 This IP address will be entered in the controller screen.
- Page 40 TS588R Smart Controller for PC Pumps User Guide Step 8: Verify the IP address of the controller appears in the top header. Step 9: Go to the setup screen of the controller and touch the Remote Server icon. Step 10: Enter the IPv4 address (IP of computer running TCP Builder)
- Page 41 TS588R Smart Controller for PC Pumps User Guide Step 11: Touch the green Check Mark icon to save. Note: By default, controller is set-up to dynamic IP. Configuring the valve controller with static/dynamic is user choice. This can be done on the same remote server configuration interface.
- Page 42 TS588R Smart Controller for PC Pumps User Guide Step 2: Press “Listen” for the controller to connect with the server. Step 3: Wait for the connection to be successful. Note: Both the server IP and controller IP need to be connected to the same local network.
- Page 43 TS588R Smart Controller for PC Pumps User Guide Note: JSON string format for TS588R (Pump Controller) Step 2: After retrieval, current program# data should show in the “Received data” field. 6.3.2 Set profile manually using TCP/IP User shall use the following command to update any profile from a remote machine that is using any TCP IP tool this is set up as a server: “Profile Data”...
- Page 44 TS588R Smart Controller for PC Pumps User Guide It’s important that the program number/name and the parameter value (programValue) are the same for updating a profile. If not, the system will not update the profile in the device. On receiving the “#” command successfully, the system will update and load the profile.
- Page 45 TS588R Smart Controller for PC Pumps User Guide Warning: you cannot update the field for output pressure A.B using TCP Builder. The output pressure field is read directly from the pressure regulator sensor. 6.3.3 PSI-L/O Alarm TCP enables users to set a lower threshold limit on the output pressure. If output pressure were to drop below this threshold limit, function of the motor will be disabled.
- Page 46 TS588R Smart Controller for PC Pumps User Guide To exit out of this error state, the user can manually adjust the pressure on the controller to a value greater than or equal to that set on TCP. If the pressure value entered on TCP is less than the current output pressure on the controller, then the status of the controller will remain unchanged.
- Page 47 TS588R Smart Controller for PC Pumps User Guide SOFTWARE UPGRADE Software upgrades can be done locally through a USB upload method. Note: If your unit has an Application and Driver version that pre-dates App:4.01.40 and OS v78, you will need to install the kernel image (PWU file) as well.
- Page 48 Application and Driver Upgrade through USB Please note: Application and Driver are packaged together in the same folder titled “PC_PUMP”. Step 1: Download the latest Application and Driver files from our Techcon website. Contact our Technical support for assistance confirming latest revision.
- Page 49 TS588R Smart Controller for PC Pumps User Guide Step 6: Touch the USB icon to upload the latest software file. Step 7: Wait while the system is loading the new software file and rebooting. Note: Do not turn off power during the rebooting sequence.
- Page 50 TS588R Smart Controller for PC Pumps User Guide I/O CONFIGURATION AND END OF CYCLE FEEDBACK During a dispense cycle, an open collector circuit closes and remains closed while the valve is dispensing. Pin 3 and 4 can be used as a feedback signal to synchronize with other devices.
- Page 51 TS588R Smart Controller for PC Pumps User Guide Pin 3 Configuration Pin 3 is programable. It can be used as “Over Current indicator”, “Speed Sensitivity Alarm” or “Busy/Dispensing indicator” / “End of Cycle Feedback”. To use as “Over Current indicator” go to the setup menu and touch the CR icon.
- Page 52 TS588R Smart Controller for PC Pumps User Guide During dispense cycle, Pin 3 is grounded (-) End of dispense cycle, Pin 3 is not connected (opened) To use as “Speed Sensitivity Alarm” go to set-up menu and enable “Speed sensitivity Alarm”. Reference section 5.14 for additional information.
- Page 53 TS588R Smart Controller for PC Pumps User Guide TROUBLESHOOTING PROBLEM POSSIBLE CAUSE CORRECTION • Check power cord Display does not • No power inputs connections light up • Turn on power • Increase supplied pressure • Supplied pressure • Check foot switch dropped below “Low...
- Page 54 5. Use only a soft cloth to clean the display screen. LIMITED WARRANTY Techcon/OK International warrants this product to the original purchaser for a period of 2 years from date of purchase to be free from material and workmanship defects but not normal wear-and-tear, abuse and faulty installation. Defective product or subassembly and components under warranty will be repaired or replaced (at Techcon’s/OK International's option) free of charge.
Need help?
Do you have a question about the TS588R and is the answer not in the manual?
Questions and answers