Table of Contents
Advertisement
Available languages
Available languages
Quick Links
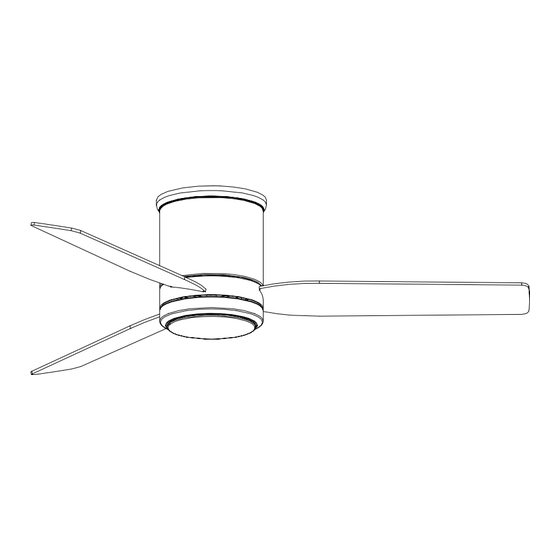
CALEDON CEILING FAN
37000062 - 5971298
Step-by-step Product
Instruction Video
Scan with your
mobile device
Since 1932, Globe has taken pride in offering products of the highest quality, and a level of service unparalleled in the industry.
Should you encounter any difficulties, have any questions or simply wish to offer us your valuable feedback, you may contact us in the following ways:
Toll Free Telephone: 1-888-543-1388 (North America Only) / Toll Free Fax: 1-800-668-4562 (North America Only)
E-Mail: info@globe-electric.com / Mail: Globe Electric Customer Service Department
150 Oneida, Montreal, Quebec, Canada H9R 1A8
Please visit our website to discover other quality Globe products: http://www.globe-electric.com
Advertisement
Table of Contents

Related Manuals for Globe CALEDON 37000062


Summary of Contents for Globe CALEDON 37000062
- Page 1 Since 1932, Globe has taken pride in offering products of the highest quality, and a level of service unparalleled in the industry. Should you encounter any difficulties, have any questions or simply wish to offer us your valuable feedback, you may contact us in the following ways: Toll Free Telephone: 1-888-543-1388 (North America Only) / Toll Free Fax: 1-800-668-4562 (North America Only) E-Mail: info@globe-electric.com / Mail: Globe Electric Customer Service Department...
-
Page 2: Table Of Contents
TABLE OF CONTENTS Table of contents Warranty Warning Tools required Features Hardware included Specifications Package content Pre-installation Installation Fan and remote control operation Maintenance Troubleshooting WARRANTY 3-YEAR LIMITED WARRANTY What is covered This product is guaranteed to be free of factory defective parts and workmanship for a period of 3 years from date of purchase. -
Page 3: Warning
- Connect the equipment to an outlet on a circuit different from that to which the receiver is connected. - Consult the dealer or an experienced radio/TV technician for help. FCC Responsible Party: Globe Electric Address: 2264 East 6th Street, San Bernardino, CA 92410 U.S.A. -
Page 4: Safety Information
SAFETY INFORMATION WARNING: • Remove and immediately recycle or dispose of used batteries according to local regulations and keep away from children. Do NOT dispose of batteries in household trash or incinerate. • Even used batteries may cause severe injury or death. •... -
Page 5: Tools Required
TOOLS REQUIRED Philips Flat blade adjustable Electrical tape Wire cutter Step ladder screwdriver screwdriver wrench Note: Do not to use power tools for the installation to avoid damaging the screws/parts FEATURES SPECIFICATIONS • Remote control • DC motor • Smart app •... -
Page 6: Package Content
PACKAGE CONTENT Note: Remove all contents from box before beginning installation. Part Description Quantity Part Description Quantity Light plate Mounting plate Blade Fan motor assembly Remote control receiver Decorative ring LED module Remote contol Light cover Remote control holder... -
Page 7: Pre-Installation
PRE-INSTALLATION Outlet Box: Fan must be able to be secured to a fan-rated outlet box. If none exists, contact a qualified electrician for installation. WARNING: TO REDUCE THE RISK OF FIRE, ELECTRIC SHOCK, OR PERSONAL INJURY, MOUNT TO OUTLET BOX MARKED “ACCEPTABLE FOR FAN SUPPORT OF 15.9/22.7/31.8 KG (35/50/70 LBS) OR LESS”... -
Page 8: Installation
INSTALLATION 1. Attach the mounting plate to the outlet box Remove any 2 screws (MM) (on opposite Secure the mounting plate (A) to the ceiling sides) completely, from the mounting outlet box with the screws and washer plate (A) and loosen the other 2 screws. provided with your outlet box. - Page 9 INSTALLATION 2. Attach the blades Slide the decorative ring (C ) onto motor Insert the blade (G) into the slot in motor housing (B) housing (B) and push the blade into place. Secure the blade using the fan blade (BB) screws and washers (CC) from the bag “BBB”. Repeat for the other 2 blades...
- Page 10 INSTALLATION 3. Attach the light plate Loosen (any) 2 of the 3 pre-installed Attach the light plate (F) by lining up the screws (RR) and completely remove the 2 keyholes with the 2 loosened screws (RR) third screw from the fan motor housing then twist until tight.
- Page 11 INSTALLATION 4. Attach the LED light module Remove the 3 pre-installed screws (YY) Connect the wires from the LED light from the light plate (F). module (D) to the wires from the light plate (F). Align screw holes from LED module (D) to the light plate (F) and screw in all 3 screws (YY) ensuring they are tight.
- Page 12 INSTALLATION 5. Hang the fan to the mounting plate Lift the fan and using the hook, hang the fan through the empty screw hole on the motor housing (B).
- Page 13 INSTALLATION 6. Wire the fan Connect the wires from the receiver Connect the Housing wires to the receiver wire (H) to the wires from the motor housing as follows: (B) using the corresponding color Connect the hot (black) wire from the ceiling connectors.
- Page 14 INSTALLATION 7. Mounting the fan Unhook the fan and align the 2 loose Align the screws (MM) that were previously screws on the hanger plate (A) with the removed with the screw holes on the motor 2 keyholes on the motor housing (B) and housing (B) and tighten them slightly.
- Page 15 INSTALLATION 8. Attach the light cover Attach the light cover (E) to the light plate (F) by twisting clockwise until tight.
-
Page 16: Fan And Remote Control Operation
FAN AND REMOTE CONTROL OPERATION power Blue LED indicator light will illuminate Press button to turn fan when any button is pressed and light on or off Note: Fan and light will turn on to last state #1-6: 6 fan speed levels fan on/off Press button to turn fan on or off fan air up... -
Page 17: Connecting Instructions
On your mobile device, please ensure all requested permissions • Select the “+” icon in the top right of the Globe SuiteTM app home screen. • If the light is flashing rapidly, the “Scan” mode will detect your smart ceiling fan within a few seconds. -
Page 18: Voice Commands
VOICE COMMANDS Alexa... When you want to... Alexa... Turn on/off the fan only. … turn on/off <device name> Turn on/off the light only. … turn on/off the light on <device name>..set <device name> light to 50%. … set <device name> brightness to 20%. Change the brightness. - Page 19 VOICE COMMANDS Google... When you want to... Hey Google... Turn on/off the fan only. … turn on/off <device name> Turn on/off the light only. … turn on/off the fan light..set the fan light to 50%. … set the fan light brightness to 20%. Change the brightness.
-
Page 20: Maintenance
Wi-Fi extender or a Wi-Fi mesh Can I still use it? system. You can factory reset your device through the Globe suite app: Device options- How do I reset the device? DELETE - Restore Factory Settings Make sure your Wi-Fi signal strength is sufficient. -
Page 21: Troubleshooting
TROUBLESHOOTING Problem Solution Ensure wall switch is turned on. Fan/Lights do not start Check all fuses/circuit breakers. Turn off electrical power and ensure the wiring is correct and connectors secured, as shown in step 6 of assembly. Confirm that the remote is working; LED indicator light should illuminate when any button is pressed. - Page 23 Desde 1932, Globe se enorgullece de ofrecer productos de iluminación de la mayor calidad y un servicio sin igual en el sector. Si tiene alguna dificultad o pregunta, o simplemente si desea hacernos llegar sus comentarios, puede comunicarse de las siguientes formas: Teléfono sin cargo de larga distancia: 1-888-543-1388 (Norteamérica únicamente) / Fax sin cargo de larga distancia:...
- Page 24 CONTENIDO Contenido Garantía Advertencia Herramientas requeridas Especificaciones Materiales incluidos Especificaciones Contenido del paquete Preinstalación Instalación Funcionamiento del ventilador y del control remoto Mantenimiento Solución de problemas GARANTÍA TRES AÑOS DE GARANTÍA LIMITADA Lo que se cubre Se garantiza que este producto no tiene partes defectuosas de fábrica o de mano de obra durante un período de tres años desde la fecha de compra.
- Page 25 - Conecte el equipo a un tomacorriente en un circuito diferente al que está conectado el receptor. - Para recibir ayuda consulte con el distribuidor o con un técnico experto en radio / TV. Parte responsable de la CFC: Globe Electric Dirección: 2264 East 6th Street, San Bernardino, CA 92410, EE. UU.
-
Page 26: Información De Seguridad
INFORMACIÓN DE SEGURIDAD ADVERTENCIA: • Retire, y recicle o deseche de inmediato las baterías usadas según las regulaciones locales, y manténgalas alejadas de los niños. NO deseche baterías junto con residuos domésticos ni incinere. • Incluso las baterías usadas pueden causar daños graves y hasta la muerte. •... -
Page 27: Herramientas Requeridas
HERRAMIENTAS REQUERIDAS Destornillador Destornillador de Llave ajustable Cinta aisladora Alicate para cables Escalera de mano Phillips punta plana Nota: No utilice herramientas eléctricas para la instalación, ya que podría dañar los tornillos o las piezas. CARACTERÍSTICAS ESPECIFICACIONES • Control remoto •... -
Page 28: Contenido Del Paquete
CONTENIDO DEL PAQUETE Nota: Retire todo el contenido de la caja antes de comenzar la instalación. Descripción Cantidad Pieza Pieza Descripción Cantidad Placa de luz Soporte de montaje Paleta Motor del ventilador Receptor de control remoto Aro decorativo Control remoto Módulo LED Cubierta de luz Soporte para control remoto... - Page 29 PREINSTALACIÓN Caja de distribución: El ventilador se debe asegurar a una caja indicada para tal fin. Si no tiene una, comuníquese con un electricista calificado para que realice la instalación. ADVERTENCIA: PARA REDUCIR EL RIESGO DE INCENDIO, DESCARGA ELÉCTRICA O LESIONES FÍSICAS, INSTALE EN UNA CAJA DE DISTRIBUCIÓN CON LA INDICACIÓN “APTA PARA SOPORTE DE VENTILADOR DE 15,9/22,7/31,8 KG (35/50/70 LB) O MENOS”...
-
Page 30: Instalación
INSTALACIÓN 1. Fijar el soporte de montaje a la caja de distribución Retire completamente los 2 tornillos Fije la placa de montaje (A) a la caja de sal- (MM) (en los lados opuestos) de la placa ida del techo con los tornillos y la arandela de montaje (A) y afloje los otros 2 tornil- suministrados con su caja de salida. - Page 31 INSTALACIÓN 2. Instalar las paletas Deslice el anillo decorativo (C ) en la car- Introduzca la cuchilla (G) en la ranura de la casa del motor (B). carcasa del motor (B) y empújela hasta que encaje. Fije el aspa utilizando los tornillos del aspa (BB) y las arandelas (CC) de la bolsa «BBB». Repita el procedimiento para las otras 2 aspas.
- Page 32 INSTALACIÓN 3. Colocar la placa de luz Afloje dos tornillos cualquiera de los tres Fije la placa de la luz (F) alineando los 2 preinstalados (RR) y extraiga completa- bocallaves con los 2 tornillos aflojados (RR) mente el tercero de la caja del motor del y, a continuación, gírelos hasta que queden ventilador (G).
- Page 33 INSTALACIÓN 4. Instalar el módulo de luz LED Quite los tres tornillos preinstalados (YY) Conecte los cables del módulo LED (I) a los de la placa (H). cables en la placa (H). Alinee los orificios de los tornillos del módulo LED (I) con la placa (H) y atornille los tres tornillos (YY) hasta que queden ajustados.
- Page 34 INSTALACIÓN 5. Colgar el ventilador en el soporte Levante la caja del motor ensamblada y colóquela en el soporte, inserte la semiesfera (D) en la abertura (A).
- Page 35 INSTALACIÓN 6. Conexión eléctrica del ventilador Conecte los cables del receptor (H) a Conecte los cables de la carcasa al cable del los cables de la carcasa del motor (B) receptor de la siguiente manera: utilizando los conectores del color Conecte el cable caliente (negro) del techo al correspondiente.
- Page 36 INSTALLATION INSTALACIÓN 7. Montaje del ventilador Desenganche el ventilador y alinee Alinee los tornillos (MM) retirados anteriormente los 2 tornillos sueltos de la placa de con los orificios para tornillos de la carcasa del suspensión (A) con los 2 orificios de la motor (B) y apriételos ligeramente.
- Page 37 INSTALACIÓN 8. Colocar el plafón Para colocar el plafón (E) en la placa (F), gire hacia la derecha hasta que quede firme.
- Page 38 FUNCIONAMIENTO DEL VENTILADOR Y DEL CONTROL REMOTO encendido/apagado El indicador LED azul se ilumina cuando se pulsa un botón Pulsar para encender o apagar el ventilador y la luz Nro.1-6: 6 niveles de Nota: El ventilador y la luz se velocidad del ventilador encenderán en el último estado encendido/apagado...
- Page 39 Asegúrese de que su dispositivo móvil tenga la versión iOS 9.0/watchOS 2.0/AndroidMC 4.4 o posterior. • Descargue la aplicación Globe SuiteTM de la tienda iOS o Android. • Use su correo electrónico para crear una cuenta e iniciar sesión. Verifica tu red •...
-
Page 40: Comandos De Voz
COMANDOS DE VOZ Alexa... Cuando desee... Alexa... Encender/apagar solo el ventilador.. … encender/apagar <nombre del dispositivo>. Encender/apagar solo la luz. … encender/apagar la luz del <nombre del dispositivo>..configurar la luz del <nombre del dispositivo> en 50 %. … configurar el brillo del <nombre del dispositivo> en 20 %. Cambiar el brillo. - Page 41 COMANDOS DE VOZ Google... Cuando desee... Hey Google... Encender/apagar solo el ventilador.. … encender/apagar <nombre del dispositivo>. Encender/apagar solo la luz..encender/apagar la luz del ventilador..configurar la luz del ventilador al 50%. … configurar el brillo de la luz del ventilador al 20%. Cambiar el brillo.
-
Page 42: Mantenimiento
¿Puedo utilizarlo de todas extensor de wifi o un sistema wifi mallado. maneras? Puede restablecer el dispositivo a valores de fábrica con la aplicación Globe Suite: ¿Cómo hago para restablecer el dispositivo? Opciones de dispositivo - ELIMINAR - Restaurar la configuración de fábrica El dispositivo permanece sin Compruebe que la intensidad de la señal de wifi sea suficiente. -
Page 43: Solución De Problemas
SOLUCIÓN DE PROBLEMAS Problema Solución Compruebe que el interruptor de pared esté encendido. El ventilador/las Revise todos los fusibles/disyuntores luces no encienden Corte la corriente eléctrica y asegúrese de que el cableado esté en condiciones y los conectores ajustados, como se muestra en el paso 6 de montaje. Confirme que el control remoto funciona, el indicador LED se debe iluminar cuando se pulsa cualquier botón.
Need help?
Do you have a question about the CALEDON 37000062 and is the answer not in the manual?
Questions and answers