Advertisement
Quick Links
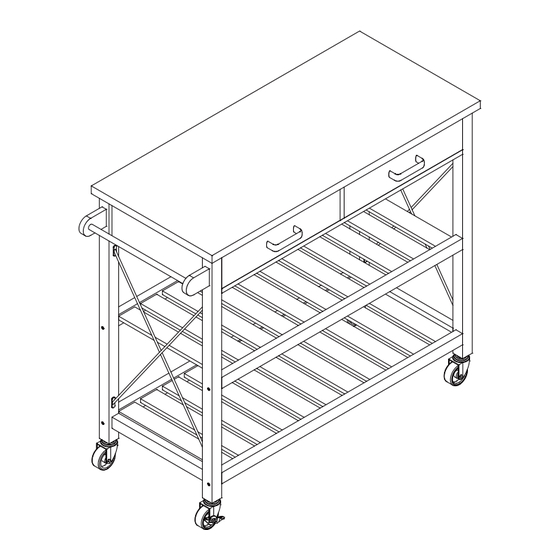
102221
60mins
Assembly Instructions
We have designed our furniture with you,the customer in mind.Our clear,easy to follow step by
step instructions will guide you through the project from start to finish. Feel confident that this
will be a fun and rewarding project. The final product will be a quality piece of furniture that will go
together smoothly and give enjoyment.
Advertisement

Subscribe to Our Youtube Channel
Related Manuals for Lehner Versand Panama 102221


Summary of Contents for Lehner Versand Panama 102221
- Page 1 102221 60mins Assembly Instructions We have designed our furniture with you,the customer in mind.Our clear,easy to follow step by step instructions will guide you through the project from start to finish. Feel confident that this will be a fun and rewarding project. The final product will be a quality piece of furniture that will go together smoothly and give enjoyment.
- Page 2 Assembly Checklist Read through the instructions carefully Make sure you have all the required tools. Never use power tools unless instructed. before you begin. Panel Identify and lay out all of the Two people are required to assemble. components before you begin assembly. Useful Information ! Never use power tools unless specifically instructed.
- Page 3 QUICKFIT Tighten quickfit until shoulder is flush with panel. Do not overtighten or undertighten. CAM LOCK When fitting cam lock, ensure starting position is correct before you insert connecting quickfit. Quickfit head should be in the centre of the cam lock when the two panels are joined.
- Page 5 1 x1 2 x1 3 x1 4 x2 5 x1 6 x1 7 x1 8 x1 9 x2 10 x2 11 x2 12 x2 13 x2 14 x2 Gx16 Bx24 Fx 16 Hx11 Tx12...
- Page 6 Step 1 Step 2 SAFETY RELEASE TAB A and Q are shipped together to maintain the oil for the ball bearings. Note that you need to tip up the safety release tab to take out the Q part prior to assembly. Slider Ax4 and Qx4...
- Page 7 Step 3 Back Front Front Back Step 4...
- Page 8 Step 5 Back Front Back Front Step 6...
- Page 9 Step 7 Back Back Front Front Front Back Back Front Step 8...
- Page 10 Step 9 Upper Wooden Dowel hole Step 10...
- Page 11 Step 11 Step 12...
- Page 12 Step 13 Step 14...
- Page 13 Step 15 Step 16 Back Front...
- Page 14 Step 17 Step 18...
- Page 15 Step 19 Back Back Front Front NOTE: When installing the drawer runners please ensure the screws are all placed in the correct position on the runner. 3 of the screw holes on the runners are an oval shape to allow for small adjustments if you 12xB find the gaps between the drawers aren't even.
- Page 16 Step 21...
- Page 17 Before you insert the drawers into the frame, please ensure that the ball bearing sliders (on the assembled unit) have been placed to the front of the main unit. If the bearings are in the middle of the slider it will be difficult to install the drawers correctly. Insert the drawer into the assembled frame as show below.
- Page 18 NOTE: CAUTION When removing the drawer,be careful to tip up the safety release tab on the left side,and tip it down on the right side to remove the drawer from the body as shown.
Need help?
Do you have a question about the Panama 102221 and is the answer not in the manual?
Questions and answers