
Related Manuals for Lynx Studio Technology LT-USB


Summary of Contents for Lynx Studio Technology LT-USB
- Page 1 LT-USB USB 2.0 LSLOT Interface User Manual Lynx Studio Technology, Inc. www.lynxstudio.com support@lynxstudio.com Page 1 of 45...
- Page 2 Troubleshooting ......................40 Support........................43 10.1 Lynx Website Support Resources ..............43 10.2 Telephone Support ..................43 10.3 Registering your LT-USB ................43 10.4 Return Policy .....................44 10.5 Locating the Serial Number of Your LT-USB ..........44 License Agreement ....................44 Warranty Information...................45 Page 2 of 45...
- Page 3 Windows computers and Core Audio with OS X Macintosh computers, virtually all professional audio applications can work with the LT-USB. The LT-USB features a USB 2.0 Device port (Type B) which is typically connected to a computer via a standard high-speed USB 2.0 cable (provided). Installation of the LT-USB into an Aurora is straightforward, as is the driver installation routine (Please note that driver installation is not required for OS X –...
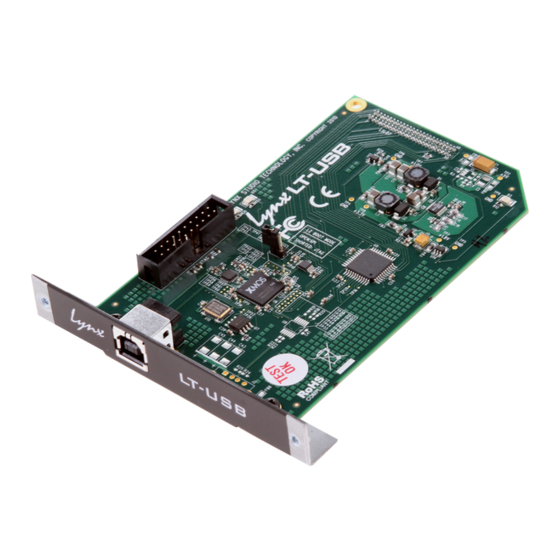
- Page 4 Features USB 2.0 Device port (Type B) USB Audio Class 2.0 compliant With an Aurora 16, provides 16 channels of I/O at sample rates up to 96 kHz and 8 channels at up to 176.4/192 kHz With an Aurora 8, provides 8 channels of I/O at all sample rates ...
- Page 5 Digital Audio Workstation software, which will likely be greater than those listed for the LT-USB. Please refer to your audio software’s documentation for more information.
- Page 6 & 4 on the output row or above (i.e. 2&5, 2&9, etc.) in the Aurora Meter Display, then your unit is compatible with the LT-USB. If pressing Power and Trim does not cause any LEDs to flash, causes a sequence lower than 24 to flash, or causes a single number to flash, then your unit needs to be updated.
- Page 7 Text in quotation marks indicates a parameter selection value or menu option (i.e. “EXT”). Phrases, such as: Start > Programs > Lynx Studio Technology use the greater than symbol (“>”) to indicate multiple menu options or mouse selections within a software control context.
- Page 8 Lynx Technical Support for instructions. 3. Remove the LSLOT Expansion Port cover above the AES I/O Ports by removing the two mounting screws. Set these two screws aside, as they will be used to secure the LT-USB after installation.
- Page 9 4. Remove the screw from the Aurora circuit board that is adjacent to the JP1 connector and the white serial number/barcode label. Set the screw aside for reuse. 5. Install the standoff post (included with the LT-USB) in this same hole. 6. Grounding yourself to earth ground, remove the LT-USB from its protective anti-static bag.
- Page 10 Use caution to insure that the pins line up as shown. Incorrect installation could damage the unit. 8. Secure the LT-USB with three screws; one on the standoff and two from the back panel of Aurora. Keep screws loose until the LT-USB is properly aligned, then tighten snugly, but do not over tighten.
- Page 11 10. Plug in and power up the Aurora using the front panel standby switch. You can see the LT-USB from the slits in the Aurora top cover. If the green LED on the LT-USB lights up, the installation was successful. If the LED does not light, unplug the Aurora and re- mount the LT-USB, making sure that it is securely attached.
- Page 12 LT-USB. See the Aurora manual for more information about these SYNC SOURCE choices.
- Page 13 1. Power on the Aurora with the USB cable disconnected. From the front panel, set the TO ANALOG OUT button to “LSLOT IN”. 2. The LT-USB driver should be installed prior to connecting the Aurora to the computer. Insert the Lynx Installation CD into your computer’s disk drive.
- Page 14 6. The system will search for the LT-USB and should be unable to find it. Connect the LT- USB and click “Next>” 6. Accept the default destination folder for the driver files and click “Install>” 7. After installation has completed, click “Next >”...
- Page 15 Section 7, Aurora Remote Control Application Reference. 5.2.2 OS X 1. The LT-USB uses the built-in USB 2.0 audio class driver provided in OS X 10.6.4 and up. No additional driver installation is required. Power on the Aurora with the USB cable disconnected.
- Page 16 The Lynx Demo program should appear in the upper left corner of your screen. Make certain that the Play Device is set to Lynx LT-USB/Aurora 5. Locate “SineWaveMinus16.wav” in the support folder of the Lynx Installation CD. Drag the file to the computer’s desktop.
- Page 17 8. Launch the Aurora Remote Control application. Click the Analog I/O tab. Check for meter activity for Analog Outputs 1&2. If you have speakers or headphones connected to your destination device, you should be hearing audio as well. If the test did not operate as described or you received any errors, please refer to Section Page 17 of 45...
- Page 18 Troubleshooting. Page 18 of 45...
- Page 19 2. If the Audio Devices window does not appear automatically, then select “Show Audio Menu” from the “Window” menu. 3. All available audio devices will appear in the left pane. Locate the Lynx LT-USB from this list. 4. Select this device. From the Gear icon in the bottom left corner, click “Use this device for sound output”...
- Page 20 7. For this test we will set the Aurora to Internal as the clock source. This is the default state of the Aurora. If this has been altered, disconnect the USB cable and select INT from the Aurora front panel and then reconnect the USB cable. 8.
- Page 21 Troubleshooting. Page 21 of 45...
- Page 22 Starting the Aurora Remote Control Application within Windows Make sure that the Aurora is powered up, and that the Aurora is connected to the computer by a USB cable. From the Start Menu, click Start > Programs > Lynx Studio Technology > Aurora Remote Control.
- Page 23 The SynchroLock status must be established prior to the connection of the USB cable. TO ANALOG OUT This button will not be active. For operation with the LT-USB, either LSLOT IN or Remote Routing mode with LSLOT sources assigned should be selected with the ARC application.
- Page 24 METER This button will function normally. See the Aurora manual for information. TRIM/AES MODE When the METER select switch is set to “Analog”, this button normally allows the nominal trim level to be set for the analog inputs and outputs. In “Lock Out” mode, this button will not be active, and trims can be set for the Analog inputs and outputs from within the Aurora Remote Control application.
- Page 25 7.3.1 Analog I/O Page This page is viewable by clicking the “Analog I/O” Tab in the top left corner of the Aurora Remote Control application. These indicators will illuminate when three consecutive full-scale samples are detected on the Aurora Analog Inputs and Outputs or when a summing overrun occurs on the Aurora Analog Outputs.
- Page 26 Analog Out 1 while holding down the CTRL key, LSLOT In 1-16 will be assigned to Analog Out 1-16). Please note that with an LT-USB installed, LSLOT sources correspond to audio streams coming from the host computer.
- Page 27 Digital Out 1 while holding down the CTRL key, LSLOT In 1- 16 will be assigned to Digital Out 1-16). Please note that with an LT-USB installed, LSLOT sources correspond to USB audio streams coming from the host computer. By default these audio streams are delivered...
- Page 28 Clock Signal from the computer’s USB adapter. Under normal circumstances, this is NOT a recommended clock source. Please note that when the LT-USB is connected to the computer and active, the SYNC SOURCE cannot be controlled through the Aurora Remote Control software. The SYNC SOURCE must be established from the front panel before connecting the USB cable.
- Page 29 USB audio sources to the digital outputs, choose “REMOTE” and manually assign the LSLOT sources. This parameter is not pertinent for the LT-USB and should be left on the default state of “DIGITAL OUT”. This drop-down menu determines whether the Aurora front panel meters display activity for the digital or analog inputs and outputs.
- Page 30 7.3.3 About Aurora Remote Control Window This dialog box details the version number of the Aurora Remote Control application, and the hardware revisions, serial numbers and board revisions of the Aurora and LSLOT devices. It also displays the Aurora’s operating temperature and the connection medium being employed.
- Page 31 8 Using the LT-USB With the LT-USB correctly installed in your computer, you can begin to use the Aurora with most popular third-party audio applications. In this section we will explore setting up the Aurora/LT-USB system for different contexts of use.
- Page 32 In OS X 10.6.4+, go to the “About This Mac> More Info…> USB” tab: Both of the following screenshots show the Lynx LT-USB as the only device on a high-speed USB host controller. This is the recommended configuration for systems that behave poorly when sharing the USB bus with multiple devices.
- Page 33 Device = Lynx LT-USB. With Windows Vista/Windows 7 navigate to: Start > Control Panel > Sound > Playback. Right-Click the Lynx LT-USB output device and choose “Set as default device”. Since these types of programs generally use a Standard Windows driver model, the way that the Aurora appears as a record/playback option will depend on the Channel Mode that has been selected.
- Page 34 Many ASIO applications provide access to an ASIO Control Panel for the device being used. For an LT-USB equipped Aurora, this button will launch the Lynx LT-USB Control Panel. From this panel, the ASIO buffer size and system latency can be established conveniently within the audio software application.
- Page 35 In the “Buffer Settings” tab, the Streaming and ASIO buffer parameters control the size of the audio packets that are used to transfer audio to the LT-USB hardware. Smaller buffer sizes will give you lower latency. However, if a buffer size is too small for the system or context, audio anomalies such as clicks and pops may occur.
- Page 36 Audio applications. 8.4.2.1 OS X Audio Applications The Aurora/LT-USB can be used as a playback device for most popular multimedia, home theater and pro audio applications. Some such applications allow selection of specific playback devices. In these cases, an Aurora output device can be selected from the appropriate device selection menu.
- Page 37 When the LT-USB is selected as the output sound device, channels 1&2 are active by default. To change this, highlight the LT-USB, choose “configure speakers” from the gear icon, and then select the desired stereo output channels from the drop-down menus.
- Page 38 It is recommended to become familiar with altering the LT-USB buffer size to best suit the context of use. Once you determine the lowest achievable buffer size, you will typically have to double the size each time you double the sample rate, but the effective latency will remain constant.
- Page 39 Although LT-USB streams cannot be globally routed to the Aurora’s Digital Outputs, they can be manually assigned to the digital outputs as “SOURCE A” or “SOURCE B” if TO DIGITAL OUT is set to “REMOTE”. In addition to Source A and Source B, Analog Outs 1-4 have 16 additional monitor sources available.
- Page 40 5. Check that the LT-USB is connected via a High-Speed USB 2.0 cable (provided). 6. Check that the OS is compatible with the LT-USB. One must be running OS X 10.6.4+ or Windows XP with SP3 (32-bit), Windows Vista with SP2 (32-bit or 64-bit) or Windows 7 (32-bit or 64-bit).
- Page 41 6. Check that the LT-USB is connected via a High-Speed USB 2.0 cable (provided). 7. Check that the OS is compatible with the LT-USB. One must be running OS X 10.6.4+ or Windows XP with SP3 (32-bit), Windows Vista with SP2 (32-bit or 64-bit) or Windows 7 (32-bit or 64-bit).
- Page 42 Dialog box? If connection via IRDA is indicated, disconnect or disable the Infrared transceiver on the host computer. 4. Close the ARC and any audio applications and reset the LT-USB either by removing then reinserting the USB cable, or by turning the Aurora off for 5 seconds, then turning it back 5.
- Page 43 10 Support We are devoted to making your experience with the LT-USB trouble-free and productive. If the troubleshooting and operational sections of this manual did not help resolve your questions, several support options are available to you: 10.1 Lynx Website Support Resources Logging on to http://www.lynxstudio.com/support.html will provide several options for...
- Page 44 30 days from the date of issue. 10.5 Locating the Serial Number of Your LT-USB To register your LT-USB, you must supply its serial number. The serial number is located on a label attached to the back of the card, and on the shipping carton.
- Page 45 Lynx Studio Technology and the Lynx Logo, LT-USB and the LT-USB Logo, Aurora and the Aurora Logo are all trademarks of Lynx Studio Technology, Inc. All other product or company names are the trademarks or registered trademarks of their respective owners.
Need help?
Do you have a question about the LT-USB and is the answer not in the manual?
Questions and answers