Table of Contents
Advertisement
Quick Links
Advertisement
Table of Contents

Subscribe to Our Youtube Channel
Related Manuals for LENCO DVD-322


Summary of Contents for LENCO DVD-322
- Page 1 DVD-322 For information and support, www.lenco.eu...
-
Page 2: Table Of Contents
Content Introduction Important Safety Instructions .................. 2 Caution ........................3 Features ........................3 Front Panel and Rear Panel Illustration……………………………………………….…4 Remote Control …………………………………………………………………..…….… 5 Connections …………………………………………………………………………….… 6 Advanced Features System setup ......................7 MP3/WMA/JPEG/MPEG4 playback ................11 Program Play Operation ................... 1 2 Others Troubleshooting...................... -
Page 3: Important Safety Instructions
Important Safety Instructions 1) Read these instructions. 2) Keep these instructions. 3) Heed all warnings. 4) Follow all instructions. 5) Do not use this apparatus near water. 6) Clean only with dry cloth. 7) Do not block any ventilation openings, install in accordance with the instructions. 8) Do not install near any heat sources such as radiations, heat registers, stoves, or other apparatus (including amplifiers) that produce heat. -
Page 4: Caution
Caution • Please use the original box and packing materials for safe transportation of this product. • It is normal for the cover and rear panel to become warm after the player has been operating for an extended period of time. •... -
Page 5: Front Panel And Rear Panel Illustration
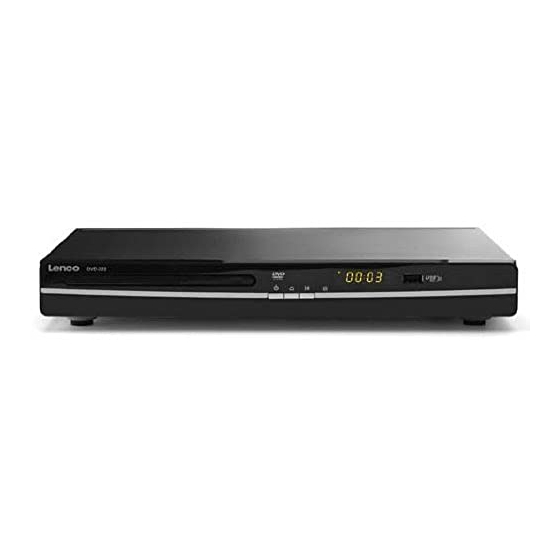
Front Panel and Rear Panel Illustration Front Panel 1. Tray Door 2. Power 3. Open/Close button 4. Play/Pause Button 5. Sensor 6. LED 7. USB port Back Panel 1. Digital Audio Coaxial Output 2. SCART Output... -
Page 6: Remote Control
Remote Control 1. OPEN/CLOSE 14. MUTE 2. POWER 15. GOTO 3. 0-9 NUMBER KEY 16. USB 4. ZOOM/MENU 17.AUDIO/ANGLE 5. SUBTITLE/TITLE 18.REPEAT/ PROGRAM 6. SETUP 19. PLAY/PAUSE 7. UP 20. STOP 8. LEFT 21. RIGHT 9. DOWN 22. OK 10. REVERSE 23. -
Page 7: Connections
Connections CONNECT DVD PLAYER TO TV SET WITH SCART SOCKET Use the SCART cable to connect DVD player and your TV. Set the [Video Out] to [RGB]. CONNECT DVD PLAYER TO AV AMPLIFIER WITH DIGITAL AUDIO(COAXIAL) OUTPUT 1. Connect the coaxial digital audio output to the AV amplifier. 2. -
Page 8: System Setup
SYSTEM SETUP Press the SETUP button on the remote control, the SETUP MENU will be displayed. There are three pages named System, DMP and Disc on top of setup menu, press Left/Right button to switch among them, then press Down button to select items you want to set. - Page 9 SYSTEM SETUP TV Standard Select the different TV system. Note: The DVD player setting should be matched to your TV set. For more information of output format, refer to the instructions or your TV set. Display Type Select the aspect ratio. Notes:The image display ratio is related to the recorded disc format.
- Page 10 SYSTEM SETUP 2. DMP Menu 2.1 Photo Settings Interval Time Set interval time during photo slide show Transition Effect Set transition effect for photo slide show Show Type Set fill mode for picture view Color Tone Set color tone 3. Disc Menu 3.1 Disc Language Setup Menu Set default menu language for DVD playback...
- Page 11 SYSTEM SETUP 3.2 Disc Audio Setup Digital Out Set digital audio output mode for coaxial. Analog out Set analog audio output (on/off) Downmix Set downmix mode for analog output 3.3 Disc Custom Setup Parental Ctrl Set parental control level Angle Mark Set angle mark on/off...
-
Page 12: Mp3/Wma/Jpeg/Mpeg4 Playback
MP3/WMA/JPEG/MPEG4 PLAYBACK Play MP3/WMA/MPEG4/JPEG in disc or in USB has similar directory structure as below: Using Direction keys to choose file you want to play then press OK or Play/Pause button to start playback. Below picture shows screen display during music file playback. Press USB button to bring out a device selection menu, then you can change file source between disc and USB device. -
Page 13: Program Play Operation
PROGRAM PLAY OPERATION Program operation during CDDA, VCD and DVD playback Press PROG button (hold for more than 1.5s) during CDDA/VCD/DVD playback, system will bring out program menu as below. Press up/down button to move highlight in program list for add/delete operation, press right button then select which track/title you want to add into program list, or press stop button to remove the highlighted item from program list. - Page 14 PROGRAM PLAY OPERATION Program operation during MP3/WMA/MPEG4/JPEG files playback Using direction buttons to select file which you want to add to program list, then press Right button to add it. Press PROG button (hold for more than 1.5s) after you added files into program list, system will bring out program menu.
-
Page 15: Troubleshooting
Troubleshooting If you have any questions, please consult the troubleshooting guide below. NO PICTURE OR SOUND "BAD DISC" DISPLAYED • Ensure the power button is on. • Ensure the disc is not warped, damaged or deformed. • Ensure the power outlet is operational. •... -
Page 16: Specifications
Audio out Audio out level: 2Vrms -1/+0.2 Frequency response: 20Hz to 20kHz S/N ratio: >90dB Total harmonic distortion: <0.025% Accessories Remote Control x 1 User's Manual x 1 Note: Specifications are subject to change without notice. For information and support, www.lenco.eu...
Need help?
Do you have a question about the DVD-322 and is the answer not in the manual?
Questions and answers