Table of Contents
Advertisement
Quick Links
Advertisement
Table of Contents

Related Manuals for LENCO DVD-320


Summary of Contents for LENCO DVD-320
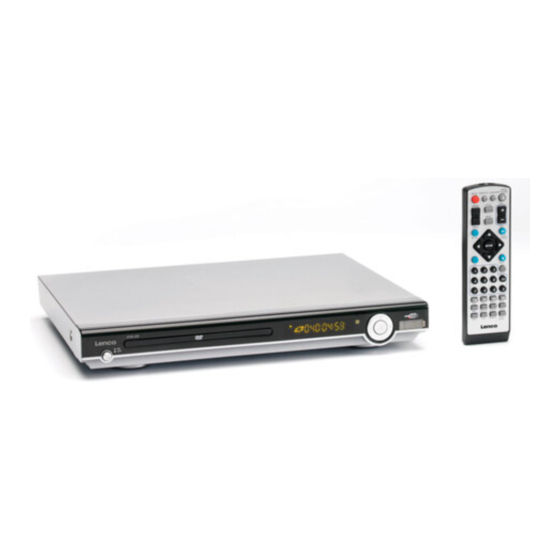
- Page 1 DVD-320...
-
Page 2: Table Of Contents
Content Introduction Safety Precautions Important Safety Instructions Caution Features Front Panel and Rear Panel Illustration Remote Control Connections Connecting to a TV set Connecting to an AV Receiver with Digital Audio Input Advanced Features Mode and Features Setup Remote Control Operation MP3 Playback Others Troubleshooting... -
Page 3: Safety Precautions
RISQUE CHOC ELECTRIQUE NE AVIS PAS OUVRIR... -
Page 7: Introduction
Features Introduction Full compatibility with MPEG4, DVD, CD, MP3, KODAK Picture CD, CD-R and CD-RW ( f i n a l i z e d ) 5.1 CH Audio Output Component (Y, Pb, Pr), S-Video and composite video output Progressive Scan Scart Output Disc formats supported by this player: MPEG4... -
Page 8: Front Panel And Rear Panel Illustration
9 10 4 5 6 7 POWER POWER PREV BUTTON PREV BUTTON PLAY/PAUSE BUTTON PLAY/PAUSE BUTTON DVD TRAY DVD TRAY STOP BUTTON STOP BUTTON OPEN/CLOSE BUTTON OPEN/CLOSE BUTTON LED SCREEN LED SCREEN NEXT BUTTON NEXT BUTTON REMOTE SENSOR REMOTE SENSOR 100-240V ~ 50/60Hz 1 2 3... -
Page 9: Remote Control
Introduction Remote Control LED screen DVD DISC DVD DISC PLAY PLAY PAUSE PAUSE DISC PLAY DISC PLAY PLAY TIME PLAY TIME MP3 DISC MP3 DISC REPEAT REPEAT DOLBY DIGITAL DOLBY DIGITAL Remote Control OPEN/ STANDBY CLOSE SUBTITLE LANGUAGE 1.STANDBY 17.TITLE 2.SUBTITLE 18.VOLUME INCREASE ANGLE... -
Page 10: Connections
Connections CONNECTING THE DVD PLAYER TO THE TV USING AN AV CABLE Connect the DVD player s FR and FL Phono to the audio input Phono on the TV VIDEO AUDIO Audio cable Video cable 100-240V ~ 50/60Hz CONNECTING THE DVD PLAYER TO THE TV USING AN S-VIDEO CABLE Use an S-VIDEO cable ( not supplied) to connect the player to your TV. - Page 11 Connections CONNECTING THE DVD PLAYER TO THE TV USING A SCART CABLE Use the SCART cable (not supplied) to connect the DVD player and your TV. Set the [Video Type] to [TV-RGB]. VIDEO AUDIO Scart 100-240V ~ 50/60Hz CONNECTING THE DVD PLAYER TO THE TV USING A Y/Pb/Pr CABLE Use the COMPONENT Cable(not supplied) to connect the DVD player to your TV.
-
Page 12: Connecting To An Av Receiver With Digital Audio Input
Connecting to an AV Amplifier with Digital Audio Input Connections Use a standard Digital audio coaxial cable (not supplied) 100-240V ~ 50/60Hz Coaxial Digital Amplifier VOLUME INPUT SELECTOR POWER BYPASS PRO LOGIC 3 STEREO MODE TEST CHANNEL KARAOKE MUTE DOWN BASS TREBLE ECHO... -
Page 13: Advanced Features
Advanced Features 1. General Steps of the setup menu A) Press the STOP button when playing a disc, then you press the setup button, A) Press the STOP button when playing a disc, then you press the setup button, the main setup menu appears. the main setup menu appears. - Page 14 Advanced Features 2. Setup Items Introduction 2. Setup Items Introduction 2.1 LANGUAGE SETUP 2.1 LANGUAGE SETUP The language setup options are illustrated below: The language setup options are illustrated below: 2.1.1 OSD LANGUAGE 2.1.1 OSD LANGUAGE Highlight the OSD LANGUAGE option, and press the Arrow buttons to choose Highlight the OSD LANGUAGE option, and press the Arrow buttons to choose the OSD language you prefer.
- Page 15 Advanced Features 2.1.3 2.1.3 AUDIO AUDIO Highlight the AUDIO option, and press the Arrow buttons to choose the audio Highlight the AUDIO option, and press the Arrow buttons to choose the audio language you prefer. Press the Enter button to confirm. If the disc you are language you prefer.
- Page 16 Advanced Features 2.2 SCREEN SETUP 2.2 SCREEN SETUP The system setup options are illustrated below: The system setup options are illustrated below: 2.2.1 TV TYPE 2.2.1 TV TYPE According to the TV type, you can choose 4:3PS,4:3LB or 16:9 . According to the TV type, you can choose 4:3PS,4:3LB or 16:9 .
- Page 17 Advanced Features 2.2.4 VIDEO OUTPUT 2.2.4 VIDEO OUTPUT According to the output jack of the TV set, you can choose CVBS+S-VIDEO, According to the output jack of the TV set, you can choose CVBS+S-VIDEO, CVBS+YUV , CVBS+RGB or YUV P-SCAN. CVBS+YUV , CVBS+RGB or YUV P-SCAN.
- Page 18 Advanced Features 2.3 AUDIO S ETUP 2.3 AUDIO S ETUP The audio setup options are illustrated below: The audio setup options are illustrated below: Downmix 2.3.1 DIGITAL OUT 2.3.1 DIGITAL OUT Highlight the DIGITAL OUT option, and press the Arrow buttons to Highlight the DIGITAL OUT option, and press the Arrow buttons to choose the audio output mode you prefer.
- Page 19 Advanced Features 2.4 CUSTOM SETUP 2.4 CUSTOM SETUP The custom setup options are illustrated below: The custom setup options are illustrated below: Style Angle Mark 2.4.1 PARENTAL CTRL 2.4.1 PARENTAL CTRL Parental Ctrl:1,2:G,3:G,4:PG13,5,6:R,7:NC17,8 level eight is. The first level Parental Ctrl:1,2:G,3:G,4:PG13,5,6:R,7:NC17,8 level eight is. The first level discs are available to people of all ages and only suitable for adults.
- Page 20 Advanced Features Style Angle Mark 2.4.3 STYLE 2.4.3 STYLE According to Style, you can choose Style 1, Style 2,Style 3 or Style 4 . According to Style, you can choose Style 1, Style 2,Style 3 or Style 4 . Style 1 Style 2 Style 3 Style...
-
Page 21: Remote Control Operation
Advanced Features DISPLAY DISPLAY During playback, press DISPLAY to show the current time counter position. GOTO GOTO During playback, press GOTO to show the current time counter position. During playback, press GOTO to show the current time counter position. Enter the title number Enter the title number to choose the title to choose the title... - Page 22 Advanced Features STANDBY STANDBY Press the STANDBY button to switch between normal mode and standby mode. Press the STANDBY button to switch between normal mode and standby mode. OPEN/ OPEN/ CLOSE CLOSE To open the disc tray, press the OPEN/CLOSE button. To open the disc tray, press the OPEN/CLOSE button.
- Page 23 Advanced Features PREV PREV Press the PREV button to skip to the previous chapter or track. Press the PREV button to skip to the previous chapter or track. NEXT NEXT Press the NEXT button to skip to the next chapter or track. Press the NEXT button to skip to the next chapter or track.
- Page 24 Advanced Features VOL- VOL+ VOL- VOL+ Press the < VOL+> button to increase the Volume. Press the < VOL+> button to increase the Volume. Press the < VOL-> button to reduce the Volume. Press the < VOL-> button to reduce the Volume. MUTE MUTE Press the MUTE button to mute the Audio output.
- Page 25 Advanced Features PROG PROG White [PROGRAM] is on, press ENTER to display the [Program] submenu: White [PROGRAM] is on, press ENTER to display the [Program] submenu: Enter the track numbers in the order you would like Enter the track numbers in the order you would like them to be played.
-
Page 26: Mp3 Playback
Mp3 PLAYBACK Mp3 PLAYBACK Advanced Features When an MPEG and an Mp3 disc is loaded, the scr e en will be as follows: When an MPEG and an Mp3 disc is loaded, the scr e en will be as follows: Queen 1/17 00:17:00... -
Page 27: Troubleshooting
Make sure the Main unit s POWER button is on Ensure the batteries of the remote are working. enter... -
Page 28: Others
Remote Control Preparation Other Read this owner s manual thoroughly before Press the OPEN/CLOSE button on the remote control (or front panel) to eject the disc tray. Load a disc, label side up, into the disc tray and press the OPEN/CLOSE button. - Page 29 Remote Control Preparation Other The following message will be displayed on the screen when there is a problem with the loaded disc: Production qualities of DVD disc s vary, some disc s might deviate from the industrial standard. Some correctly formatted discs may playback on the player. However, the playback and operational quality of those discs may be substandard.
-
Page 30: Specifications
Specifications Power requirements: AC 100-240 Volt, 50/60Hz Power consumption: 15W Video standard: NTSC/PAL/AUTO Unit Weight: 1.7kg Video out Video out: 1.0V(p-p)/75 , sync, negative polarity, RCA pin jack x 1 S-video output connector(separate Y C signal output connector): Y output: 1.0V(p-p)/75 , sync, negative polarity C output: 0.286V(p-p)/75 Audio out 2.0 channel out: RCA pin jackx6...
Need help?
Do you have a question about the DVD-320 and is the answer not in the manual?
Questions and answers