
Related Manuals for Launch EVC11C


Summary of Contents for Launch EVC11C
- Page 2 Contents 1. Introduction....................... 1 2. Warranty ........................3 3. Instructions for use ....................4 4. Standards and Certificates ..................6 5. Installation ......................... 8 6. Introduction for operation areas ................. 18 7. Introduction for mobile APP ................20 8. OCPP Connection ....................48 9.
- Page 3 1. Introduction This manual introduces the Launch EV smart charger European Standard AC chargers and related products, and gives the detailed description of the installation and use process. Safety warning: Please read this manual carefully before installing and using the charger.
- Page 4 Before the charger is connected to the power supply, please ensure that the ground wire is connected ⚫ reliably; Power input cables, sockets and all accessories required for installation must meet the current laws and ⚫ regulations; Please install short-circuit protection device at the power supply input end of the charger; ⚫...
- Page 5 2. Warranty The warranty period of the charger shall be stipulated by the official sales of manufacturer.. Prerequisites for coverage of product warranty: Follow the instructions in the manual to ensure that the product will have no fault and will be safe for use. The following conditions are not covered by the warranty: Failure to comply with the installation requirements and use conditions of the charger;...
- Page 6 3. Instructions for use The charger is an electrical equipment for charging the energy storage battery of battery electric vehicles (BEV). Charging plugs and sockets meet the requirements of IEC 62196 (AC charging, mode 3). The charger is suitable for indoor and outdoor use. If the product is faulty or damaged, please contact the technician and inform the manufacturer.
- Page 7 The users must: After installing the Charging station, tighten the gland again The professionals (Electrical Engineer/Technical Specialist), are only allowed to carry out installation, initial operation, inspection and configuration, and the professionals must have read and understood this manual.
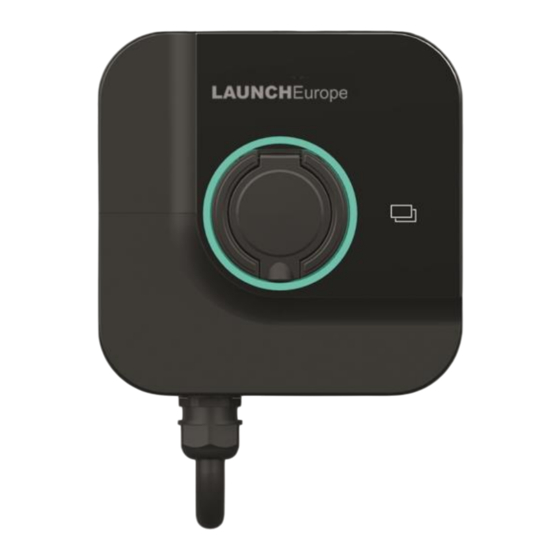
- Page 8 (RED RFID 13.56MHz----RF: EN 300 330 RF-EMC: EN 301 489-1&-3 Health (MPE): EN 62311) CE certification CE (Rheinland)/UKCA (Rheinland) RoHS/REACH RoHS/REACH (Rheinland) Certification Technical parameters Picture Model EVC11C EVC11B Power 3.5-11kW 3.5-11kW MODE 3 CASE C MODE 3 CASE B Charging mode (Tethered version)
- Page 9 TN/TT (3P+N+PE) (three- TN/TT(3P+N+PE) phase) TN/TT/IT(1P+N+PE (three-phase) Grid system TN/TT/IT(1P+N+PE or 2P+PE) (single-phase) 2P+PE) (single-phase) Efficiency >99% >99% Electric leakage DC leakage (6mA) DC leakage (6mA) protection APP start APP start Charging start RFID card start RFID card start methods OCPP start OCPP start LED strip display...
- Page 10 5. Installation The following content describes the installation process of the charger. Installation must be carried out by qualified professional electrician. 5.1 Installation conditions and environmental requirements The charger can be used outdoors. The charger must operate in the environment required by the manual, otherwise the life of the charger will be affected.
- Page 11 5.3 Install short-circuit protection device There is overcurrent protection detection assembly inside the charger. However, a short circuit protection device must be installed at the front end of the charger power supply incoming line, for example, an isolation switch must be installed at the front end of the charger power supply incoming line. Do not use the charger if short circuit protection device is not installed.
- Page 12 5.7 Power supply system Both single-phase and three-phase chargers support the following power supply systems: TN-S; ⚫ TN-C; ⚫ TN-C-S; ⚫ ⚫ For single-phase charger, in the power supply system with neutral line, the voltage between phase line and neutral line cannot be higher than the rated voltage ( a power supply system without neutral wire, the voltage between phase lines cannot be higher than the rated voltage (230VAC).
- Page 13 Description Picture Remove back bracket: Remove one screw fixing the exterior trim cover plate and remove the exterior trim cover; Remove one screw fixing the sealing cover and remove the sealing cover; Remove a screw fixing the back bracket, slide the back bracket down to remove it from the back of the whole machine;...
- Page 14 Punch holes for wall mounting: The positioning cardboard is attached closely to the wall, and the recommended height is: the distance from the center of the positioning cardboard to the ground is 1300mm; Check whether the positioning cardboard is horizontally aligned with the wall surface;...
- Page 15 Install expansion tubes: Whole charger: insert four expansion tubes into four wall surface mounting holes and press them into place by hand. If they are not in place after pressing by hand, please use tools (hammers, etc.) to make the expansion pipes into place; Charging cable holder: insert two expansion tubes into two wall surface mounting holes and press...
- Page 16 Fix the charger: Slide the charger down from top to bottom, fix it on the back bracket; Install 1 screw for fixing the back back bracket. Fix the charging cable holder: Insert 3 expansion tubes(φ6*60) into3 wall surface mounting holes and press them into place by hand.When fixing the charging cable holder on the wall, use 3 expansion...
- Page 17 Power wiring: Remove the power protection cover; Measure the length of the power cord, strip the power cord, and conduct crimping between the top end of the stripped cable and the tube-shaped terminal, if it is 6mm cable, it is recommended to use a 6012 tube-shaped terminal;...
- Page 18 Ensure that the power supply incoming line is not connected to the power supply. It should be noted that the power supply incoming line must be fixed tightly with waterproof gland to avoid pulling by external force; Definition of supply power incoming lines (from left to right): N: Blue PE: Yellow-green...
- Page 19 Wiring of power cord: Remove the power supply protection cover; Measure the length of the power cord, strip the power cord, and conduct crimping between the top end of the stripped cable and the tube-shaped terminal, if it is 6mm cable, it is recommended to use a 6012 tube-shaped terminal;...
- Page 20 6. Introduction for operation areas After installation of the charger is completed, the electric vehicle can be charged. The operation area and display of the charger are described below. 6.1 Display Panel There are display areas on the front of the charger: AREA 1 and AREA 2. The display functions of each areas are as follows: Display Type...
- Page 21 6.3 LED indicator (AREA 2) LED indicator ring Color Flashing mode Status White Flashing Power on and self-inspection White Constant light Updating Green Slow flashing Standby Green Constant light OCPP platform connected Blue Fast flashing Start charging Blue Breathing Charging Blue Slow flashing Plug in...
- Page 22 7. Introduction for mobile APP The charger has five communication interfaces for connection to the outside: Bluetooth interface: used to connect mobile APP; ⚫ WiFi interface: used to connect OCPP platform; ⚫ Ethernet interface: used to connect OCPP platform, or to realize the networking among multiple chargers ⚫...
- Page 23 7.3 Detailed introduction to APP(See the last page for app download): 7.3.1 User interface Steps Description Picture User configuration: Click the User Configuration button (red circle) in the main interface of the APP to enter the personalized configuration interface of the APP, and set the avatar (currently, users only can select avatar from the avatars built in the APP), nickname, gender...
- Page 24 Connect the charger: To find the charger for your device, first look for a red circle button in the upper right corner of the app's main screen. Click that button and the app will show you the names of chargers that are within range and connected by Bluetooth.
- Page 25 Settings of password: When you use the APP for the first time or the charger parameters are reset, the password needs to be configured. When setting the password, you need to input the same password twice before it can be set successfully. The current password is limited to 6 characters a-z, A-Z, 0-9.
- Page 26 Main interface of the APP: After the password is set, correctly it will enter into the charger menu, which displays: 1. Name of current charger; 2. Configuration option; 3. Maximum charging current; 4. Locking state of electronic lock (CASE B); 5.
- Page 27 Status of the charger: 1. Standby; 2. The charger is plugged in; 3. Charging is starting; 4. Charging is in progress; 5. Pause charging; 6. Charging is completed; 7. Failure; 8. Alarm; 9. Fault and alarm (fault and alarm statuses are displayed at the same time).
- Page 28 Setting of maximum charging current: In the charger menu, the maximum charging current of the charger can be set by sliding the dial. Slide it clockwise, the current will increase and slide it counterclockwise, the current will decrease, and the adjustment accuracy is 1A.
- Page 29 Boost timer: To use the Boost timer, click on the "Boost timer" icon (it's a red circle) to enter into the timing charging list. If you haven't set up any timing charging yet, the list will be empty. To add timing charging information, click the "+"...
- Page 30 Charging Statistics: To see how much your charger has been used, go to the main screen of the charging app and click on "charge statistics." This will show you how much the charger was used each day of the most recent month and each month of the most recent year.
- Page 31 The setting interface of the charger: To access the setting interface of the charger, click on the " Configuration option " button on the main screen. This will take you to a screen where you can view and change different functions of the charger.
- Page 32 The charger information: Click the "Charger Info" button to view the information of current charger, including the charger board SN(serial number), the charger SN(serial number), software version, and the IEMI number, ICCID number and IMSI number of SIM card.
- Page 33 Network configuration: Click the Networking Mode button to select four networking access modes: default networking, WiFi networking, 4G networking and Ethernet. The default networking sequence order is Ethernet > WiFi > 4G. When configuring the default networking mode, the WiFi user name, password, Ethernet IP, subnet mask and gateway must be configured, then the default...
- Page 34 Configuration of power supply system: Click the ES Configuration button to configure the charger power supply system, and TN/IT/TT can be selected. Operation mode configuration: Click the Operation Mode button to switch the operation mode of the charger when the charger is idle (no charging plug is inserted);...
- Page 35 Charging record inquiry: Click the Charging Record button to view the charging record of the current charger. If it has never used for charging, the inquiry interface will be displayed as empty, otherwise the charging record will be displayed in the APP according to the current charging number and maximum charging number of the charger.
- Page 36 Fault self-inspection: Click the Self-inspection button to export a charger inspection report file and it will be stored in the mobile phone. The function is only used for manufacturers to analyze fault states.
- Page 37 User password modification: 1.To change your password, click on the "Password Reset" button. If you enter the wrong original password, the system will prompt that the password setting failed. 2. If the new password input twice is inconsistent, it will prompt that two new password is inconsistent;...
- Page 38 Charging Mode: To configure the charging mode of the charger, click on the "Charge Mode" button. This includes the option for Authentication-free Charging and Electronic Lock Fault Enable Mode function. The Authentication-free Charging function can only be used when the charger is offline.
- Page 39 OCPP settings: Click the OCPP button to configure the OCPP server address and CPID for the charger. The server address must be used to log in the OCPP server under online mode for the charger.
- Page 40 Load balancing configuration: Click the Load Balancing button, you can select: 1. Whether the load balancing function is enabled; 2. Configure the phase position of single-phase charger in power supply system; 3. Configure the master-slave mode of the charger; 4. Configure the charging mode; 5.
- Page 41 In the Load balancing Setting, the interface of main charger is shown in the upper figure in the right, and the interface of the slave charger is shown in the lower figure.
- Page 42 In the Load Balancing Setting, for the charging mode configuration, click the red column in the right picture to select "Fast", "ECO" and "ECO +" modes. In the Load Balancing Setting, the charger networking mode can be configured. Click the red column in the right picture to conduct the load balancing network configuration, and you can select WiFi or Ethernet.
- Page 43 7.3.2. Administrator operation interface Steps Description Picture Enter the administrator interface: In the Charger Setting, some items can only be used under the administrator mode. After clicking the charger icon in the setting interface 5 times (red column in the right figure), enter into the administrator interface, and the default password is 123456.
- Page 44 Administrator interface: The administrator interface includes common configuration items (which were introduced in the user operation interface section) as well as some additional functions. These additional functions include the ability to read fault records, configure RFID cards, perform remote upgrades, configure device types, and modify the administrator password.
- Page 45 View the charging fault records: Under the administrator mode, click the Fault Record button to view the fault record of the current charger. Similar to the charging record, you can view the fault record according to the quantity and total number of fault records stored in the current charger, and click the Export button in the lower right corner to export the fault...
- Page 46 In administrator mode, you can configure the RFID card settings by clicking on the "RFID Card" button in the app. This will display the whole list of card numbers currently stored in the charger, as well as allow you to read the card number from a physical charging card.
- Page 47 Remote upgrade: Under administrator mode, copy the upgrade link to the input column, click the Remote Upgrade button, and the APP can remotely upgrade the charger software. First, connect the charger to the network (if Ethernet or 4G cannot be used, you can turn on the hotspot of the mobile phone and provide it for the charger), and then send the...
- Page 48 Configuration of equipment type: Under administrator mode, click the Device Type Settings button to set the equipment type of the charger. The charger power can be configured to 7KW (single phase) and 22KW (three phases). For connection mode, you can choose CASE B (charging socket version) and CASE C (charging cable version);...
- Page 49 Administrator password modification: Under the administrator mode, click the Administrator Password Reset button to change the administrator password; Similar to the modification of the user password, the previous administrator password (default is 123456) and the new administrator password can be input, and they cannot not be same.
- Page 50 8. OCPP Connection The charger is connected to OCPP server, which provides a network-based management solution for the charging session. Through OCPP software platform(back office), the charging session of the charger can be remotely controlled and order management can be carried out (such as charging authorization, report, etc.) . The charger only supports OCPP1.6J protocol.
- Page 51 8.1。3 OCPP settings: Click the OCPP button to configure the OCPP server address and CPID for the charger, setting completed, click to confirm(When leaving the factory, the OCPP address and CPID have been set, please ignore this step): The OCPP server address format is as follows:...
- Page 52 The example is as follows: OCPP server address: ws://13.200.14.12:58080 CPID:7121050066603101050600A03 For example, CPID is the SN (serial number) of charging equipment, it is for reference only. Different platforms have different CPID values. When connecting specific platforms, you shall obtain the corresponding CPID value from the platform.
- Page 53 Click to confirm and the WiFi module restarts (waiting for approximately 15 seconds); Repeat step 1, Log back into the APP; The following figure represents a successful connection to the network through WiFi;...
- Page 54 The following figure indicates successful connection to the OCPP platform Connecting to the OCPP platform through 4G: Configure 4G(If the SIM card needs to configure APN, write the APN parameter in the 4G option; If the SIM card does not need to be configured with an APN, no content will be written in the 4G option.
- Page 55 Click to confirm and the 4G module restarts (waiting for approximately 15 seconds); Repeat step 1, Log back into the APP; The following figure represents a successful connection to the network through 4G;...
- Page 56 The following figure indicates successful connection to the OCPP platform Connecting to the OCPP platform through Ethernet: Configure Ethernet (Enter Ethernet IP address);...
- Page 57 Click to confirm and the Ethernet module restarts (waiting for approximately 15 seconds); Repeat step 1, Log back into the APP; The following figure represents a successful connection to the network through Ethernet;...
- Page 58 The following figure indicates successful connection to the OCPP platform...
- Page 59 8.2 OCPP1.6J supports the following functions:...
- Page 61 9. Charging Operation Before beginning the charging process, it is important to make sure that the charger's plug is securely connected to the electric vehicle. In the CASE B charging mode (where the charger has a charging socket), one end of the Type 2 Standard charging cable should be connected to the charger while the other end should be connected to the electric vehicle.
- Page 62 to the card swiping area), and the buzzer generates the "beep" sound, and the charging session is finished. At this time, you can unplug the charger. Warning: When swiping the card to start charging, if the buzzer generates the "beep" sound twice (the interval is about 0.5s), it means that the RFID card is not authorized! 9.2 Start/stop charging through platform The platform starts and stops the charging according to OCPP1.6J standard protocol.
- Page 63 10. Power management (with external smart meter or CT) The charger can be connected to the electricity meter or CT through an external port (RS485) to reasonably distribute the power energy. The charger has an external port, which can be connected to an external smart electricity meter (optional). The charger can identify the available power of the grid power supply, this means that the charger can adjust the charging power in real time according to the remaining power of other loads (load balancing, see Chapter 12).
- Page 64 11. Load Balancing 11.1 Brief introduction to the function. 11.1.1 Protect the safety of household electricity use and prevent excessive charging power from causing protection of household front air switch and power failure; 11.1.2 Detect three-phases imbalance to prevent excessive load of power grid due to too large power consumption of one phase;...
- Page 65 Network cable. 11.2.3 Smart meter signal wiring Three-phase smart meter signal wiring: Three-phase smart meter and the charger are connected by RS485 communication lines, and RS485 signal wiring of three-phase smart meter is shown in the following figure:...
- Page 66 The smart meter signal port "24" is RS485 signal A ; The smart meter signal port "25" is RS485 signal B. Single-phase smart meter signal wiring: Single-phase meter and the charger are connected by RS485 communication lines, and RS485 signal wiring of single-phase meter is shown in the following figure:...
- Page 67 The smart meter signal port "24" is RS485 signal A; The smart meter signal port "25" is RS485 signal B. 11.2.4 The current transformer clamp signal wiring is shown in the following figure:...
- Page 68 11.2.5 The charger signal wiring The charger and smart meter signal wiring: the charger and smart meter are connected by RS485 communication cable, and the charger RS485 signal wiring is shown in the following figure: The charger signal port "4" is RS485 signal A1 (red arrow in above figure); The charger signal port "5"...
- Page 69 The wiring between the smart meter and the charger is as follows: The charger signal port "4" (RS485 signal A1) is connected with the electricity meter signal port "24" (RS485 signal A); The charger signal port "5" (RS485 signal B) is connected with the electricity meter signal port "25" (RS485 signal B);...
- Page 70 The wiring between current transformer and the charger is as follows: The charger signal port "4" (RS485 signal A1) is connected with the "yellow" cable of current transformer; The charger signal port "5" (RS485 signal B) is connected with the "green" cable of current transformer; The charger signal port "6"...
- Page 71 11.3 Load Balancing Configuration Connect APP, enter administrator mode, open "Load Balancing", select Load Balancing Enable, and set phase, the master and solar working mode. Make sure that the settings are consistent with the actual connection, otherwise the load balancing may not work normally.
- Page 72 Description of load balancing configuration Master: Enable the master, set the master/slave mode of the charger. The charger connected with smart meter is the master, and the charger which is not connected with smart meter is the slave. Configure information of the master as shown in the following figure, and configure the following information according to the actual master/slave situation of the charger.
- Page 73 ECO mode: It is continuous charging mode. When solar energy is sufficient, consume the solar energy as much as possible, and when solar energy is insufficient, it charges the vehicle according to the minimum charging current. ECO + mode: Green and economic mode. When solar energy is sufficient, consume solar energy as much as possible, and when solar energy is insufficient, the allowed maximum consumption of non-solar current is a fixed value, when the consumption exceeds the value, charging is suspended.
- Page 74 Note: Ensure that the device load balancing network configuration is the same for all devices, otherwise communication may fail and the load balancing function will not work normally. Power grid side smart meter: Configure the address of power grid side smart meter (address is in red column), and the address of electricity meter is 2 by default.
- Page 75 For three phase:Selection and input differentnumber(other number is also okay)for Corresponding phase; Maximum current that can be set by user: the maximum allowable current of the current system Three-phase current imbalance: After opening, adjust the three phase currents to make them balance when conditions permit, make the imbalance rate is less than 15%.
- Page 76 11.4.2 2 chargers Networking (WiFi connection) When conduct networking of 2 chargers through WiFi (routers must be equipped), turn on the load balancing function on the APP for both of them, set the master charger and slave charger modes (1 master and 1 slave), and in the load balancing interface, set the "Networking Configuration"...
- Page 77 11.4.3 Multiple chargers Networking When conduct networking of multiple chargers through WiFi or using network cable (router must be equipped, and in case of networking with network cable, it can also be equipped with switchboard). Turn on the load balancing function on APP for all of the chargers, set master charger and slave charger modes (1 master and multiple slaves), and in the load balancing interface, set "Networking Configuration", both of WiFi or Ethernet are allowed.
- Page 79 12. Upgrade of the system 12.1 Local APP upgrade 12.1.1 Connect the charger to the network through Ethernet (WiFi or 4G), open the mobile APP, and under the administrator mode, enter the remote upgrade interface, as shown in the following figure: 12.1.2 Copy the "URL"...
- Page 81 12.1.4 After reconnecting and logging in to the APP, the interface of successful or failed upgrade is shown in the figure below: 12.2 Remote OCPP upgrade 12.2.1 Connect the charger to OCPP platform through Ethernet (WiFi or 4G); 12.2.2 Send the "URL" of the upgrade pack to the OCPP platform, and OCPP will issue the upgrade pack to the charger, the upgrade is completed.
- Page 82 13,SIM Card Configuration 13.1 SIM Card Installation When using 4G/5G networking, you need to install a SIM card on the charger. The schematic diagram as follows: After the SIM card is installed in place, open the manufacturer APP, select 4G/5G in the APP network configuration interface, and configure the SIM card APN information, as shown in the following figure:...
- Page 83 13.2 SIM card removal When not using the 4G/5G networking, open the charger maintenance bin and take the SIM card out. When taking out the SIM card, press the SIM card first, and then take out the SIM card after the it pops up, as shown in the following figure:...
- Page 84 14,Troubleshooting Fault info Reason Solution When the PE cable is not connected, The PE cable is not connected or check whether the TT, IT, TN systems Abnormal Grounding there is a problem with the system settings are set to the expected results. If Fault settings.
- Page 85 Restart the charger 3 times in a row to Metering module chip reading see if the fault eliminated. If it is not Metering Failure Fault incorrectly or metering chip eliminated, the metering chip is failure. damaged, return the charger to factory for repair.
- Page 86 The temperature of the socket is Socket overtemperature Stop charging and wait for the relay to higher than the over temperature Fault protection threshold of the socket cool down before charging again. (115±5℃.) It is detected that the AC leakage Restart the charger 3 times in a row to Leakage Protection Fault the DC≥...
- Page 87 PE line leakage current ≥30mA Restart the charger 3 times in a row to or three-phase unbalanced N line see if the fault is eliminated, if not, Leakage Fault Of PE Line voltage ≥70V and PE return it to the factory for repair. disconnection.
- Page 88 Importer: xxx Address: xxx WIFI(Only 2.4G wireless technology is supported): Frequency:2412MHz -2472MHz Output Power:802.11 b/g/n:<18.5dBm BLE: Frequency:2402-2480MHZ Output Power:1.8dBm RFID: Frequency:13.56MHZ GSM/LTE: Frequency: GSM 850/900/1800/1900 MHz LTE-FDD B1/B3/B5/B7/B8/B20/B28 LTE-TDD B38/B40/B41 Output Power: GSM850:33 dBm EGSM900:33 dBm DCS1800:30 dBm PCS1900:30 dBm LTE-FDD B1/B3/B5/B7/B8/B20/B28:23 dBm LTE-TDD B38/B40/B41:23 dBm...
- Page 89 Download APP Download the "LEcharger" app on Google Play(Android) or App Store(ISO). Launch Tech Co., Ltd Launch Industrial Park, No. 4012, North of Wuhe Rd, Bantian Street, Longgang, Shenzhen ZIP: 518129 Tel: +86-755-84528888 Fax: +86-755-84528889 http://www.cnlaunch.com China ________________________________________ Importer: LAUNCH Europe GmbH Heinrich-Hertz-Str.
Need help?
Do you have a question about the EVC11C and is the answer not in the manual?
Questions and answers