Table of Contents
Advertisement
Quick Links
Advertisement
Table of Contents

Related Manuals for Akuvox S560 Series

Summary of Contents for Akuvox S560 Series
- Page 1 About This Manual About This Manual...
- Page 2 Thank you for choosing the Akuvox S560 series indoor monitor. This manual is intended for the administrators who need to properly configure the indoor monitor. This manual applies to the 560.30.10.10 version, and it provides all the configurations for the functions and features of the S560 series indoor monitor.
-
Page 3: Product Overview
Product Overview Product Overview S560 series is a Linux SIP-based indoor device. It can be connected to the Akuvox door phone for audio communication and unlocking and can be deployed and maintained on the SmartPlus platform along with Akuvox door phones and SmartPlus app. It is economical, easy, and simple to... -
Page 4: Model Specifications
Model Specifications Model Specifications Model Model S560 S560 Speaker Main unit: 8Ω1W Earpiece: 32Ω0.25W -36dB Card Reader Wi-Fi Bluetooth RJ45 x1, 10/100Mbps Indicator light Power Supply 12VDC/1A or IEEE 802.3af PoE... - Page 5 Introduction to Configuration Menu Introduction to Configuration Menu Status Status: This section gives you basic information such as product information, network Information, account information, etc. Account Account: This section concerns the SIP account, SIP server, proxy server, transport protocol type, audio codecs, DTMF, etc. Network Network: This section mainly deals with DHCP &...
-
Page 7: Access The Device
Press the # # key for about 5 seconds and the device will automatically broadcast its IP address. Use IP Scanner Use IP Scanner You can use the IP scanner tool to check the device IP on the same local network. Note Note Download IP scanner: https://knowledge.akuvox.com/docs/akuvox-ip-scanner?highlight=IP https://knowledge.akuvox.com/docs/akuvox-ip-scanner?highlight=IP See detailed guide: https://knowledge.akuvox.com/v1/docs/en/how-to-obtain-ip-address-via-ip- https://knowledge.akuvox.com/v1/docs/en/how-to-obtain-ip-address-via-ip- scanner?highlight=IP%20Scanner scanner?highlight=IP%20Scanner... - Page 8 Log into the Device Setting W eb Interface Log into the Device Setting W eb Interface To log into the device web interface where you can configure and change parameters, enter the device IP address on the browser. The default user name and password are both admin admin.
-
Page 9: Language Setting
Language and Time Setting Language and Time Setting Language Setting Language Setting When you first set up the device, you might need to set the language to your need or you can do it later if needed. And the language can be set up on the device web interface according to your preference. -
Page 10: Daylight Saving Time Setting
Preferred/Backup Server Preferred/Backup Server: enter the NTP server address. The backup server will take effect when the preferred server is invalid. Update Interval Update Interval: to configure the interval between two consecutive NTP requests. You can also set up time manually on the same interface, select the Manual Manual checkbox and input time data. - Page 11 Enabled Enabled : to enable or disable daylight saving time. You can also configure it to make the device adjust the daylight saving time automatically. Offset Offset: to set the offset value, it is 60 minutes as default, setting the clocks an hour ahead of the standard time.
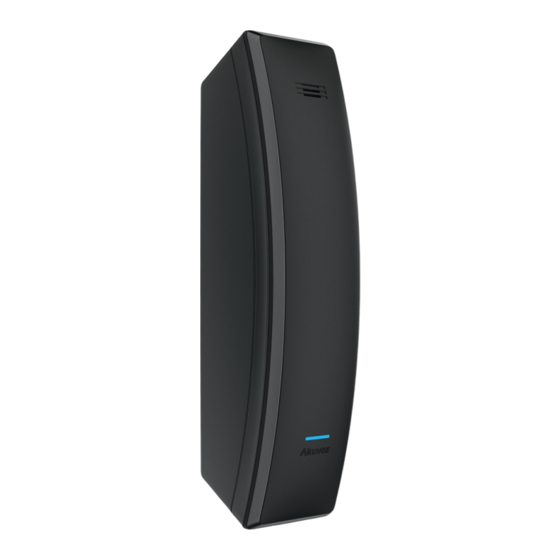
- Page 12 Indicator Light Setting Indicator Light Setting Indicator Light Display Status Indicator Light Display Status The device has an indicator light installed on the top surface. The light colors vary by the state the device is currently in. You can change light colors and states that represent the device status on the Phone >...
- Page 13 Color Color Indicator Light Status Indicator Light Status Color Code Color Code Blue A solid blue light Normal status A fast blinking blue light Ringing A slowly blinking blue light During a call or calling Purple A solid purple light Do Not Disturb is on A solid purple light The handle is picked up...
-
Page 14: Volume Configuration
Sound and Volume Configuration Sound and Volume Configuration S560 provides you with various types of ringtones and volume configurations. You can configure them on the device web interface. Volume Configuration Volume Configuration You can set up volumes on the device Phone > Audio Phone >... - Page 15 Note Note The uploaded file should be .WAV .WAV format within 250K.
-
Page 16: Network Setting
Network Setting Network Setting Device Network Configuration Device Network Configuration You can check the indoor monitor’s network connection info and configure the default DHCP mode (Dynamic Host Configuration Protocol Dynamic Host Configuration Protocol) and static IP connection for the device on the device's web interface. - Page 17 For the device network data transmission purpose, the device needs to be set up with a range of RTP ports (Real-time Transport Protocol Real-time Transport Protocol) for establishing an exclusive range of data transmission in the network. To configure it on the device Network > Advanced > Local RTP Network >...
- Page 18 Discovery Mode Discovery Mode : select Enabled Enabled to turn on the discovery mode of the device so that it can be discovered by other devices in the network, and select Disabled Disabled if you want to conceal the device so as not to be discovered by other devices. Device Node Device Node : specify the device address by entering device location information from the left to the right: Community, Unit, Stair, Floor, Room in sequence.
- Page 19 SIP Account Registration Each device needs a SIP account to make and receive SIP calls. Akuvox intercom devices support the configuration of two SIP accounts, which can be registered under two independent servers. To configure the SIP account, go to Account > Basic > SIP Account Account >...
- Page 20 SIP servers enable devices to establish and manage call sessions with other intercom devices using the SIP protocol. They can be third-party servers or built-in PBX in Akuvox indoor monitor. To configure it on the device Account > Basic > SIP Server 1 Account >...
- Page 21 Parameter Set-up : Parameter Set-up Preferred/Backup Outbound Proxy Server Preferred/Backup Outbound Proxy Server: set up preferred/backup server IP for the outbound proxy server. Preferred/Backup Outbound Proxy Server Port Preferred/Backup Outbound Proxy Server Port: enter the port number to establish a call session via the outbound proxy server or the backup one.
- Page 22 Data Transmission Type Configuration Data Transmission Type Configuration Akuvox intercom devices support four data transmission protocols: User Datagram User Datagram Protocol(UDP), Transmission Control Protocol(TCP Protocol(UDP) Transmission Control Protocol(TCP ), Transport Layer Security Transport Layer Security(TLS TLS ), and DNS-SRV DNS-SRV .
-
Page 24: Call Setting
Call Setting Call Setting Direct IP Call Direct IP Call IP calls and SIP calls can be made directly on the intercom device by entering the IP number on the device. Press Button to Make a Call Press Button to Make a Call You can quickly make a call with the preset number by pressing on the device. -
Page 25: Call Forwarding
Parameter Set-up : Parameter Set-up Key: each DDS Key corresponds to the numeric key on the device from 1-9. Name Name : name the key. It supports up to 63 bytes. Value Value : enter the device SIP/IP number to be called. Call Forwarding Call Forwarding Call Forward is a feature used to redirect an incoming call to a specific third party. - Page 26 No Answer Forward: No Answer Forward: incoming calls will be forwarded to a specific number if the device is not picked up within no answer ring time. Target Number Target Number: to enter the specific forward number if the indoor monitor enables Always Forward / Busy Forward / No Answer Forward Always Forward / Busy Forward / No Answer Forward .
- Page 27 Parameter Set-up : Parameter Set-up Multicast Multicast Group Group : set the device in one of the groups or disable this function. Multicast Multicast List List: to fill in the parameters of the multicast group. Indoor monitor will establish multicast calls to other indoor monitors which are set in the multicast group. Listen List Listen List: to fill in the parameters of listen group.
-
Page 28: Audio Codec Configuration
Audio Codec Configuration Audio Codec Configuration The device supports four types of Codec (PCMU, PCMA, G729, and G722) for encoding and decoding the audio data during the call session. Each type of Codec varies in terms of sound quality. You can select the specific codec with different bandwidths and sample rates flexibly according to the actual network environment. - Page 29 Door Access Control Configuration Door Access Control Configuration Remote Relay Switch Setting Remote Relay Switch Setting You can use the unlock tab during the call to open the door. And you are required to set up the same DTMF code in the door phone and indoor monitor. Go to the web Phone >...
- Page 30 To do this configuration on web Phone > Relay > WebRelay Setting Phone > Relay > WebRelay Setting interface. IP Address, IP Address, User Name and Password User Name Password are provided by the web relay manufacturer. Parameter Set-up : Parameter Set-up Password Password : the passwords are authenticated via HTTP and you can define the passwords...
- Page 32 Door Unlock Configuration Door Unlock Configuration Door Unlock by DTMF Code Door Unlock by DTMF Code In order to achieve door access via DTMF code or some other applications, you are required to properly configure DTMF in order to establish a DTMF-based data transmission between the door phone and other intercom devices for third-party integration.
- Page 33 Parameter Set-up : Parameter Set-up IP/SIP IP/SIP : enter IP address or SIP account to trigger a certain remote relay of doorphone by sending HTTP message. Username Username : enter the device username to be used as a part of HTTP command to trigger the relay.
- Page 34 Unlock Key Configuration Unlock Key Configuration You can also set the DDS keys as the unlock key and select the desired relay trigger type. To set it up on the Phone > Function Key Phone > Function Key interface. Parameter Set-up : Parameter Set-up Type Type : select Unlock...
-
Page 35: Voice Encryption
Security Security Voice Encryption Voice Encryption The encryption function provides you with greater security for the intercom call. And Akuvox indoor monitors support three modes of voice encryption: SRTP(Compulsory), SRTP(Optional), SRTP(Compulsory), SRTP(Optional), ZRTP(Optional). ZRTP(Optional) To configure this feature on web Account > Advanced > Encryption Account >... -
Page 36: Action Url
The device allows you to set up specific HTTP URL commands that will be sent to the HTTP server for the predefined actions. Relevant actions will be initiated if there occur any changes in the relay status, input status, and PIN code for security purposes. Akuvox Action URL: Akuvox Action URL: Event... -
Page 37: High Security Mode
For example: http://192.168.16.118/help.xml? mac=$mac:ip=$ip:model=$model:firmware=$firmware:card_sn=$card_sn To configure it on the Phone > Function Key Phone > Function Key interface. Parameter Set-up : Parameter Set-up Type Type : select Action URL Action URL . Value Value : enter the HTTP command triggered by pressing the corresponding key. High Security Mode High Security Mode High security mode is designed to enhance the security, for example, it optimizes the password... - Page 38 2. Enabling this mode will make the old version tools unusable. To continue using them, you must upgrade them to the following versions. PC Manager: 1.2.0.0 IP Scanner: 2.2.0.0 Upgrade Tool: 4.1.0.0 SDMC: 6.0.0.34 3. The supported HTTP format varies depending on whether high secure mode is enabled or disabled.
-
Page 39: Firmware Upgrade
Firmware Upgrade Firmware Upgrade Akuvox devices can be upgraded on the device web interface. Navigate to Upgrade > Basic Upgrade > Basic interface and click Select File Select File . Note Note The file uploaded should be in .rom .rom format. - Page 40 Backup Backup You can import or export encrypted configuration files to your Local PC. Go to Upgrade > Advanced > Others Upgrade > Advanced > Others interface if needed. Note Note The file imported should be in .tgz, .conf .tgz, .conf, or .cfg .cfg format.
- Page 41 Provisioning Principle Auto-provisioning is a feature used to configure or upgrade devices in batch via third-party servers. DHCP, PNP, TFTP, FTP, and HTTPS are the protocols used by the Akuvox devices to access DHCP, PNP, TFTP, FTP, and HTTPS the URL of the address of the third-party server which stores configuration files and firmware, which will then be used to update the firmware and the corresponding parameters on the device.
- Page 42 Autop Schedule Autop Schedule Akuvox provides you with different Autop methods that enable the device to perform provisioning for itself according to the schedule. To set up the schedule on device web Upgrade > Advanced > Automatic Autop...
- Page 43 Parameter Set-up : Parameter Set-up Mode Mode : Power On: select Power on, if you want the device to perform Autop every time it Power On boots up. Repeatedly: select Repeatedly, if you want the device to perform autop Repeatedly according to the schedule you set up.
- Page 44 Parameter Set-up : Parameter Set-up URL : set up TFTP, HTTP, HTTPS, FTP server address for the provisioning. User Name User Name : set up the user name if the server needs a user name to be accessed to. Password Password : set up the password if the server needs a password to be accessed to.
-
Page 45: Pnp Configuration
HTTP: http://192.168.0.19/ (use the default port 80) http://192.168.0.19:8080/ (use other ports, such as 8080) HTTPS: https://192.168.0.19/ (use the default port 443) Akuvox does not provide user specified server. Please prepare TFTP/FTP/HTTP/HTTPS server by yourself. PNP Configuration PNP Configuration Plug and Play (PNP) is a combination of hardware and software support that enables a computer system to recognize and adapt to hardware configuration changes with little or no intervention by a user. - Page 46 Call Log Call Log If you want to check on the calls inclusive of the dial-out calls, received calls, missed calls, and forwarded calls in a certain period, you can check and search the call log on the device web interface and export the call log from the device if needed.
- Page 47 Parameter Set-up Log Level Log Level: select log levels from 0 to 7 levels. You will be instructed by Akuvox technical staff about the specific log level to be entered for debugging purpose. The default log level is 3. The higher the level is, the more complete the log is.
-
Page 48: User Agent
Parameter Set-up : Parameter Set-up PCAP Specific Port PCAP Specific Port: select the specific ports from 1-65535 so that only the data packet from the specific port can be captured. You can leave the field blank. PCAP PCAP : click Start Start tab and Stop Stop tab to capture a certain range of data packets before clicking Export... -
Page 49: Password Modification
Password Modification Password Modification Modify Device W eb Interface Password Modify Device W eb Interface Password To modify web interface password, you can do it on device web interface. Select admin admin for the administrator account and user user for the user Account. Click the Change Password Change Password tab to change the password. - Page 51 System Reboot & Reset System Reboot & Reset Reboot Reboot You can reboot the device by inserting a pin into the reset hole and holding it for three seconds. You can also operate it on the device web interface. Navigate to Upgrade > Basic Upgrade >...
- Page 52 The device system can also be reset on device web interface without approaching the device. Go to Upgrade > Basic interface. Upgrade > Basic Powered by Document360...
Need help?
Do you have a question about the S560 Series and is the answer not in the manual?
Questions and answers