Advertisement
Quick Links
Advertisement

Subscribe to Our Youtube Channel
Related Manuals for BENIFERRO Speedy Pool Twin

Summary of Contents for BENIFERRO Speedy Pool Twin
- Page 1 Please read this manual carefully before use. Speedy Pool Twin Wi-Fi Full Instruction Manual...
- Page 2 Contents Introduction ......................3 Safety........................3 Installation of Wifipool App and connection ....Error! Bookmark not defined. Physical installation ....................12 ......................... 12 Installation Overview ..................13 Tools and materials needed ................14 Part Descriptions ....................14 Temperature sensor and flow switch: ............... 14 Injection probes ....................
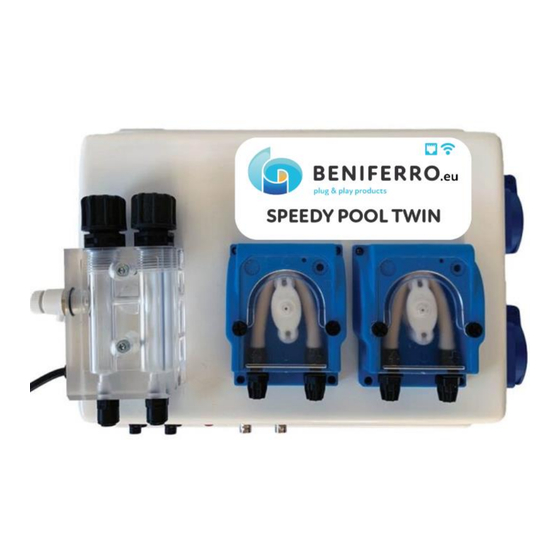
- Page 3 From 2024, Beniferro will introduce the Speedy Pool Twin, an advanced device specially designed to accurately monitor the pH value and Redox (chlorine) levels of your pool. The Speedy Pool Twin provides pool owners with a reliable way to monitor and maintain their water quality, ensuring a safe and healthy swimming climate.
- Page 4 • In case of damaged parts, it is preferable to purchase replacement parts from the manufacturer. Use only original standard parts. Failure to do so will void your warranty. • Beniferro is only liable for the functionality of the appliance, and not for any consequential damages.
- Page 5 • To ensure proper operation of peristaltic pumps, check the pumps weekly for leaks. In the event of a leak, please refer to the complete manual of your installation at www.beniferro.eu • Ensure that the probes are kept constantly moist during transport, especially when they are transported for maintenance or repair work at the supplier's factory.
- Page 6 Pair your equipment • Pair the Speedy pool twin with your home Wi-Fi network and your phone. Please read the Wifipool app manual for more information. Perform the pairing internally, using an ethernet cable near the Wi-Fi router and before physical installation. Read the Wi-Fi Pool app manual for more information.
- Page 7 Once downloaded, create your Wifipool account After creating your account, using a valid email address, the "Wifipool App" will send you an email for verification (check your spam and move the email from spam to inbox to confirm) You are now ready to create your pool. Click on the + to add your pool to the app. Give your pool a clear, recognizable name Step 2.
- Page 8 other, if you apply the steps from Ethernet to Wi-Fi or vice versa this can cause problems (see Troubleshooting) Go to the pool settings page. Then click on the plus sign next to "Control plugs and measurement sensors". This allows you to add the handlebar plugs and the separate measuring modules.
- Page 9 - Scan the barcode of your measurement and control box via the option "start scanning" or "start searching for devices" - Select your pool's Wi-Fi network - Enter password. A few seconds later, your pool is connected and the automation is entered. If your installation contains pH and Redox probes, you will need to calibrate now.
- Page 10 Please note: Beniferro does not provide free technical support for Wi-Fi pairing issues if you have an Ethernet device. See manual "Wifipool app and simple devices", for full instructions. AUTOMATIONS There is no level measurement with the speedy 2 Temp Probe The automations are automatically loaded into the app when the devices are paired with your smartphone.
- Page 11 power start-up, to ensure that the pH and Redox probes are balanced before starting chemical treatment. Stop the pH pump and the Chlorine pump can set a timer before the filter pump shuts off. • Create a notification scheduler and make sure the water treatment has had a chance to reach an equilibrium.
- Page 12 6. Enter a value. Although the recommended pH level is 7.6, you can manually adjust it according to your preferences. PHYSICAL INSTALLATION General The factory supplies the water treatment unit electrically connected and in some cases already mounted on a plate or in a box. Modifications to the unit must be carried out by trained personnel with knowledge of pool technology and electrical systems.
- Page 13 o Make sure the pH/chlorine adjustment does not work if there is no flow through the pH injection/chlorinator lines. This can be done by using a flow switch and/or by connecting the electrical connections of the dosing pump / chlorinator to the same electrical line as the filter pump.
- Page 14 - Hoses and connectors (included with the system) - pH and RX sensors (included with the system) Part Descriptions The following components are included with the Speedy Pool Twin system: Temperature sensor and flow switch: Temperature sensor: Measures the temperature of the pool water and provides this information to the control unit.
- Page 15 Injection probes 1 Temperature sensor and flow switch pH probe (blue), Level switches RX Probe (Red), (optional) Calibration Solutions Installation steps 1. Assemble the Control Unit 1. Choose a Location: Select a spot on the wall within range of the pool and filtration system.
- Page 16 2. Connect the Sensors: a. Connect the pH sensor and RX sensor to their respective inputs on the control unit. The sensors are usually color-coded for easy identification (pH in blue and RX in red). 2. Position the Probes: a. Place the probes in the designated ports on the water circulation system.
- Page 17 5. Power and Calibration 1. Turn on: - Connect the control unit to a power source and turn it on. 2. Calibrate the Sensors: - Follow the manufacturer's instructions to calibrate the pH and RX sensors via the control unit interface or the accompanying mobile app. 6.
- Page 18 - Diagram 2: Close-up of the control unit with the pH and RX motors, sensor connections and hose paths. By following these steps, you should have the Speedy Pool Twin system installed and operational, keeping your pool water at optimal quality.
- Page 19 CALIBRATION PH AND RX Calibration • The pH and Redox probes should be calibrated regularly and the correct operation should be verified by means of a high-quality color measurement method (e.g. Poollab) • Connect the pH and redox measuring heads to the BNC terminal (Figure 4-5) in the positions provided for this purpose: pH probe (blue connection) top, RX probe (red) bottom.
- Page 20 MAINTENANCE INSTRUCTIONS Maintenance should be performed at the recommended time and frequency as stated in the manual. Maintenance of the water treatment Maintenance should be carried out by a person who understands swimming pool technology. Be sure to take the necessary safety precautions before starting maintenance, such as: Turn off the power before starting maintenance Always wear protective gloves and goggles when working on installation.
- Page 21 Maintenance of the chlorine injection nipple Anti kalk The chlorine injection nipple can leak due to clogging by saling / Calcium carbonate crystals. This can be prevented by adding anti-scalinig to the chlorine. How do you prevent limescale from injection nipples? 1.
- Page 22 o Reduced or stopped chlorine flow o Leakage from the injection nipple itself o Swelling and leakage of peristaltic tubes Such problems not only jeopardize operational efficiency but also pose safety risks. In addition, prolonged presence of tarnishing can cause corrosion in the equipment. How to descale the injection nipples? First, it is important to understand the construction of the injection system.
- Page 23 The deposit can react with vinegar and produce CO2 gas. Note: Liquid chlorine reacts with vinegar to produce gaseous and highly dangerous (toxic and corrosive) chlorine gas. It is imperative to flush the injection nipple thoroughly with water before and after vinegar treatment.
- Page 24 Start-up spring Recalibrate the pH and RX probes. Check for leaks. Check the salt level and adjust it. Place and grease – with silicone grease – the white peristaltic tube and rollers in. Correct pH, if necessary temporarily dose pH+ (manual or automatic). At correct pH (7.2 - 7.6): Make sure pH- is used and set in the app.
Need help?
Do you have a question about the Speedy Pool Twin and is the answer not in the manual?
Questions and answers