Advertisement
- 1 Introduction
- 2 Service Disable
- 3 General Understanding
- 4 General Operation
-
5
Setup Programming
- 5.1 Automatic System Calibration (Suggested)
- 5.2 Manual Range System Calibration (Alternative to Automatic Calibration)
- 5.3 Manually Raise/Lower
- 5.4 Tank Pressure Mode
- 5.5 Turning Ride-Height-On-Start ON/OFF
- 5.6 Turning RideMonitor Mode ON/OFF
- 5.7 RideMonitor Mode Accuracy Level
- 5.8 Adjusting Active Accuracy Level
- 6 Operation Trouble Indication/Diagnosis
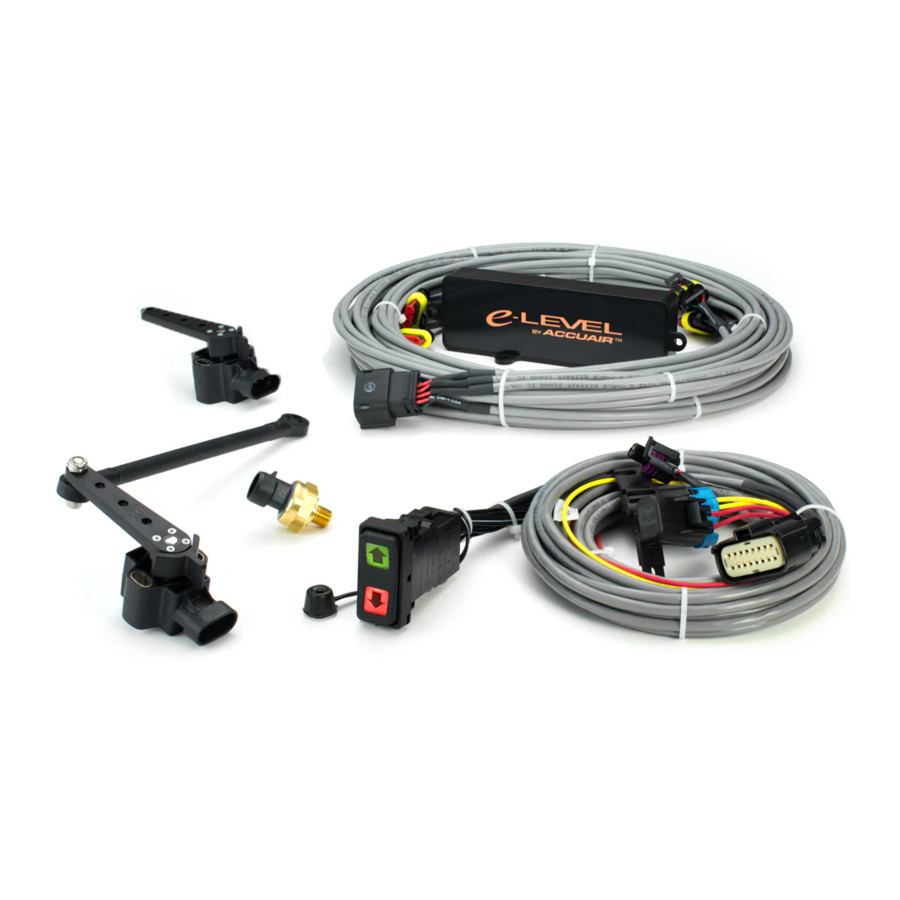
- 7 System Diagram
- 8 Documents / Resources
Introduction
Thank you for purchasing the revolutionary e-Level™ system by AccuAir.
This system manages the height of up to 4 Air Springs and offers never before seen accuracy in all applications by constantly learning your vehicle's characteristics. Through the use of advanced height monitoring techniques, this system automatically corrects for changes in load, whether driving or parked, minimizing user input and maximizing accuracy throughout your driving experience. To enhance the entire system's performance and reliability, the AccuAir e-Level™ also manages your Air Compressor(s) to keep onboard air at an ideal pressure for your application.
To maximize functionality, the AccuAir e-Level™ allows you to select from three distinct vehicle heights through a Rocker Switch:
- Ride Height (The height that you will typically drive your vehicle at).
- Low/Cruise (Typically set at 10% of your total suspension travel).
- High/Extra Clearance (Typically set at 90% of your total suspension travel to increase mobility and clear driving obstacles).
Service Disable

For all under vehicle maintenance, you must first disable the air system by removing the main system fuse located near the battery.
General Understanding
For simplicity of use and understanding we refer to the four wheels of a vehicle by number. Instead of using "Left Front", or "Right Front" etc. Refer to the following diagram for labeling:

General Operation
Dump/Kneel
While driving or parked, you may choose to Dump/Kneel the Air Springs to 10% of their total travel for loading, etc.
Press the "![]() " Button momentarily.
" Button momentarily.
The "![]() " Arrow will flash until Ride Height is resumed.
" Arrow will flash until Ride Height is resumed.

Raise/Extra Clearance:
While driving or parked, you may choose to Raise the Air Springs to 90% of their total travel to clear an obstacle.
Press the "![]() " Button momentarily.
" Button momentarily.
The "![]() " Arrow will flash until Ride Height is resumed.
" Arrow will flash until Ride Height is resumed.

Return To Ride Height:
From Dump/Kneel Position:
Press the "![]() " Button momentarily.
" Button momentarily.
From the Raised/Extra Clearance Position:
Press the "![]() " Button momentarily.
" Button momentarily.
The "![]() " Arrow will stay ON while at Ride Height.
" Arrow will stay ON while at Ride Height.

Setup Programming
Automatic System Calibration (Suggested)

Do NOT use this procedure for KELDERMAN Systems because suspension damage will occur. Use the procedure below.
Before the system will operate, it must be calibrated to learn the vehicle characteristics. This process should be repeated if any air suspension components get changed or replaced in the future.
 NOTE: Your system was shipped with the Tank Pressure Mode set at 150 PSI. If you have High Pressure Compressor(s) you can change the Tank Pressure Mode to 175 PSI or 200 PSI, before calibrating below.
The system will automatically Raise/Lower the vehicle in the next procedure. Remove all obstructions and keep clear of vehicle before proceeding.
The vehicle needs to be on level ground with the wheels pointed straight ahead. Leave vehicle running to power the Compressor(s) during this procedure.
Automatic Calibration:
Turn the Ignition OFF. Then hold Program " " Button while turning the Ignition ON.

The system will then begin adjusting the vehicle throughout its total travel. This process requires no user interaction and should take no more than 15 minutes depending on the size of your Compressor(s) and Tank(s).
Both the "![]() " and "
" and "![]() " Arrow will flash slowly during calibration. The "
" Arrow will flash slowly during calibration. The "![]() " Arrow will be on when calibration is complete, indicating that the system is at Ride Height (currently saved at 50% of your total travel).
" Arrow will be on when calibration is complete, indicating that the system is at Ride Height (currently saved at 50% of your total travel).
When calibration is complete the positions will be saved as follows:
- Position #1 = 10% of total suspension travel.
- Position #2 = 50% of total suspension travel.
- Position #3 = 90% of total suspension travel.
To re-save these heights to your preference.
Manual Range System Calibration (Alternative to Automatic Calibration)
Maximum Height will be determined by you; instead of your mechanical suspension limits! This procedure should only be used on suspensions that are likely to over extend.
Your system must be calibrated to learn your vehicle's characteristics before the automatic leveling features can be used. This process should be repeated if any system components are changed or replaced in the future.
The system will automatically Raise/Lower the vehicle in the next procedure. Remove all obstructions and keep clear of vehicle before proceeding.
The vehicle needs to be on level ground with the wheels pointed straight ahead. Leave vehicle running to power the Compressor(s) during this procedure.
With the Ignition ON, use the Manual Raise/Lower to adjust all four corners until each corner is at your preferred MAXIMUM TRAVEL and the vehicle is level from side to side.
Manual Calibration:
Turn the Ignition OFF. Then hold Program "" Button and the Up "![]() " Arrow while turning the Ignition ON.
" Arrow while turning the Ignition ON.

The system will then begin adjusting the vehicle throughout its total travel. This process requires no user interaction and should take no more than 15 minutes depending on the size of your Compressor(s) and Tank(s).
Both the "![]() " and "
" and " " Arrow will flash slowly during calibration. The "
![]() " Arrow will be on when calibration is complete, indicating that the system is at Ride Height (currently saved at 50% of your total travel).
" Arrow will be on when calibration is complete, indicating that the system is at Ride Height (currently saved at 50% of your total travel).
When calibration is complete the positions will be saved as follows:
- Position #1 = 10% of total suspension travel.
- Position #2 = 50% of total suspension travel.
- Position #3 = 90% of total suspension travel.
To re-save these heights to your preference.
Manually Raise/Lower
Manual Adjustment to a New Height:
In order to save a New Favorite Ride Height, you must first manually adjust each Air Spring to the height that you wish to save using the procedure outlined below. Once you have achieved the desired height on all corners, see "Saving A New Ride Height".

To Adjust Front Air Springs Together (1&2):
Press the Program "" Button 1-Time;
the "![]() " Arrow will flash 1-Time per second. Then within 5 seconds press the "
" Arrow will flash 1-Time per second. Then within 5 seconds press the "![]() " Button to fill or the "
" Button to fill or the "![]() " Button to empty the Air Springs.
" Button to empty the Air Springs.
To Adjust Rear Air Springs Together (3&4):
Press the Program "" Button 2-Times;
the "![]() " Arrow will flash 2-Times per second. Then within 5 seconds press the "
" Arrow will flash 2-Times per second. Then within 5 seconds press the "![]() " Button to fill or the "
" Button to fill or the "![]() " Button to empty the Air Springs.
" Button to empty the Air Springs.
To Adjust Air Spring # 1:
Press the Program "" Button 3-Times;
the "![]() " Arrow will flash 1-Time per second. Then within 5 seconds press the "
" Arrow will flash 1-Time per second. Then within 5 seconds press the "![]() " Button to fill or the "
" Button to fill or the "![]() " Button to empty Air Spring # 1.
" Button to empty Air Spring # 1.
To Adjust Air Spring # 2:
Press the Program "" Button 4-Times;
the "![]() " Arrow will flash 2-Times per second. Then within 5 seconds press the "
" Arrow will flash 2-Times per second. Then within 5 seconds press the "![]() " Button to fill or the "
" Button to fill or the "![]() " Button to empty Air Spring # 2.
" Button to empty Air Spring # 2.
To Adjust Air Spring # 3:
Press the Program "" Button 5-Times;
the "![]() " Arrow will flash 3-Times per second. Then within 5 seconds press the "
" Arrow will flash 3-Times per second. Then within 5 seconds press the "![]() " Button to fill or the "
" Button to fill or the "![]() " Button to empty Air Spring # 3.
" Button to empty Air Spring # 3.
To Adjust Air Spring # 4:
Press the Program "" Button 6-Times; the "![]() " Arrow will flash 4-Times per second. Then within 5 seconds press the "
" Arrow will flash 4-Times per second. Then within 5 seconds press the "![]() " Button to fill or the "
" Button to fill or the "![]() " Button to empty Air Spring # 4.
" Button to empty Air Spring # 4.
If you pass this 5 second window, simply start the process over. When you get finished adjusting one corner, you may increment to the next corner by simply pressing the Program "" Button 1-Time within the 5 second window.
Tank Pressure Mode
Your system was shipped with the Tank Pressure Mode set at 150 PSI. If you have High Pressure Compressor(s) you can change the Tank Pressure Mode to 175 PSI or 200 PSI using the following Procedure:
NOTE: The new Tank Pressure setting will NOT take affect until the system is RE-CALLIBRATED.
Changing Tank Pressure To 150 Mode: (Factory Setting)
Hold the Program "" Button for approximately 3 seconds until both the "![]() " and "
" and "![]() " Arrows flash; then Press the "
" Arrows flash; then Press the "![]() " Button 5-Times to set the Tank Pressure Mode to 150 Mode.
" Button 5-Times to set the Tank Pressure Mode to 150 Mode.

150 Mode:
- 110 psi ON/150 psi OFF
175 Mode:
- 135 psi ON/175 psi OFF
200 Mode:
- 160 psi ON/200 psi OFF
The "![]() " Arrow will turn ON when in 150 Mode.
" Arrow will turn ON when in 150 Mode.
Changing Tank Pressure To 175 Mode:
Hold the Program "" Button for approximately 3 seconds until both the "![]() " and "
" and "![]() " Arrows flash; then Press the "
" Arrows flash; then Press the "![]() " Button 6-Times to set the Tank Pressure Mode to 175 Mode.
" Button 6-Times to set the Tank Pressure Mode to 175 Mode.

The "![]() " and "
" and "![]() " Arrows will turn ON when in 175 Mode.
" Arrows will turn ON when in 175 Mode.
Changing Tank Pressure To 200 Mode:
Hold the Program "" Button for approximately 3 seconds until both the "![]() " and "
" and "![]() " Arrows flash; then Press the "
" Arrows flash; then Press the "![]() " Button 7-Times to set the Tank Pressure Mode to 200 Mode.
" Button 7-Times to set the Tank Pressure Mode to 200 Mode.

The "![]() " Arrow will turn ON when in 200 Mode.
" Arrow will turn ON when in 200 Mode.
Saving A New Dump/Kneel Height:
Once you have manually adjusted each Air Springs to the height that you wish to save:
Hold the Program "" Button for approximately 3 seconds until both the "![]() " and "
" and "![]() " Arrows flash; then Press the "
" Arrows flash; then Press the "![]() " Button 1-Time to save a New Dump/Kneel Height.
" Button 1-Time to save a New Dump/Kneel Height.

The "![]() " Arrow will flash 1-Time.
" Arrow will flash 1-Time.
Saving A New Ride Height:
Once you have manually adjusted each Air Springs to the height that you wish to save:
Hold the Program "" Button for approximately 3 seconds until both the "![]() " and "
" and "![]() " Arrows flash; then Press the "
" Arrows flash; then Press the "![]() " Button 2-Times to save a New Ride Height.
" Button 2-Times to save a New Ride Height.

The "![]() " Arrow will flash 2-Times.
" Arrow will flash 2-Times.
Saving A New Raise/Extra Clearance Height:
Once you have manually adjusted each Air Springs to the height that you wish to save:
Hold the Program "" Button for approximately 3 seconds until both the "![]() " and "
" and "![]() " Arrows flash; then Press the "
" Arrows flash; then Press the "![]() " Button 3-Times to save a New Raise/Extra Clearance Height.
" Button 3-Times to save a New Raise/Extra Clearance Height.

The "![]() " Arrow will flash 3-Times.
" Arrow will flash 3-Times.
Turning Ride-Height-On-Start ON/OFF
Your system was shipped with Ride-Height-On-Start enabled (ON). You may wish to disable (OFF) or re-enable (ON) this feature. When this feature is ON, the system will automatically re-level the vehicle to Ride Height every time that the IGN is switched ON. When this feature is OFF, the system will remain at the last height the vehicle was at when the IGN is switched ON.
To Turn Ride-Height-On-Start (ON)/(OFF):
First, turn the Ignition OFF. Then hold "![]() " while turning Ignition ON.
" while turning Ignition ON.

If this feature was previously ON, then it will be turned OFF and the "![]() " Arrow will light momentarily.
" Arrow will light momentarily.
If this feature was previously OFF, then it will be turned ON and the "![]() " Arrow will light momentarily.
" Arrow will light momentarily.
Turning RideMonitor™ Mode ON/OFF
Your system was shipped with RideMonitor™ Mode enabled (ON). You may wish to disable (OFF) or re-enable (ON) this feature. When RideMonitor™ Mode is ON, the system will Monitor the vehicle's height whenever the IGN is ON and make adjustments for changes in load when deemed necessary. When this feature is OFF, the system will only adjust when prompted by pressing the height selection switch – It will not Monitor the vehicle's height and will not make any adjustments for changes in load.
NOTE: RideMonitor™ Mode should be left ON for maximum accuracy. The only case that it should be turned OFF is if you feel that the system is adjusting too often or inaccurately while driving. In this case, first try re-calibrating the system. If this does not solve the problem, turn the RideMonitor™ Mode OFF and contact the manufacturer for further assistance.
To Turn RideMonitor™ Mode (ON)/(OFF):
First, turn the Ignition OFF. Then hold "![]() " while turning Ignition ON.
" while turning Ignition ON.

If this feature was previously ON, then it will be turned OFF and the "![]() " Arrow will light momentarily.
" Arrow will light momentarily.
If this feature was previously OFF, then it will be turned ON and the "![]() " Arrow will light momentarily.
" Arrow will light momentarily.
RideMonitor™ Mode Accuracy Level
RideMonitor™ Mode Accuracy Level will determine the acceptable variation from saved height for your vehicle (in other words, the distance away from saved height that it will not make a correction for). If you decide that you would prefer that the system was more or less accurate, you can use the procedure below to either increase the accuracy by 8% (Level 3), or decrease the accuracy by 15% (Level 1).
NOTE: The only time that this setting should be changed is if you feel that the system is adjusting too often, or not often enough in it's factory setting (Level 2).
1 = Lower Accuracy & Fewest Adjustments.
2 = Moderate Accuracy & Moderate Adjustments (Factory Setting).
3 = Higher Accuracy & Most Adjustments.
Adjusting Active Accuracy Level
LEVEL 1 = Lower Accuracy & Fewest Adjustments:
Hold the Program "" Button for approximately 3 seconds until both the "![]() " and "
" and "![]() " Arrows flash; then Press the "
" Arrows flash; then Press the "![]() " Button 1-Time to set to Active Level 1.
" Button 1-Time to set to Active Level 1.
1 = Lower Accuracy & Fewest Adjustments.
2 = Moderate Accuracy & Moderate Adjustments.
3 = Higher Accuracy & Most Adjustments.

The "![]() " Arrow will flash 1-Time.
" Arrow will flash 1-Time.
LEVEL 2 = Moderate Accuracy & Moderate Adjustments:
Hold the Program "" Button for approximately 3 seconds until both the "![]() " and "
" and "![]() " Arrows flash; then Press the "
" Arrows flash; then Press the "![]() " Button 2-Times to set to Active Level 2.
" Button 2-Times to set to Active Level 2.

The "![]() " Arrow will flash 2-Times.
" Arrow will flash 2-Times.
LEVEL 3 = Higher Accuracy & Most Adjustments:
Hold the Program "" Button for approximately 3 seconds until both the "![]() " and "
" and "![]() " Arrows flash; then Press the "
" Arrows flash; then Press the "![]() " Button 3-Times to set to Active Level 3.
" Button 3-Times to set to Active Level 3.

The "![]() " Arrow will flash 3-Times.
" Arrow will flash 3-Times.
Operation Trouble Indication/Diagnosis
In the unlikely case of a system component failure during operation, both the "![]() " and "
" and "![]() " Arrows will flash simultaneously and sequentially to indicate the potential failures outlined below.
" Arrows will flash simultaneously and sequentially to indicate the potential failures outlined below.
NOTE: This is the ONLY time that both the "![]() " and "
" and "![]() " Arrows will light up simultaneously during normal operation.
" Arrows will light up simultaneously during normal operation.
| Warning Indication: | Diagnosis: | Possible Cause: |
| Low Pressure Warning | ||
 Both Flash Together 1-time per second | Tank pressure is not increasing after the ECU turns the Compressor(s) ON. | Verify Compressor circuit wiring connections. Check Compressor fuse F2 or F3. Verify Compressor plumbing connections. Check for Compressor relay failure. Check for Compressor failure. Check for Pressure Sensor failure. |
| Pressure Sensor Warning | ||
 Stays On Stays On+ Flashes 1-time per second | Pressure Sensor is not reading. | Verify wiring to Pressure Sensor. Check Pressure Sensor for failure. |
| Valve Operation Warning | ||
| Flashes multiple times + Flashes 1-time per second | Valve(s) are not opening after the ECU turns them ON. | Verify Valve harness wiring connections. Verify Valves plumbing connections. Check Valves for failure. |
| Ride Height Sensor Warning | ||
| Flashes 1-time per second + Stays On | Ride Height Sensor #1 is not reading. | Verify wiring to Ride Height Sensor #1. Check Ride Height Sensor #1 for failure. |
| Flashes 2-times per second + Stays On | Ride Height Sensor #2 is not reading. | Verify wiring to Ride Height Sensor #2. Check Ride Height Sensor #2 for failure. |
| Flashes 3-times per second + Stays On | Ride Height Sensor #3 is not reading. | Verify wiring to Ride Height Sensor #3. Check Ride Height Sensor #3 for failure. |
| Flashes 4-times per second + Stays On | Ride Height Sensor #4 is not reading. | Verify wiring to Ride Height Sensor #4. Check Ride Height Sensor #4 for failure. |
| Ride Height Sensor Travel Warning | ||
Both Flash Rapidly. | Ride Height Sensors travel is found to be too small during calibration. | Verify Sensor Mechanical Linkage Connections. The Ride Height Sensor needs to be remounted to a point in the suspension with more travel. |
| Low Voltage Warning | ||
Both Flash Alternating. | System Voltage has dropped below 10.5V/compressor(s) have been shut OFF. | Start the vehicle to charge the battery. System will then resume normal operation. |
System Diagram

At AccuAir, we pride ourselves on thorough customer service, quality products, and a better driving experience through technologically superior design. Please visit our website or call us toll free to let us know if there is any way that we can help improve your AccuAir experience.
(877) AIR-DOWN (247-3 6 9 6)
www.accuaircs.com
Documents / Resources
References
Download manual
Here you can download full pdf version of manual, it may contain additional safety instructions, warranty information, FCC rules, etc.
Advertisement

Need help?
Do you have a question about the e-Level and is the answer not in the manual?
Questions and answers