PS Audio Stellar Manual
- Owner's reference manual (20 pages) ,
- Instructions for use manual (28 pages)
Advertisement
- 1 Introduction
-
2
Quick Start Guide
- 2.1 Installation Considerations
- 2.2 Digital Inputs Available
- 2.3 DoP
- 2.4 Power Cables
- 2.5 Unpacking and Connections
- 2.6 Register the Unit
- 2.7 Connecting the Device
- 2.8 USB
- 2.9 I2S Input
- 2.10 Connecting the Output
- 2.11 Power On
- 2.12 Set Up Guide
- 2.13 Front Panel Logo Button
- 2.14 Reboot
- 2.15 Main Display
- 3 Operating Manual
- 4 Reference
- 5 Troubleshooting
- 6 Safety Instructions
- 7 Documents / Resources
Introduction
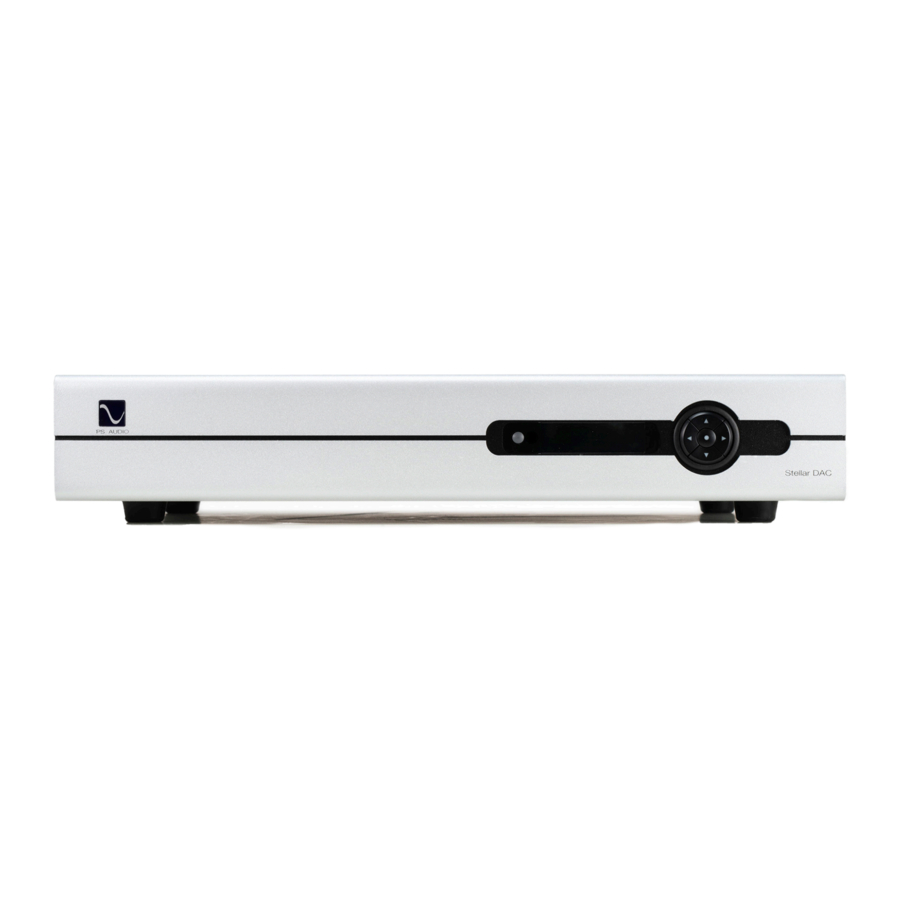
In PS Audio's ongoing quest to bring music lovers closer to the sound of live music in their homes, PS Audio proudly introduces the Stellar DAC, a full-featured, reference-level Digital to Analog converter.
The Stellar DAC features an array of advanced inputs and outputs to accommodate a wide range of audio formats and devices, ensuring compatibility and versatility. Whether your setup includes traditional CD players, modern streamers, or anything in between, the Stellar DAC integrates seamlessly with its remarkable clarity and depth.
Quick Start Guide
Installation Considerations
A good location for Stellar DAC is in a cabinet or on a shelf at an easily accessible height. The IR (infrared) receiver for the remote is located to the left of the display screen. A direct line of sight will help with Stellar DAC's IR sensor.
Digital Inputs Available
Stellar DAC offers multiple digital input choices including: two I2S, two RCA (coax), one optical (S/PDIF), and one USB. All inputs, including USB, are capable of accepting high-definition digital audio signals. The Optical input is capable of 96kHz, 24 bit PCM audio. The Coax inputs are capable of 192kHz, 24 bit PCM audio. I2S handles up to 384 kHz PCM and up to DSD256 while USB is capable of handling up to 352.8 kHz PCM and up to DSD256 (Native or DoP).
Stellar DAC uses an HDMI cable to transfer I2S data. This data can only be used with another compatible component, such as the PerfectWave SACD transport and the AirLens, and will not work in other HDMI equipment as the I2S format incorporated does not comply with the HDMI standards. PS Audio freely publishes its I2S standard and it has been adopted by multiple other manufacturers as well.
DoP
DoP (DSD over PCM) is a standard allowing single rate DSD to travel over S/PDIF (the RCA, and optical inputs are S/PDIF compatible) as well as over USB and I2S. It is not currently possible to send DSD directly over S/PDIF and the DSD files must first be converted to DoP standards to travel this route.
It is possible to send DSD files (without conversion to DoP) over Stellar DAC's I2S inputs as well as USB. Most programs, such as Roon, Audirvana, JRiver Media Center and Foobar 2000, will automatically convert DSD files to the DoP standards on the fly if the appropriate check box has been enabled. There are no sonic penalties for conversion to DoP as the raw DSD data is unaffected by the process.
Power Cables
Your new PS Audio DAC is supplied with a removable AC Power cord. While the supplied cord is of good quality, it is recommended that you replace it with a high-end power cord for optimum performance. It is also recommended that you connect your new Stellar DAC to one of PS Audio's award-winning AC power products such as the P3 or P12 Power Plants.
Unpacking and Connections

- Carefully unpack the unit and place in the chosen location.
- Connect Stellar DAC to your digital sources using the appropriate connections (see Connecting the Device for details).
- Connect the AC cable into the receptacle in back and plug the unit into your Power Plant or the wall.
Register the Unit
PS Audio products come from the factory with a 3-year warranty. Please register your new Stellar DAC. Registration takes just a few minutes, helps us inform you about future upgrades, keeps track of your serial number and allows us to maintain the highest standards of product quality of any company.
To register your new unit, look on the back panel of Stellar DAC and note the serial number. Using any web browser, go to www.psaudio.com, click on Support and select Product Registration from the drop down menu. Once you have completed the registration process, you can go to the PS website and look at the My Registered Products page. The link to this page is located at the top right hand corner of the website once you are logged in. If you do not have web access, you may register the unit via mail or phone. Notification of software upgrades to this product will be available only to registered owners via the web and email.
Connecting the Device
There are multiple methods of connecting the digital inputs of Stellar DAC: through the S/PDIF based Optical and Coax inputs, USB, and I2S S/PDIF is a serial digital interface available as an optical source (Optical) or coaxial source (RCA). Connect to your digital sources with any of these cable types.
USB
USB is the preferred method of connection for a direct-to-computer connection and Stellar DAC is capable of processing up to 352.8 kHz bit PCM data and up to DSD256 (native or DoP). Connect Stellar DAC to your computer using a well regarded USB cable and make sure to set the output of your computer to the highest 24 bit standard. Once connected, your computer should automatically install Stellar DAC as a new device if you have a Mac. If you have a Windows operating system, you will need to download the driver from our website and install it on your Windows computer.
I2S Input
I2S is available through several manufacturers as well PS Audio equipment, such as the PerfectWave SACD Transport or the AirLens. I2S is a parallel data connection with separate clocks and data and transferred via an HDMI cable. I2S will typically provide a better performance standard than USB or any serial data stream such as S/PDIF or XLR/EBU.
You can connect one or all five inputs at the same time. For instance, you can connect the USB input to your computer and the coax input to your CD player. Then you can simply choose which one to listen to from the front panel (or the remote) that selects the input. If you are using USB, make sure both the computer and Stellar DAC are connected and powered up. USB also requires a driver to operate properly. Mac computers running OSX have the driver built in. Windows based computers require the PS Audio USB driver to be installed. Download the driver from our website https://www.psaudio.com/pages/download-drivers. Use the zip file titled "PS Audio USB Audio Drivers_setup_WHQL_v2.zip." Stellar DAC will show up under Device Manager.
Stellar DAC is designed to drive a power amplifier directly or as another input on a preamplifier. The outputs of Stellar DAC are high-performance, high current outputs that can drive long lengths of interconnect cable without degradation.
Connecting the Output
Stellar DAC has two types of analog outputs, balanced XLR or single ended RCA. Both can be used at the same time. Be aware that most amplifiers and preamplifiers will produce 6dB higher level with the balanced outputs relative to the single ended outputs. If you are using both outputs, be advised they will be at different levels. Our preference for connection to a power amplifier or preamplifier is through the balanced XLR outputs of Stellar DAC.
RCA or single ended outputs will be the typical outputs as many preamplifiers, surround processors receivers, integrated amplifiers, and power amplifiers have only this standard type of input.
Plug either the RCA or the XLR outputs of Stellar DAC into a line level input on the preamp, integrated, amplifier, or subwoofer. Do NOT plug the output of Stellar DAC into a phono or equalized input of any type.
Power On
Turn the AC power switch in the rear of Stellar DAC to the ON position. The power switch is located just left of the AC inlet. "PS Audio" will flash across the display.
Set Up Guide
The first time you power on the unit, the setup guide will ask questions to help you configure the unit. Use the left and right arrow on the control ring to highlight your answer and the center button on the control ring to select it. Please note the below:
- If you select No to the question "Do you have a preamp?", fixed volume is disabled and the default volume will be set to 25. The main display will show the volume.
- If you select Yes to the question "Do you have a preamp?", fixed volume will be set to 100 and the main display will show the sample rate.
- If this was not your intention, you can cancel it on the second screen. The second screen informs you that the fixed volume will be set to 100. You can choose OK or Cancel. Simply highlight and select Cancel if you don't want to set a fixed volume.
Front Panel Logo Button

The front panel PS logo button, located on the upper left hand corner of the unit, is the Ready/ Operational Mode control for Stellar DAC. This control has two modes: Ready Mode and Operational Mode. Ready Mode (Idle) turns off the display and outputs while keeping power on to critical internal circuitry, including power supply capacitors, thermally sensitive semiconductors and integrated circuits. Operational Mode turns the display and outputs on.
Press the logo button to activate Ready Mode or to place Stellar DAC in Operational Mode. When pressed to activate the Ready Mode, the display as well as the outputs are turned off, but all the unit's critical internal circuitry remains active.
If you wish to conserve energy consumed by Stellar DAC, it will be necessary to use the rear panel power switch. Using this rear panel switch will remove power from critical components. In order to gain maximum performance levels, you will need to turn the DAC's power on at least 1 hour before use.
Reboot
Should Stellar DAC need to be rebooted, use the rear panel power switch to power cycle the instrument. It's best to wait 30 seconds before powering back on.
Main Display
Information on Main Display:
- Depending on how your DAC was configured during the setup guide, the main display will either show the volume (if you said No to using a preamp) or the sample rate (if you said Yes to using a preamp).
Note: In addition to volume and sample rate, input can also be the main display. Please see the section on Display Mode in the System Sub-Menu for more on this and other display options.
- The red or green dot in the corner indicates whether the current input is connected. A green dot indicates the connection is good.
![]()
- For USB, a green dot indicates that a USB cable is connected to a USB host. A red light indicates that there's no connection to a USB host.
- For S/PDIF and Optical, a green dot means there's an active signal on that input with a valid sampling rate.
- For I2S, a green dot means there's a PS Audio I2S source connected with a valid signal.
- When certain menu options are selected, small icons will appear on the display. Please note that the example to the right has volume as the main display.

Operating Manual
Input
To change the input, press the right or left arrow keys on the control ring. Once you reach the desired input, stop scrolling to select it. You can also use the remote to select the desired input.
Note: If the input is not displayed, the initial press will display the current input for 5 seconds. Subsequent presses (before 5 seconds elapse) will change the input.
Volume
To change the volume, press the up and down arrow keys. Once you reach the desired volume, stop scrolling to select it. If fixed volume has been selected, you will not be able to change the volume.
Note: If volume is not the main display, the initial press will display the current input for 5 seconds. Subsequent presses (before 5 seconds elapse) change the input.
Mute
A quick press of the Menu button toggles mute on or off. (You will hear a soft click.) If the display is set to volume or sample rate, "MUTE" will appear in big letters. If you are on input, a smaller "MUTE" will appear in red on the top right corner of the screen.
Menu System

To enter and exit the Stellar DAC menu system, execute a long press of the menu button to the left of the display. A gear icon will appear in the upper right corner of the display to show that you are in the menu system.
Navigating Menu System
To navigate the menu system:
- Use the left and right arrow keys to scroll through menu items.
- Use the up and down arrows to change an item's values.
- To enter sub-menus, press the center button on the control ring.
- When in a sub-menu, press the center button twice to go back one menu level.
Note: The menu screen will also time out after 15 seconds of inactivity. Note that changes to settings are typically saved in real time as the changes are made.
Main Menu
The main menu has the below features.
- Balance
- Filter
- Phase
- Pre-Emphasis
- Versions (informational)
- Audio (sub-menu)
- System (sub-menu)
Balance
The Balance feature allows you to adjust the center location of the stereo image. Press the down arrow on the control ring to reduce the gain of the right channel, thus making the image come more from the left channel. Press the up arrow to reduce the gain of the left channel, thus making the image come more from the right channel. The balance steps are each 1/4dB and the range is 48 steps each way for a maximum shift of 12dB.
When the balance is set to anything other than the center position (0), there will be an icon on the main display that points to either the left or right, depending on what the balance is set to. (See green arrow.)

Filter
The Stellar DAC has 3 filter options that can tailor the sound of digital sources to the listener's preference. The unit comes with our recommended default filter (F1) selected but we encourage you to experiment with filters during listening sessions. Use the up arrow to scroll from 1-3 and the down arrow to scroll from 3-1. Leave the screen on the one you want.
Filter 1 - Fast
Filter 2 - Slow
Filter 3 - Min
Filter 1 is "Fast Roll-off Linear Phase". This filter has very good high frequency response. It has slightly less ringing than Filter 2 but it does exhibit pre-ringing. While this filter may actually measure the best in a laboratory, we found it to be the most analytical sounding. This is the default filter for the Strata.
When this filter is activated, an F1 will appear in the icon bar on the top of the Home screen.
Filter 2 is "Slow Roll-off Linear Phase". This filter is the least sharp and has the least amount of ringing. There is a slight loss in high frequencies that might be noticeable on CDs and other 44.1KHz sample rate material. It should not be detectable at all with higher sample rate sources.
When this filter is activated, an F2 will appear in the icon bar on the top of the Home screen.
Filter 3 is "Fast Roll-off Minimum Phase". This filter has more extended high frequency response than Filter 2 but more ringing as well. There is no pre-ringing (an undesirable artifact of some digital filters) so this is still a very musical sounding filter. Some people may prefer this filter for 44.1KHz source material.
When this filter is activated, an F3 will appear in the icon bar on the top of the Home screen.
Phase
The phase feature allows you to invert the signal from the digital inputs. Use up or down buttons on the control ring to change the absolute polarity of the signal from "Norm" (Normal) to "Inv" (Inverted). This can be useful when listening to certain source material that may have inverted absolute polarity.
Note: Some listeners are more sensitive to absolute polarity than others.
Pre-Emphasis
Some Compact Discs were recorded with pre-emphasis in order to improve the performance at high frequencies. If you are playing a track that was recorded with pre-emphasis, you can engage the de-emphasis filter using the pre-emphasis option.
Use the up or down buttons on the control ring to choose between On, Off or Auto. On engages the de-emphasis filter and Off disables it. Auto automatically detects tracks with preemphasis and then engages de-emphasis (this only works on Coax and Optical inputs). The default is Auto.
Versions
The Versions menu display shows the versions of the Stellar DAC's operating firmware. It is informational only. If you need to contact our customer service team for help with your unit, please have this information ready.
Access Sub-Menus
There are 2 sub-menus that can be accessed from the main menu. They are:
- Audio
- System
Once you land on one of the above sub-menus, press the center button of the control ring once to enter it. If you need to go back one level to the previous menu, do two quick presses of the center button.
Sub-Menu
Audio
The Audio sub-menu allows you to change the following:
- Input Names (sub-menu)
- Transport Input
- Fixed Volume
- Max Volume
Input Names (sub-menu)
This feature allows you to rename the inputs (I2S 1, I2S 2, Coax 1, Coax 2, Optical, USB) using a preset list with items like Bridge, CD, DVD, PC, Phono, etc. This is a sub-menu, so click on the center button to enter it. To use this feature:
- Use the up and down arrows until you land on the input you want to rename. Press the center button to select it.
- Use the up and down arrows until you land on the name you want. Press the center button to select it.
- A pop up will appear to ask if you want to rename it. Click the center button to choose okay or use the right arrow to navigate to cancel first if you change your mind.
- The input has now been renamed. Do a long press of the menu button (or the center button) to return to the display.
Transport Input
Use the Up and Down arrows to select the input you are using for the PS Audio Transport. Once selected whenever you press Play, Pause, Open or Close on the remote, the DAC will automatically switch to the input you specified. If you don't have a Transport or don't want to use this feature, select Off.
Fixed Volume
Fixed volume means the volume cannot be changed and all inputs are affected by this setting. This is useful when feeding the Stellar DAC into a pre-amplifier. As a reminder, if you selected Yes for using a preamp during setup, the fixed volume has automatically been set to 100. If you want to change the volume, use the up and down arrows until you find the volume you want and leave it there. (Press and hold to move quickly through the numbers.) If you don't want the Stellar DAC on fixed volume, use the down arrow until you get to 0 or "Off" to disable it.
Max Volume
Setting this value limits the maximum volume when using the up volume control. This value is ignored if the Fixed Volume setting is enabled. Use the up and down arrow keys to set the max volume you desire. Set to 100 to disable this feature.
System
The System sub-menu has the following features:
- Backlight
- Display Mode
- Trigger Timeout
- IR Enable
- Firmware Update (sub-menu)
- Factory Reset (sub-menu)
Backlight
The brightness of the display and logo button can be adjusted to suit your room. The range is from 1 to 10.
Display Mode
This menu provides three options for the main display: auto, sample rate and minimal. The auto function varies depending on whether or not fixed volume is on. (As a reminder, if you indicated you were using a preamp during set up, fixed volume is automatically turned on.)
- Auto: When fixed volume is on, this shows the input on the main display. If fixed volume is off, this shows the volume on the main display. Both will display small icons when certain menu options are selected.

- Sample Rate: This option shows the current sample rate on the main display. Small icons will be displayed when certain menu options are selected. If the input selected is not connected - indicated by the red dot in the corner of the screen - the screen will show the current input instead.
Note: It's common for the FPGA to take a second or two to detect the sample rate when it changes. What may look like delayed reporting is normal. It is a result of detecting and reporting the correct sample rate.

- Minimal: Provided the connection is good, this option shows the sample rate without any icons. If the input is not good, it will show the input with icons.
Note: You can also toggle through these three options from the main display by pressing the center button on the control ring. However, you cannot make a permanent change without going to the Display Mode menu item.


Trigger Timeout
This feature allows the trigger output to be delayed a period of time after the Stellar DAC logo button is activated. You can adjust the time it takes for any other units plugged into the trigger output of the Stellar DAC to turn on once the Stellar DAC is powered up. The time delay can be adjusted from 0 to 60 seconds.
IR Enable
There are 3 options - Off, IR1, and IR2. If you experience interference with your other devices and your Stellar DAC when using the remote, you can change this setting. Both the unit and the remote will need to be updated when changing this setting.
- Off: This makes it so that no remote works with the Stellar DAC.
- IR1: This is the default setting. If you are not experiencing interference with your other devices, leave this setting.
- IR2: This changes the remote to a different code set. If your remote is interfering with other devices, for example, turning off your television, change to this setting.
When changing this option, the remote will also need to be updated. To do so, press the Light Bulb button (bottom of the remote) and the circular Off button (top center of the remote) at the same time. If the remote backlight flashes white once, you are on IR1. If it flashes white twice, you are on IR2.
Firmware Update (sub-menu)
This feature allows you to select from multiple firmware loads on a USB thumb drive. It provides a faster and easier method of upgrading and downgrading new firmware for A/B style testing.
Preparing the USB thumb drive
- You can have as many files on the USB thumb drive as you want, but only the first five valid files for the device are displayed.
- The files must be named stellar_dac_v#.#.#.bin. For example, stellar_dac_v2.4.1.bin.
- You can have other bin files for other products on this thumb drive (for example, stellar_ pre_v2.1.2.bin). Only files that start with "stellar_dac_" will be loaded by the Stellar DAC.

In the past, you would update a unit by copying an "image.bin" file to the thumb drive. This method still works to automatically update a unit after a reboot (you do not need to go through the menus to use the image.bin file). The image.bin file takes precedence over the stellar_bin_xxx.bin files. It is recommended to NOT have an image.bin file on the thumb drive if you are using the stellar_dac_xxx.bin files and the System | FW Update method to update files.
Upgrading/Downgrading
- Plug the USB thumb drive into the unit in USB-A slot on the back panel marked FW.
- Enter the menus and go to System | FW Update. Press the center button to enter the submenu.
- The files will display on the screen in alphabetical order.
- Scroll up or down to highlight the file you want to load.
- Press the center button to select the file.
- A progress screen will display. The update process will initialize and then a progress indicator in percentage complete will display.
- Once complete, the progress screen will indicate the unit is resetting.
- The unit will reset. The Logo LED will blink rapidly as the unit is being programmed.
- Note that if you select the same version that is already loaded, the upgrade will be skipped and the Logo LED will not blink. The unit will still reset.
- If there is an error, the error will be displayed.
- If you have problems with loading firmware, you can contact PS Audio customer support with the error you see.
- Press the center button to exit from the error screen
- You can exit the FW Update screen using the right/ left arrows or long pressing the menu button.
Factory Reset (sub-menu)
This feature allows you to reset all of the configuration settings back to what they were when the Stellar DAC was shipped from the factory. Any input names and other settings you have changed will be erased.
To start the factory reset, press the center button when you get to this menu item. It will ask "Factory Reset System?" Use the left arrow key to highlight reset and press the center button. After a few seconds, your unit will automatically restart with factory settings restored.
Remote Control

Your Stellar DAC comes with a fullfunction remote control. In addition to operating your Stellar DAC, this remote works with all Stellar products and most functions will translate to the PerfectWave line.
Remote Code Settings:
Your Stellar DAC comes with a default code set. If your remote is interfering with other devices, you can switch to the second code set. To do so, press and hold the Light Bulb button (bottom of the remote) and the circular Off button (top center of the remote) at the same time. If the remote backlight flashes white once, you are now on IR1. If it flashes white twice, you are now on IR2.
This change will also need to be done on the unit. See the Update Firmware section for details.
Button Guide:
On: Takes the DAC out of Ready (Idle) mode and puts it in Operational mode. In addition, it undoes the Dim function.
Off: Puts the DAC in Ready (idle) mode.
Dim: Dims the logo button and turns off the screen and control navigation backlight. Press On to undo it.
DAC Input Select: Lets you select the desired input.
DAC Filter: Switch between the 7 filters.
Reference
Product Specifications
| Physical: | |
| Unit Weight | 22.5 lbs [10.2 kg] |
| Unit Dimensions | 17"W x 3"H x 12" D [43.18 cm x 7.62 cm x 30.48 cm] |
| Shipping Weight | 26 lbs [11.8 kg] |
| Shipping Dimensions | 22"W x 8"H x 17"D [55.88 cm x 20.32 cm x 43.18 cm] |
| Color Options | Black Silver |
| Power Requirements: | |
| Input Power | Model specific 100VAC, 120VAC, or 230VAC 50 or 60Hz |
| Power Consumption | 25W |
| Digital Audio Inputs | I2S (2), Coax (2), Optical, USB |
| Sample Rates | I2S: 2 inputs
Coax: 2 inputs
Optical: 1 input
USB: 1 input
|
| Analog Audio Output | |
| Connector | RCA single ended, XLR balanced |
| Output Level High, Maximum | 4 VRMS Balanced 2 VRMS Single Ended |
| Output Impedance | 100 Ω / 200Ω |
| Frequency Response | 20Hz-20kHz, +/- 0.1dB 10Hz-55kHz, -1dB |
| Max Output | 4V RMS Balanced, 2V RMS single-ended |
| THD+N @ 1KHz (full scale) | <0.003% at full output |
| IMD | <0.004%, CCIF, at full output |
| SNR | 110dB, referenced to 4V RMS |
| Data Handling: | |
| Format | PCM or DSD |
| Sample Rate (PCM) | 44.1kHz, 48.0kHz, 88.2kHz, 96.0kHz, 176.4kHz, 192kHz, 352.8kHz, 384kHz |
| Word Length (PCM) | 16-32-bit |
| Data Rate (DSD) | Up to DSD256 (11.2MHz) Native |
| Digital Volume Control | Yes |
| Analog Conversion Method | ES9018K2M DAC Chip |
| I2S Digital Input: | |
| Connector | HDMI |
| Format | PCM or DSD. DoP on all inputs as well as native DSD on I2S inputs |
| USB Digital Input: | |
| Connector | USB "B" Type |
| Format | PCM, DoP v1.1 (DSD over PCM), or Native DSD |
| Transfer Mode | Asynchronous |
Menu Operations

Navigating the Menus:
- To enter the menus, do a long press of the menu button. A gear icon will appear in the right corner of the screen to show you are in the menus. Do another long press to leave the menus. Note: Menus time out after 15 seconds of inactivity.
- Scroll through menu and sub menu items using the right and left arrows. Use the up and down arrows to change values for specific items.
- Unless otherwise specified, scrolling to your choice and leaving it on the screen updates your settings.
- Menu items with sub-menus are indicated by a right arrow. Press center button to enter them.
- Two quick presses of the center button take you back one menu level. For example, if you are in the Audio submenu and press the center button twice, you will return to the main menu.
Top Level Menu

Audio Sub-Menu

System Sub-Menu
| System Sub-Menu From the main menu, find System then press  to enter the System sub-menu. to enter the System sub-menu. | |
| Backlight |  Scroll to select 1-10. 10 is brightest. |
| Display Mode | Scroll to select auto (fixed volume on = input, fixed volume off = volume), sample rate, or minimal (sample rate, no icons) for the main display. |
| Trigger Timeout (delay output to other devices for short period after Stellar DAC activated) | Scroll to select 0 seconds to 1 minute for trigger timeout. Select off to disable. |
| IR Enable | Choose Off (no remote works), IR1 (default) or IR2 (if remote is interfering with other devices). |
| Firmware Update (sub-menu) | This is a multi-step process. See section on System/ Firmware Update for instructions. |
| Factory Reset (sub-menu) | To select factory reset. Use right arrow to select reset and press it again. |
Troubleshooting
USB not connecting
USB – Stellar DAC not recognized, or no sound via USB
To play music from your computer into the Stellar DAC via USB you must have a driver installed that communicates with the DAC. On a Mac computer with OSX or Monterey the drivers are already available and the unit should be automatically recognized. You can then go and choose the PS Audio USB driver to play to by going to System Preferences->Sound and select the Stellar DAC. You can also go to Applications->Utilities->Audio Midi and select the driver as well as set the same rate.
On Windows the drivers are not yet available for automatic recognition. You will need to download the PS Audio USB driver from our website. Go to https://www.psaudio.com/pages/downloads and select Drivers. Select the Windows USB Driver bundle. Unzip the folder and then unzip the driver file titled "PS Audio USB Audio Drivers_setup_WHQL_v2.zip" and install it on your Windows machine. Once installed, Windows will recognize the Stellar DAC and allow you to select it for playback from any program on your computer.
You can also contact our support team via email (support@psaudio.com) or phone (1-800-PSAUDIO) for help.
If you are unable to obtain sound via USB on a Windows based device, it is most likely the result of a partial or incorrect driver installation.
You may have also experienced a pop-up window asking you to provide the correct driver. In any of these cases the remedy is quite simple. Remove the device and force Windows to reinstall the driver and the device.
Stellar DAC will show up under device manager as "PS Audio High Resolution DAC" under "Sound video and game controllers".

Safety Instructions


TO REDUCE THE RISK OF FIRE OR ELECTRICAL SHOCK, DO NOT EXPOSE THIS APPARATUS TO RAIN OR MOISTURE.
Clean only with a dry cloth.
Do not place flammable material on top of or beneath the component.
All PS Audio components require adequate ventilation at all times during operation. Rack mounting is acceptable where appropriate.
Do not remove or bypass the ground pin on the end of the AC cord. If the provided plug does not fit into your outlet, consult an electrician for replacement of the obsolete outlet.
Protect the power cord from being walked on or pinched particularly at plugs, convenience receptacles, and the point where they exit from the apparatus. Unplug this apparatus during lightning storms or when unused for long periods of time.
When making connections to this or any other component, make sure all components are off. Turn off all systems' power before connecting the PS Audio component to any other component. Make sure all cable terminations are of the highest quality.
THERE ARE NO USER-SERVICEABLE PARTS INSIDE ANY PS AUDIO PRODUCT. REFER ALL SERVICING TO QUALIFIED SERVICE PERSONNEL
Please contact your authorized dealer, distributor, or PS Audio if you have any questions not addressed in this reference manual.
 The exclamation point within a triangle is intended to tell the user that important operating and servicing instructions are in the papers with the appliance.
 The lightning flash with arrow-head within a triangle is intended to tell the user that parts inside the product are a risk of electric shock to persons.
RISK OF ELECTRIC SHOCK
DO NOT OPEN
To reduce the risk of electric sock do not remove cover or back.
No user-serviceable parts inside. Refer servicing to qualified service personnel.
PS Audio Inc. 800-PSAUDIO 4865 Sterling Drive Boulder, Colorado 80301
Documents / Resources
References
Download manual
Here you can download full pdf version of manual, it may contain additional safety instructions, warranty information, FCC rules, etc.
Advertisement


Need help?
Do you have a question about the Stellar and is the answer not in the manual?
Questions and answers